What Is Disk Utility on Mac?
Disk Utility is a hard disk management tool that comes with your Mac operating system. It can be used for disk partition and disk volume-related tasks on your Mac computer.
What does Disk Utility Do on a Mac?
To be specific, Mac Disk Utility can do these things for you:
- Format volumes on your Mac storage devices.
- Manage volumes on your Mac storage devices.
- Create a disk image for data migration/backup/archive.
- Combine multiple hard disks into a RAID set to make it act as a single disk.
- Check for and repair disk errors on your Mac.
- ….
When Use Disk Utility on Mac?
Under these situations, you can use Mac Disk Utility to fix your issues:
- One or more applications on Mac quit unexpectedly.
- There are some corrupted files on your Mac.
- You need to mount, unmount, or eject a disk.
- You need to change the file system of a disk or a partition on Mac.
- There is something wrong with your startup disk.
- There is a damaged or corrupted disk on your Mac and you need to repair it.
- You need to erase, format a partition or a disk for some reason.
- And more….
How to Use Disk Utility on Mac?
Now, we will show you how to use Mac Disk Utility including how to open it and how to use it to solve your issues.
How to use Disk Utility on Mac:
- Open Disk Utility on Mac
- Partition drives or format partition on Mac
- Repair the file system on Mac
- Wipe a partition or a drive on Mac
- Create and restore a disk image on Mac
- Set up RAID disk sets on Mac
How do I Open Disk Utility on Mac?
Where is Disk Utility on Mac? You can’t directly find Mac Disk Utility on the desktop. Then, how to access Disk Utility on Mac? There are different methods in different situations. Here we will show you some universal methods.
Way 1: Open Disk Utility via Spotlight Search
- Press Command+Space on your keyboard or click the Spotlight icon in the upper-right corner of the top menu bar to open Spotlight search.
- Type Disk Utility into the search box.
- Double-click Disk Utility – Utilities from the search results to open it.
Way 2: Open Disk Utility via Launchpad
- Press the F4 button to open Launchpad.
- Select the Other folder from the Launchpad.
- Select Disk Utility to open it.
Way 3: Open Disk Utility via Finder
- Click Finder from the bottom menu on your Mac.
- Click Application from the left sidebar, double-click the Utilities folder, and double-click Disk Utility to open it.
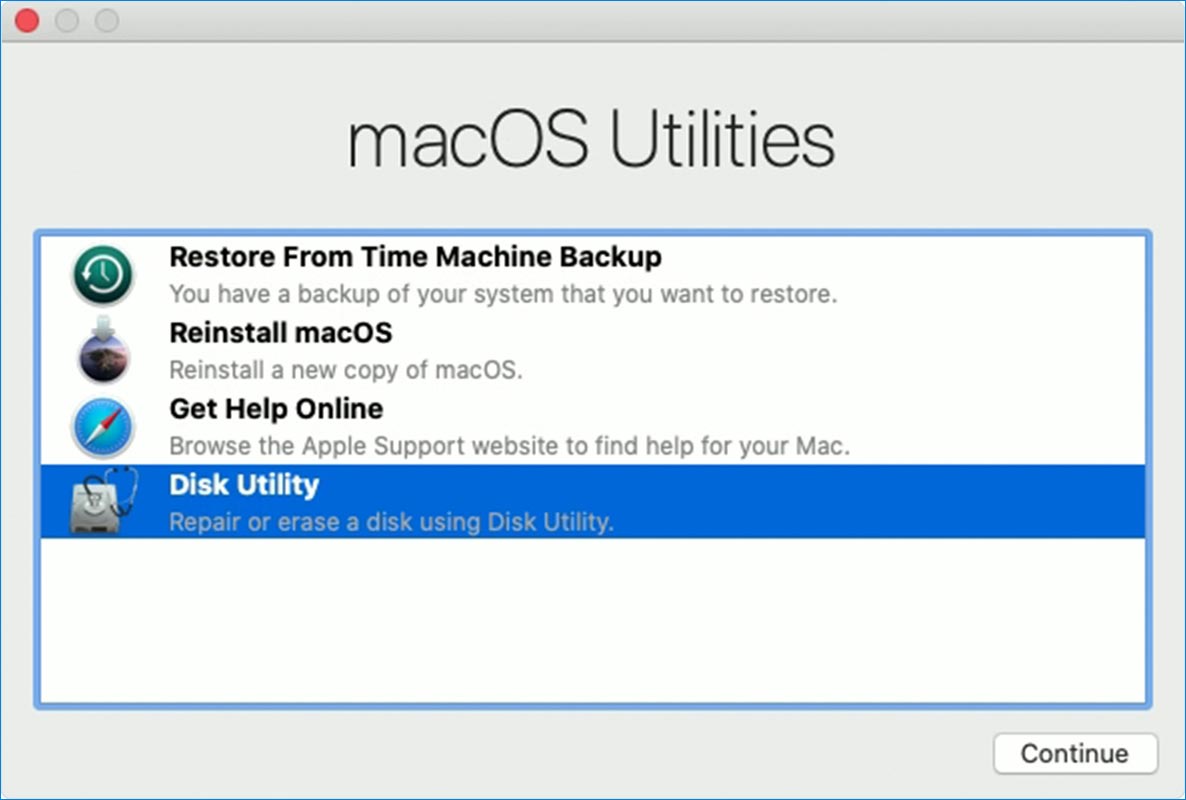
Way 4: Open Disk Utility via Recovery Mode
You can also access Disk Utility via Recovery Mode. This method is especially useful when your Mac won’t turn on.
- Press and hold Command+R when you boot your Mac.
- You will enter Mac Recovery Mode, seeing the following interface. Then, you need to select Disk Utility and click Continue to open it.
How to Partition Drives and Format Partitions on Mac?
How to View All Devices in Disk Utility?
In Disk Utility, you can see all the internal and external drives on your Mac. You can also see all the mounted volumes on the left side list. But you can’t see the empty hard drives by default. You need to go to Views > Show All Devices to make Disk Utility show a tree of drives and the internal partitions.
The parent drive stands for a separate physical drive and the drive icon in the subdirectory stands for a partition on that drive.
How to Partition or Format a Drive on Mac?
To manage a specific partition on your Mac, you need to click the parent drive and then select the targeted partition from its subdirectory. Then, you can resize, create, rename, delete, and reformat that partition.
However, if you want to partition your system disk, you will need to do the job in Recovery Mode. But there is an exception: APFS volumes. APFS is a new file system on Mac. It is the default file system on the solid-state drive (SSD) since macOS High Sierra.
If you want to add a new APFS volume, you can just select the system disk, click Edit > Add APFS from the menu bar, and then set up the volume according to your requirements.

How to Repair File System on Mac?
If the drive on your Mac is corrupted, damaged, or inaccessible, you can use the First Aid feature in Disk Utility to check the file system for errors and then correct them.
You can just:
- Select the drive you want to fix from the left drive list.
- Click the First Aid button. The file system checking and fixing process will start automatically. If it is checking your system drive, your Mac will have no response. You should wait until the whole process ends.
How to Wipe a Partition or a Drive on Mac?
The Erase feature in Disk Utility allows you to securely erase all data on a disk or a partition. You can even only erase the free space using it.
- Select the drive or partition you want to wipe.
- Click the Erase button on the top menu.
- Click Security Option and then select a security level to overwrite the data on the drive.
The Fastest option is not a secure choice because a Mac data recovery program can recover these erased files. You can switch to the next level to erase the drive. Of course, you can use a more advanced level to erase the drive.
How to Create and Restore a Disk Image on Mac?
How to Create a Disk Image on Mac?
- Go to Finder > Applications > Utilities > Disk Utility. You can also use other methods mentioned in this post to open Disk Utility on Mac.
- On the Menu bar, you need to go to File > New Image > Image from Folder.
- Select your startup disk ad then click Open.
- Type a name for the disk image and add tags for it if necessary. Then, select a location to save it.
- You can encrypt the disk image by clicking the Encryption pop-out menu and choosing an encryption option.
- Click the Format pop-up window and you will see 5 format choices: Read-only, Compressed, Read/write, DVD/CD master, and Hybrid image (HFS+/ISO/UDF). You can select one option according to your requirements.
- Click Save and then click Done to save the disk image.
You can also use the same method to create a blank disk image for storage/a disk/a connected device.
How to Restore a Disk Image on Mac?
The Restore feature on Disk Utility can help you restore a disk image to a partition or a disk. Here, you need to know that this process will erase the destination partition or disk and copy the data from the disk image to it.
How to Set up RAID Disk Sets on Mac?
You can also use Disk Utility to set up RAID on your Mac. The operations are very simple:
- In Disk Utility, you need to go to File > RAID Assistant.
- Select a RAID type you want to use when seeing the following interface.
- Follow the wizards to define RAID and save the settings.
Reading there, you can see that Disk Utility Mac is like the Disk Management tool on Windows. It is more advanced. If you are a Windows user and you are looking for a more powerful partition manager, you can try MiniTool Partition Wizard.
What If You Lose Some Important Files when Using Disk Utility on Mac?
As mentioned above, some operations in Disk Utility can destroy files on the targeted drive. If your operation is wrong, you will lose your data unexpectedly. As long as the missing files are not overwritten by new items, you can use Stellar Data Recovery for Mac to get them back.
This Mac data recovery software has a trial edition. You can go to the MiniTool download center to get it. Then you can use it to scan the target drive and see whether it can find the files you want to restore.
You can follow this guide to make the software scan the drive for lost files:
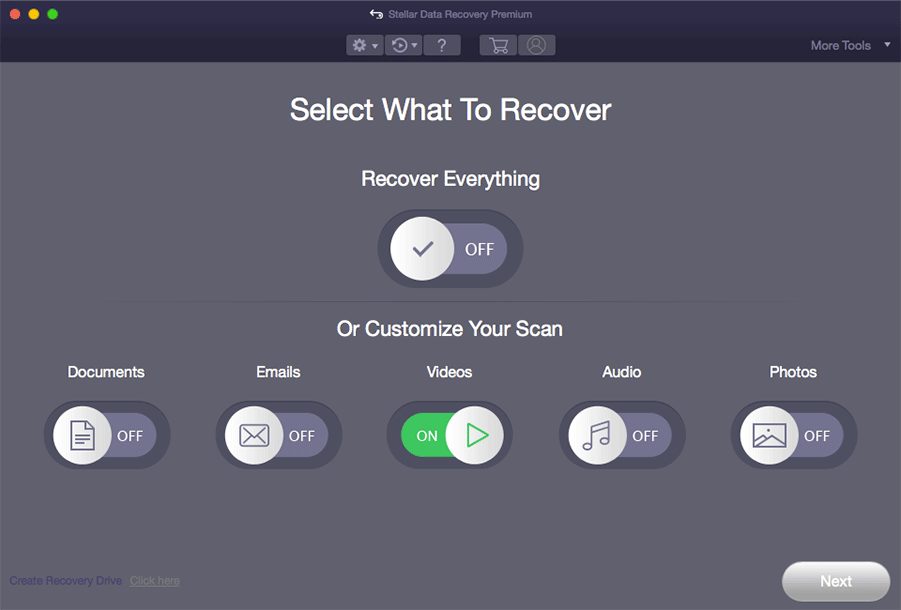
1. Open Stellar Data Recovery for Mac.
2. Select the files’ types you want to recover. For example, if you want to recover all types of files, you need to make sure the button for Recover Everything is turned on. If you only want to recover videos, you just need to turn on the button for Videos.
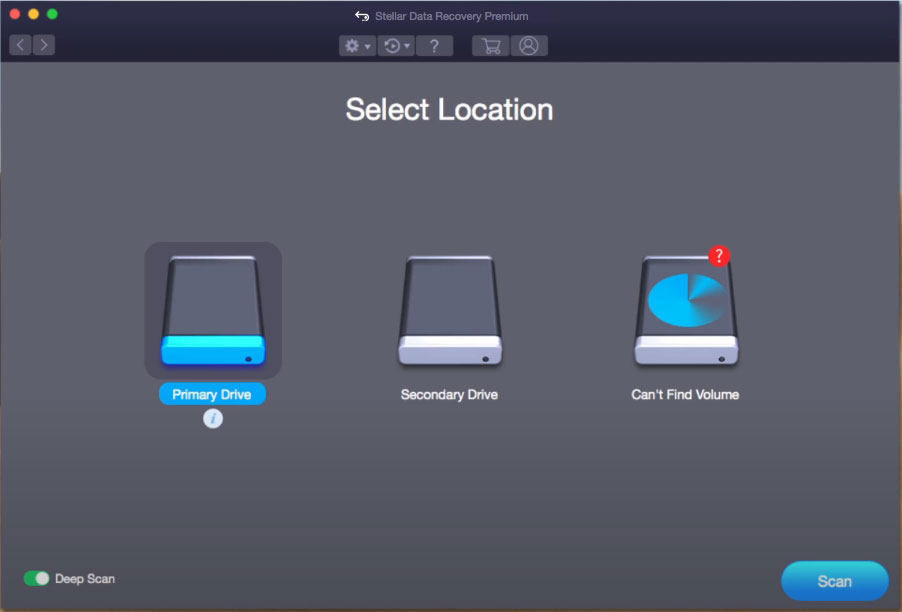
3. When seeing the next interface, you need to select the drive you want to recover data from to continue. If you want this software to perform a deep scan, you need to turn on its button that is at the bottom left corner. While a deep scan will last longer relatively. You need to wait patiently.
4. After scanning, this software will show you the scan results that are in the Classic List. You can switch to the Deleted List to only view the deleted items.
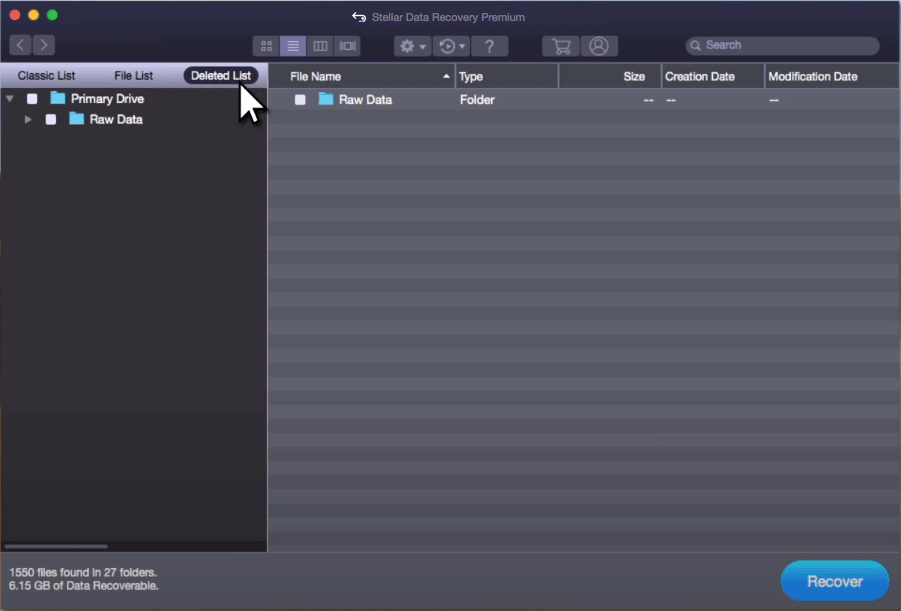
5. You can open the folder from the left list and check whether your needed files are there. You can also preview some types of files like photos, videos, etc.

You are not allowed to use the trial edition to recover the found files. You can go to the MiniTool store to upgrade this free Mac data recovery program to a full edition and then use it to get your data back.
Bottom Line
Now, you should know what Disk Utility on Mac is and how to use it to manage your disk and partitions on your Mac computer. Should you have any related issues, you can let us know in the comment or contact us via [email protected].
Disk Utility Mac FAQ
About The Author

Position: Columnist
Stella has been working in MiniTool Software as an English Editor for more than 8 years. Her articles mainly cover the fields of data recovery including storage media data recovery, phone data recovery, and photo recovery, videos download, partition management, and video & audio format conversions.
User Comments :