Experiencing disk issues on your Mac? Attempting to use Disk Utility for repairs but receiving "Disk Utility can't repair this disk"? This post from MiniTool will walk you through how to effectively fix this issue.
Help! Disk Utility Failed to Repair This Disk
“I might have accidentally disconnected my hard drive without ejecting it first. Now when I run Disk Utility and click Repair Disk it says: "Disk Utility can't repair this disk. Back up as many of your files as possible, reformat the disk, and restore your backed-up files."forums.macrumors.com
Disk Utility is a comprehensive system utility developed by Apple for performing tasks related to disk and disk volume on the Mac operating system. These tasks include formatting, partitioning, erasing, cloning disks, repairing a damaged disk, etc. When certain disk problems happen, repairing this disk using Disk Utility will be a good choice.
However, sometimes you may receive the error message “Disk Utility stopped repairing ‘Macintosh HD’. Disk Utility can’t repair this disk”. Typically, this issue may not only occur on Macintosh HD but also on an external hard drive connected to a Mac.
The “Disk Utility can’t repair this disk” error appears when your hard drive is beyond the repair scope of Disk Utility, for example, when the file system is corrupted.
So, what should you do to fix the Macintosh HD, external hard drive, or another disk that cannot be repaired by Disk Utility? Here are some feasible solutions for you.
Back up Important Files With Time Machine on Mac
When Disk Utility can’t repair your external hard drive or Macintosh HD, you should do as the error message shows: Back up as many of your files as possible before fixing the issue for data protection.
When it comes to Mac data backup, Time Machine is a good option.
Time Machine is the built-in data backup tool of Mac and can back up your files with ease to an external storage device so you can restore them in the event of unexpected accidents.
How to make a Time Machine backup from Disk Utility?
Step 1: Connect an external storage drive to your Mac.
Step 2: Then an alert may appear on your Mac asking if you want to configure the connected drive as the backup disk with Time Machine. Just click Use as Backup Disk. Besides, it is recommended to check Encrypt Backup Disk.
If you don’t receive this alert, please go to Apple menu > System Preferences > Time Machine. Then click Select Backup Disk to select a storage device to back up to, and click Use Disk.
Besides, you can choose to back up your Mac to iCloud.
After having a copy of your Mac files, let’s see how to repair the disk that cannot be repaired by Disk Utility.
Fix Disk Utility Can’t Repair This Disk
Solution 1. Use First Aid to Repair the Disk Again
Before trying the advanced solutions, you had better repair your disk again by using First Aid. The steps are as follows.
Step 1. Restart your Mac computer.
Step 2. Launch Disk Utility, and then click View > Show All Devices.
Step 3. Select the disk that needs to be repaired, and click the First Aid button at the top bar.
Step 4. In the new window, click Run and follow the on-screen instructions to complete the necessary actions.
If this solution fails to work, try the methods below.
Solution 2. Fix the Hard Drive in Single User Mode
To fix the problem of “Disk Utility stopped repairing Macintosh HD”, you can use the FSCK tool. This is the built-in disk error diagnostic & repair program that can check your file system and fix errors. Here you can see how to use it in Single User Mode.
Step 1: Restart your Mac computer, then press and hold the Command + S key combinations during the startup to enter Single User Mode which will provide you with a text-mode terminal.
Step 2: Type the command /sbin/fsck -fy and press Return.
If everything is fine, you will see “The volume Macintosh HD appears to be OK”.
If some problems are found, you will see “File system was modified”. Just run the fsck -fy command again until you see a “The volume Macintosh HD appears to be OK” message.
Step 4: Type reboot and press Return to exit Single User Mode.
Run Disk Utility and check if the error message has gone.
Solution 3. Reformat Drive When Disk Utility Can’t Repair External Drive
If Disk Utility still failed to repair your external hard drive or other data disk after trying the methods mentioned above, you can do nothing but reformat the disk.
How can you format the target hard drive?
Step 1: Go to Applications > Utilities to launch Disk Utility, and click View > Show All Devices to view all the hard drives.
Step 2: Select the target disk or drive, and click the Erase feature in the top menu. You need to note that this operation will destroy all the data stored on the disk.
Step 3: Enter a disk name, choose a file system and a partition map. Finally, click the Erase button.
After completing the formatting, Disk Utility can’t repair this disk issue on an external hard drive can be solved. And there is another thing you should do, which is to restore the deleted data from the backups.
Restore Your Backed-up Files
Step 1: Select Enter Time Machine from the menu bar. If you cannot locate this option, please go to System Preferences > Time Machine to check Show Time Machine in menu bar.
Step 2: In Time Machine, open the folder containing the files you want to restore.
Step 3: Use the timeline on the edge of the screen or on-screen up and down arrows to quickly find needed items.
Step 4: Select the needed files and click the Restore button to finish the data recovery process.
Recover Data From Formatted Hard Drive on Mac
When Disk Utility failed to repair the disk, you may forget to back up the important files or fails to back up your disk with Time Machine and directly format the target disk. And, formatting results in a total loss of your data. In this case, the key thing is to recover lost files from the formatted hard drive.
Is there any data recovery software that can help you to get your files back? Sure! Just keep reading.
As to Mac data recovery, Stellar Data Recovery for Mac is worthy of being recommended. It is specialized in recovering deleted data like documents, photos, videos, audio, emails, and more from your internal hard drives, external hard drives, SD cards, USB flash drives, memory sticks, and other storage devices on all Mac devices.
Besides, it can restore data from formatted, damaged, and lost partitions, as well as unmounted and encrypted drives. What’s more, it supports APFS, HFS+, FAT, NTFS, etc. file systems.
To carry out formatted hard drive data recovery, get the trial edition of Stellar Data Recovery for Mac on your Mac first.
Data Recovery for MacClick to Download100%Clean & Safe
Now, let’s see how to use Stellar Data Recovery for Mac to perform a Mac hard drive recovery.
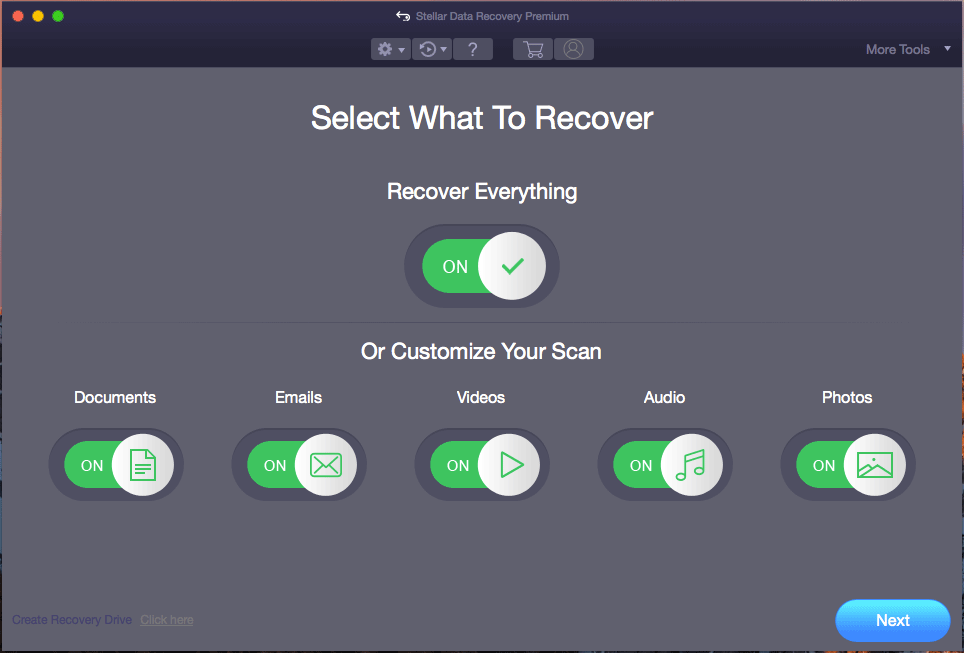
Step 1: After getting this Mac data recovery software, install it on your computer and then launch it to go to its main interface. In this window, select what you want to recover, and click Next to continue.
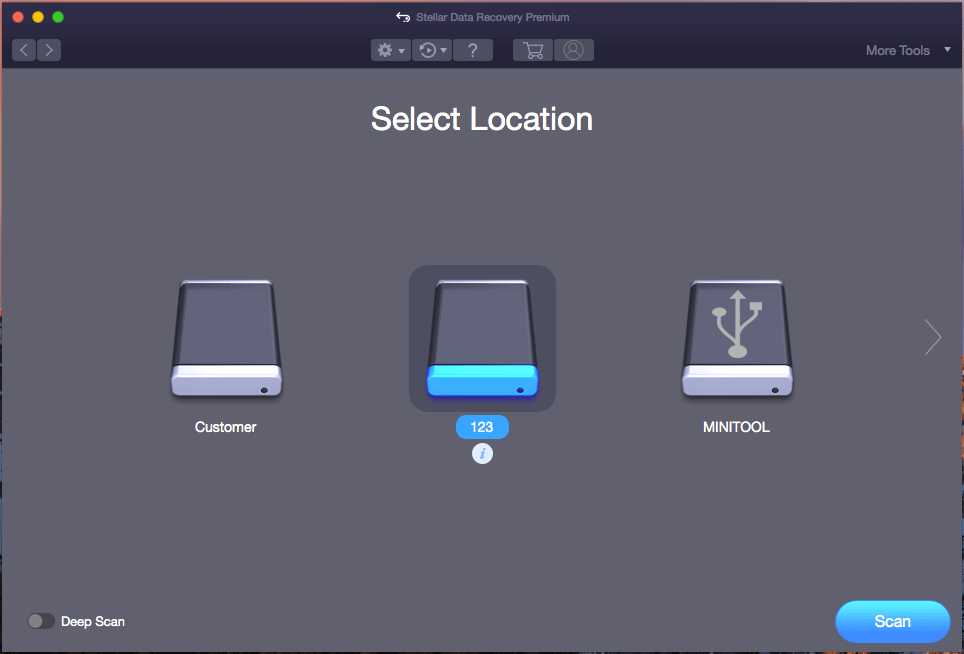
Step 2: Select your disk and click Scan to start a data scan.
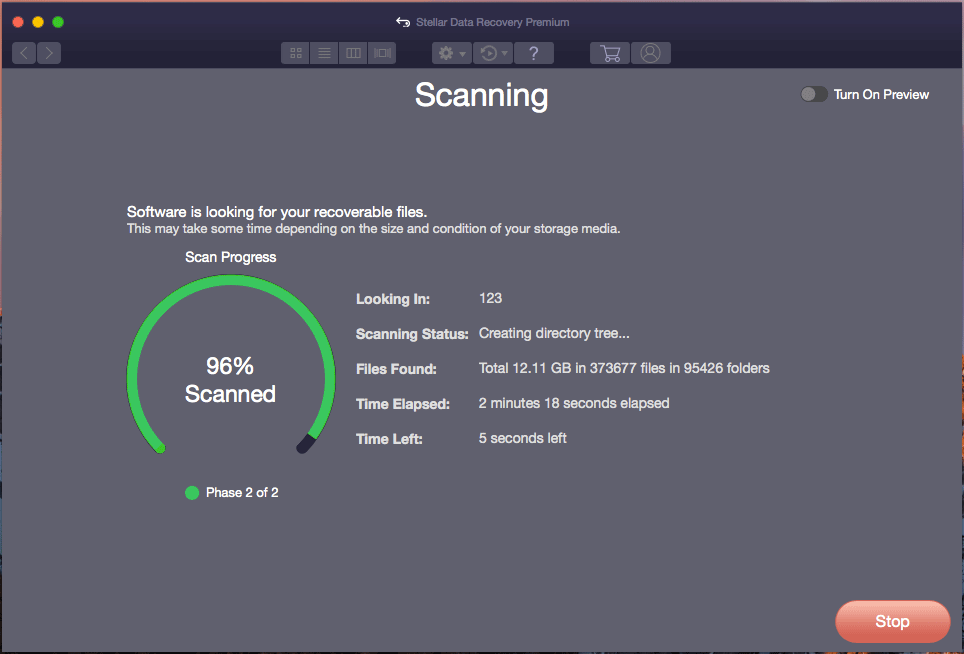
Step 3: Now, this data recovery software starts to scan your disk. This scanning duration depends on the size and condition of the disk, so please be patient.
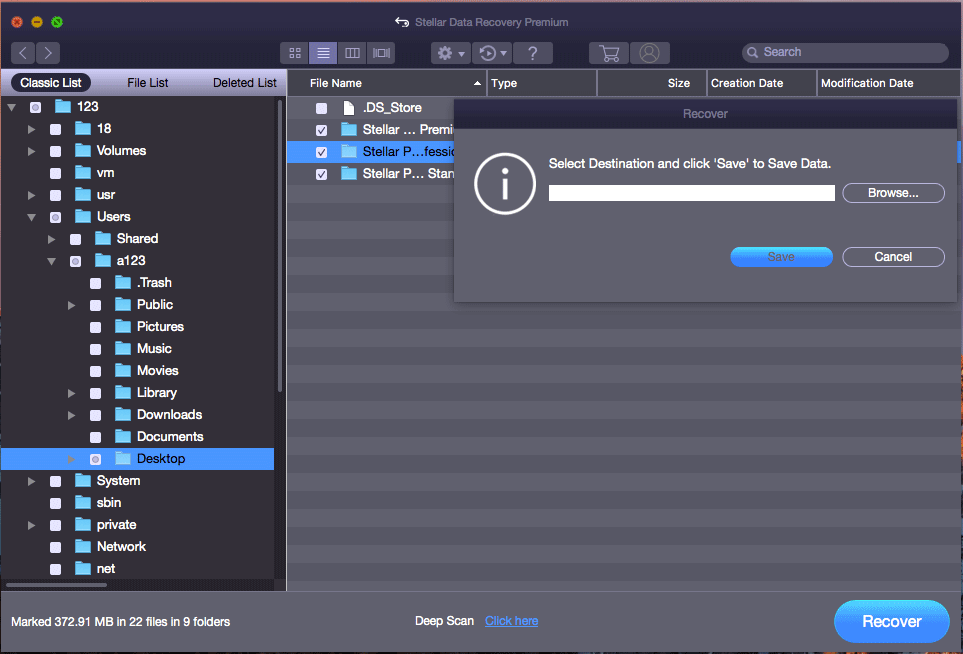
Step 4: After the scan, the deleted or lost files on the scanned disk will be found. In the left panel, unfold each folder to find needed files by previewing them, or you can go to Deleted List to look for deleted files specially.
Step 5: Check the items that need to recover and click Recover. Then, specify a path to save the data.
If you don’t activate Stellar Data Recovery Premium, you will get a prompt asking you to enter a license key. Just click the Get it Now button to get one or go to MiniTool Online Store to choose a wanted edition.
Within a few steps, Stellar Data Recovery for Mac helps you recover lost files from the formatted drive. If you encounter the “Disk Utility can’t repair this disk” error message and format the target drive without a backup file, just get this Mac data recovery software to get lost data back.
Bottom Line
Get the “Disk Utility can’t repair this disk” error message on Macintosh HD or an external hard drive?
This post offers you the corresponding solutions in two cases – Disk Utility stopped repairing Macintosh HD and Disk Utility can’t repair external drive. Just do as the above steps show. Besides, if you lost some important files when fixing this issue, try to recover them with Stellar Data Recovery for Mac.
Should you have any suggestions about the “Disk Utility failed to repair disk” issue or any questions during using Stellar Data Recovery for Mac hard drive recovery, please don’t hesitate to tell us by leaving a comment in the following comment area or sending an email to [email protected].
User Comments :