If you want to switch from a Dev Insider build to a stable build of Windows 11 or switch from a Beta Insider build to a stable build of Windows 11, do you know how to do it? In this article, MiniTool Software shows you different methods to switch from Insider to a stable build of Windows 11 under different Channels.
Want to Switch to a Stable Build of Windows 11 from Insider?
Before the final release of Windows 11, Microsoft released many Insider preview builds for testing to Insiders in the Dev Channel, the Beta Channel, and the Release Preview Channel of the Windows Insider Program.
In the beginning, Microsoft only rolled out preview builds to the Dev Channel. When the Windows 11 preview builds became stable, the company gradually released preview builds to the Beta Channel and then the Release Preview Channel. Since Windows 11 preview build 22000.160, Microsoft began to prompt Insiders who want to use stable Windows 11 builds to switch to Dev Channel if they are still in the Dev Channel.
![[FIXED] Can’t Switch Windows Insider Channel on Windows 11](https://images.minitool.com/minitool.com/images/uploads/2021/10/cant-switch-windows-insider-channel-on-windows-11-thumbnail.png)
Now, Microsoft continues to release Windows 11 builds to the Dev Channel, the Beta Channel, and the Release Preview Channel. But the Windows 11 preview builds in the Dev Channel don’t match the official and stable Windows 11 builds any more. The preview builds in the Dev Channel are higher.
Windows 11 was official released on October 5, 2021. Since then, you can free upgrade from Windows 10 to Windows 11 as long as your device is Windows 11 eligible. But many users are still in the Windows Insider Program. If you are one of them, do you know how to switch from Insider to a stable build of Windows 11?
There are three different Channels in the Windows Insider Program. Different Channels have different methods to switch from Windows 11 preview to full. Now, we will show you how to switch from Insider to a stable build of Windows 11 under different Channels.
How to Switch from a Beta/Release Preview Insider Build to a Stable Build of Windows 11?
Since the Windows 11 preview builds in the Beta Channel and the Release Preview Channel still match Windows 11 full and official versions, it is easy to switch from Windows 11 Insider preview to full under these two Channels. You just need to leave the Windows Insider Program and then upgrade to the latest Windows 11 version via Windows Update in the Settings app.
Now, we will show you how to leave the Beta/Release Preview Channel and get the full version of Windows 11.
Step 1: Leave the Windows Insider Program
If you want to use a stable and official version of Windows 11, it’s time to leave the Windows Insider Program now.
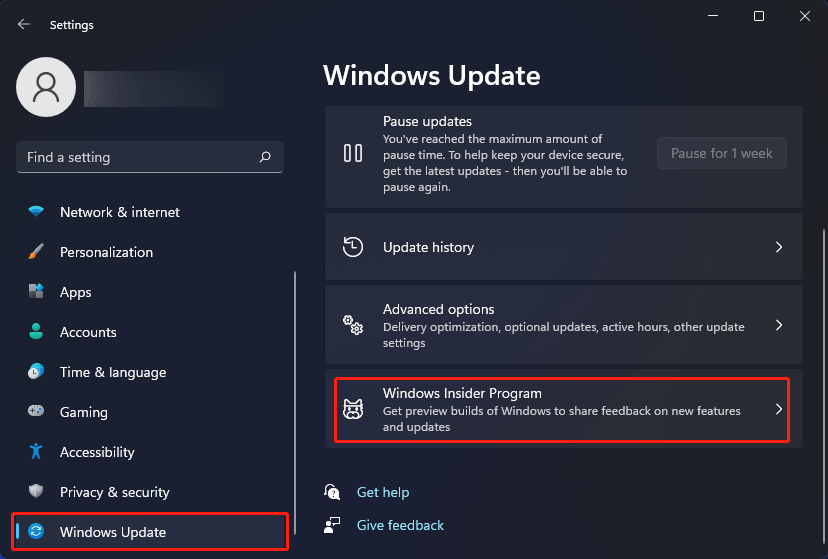
1. Go to Start > Settings > Windows Update.
2. Click Windows Insider Program from the right panel.
3. Click Stop getting preview builds on the next page.
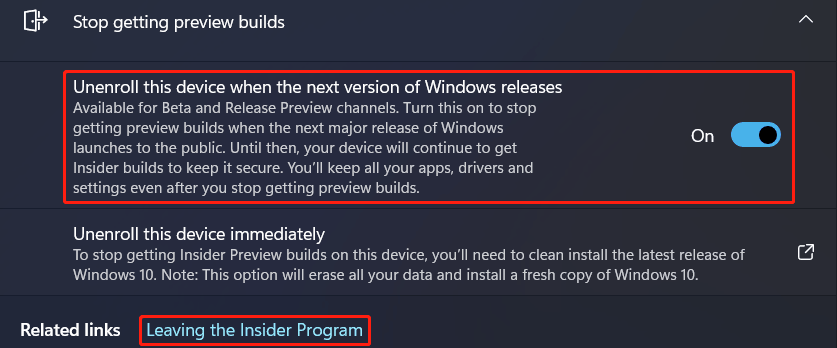
4. Here, you will see two options:
- Unenroll this device when the next version of Windows releases
- Unenroll this device immediately.
If you are in the Beta Channel or the Release Preview Channel, both of these two options are available. However, if you just want to switch from a Beta/Release Preview Insider build to a stable build of Windows 11, the first option is enough. You need to turn on the button next to this option (Unenroll this device when the next version of Windows releases) to stop getting Windows 11 preview builds.
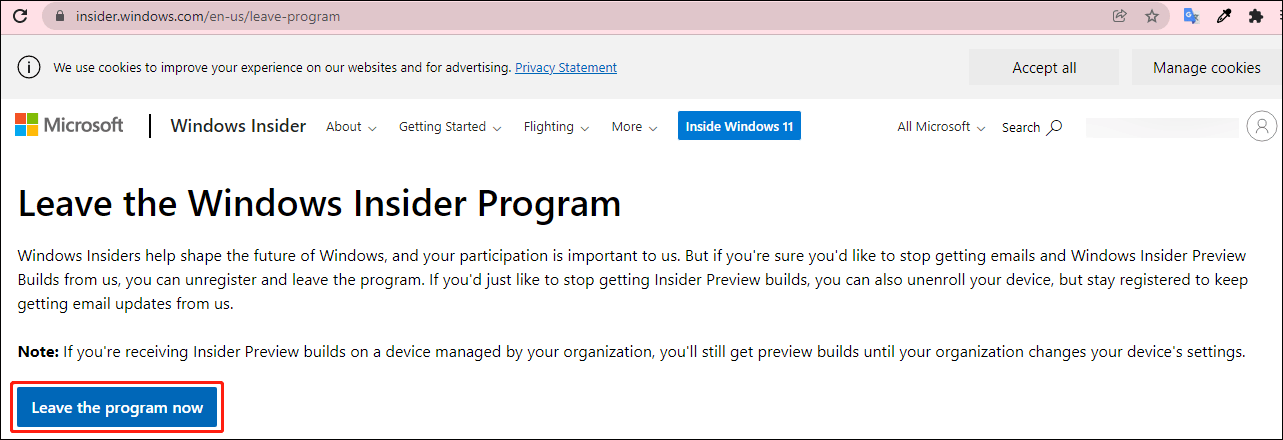
5. Click the Leaving the Insider Program link at the bottom to continue.
6. You will be guided to a webpage where you can click the Leave the program now button to opt out of the Windows Insider Program.
Now, you leave the Windows Insider Program. Your device will not receive Windows 11 preview builds. If you want to get a stable version of Windows 11, you need to continue with the next step.
Step 2: Upgrade to Windows 11
You are not in the Windows Insider Program. But currently you are still running a Windows 11 preview build. If you need to switch to a stable Windows 11 version, you need to check for updates on your computer.
It is easy to do this:
- Go to Start > Settings > Windows Update.
- Click the Check for updates button to get the latest version of Windows 11. Your system will automatically download and install Windows 11 full version on your computer. The whole process may last for even hours and your computer may restart several times. You should wait patiently until the whole process ends.
Another Choice: Reset This PC
After leaving the Windows Insider Program, you can also use the Reset This PC tool to reinstall the latest version of official Windows 11 on your computer.
- Go to Start > Settings > System > Recovery.
- Click the Reset PC button under Recovery options.
- On the pop-up interface, select Keep my files or Remove everything according to your requirements.
- Select Cloud download or Local reinstall to continue.
- Follow the on-screen guide to reset your computer and get the stable Windows 11 version.
TIP: Back up Your Data
If you choose to remove everything during the PC reset process, you should make a full back up of your important files in advance. You can use MiniTool ShadowMaker, professional data backup software, to do this job.
This software focuses on files/folders/partitions/disks/systems backup and restore. It even supports automatic backup, full backup, differential backup, and incremental backup. You can use the trial edition of this software to experience it for free within 30 days.
MiniTool ShadowMaker TrialClick to Download100%Clean & Safe
To protect your data, you’d better back up your Windows 11 files to an external hard drive using MiniTool ShadowMaker. After resetting your computer, you can use this software to restore the backup files to your device.
How to Switch from a Dev Insider Build to a Stable Build of Windows 11?
If you are still in the Dev Channel now, you will be unable to use the above method to switch to a stable version of Windows 11. The Windows 11 preview builds in the Dev Channel are higher versions. You can’t switch to the Dev Channel or the Release Preview Channel from the Dev Channel now. Besides, you can’t stop your device from receiving the preview builds unless you clean install Windows 11 on your computer.
How to confirm?
Now, you can go to Start > Settings > Windows Update > Windows Insider Program > Stop getting preview builds to see if the Unenroll this device when the next version of Windows releases option is available.
You can see the first option is greyed out. From the following explanation, you can see that this option is only available for the Beta and Preview Release Channels.
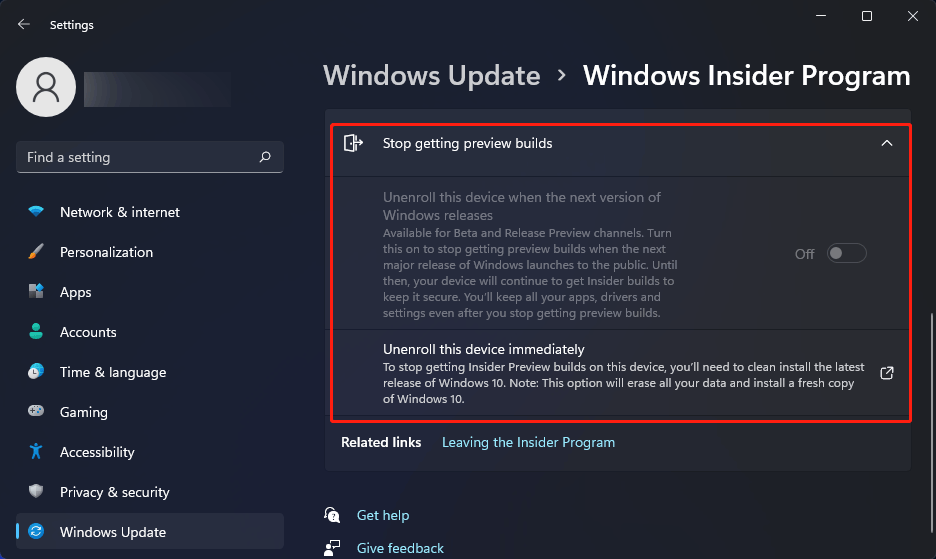
Then, you can continue to read the explanation of the second option:
To stop getting Insider Preview builds on this device, you’ll need to clean install the latest release of Windows 10. Note: This option will erase all your data and install a fresh copy of Windows 10.
However, if you want to use Windows 11, you can also choose to clean install Windows 11 on your computer.
Now, we will show you how to switch from a Dev Insider build to a stable build of Windows 11.
Step 1: Leave the Windows Insider Program
If you want to use the official Windows 11, you should leave the Windows Insider Program first. Likewise, you can go to Start > Settings > Windows Update > Windows Insider Program > Stop getting preview builds, click the Leave the Insider Program link, and then click the Leave the program now button on the pop-up webpage to opt out of the Windows Insider Program.
Step 2: Back up Your Files Using MiniTool ShadowMaker
Since a Windows 11 clean install will erase all files on your computer, you should back up your data in advance. As we have mentioned above, you can use MiniTool ShadowMaker to do the job.
MiniTool ShadowMaker TrialClick to Download100%Clean & Safe
Step 3: Create a Windows 11 Installation USB Drive
You can use Windows 11 Media Creation Tool to create a Windows 11 Installation USB drive. Here is a guide:
- Go to Windows 11 software download page.
- Click the Download now button under Create Windows 11 Installation Media to download Windows 11 Media Creation Tool on your computer.
- Prepare a USB flash drive that has at least 8GB space and connect it with your computer. All files on the USB drive will be deleted during the creation process. So, you should make sure that there is no important data on it.
- Open the downloaded Windows 11 Media Creation Tool.
- If you see the User Account Control interface, click Yes to continue.
- Click Accept.
- Select the language and edition according to your requirements.
- Click Next.
- Select USB flash drive.
- Click Next.
- Select the connected USB flash drive from the next page.
- Click Next.
Windows 11 Media Creation Tool will begin to create a Windows 11 installation USB drive. You should wait until the whole process ends.
![How to Install/Download Windows 11 onto a USB Drive? [3 Ways]](https://images.minitool.com/minitool.com/images/uploads/2021/10/download-windows-11-onto-a-usb-drive-thumbnail.png)
Step 4: Clean Install Windows 11 on Your PC
- Close your computer.
- Make sure the Windows 11 installation USB drive is connected to your computer.
- Boot your computer into BIOS and set the PC to start from the USB drive.
- You will see the Windows Setup interface. Select your needed language, time, and keyboard layout.
- Click Next.
- Click Install now on the next page.
- Click I don’t have a product key.
- Select the operating system you want to install.
- Click Next.
- Select I accept the Microsoft Software License Terms.
- Click Next.
- Click Custom: Install Windows only (advanced).
- Select the partition drive you want to install Windows 11 to. Usually, it is the Drive 0 Partition 1.
- Click Delete.
- Click OK to confirm the operation.
- Select the deleted drive and click Next.
- Windows 11 installing process starts. The process will last for some minutes. You should wait until the whole process ends.
After cleaning install Windows 11, you still need to continue with the Windows 11 out-of-box experience (OOBE) to complete the whole settings.
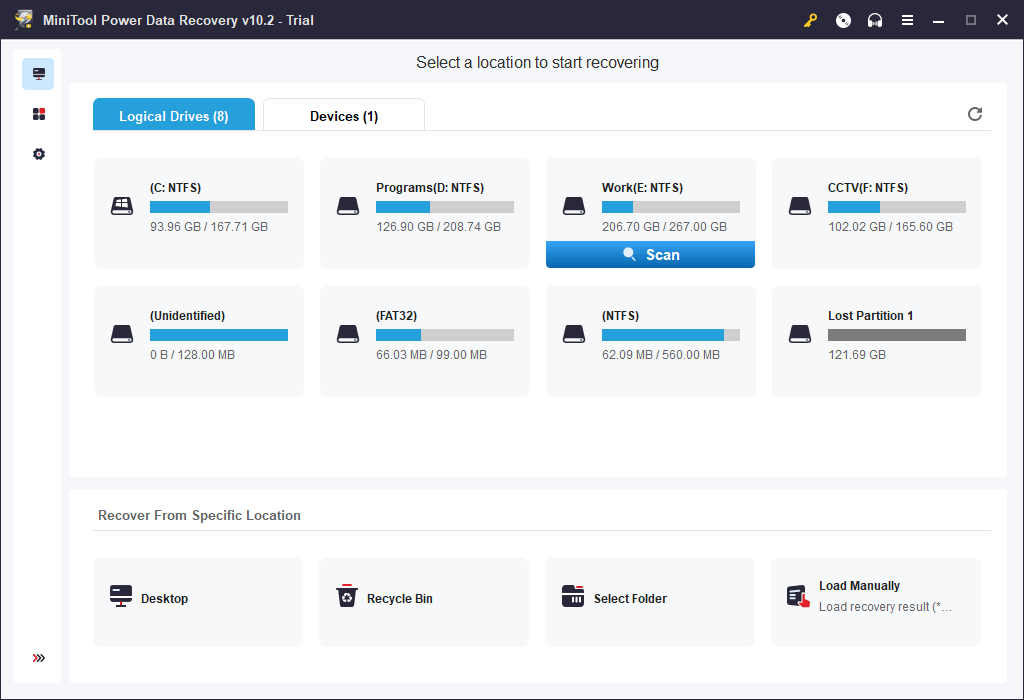
Step 5: Recover Your Lost Files Using MiniTool Power Data Recovery
If you lost your important files after cleaning install Windows 11 on your computer but there is no available backup, you can use MiniTool Power Data Recovery to get them back.
This software is a free file recovery tool. With it, you can recover data from all kinds of data storage devices including computer hard drives, memory cards, USB flash drives, SD cards , and more.
This software has a trial edition. You can first use it to scan the drive you want to recover data from. If this data recovery software can find the files you want to recover, you can use a full edition to recover all your needed files.
MiniTool Power Data Recovery TrialClick to Download100%Clean & Safe
Bottom Line
How to switch from Insider to a stable build of Windows 11 without data loss? After reading this article, you should know how to do it no matter you are in the Dev Channel, or the Beta/Preview Release Channel. Should you have any other related issues, you can let us know in the comments. You can also contact us via [email protected].
About The Author

Position: Columnist
Stella has been working in MiniTool Software as an English Editor for more than 8 years. Her articles mainly cover the fields of data recovery including storage media data recovery, phone data recovery, and photo recovery, videos download, partition management, and video & audio format conversions.
User Comments :