If you are encountering the 0x80042109 error when you try to send Outgoing emails with various versions of Outlook, don’t worry too much. It is not hard to fix. You can refer to this post offered by MiniTool Solution to get some useful methods.
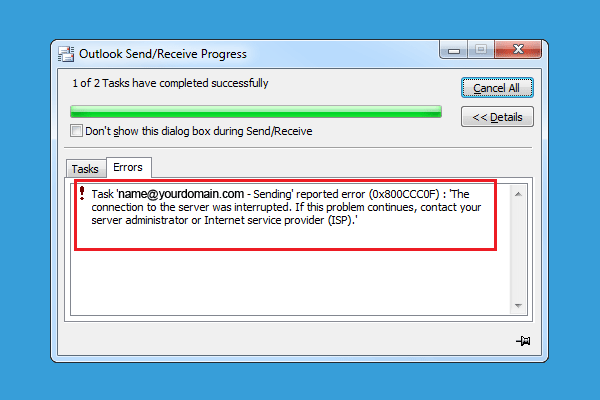
When you try to send Outgoing emails with various versions of Outlook, you may encounter the error 0x80042109. The full error message states that – Task ‘server name – Sending’ reported error (0x80042109): ‘Outlook is unable to connect to your outgoing (SMTP) e-mail server. If you continue to receive this message, contact your server administrator or Internet service provider (ISP).’
What’s causing the Outlook error message 0x80042109? Here are some possible reasons: Incorrect SMTP settings, 3rd party firewall interference or add-in interference. Now, follow the instructions below to fix this 0x80042109 error.
Method 1: Adjust SMTP Settings Manually
If there are some incorrect SMTP settings, Outlook error 0x80042109 may occur. Thus, you can try to adjust SMTP settings manually to fix this error.
Here’s a quick step-by-step guide on how to do that.
Step 1: Completely close Outlook and all associated instances.
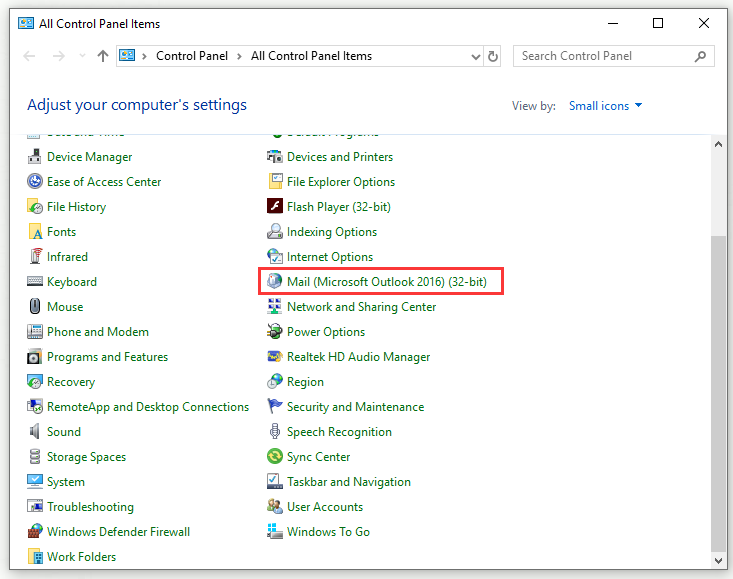
Step 2: Type Control Panel in the Search bar, navigate to it and click to open it.
Step 3: Set View by: Small icons. Find Mail and click to open the Mail Setup – Outlook window.
Step 4: Click the E-mail Accounts… button.
Step 5: Select the E-mail tab, click the email account that you’re encountering issues with and click the Change… button.
Step 6: Click the More Settings… button in the bottom-right corner to open the Internet E-mail Settings window.
Step 7: Go to the Outgoing Server tab and check My outgoing server (SMTP) requires authentication.
Step 8: Switch to the Connection tab and check Connect using my local area network (LAN).
Step 9: Then, go to the Connection tab. Change Incoming server (POP3) to 110, change Outgoing server (SMTP) to 587 and set Use the following type of encrypted connection to TLS. Finally, click OK.
After that, repeat the action that was previously causing the 0x80042109 error to check if the problem is resolved.
Method 2: Disable Third-Party Firewall
The 0x80042109 error may also appear because the third-party firewall you’re using is overprotecting and it interferes with the connection between Outlook and the external email server used for SMTP. In this case, you can try to disable the third-party firewall triggering this false positive.
Comodo and McAfee are the most common suites that cause this type of behavior. If this scenario is applicable, you can disable the real-time protection or uninstall the entire third-party suite altogether to resolve the 0x80042109 error.
However, this operation is not enough for most firewall suites. Even if the real-time security protection is disabled, the same security rules will remain. In this case, you should whitelist the communication between Outlook and the email server.
Here is a quick guide on how to do that. Depending on the security tool you use, the steps to perform this action will vary.
Uninstall the Third-Party Security Suite
Step 1: Press Win key + R key, type appwiz.cpl and press Enter to open the Programs and Features menu.
Step 2: Next, find the firewall that you want to uninstall through the list of installed applications.
Step 3: Select it and choose Uninstall. Then, follow the instructions to complete the uninstallation.
Step 4: After the uninstallation is complete, restart your computer.
To ensure that you don’t leave any leftover files that might still cause this issue, follow the instructions below.
Remove All Remnant Files
Step 1: Click here to find the removal tool for the security program you want to uninstall from your computer.
Step 2: Click the provided link to download the removal tool and then launch it.
Step 3: Follow the instructions on the screen and get rid of everything left behind by the uninstalled application with the removal tool.
Now, repeat the previous operation that triggered the 0x80042109 error to see if the problem is resolved.
Method 3: Open Outlook in Safe Mode
Finally, to solve the 0x80042109 error, you can try to open Outlook in Safe Mode. Safe Mode will run the application without any other third-party modules. If the email sending module works in Safe Mode, then it is actually a third-party add-in that is causing this issue.
If this is the case, and you confirm that a installed add-in is causing this issue, you are able to systematically re-enable all of the add-ins and then test the email sending feature until finding the module responsible for the problem.
Here are the steps to open Outlook in Safe Mode and find the add-in that is causing issues.
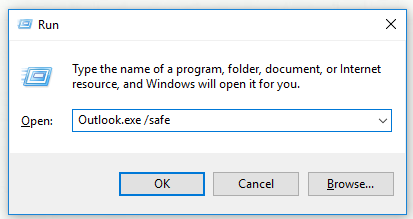
Step 1: Completely close Outlook and all associated instances.
Step 2: Press Win key + R key, type Outlook.exe /safe and press Enter to open Outlook in Safe Mode.
Step 3: If you have multiple profiles, confirm your Outlook profile that you want to use.
Step 4: Go to the File tab and click Options.
Step 5: Click the Add-ins tab from the left side. Then move over to the right side, select COM Add-ins from the Manage menu and click Go to launch the menu.
Step 6: To disable every installed Add-in, uncheck the boxes associated with it and then click OK.
Once you disable every add-in, restart Outlook and check if the 0x80042109 error is fixed. If yes, proceed to systematically re-enable the add-ins previously disabled until you find the culprits.
Bottom Line
After reading this post, you should know how to fix the 0x80042109 error now. If you are still struggling with this error, try the methods mentioned above.
User Comments :