What is 0x8019001 and how to fix it? This article on MiniTool Website will give you detailed explanations and instructions. Sincerely hope that these solutions listed below can turn your issues into a piece of cake! Come and have a try!
Windows Update Error Code 0x8019001
Error code 0x8019001 is one of the most common problems when you try to upgrade & update Windows or open some Windows local applications. Though the cause might vary from situation to situation, you can resolve it by following our instructions.
How to Fix Windows Update Error Code 0x8019001
Solution 1: Run the Troubleshooter
Troubleshooter is an automatic inbuilt troubleshooting tool in Windows 11/10 which can generate a report listing all the suspicious problems and resolve them. Once you encounter error code 0x8019001, you can go to Troubleshoot for help.
Step 1. Press Win + I to open Settings.
Step 2. Scroll down to find Update & Security.
Step 3. Click Troubleshoot and tap on Additional troubleshooters on the bottom of the new window.

Step 4. Hit Windows Update and choose Run the troubleshooter.
Step 5. Follow the instructions on the screen.
Step 6. Upon completion, try to update Windows again to check if error code 0x8019001 still exists.
Solution 2: Run the SFC and DISM Scan
Another possibility of 0x8019001 is that some system files may be corrupted, you need to take several minutes to run SFC and DISM to detect them and replace them with healthy equivalents.
Move 1: Execute the SFC Scanning
Step 1. Type cmd in the search box to navigate to Command Prompt.
Step 2. Right-click it to choose Run as administrator.
Step 3. Type sfc /scannow in the black command window and hit Enter.
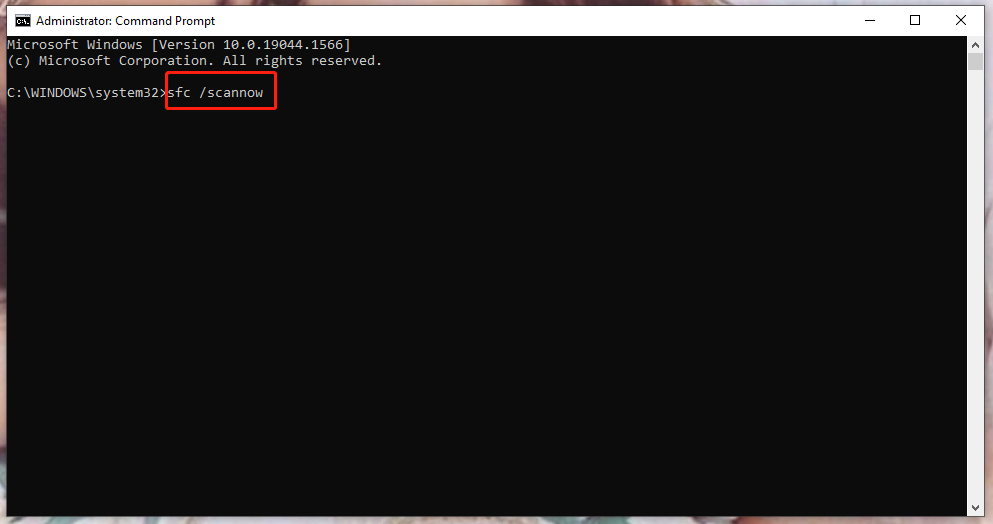
Step 4. Wait for the process to complete.
Move 2: Run the DISM Scanning
Step 1. Open Command Prompt and choose to run it as administrator.
Step 2. Copy and paste the following commands in the back console one by one and don’t forget to hit Enter.
Dism /Online /Cleanup-Image /CheckHealth
Dism /Online /Cleanup-Image /ScanHealth
Dism /Online /Cleanup-Image /RestoreHealth
Step 3. This process might take you a few minutes, please wait patiently.
Solution 3: Clear Files from Software Distribution Folder
The principle of deleting files in Software Distribution is the same as SFC and DISM, that is to say, solving Microsoft 0x8019001 caused by corrupted files. Pay attention to disabling a selection of services first (Background Intelligence Transfer Service and Windows Update Service).
Step 1. Press Win + R to open the Run dialog.
Step 2. Type cmd to open Command Prompt.
Step 3. Paste the following two commands respectively into the command line and tap on Enter to stop the two services mentioned above.
net stop wuauserv
net stop bits
Step 4. Press Win + X and click File Explorer.
Step 5. Paste C:\Windows\SoftwareDistribution and hit Enter.
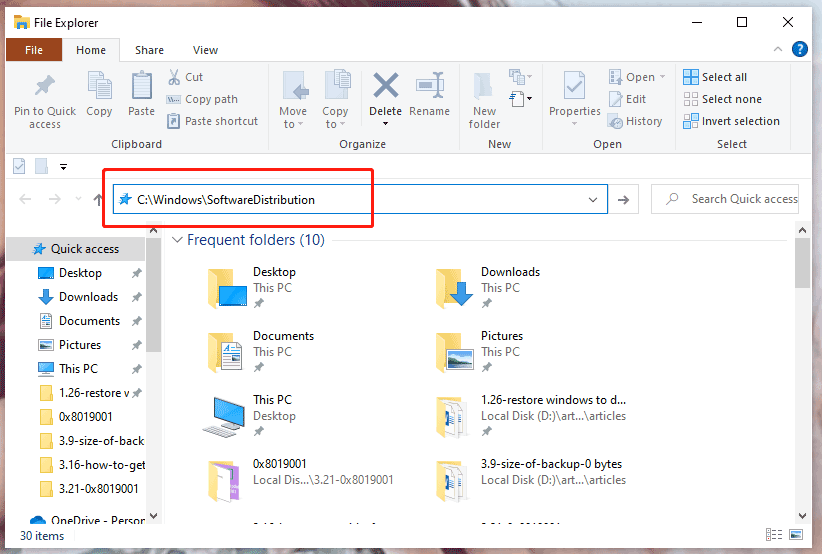
Step 6. Right-click all the listing contents and choose Delete.
Solution 4: Perform A Clean Boot
Sometimes, 0x8019001 may be caused by third-party applications and services. In this case, you are able to deploy a clean boot to address it.
Step 1. Press Win + R to launch the Run box.
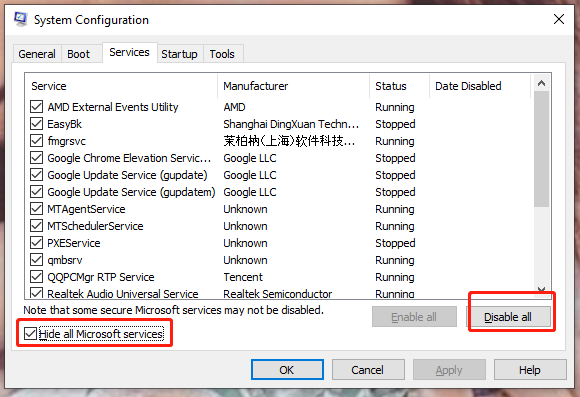
Step 2. Type msconfig and click OK to open System Configuration.
Step 3. In Services, check Hide all Microsoft services and click Disable all.
Step 4. Go to Startup and click Open Task Manager.
Step 5. Disable all the startup applications by right-clicking every application one by one and choosing Disable.
Step 6. Click Apply and OK.
Solution 5: Enable Windows Update Dependency Services
You can also avoid the interference of third-party applications by enabling Windows Update Dependency Services.
Step 1. Type cmd in the search box to find Command Prompt and grant administrate privileges.
Step 2. Copy the next orders in the new window and hit Enter respectively.
SC config trustedinstaller start=auto
SC config bits start=auto
SC config cryptsvc start=auto
Step 3. Restart your device to inspect if the code 0x8019001 is still ongoing.
Solution 6: Reset the Windows Store Cache
Generally speaking, the root cause of 0x8019001 is temporary file data or corrupted dependency, so you need to repair the entire suite.
Step 1. Open Settings and choose Apps.
Step 2. In Apps & features, scroll down to find Microsoft Store.
Step 3. Click on Advanced options.
Step 4. Under Reset, click Repair.
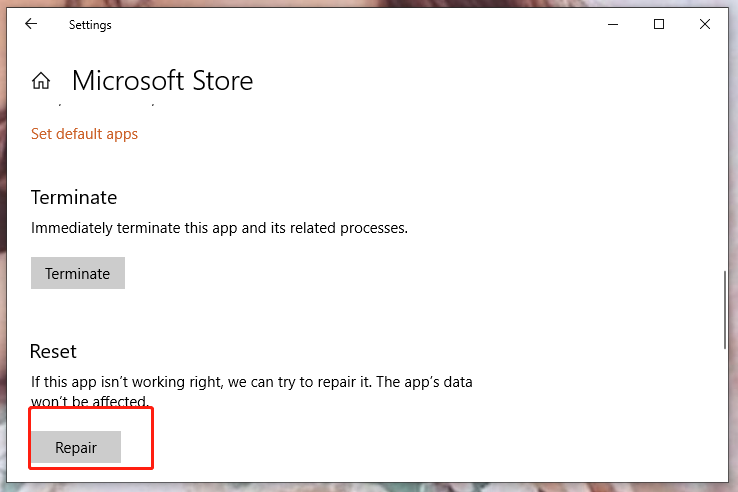
Step 5. Click Repair again to confirm this action.
Solution 7: Turn off Sync in Chrome
If none of the methods above work, you can try to turn off Sync in Chrome. This solution might sound weird but it does make sense. Under certain circumstances, the sync feature in Chrome may interfere with some Windows inbuilt apps thus triggering error code 0x8019001.
Step 1. Launch your Chrome and open your account by clicking the top-right part of the screen.
Step 2. Click Sync is on and tap on the Turn off button.
Step 3. Reboot your PC to check if 0x8019001 is still there.
User Comments :