DXGI_ERROR_DEVICE_REMOVED or DXGI_ERROR_DEVICE_HUNG are the most common DirectX errors when playing Battlefield 2042. If you are also one of the victims of Battlefield 2042 DirectX error, you can check out this tutorial on MiniTool Website for more help.
Battlefield 2042 DirectX Error
Battlefield 2042 DirectX error is usually caused by the incompatibility between the game and your DirectX version, so it is very necessary to update your computer and the version of DirectX. Besides the above reason, Battlefield 2042 DirectX error may occur due to outdated GPU drivers, missing DirectX package, enabled DLSS, wrong dependencies of MachineGUID and so on. If you meet this error by accident, you can try the easy solutions provided on this page.
Tip: You might also face Battlefield 2042 issues like Battlefield 2042 crashing on PC or black screen. In this circumstance, go to – [Solved] Battlefield 2042 Black Screen Issues (7 Solutions) for detailed workarounds.
How to Fix Battlefield 2042 DirectX Error?
Way 1: Update Your Graphics Driver
Battlefield 2042 beta DirectX error may be caused by a driver issue. Therefore, you need to update your graphics driver to the latest version. There are two ways to update your graphics. One is to update it manually, the other is to update it automatically. Of course, the latter one is more convenient and fast. To do so:
Step 1. Press the Windows icon and X to open the quick start menu.
Step 2. Choose Device Manager.
Step 3. Click on Display adapters to show your graphics driver.
Step 4. Right-click on your graphics and select Update driver.
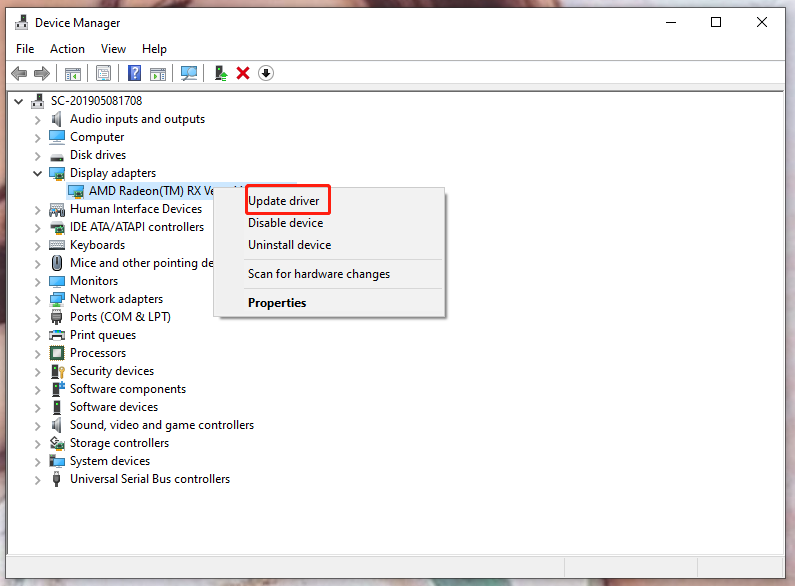
Step 5. Click Search automatically for updated driver software and follow the on-screen instructions.
Way 2: Check Windows Updates
You may encounter Battlefield 2042 DirectX error due to outdated or corrupted Windows operating system version. Make sure to follow the next instructions carefully.
Step 1. Press Win + I to open Windows Settings.
Step 2. Click Update & Security > Windows Update.
Step 3. On the right page, click Check for updates.
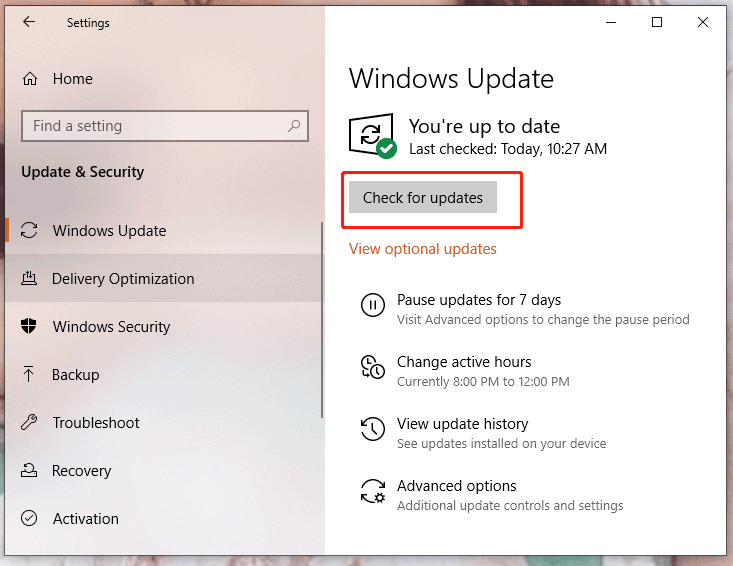
Step 4. If there is an update available, click Download and install.
Step 5. Wait patiently for a while until the update completes.
Way 3: Update DirectX
If you have already updated your Windows but it still doesn’t work. The chance is high that somehow the DirectX version is outdated.
First, you should check your DirectX version.
Step 1. Press Win + R to launch the Run box.
Step 2. Type dxdiag and click OK to open DirectX Diagnostic Tool.
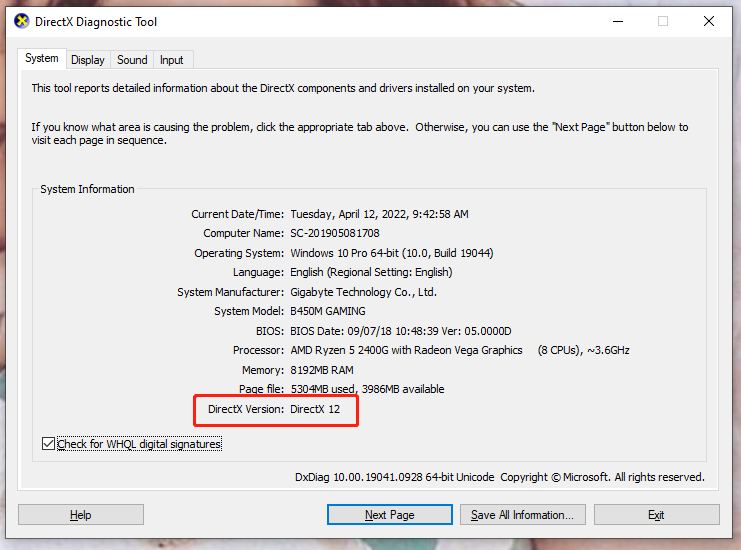
Step 3. In the System tab, you can see your DirectX version. If yours is not DirectX 12, you should do the next steps.
Step 4. Go to download the DirectX End-User Runtime Web Installer on your computer. Remember to reboot your PC after installing or updating the DirectX version manually.

Way 4: Edit the Game Profile
Even if keeping the latest version of DirectX is very significant, your device may not support it. If Battlefield 2042 DirectX error is caused by this factor, you can change the settings config files.
Step 1. Open File Explorer and click the Documents folder.
Step 2. Double-click the Battlefield 2042 folder > Settings.
Step 3. Right-click PROFISAVE_profile and select Open with Notepad.
Step 4. Make sure that you are inside the contents of the PROFISAVE_profile file.
Step 5. Navigate to the option named GstRender.Dx12Enabled at the bottom of the screen.
Step 6. Change the value from 0 to 1.
Step 7. Select File and click on Save to exit this window.
Way 5: Check the Integrity of Game Files
At times, corrupted or missing game files may also trigger game launching or running problems. As a result, you are supposed to check the integrity of game files and repair them in time.
Step 1. Click Steam > Library.
Step 2. Scroll down to locate Battlefield 2042 and right-click it to choose Properties.
Step 3. Click LOCAL FILES > VERIFY INTEGRITY OF GAME FILES.
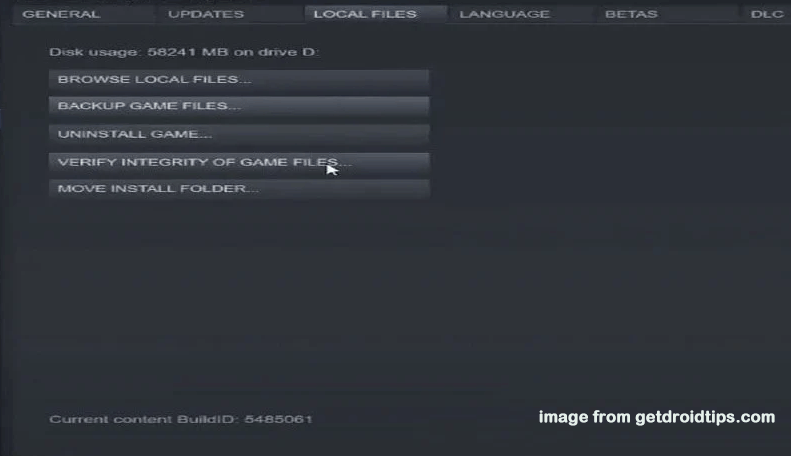
Step 4. Wait for the process to get accomplished.
Way 6: Clear the Game Cache
Clearing the game cache is helpful in improving game performance and fixing some random crashes including DirectX function error Battlefield 2042.
Step 1. Press Win + R to open up the Run box, copy %ProgramData%/Steam in the box, and click OK.
Step 2. Delete all folders except LocalContent.
Step 3. Open the Run box again and paste %AppData% and hit Enter.
Step 4. Scroll down to navigate to Steam and delete it.
Step 5. Navigate to C:\Users\Your Username\AppData\Local, and delete the Steam folder again.
Step 6. Restart the game via Steam.
Way 7: Disable DLSS
If you enable DLSS for the game and you own an Nvidia card. You have to disable DLSS and reboot the game to check whether Battlefield 2042 DirectX error appears or not.
Step 1. Open the game and the Graphics Setting menu.
Step 2. Click Options > Display > Video.
Step 3. Turn off DLSS.
Way 8: Change the Machine GUID Registry Key
The last possibility of DirectX error Battlefield 2042 is that a registry key may point to the wrong dependency, so you need to change the actual path of MachionGUID to the right one.
Step 1. Open the Run box, type regedit in the blank box and press Ctrl + Shift + Enter to open Registry Editor with administrator privileges.
Step 2. Copy & paste the following path in the navbar and hit Enter.
HKEY_Local_Machine\Software\Microsoft\Cryptography\
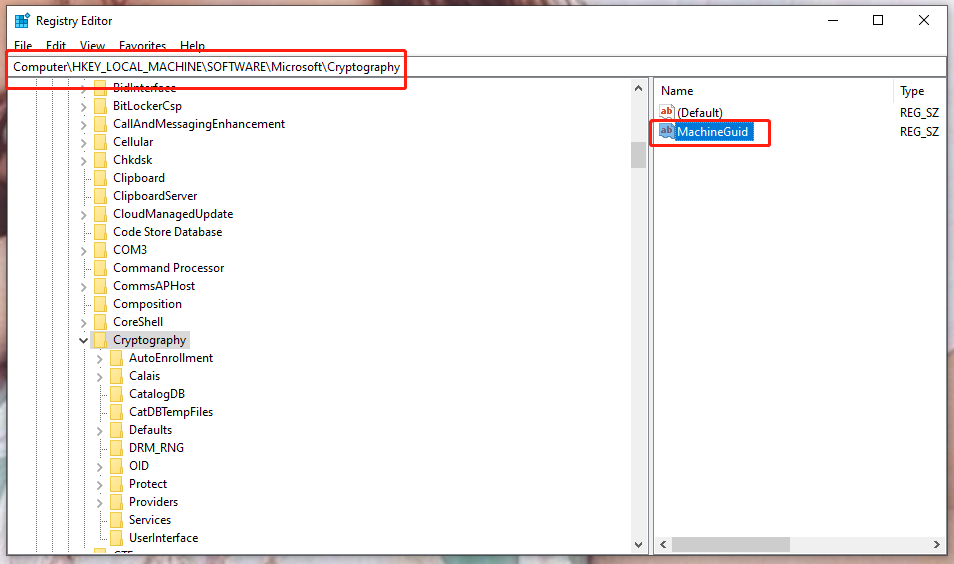
Step 3. In the right-hand menu, right-click MachionGuid and choose Modify.
Step 4. Replace the value of the MachineGuid string with the following content and hit Enter to apply this change.
d1eb246e-6243-4460-a88e-5d4e52b1ef6b
Step 5. Reboot your device.
User Comments :