In Windows 10, you may encounter the issue – corrupted font. How do you fix the damaged fonts on your computer? Take it easy and now you can try some solutions to easily fix the font problem. Now, read this post from MiniTool to see the methods.
Windows 10 Font Problem
When using a computer, you may encounter many issues, for example, the update problem, disk space issue, apps not working, etc. Some are just annoying but some are severe. One of the serious problems is the Windows 10 font problem.
You are not the only one who is bothered by it. According to users, they also experience it. Some reported Windows 10 fonts not displaying correctly, fonts missing, blurry or corrupted, etc. Sometimes the fonts continually shapeshifting with pieces of the font randomly disappearing and then rebuilding.
What should you do if the computer shows corrupted fonts? You can try these solutions below to easily get rid of the trouble.
Solutions to Windows 10 Fonts Corrupted
Reinstall the Font
If you upgrade to Windows 10 from Windows 7 or 8, the font may be not installed properly. So, you need to reinstall it by following these steps.
Step 1: If you do a clean install of Windows 10, go to C:\Windows\Fonts. If you upgrade from Windows 7 or 8, go to C:\Windows.old\Windows\Fonts.
Step 2: Find the problematic font. Usually, it is Arial.
Step 3: Preview the font and click Install to reinstall the font.
If the font is missing, you should do these steps.
Step 1: Run Command Prompt as administrator.
Step 2: Type C:\Windows\Fonts\Arial.ttf and press Enter.
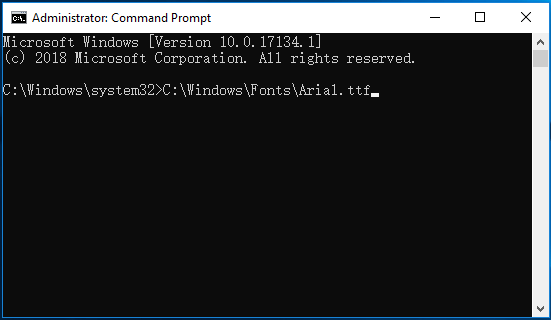
Step 3: Click Install in the preview window.
Disable Scaling on High DPI Settings
Sometimes corrupted fonts are caused by high DPI settings. To fix this issue, disable it.
Step 1: Right-click the executable file that has the font problem and choose Properties.
Step 2: Go to Compatibility and check the box of Disable display scaling on high DPI settings.
Step 3: Click Apply and then OK.
Modify the Windows Registry
If the registry key is not correct, the Windows 10 font problem may appear. So you can try to change the Windows Registry.
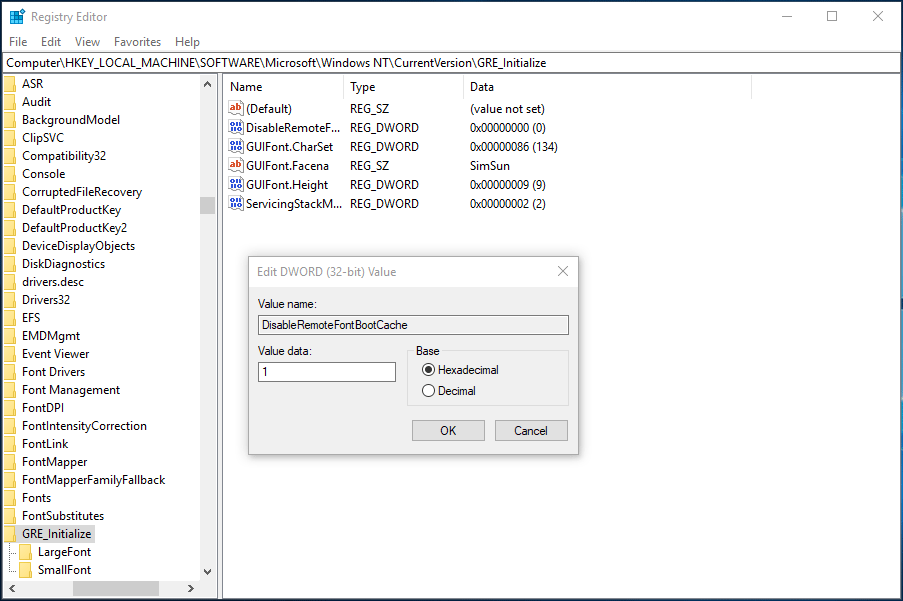
Step 1: Type regedit to the search bar and click the result.
Step 2: After the Registry Editor is open, go to HKEY_LOCAL_MACHINE\SOFTWARE\Microsoft\Windows NT\CurrentVersion\GRE_Initialize.
Step 3: Duble-click DisableRemoteFontBootCache and change the Value data to 1.
Rebuild Font Cache
Sometimes the Windows 10 fonts corrupted issue is triggered by font cache corruption. To fix the issue, you need to reset, clear, and rebuild the font cache.
Step 1: Press Win + R, input services.msc and press Enter.
Step 2: Double-click Windows Font Cache Service and click Stop.
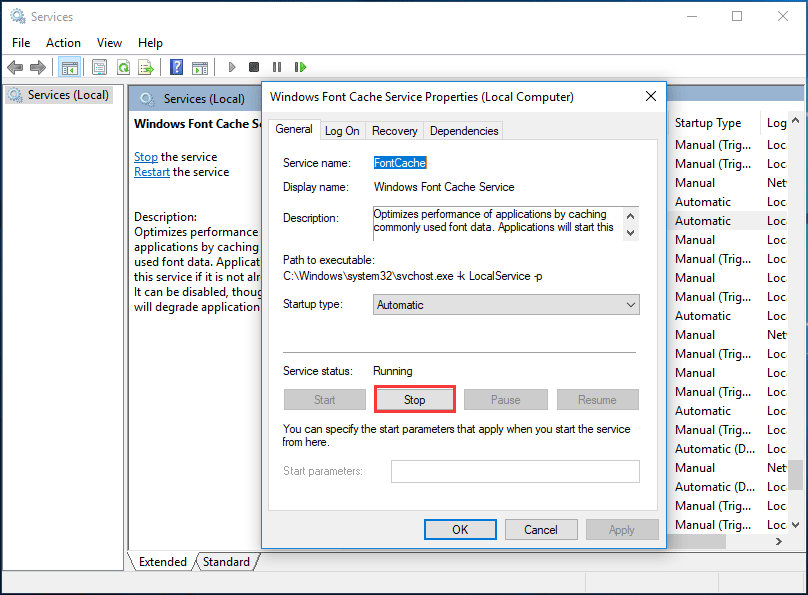
Step 3: Also stop Windows Presentation Foundation Font Cache 3.0.0.0.
Step 4: Go to C:\Windows\ServiceProfiles\LocalService\AppData\Local and delete all .dat files starting with FontCache.
Step 5: Open the FontCache director and delete all files with ~FontCache- prefix.
Now, your fonts should display normally.
Some other solutions:
- Delete the problematic Windows updates
- Go to C:\Windows\System32 and delete FNTCACHE.DAT
- Use FontReg tool to register your fonts
Bottom Line
Does Windows 10 show a corrupted font? How to fix the font problem? Now, after trying these solutions, the fonts should become normal. Just do by following the methods above.
About The Author

Position: Columnist
Vera has been working at the MiniTool Team for over 10 years as a technical editor and content writer. She mainly focuses on disk and partition management, data recovery, Windows backup and restore, and PC troubleshooting. Through in-depth software testing and hands-on experience, she has helped users solve a wide range of computer problems and better protect their data on Windows devices.
User Comments :