When installing a virtual machine, you may have to transfer files between the guest and host operating systems. Thus, you need to create a VirtualBox shared folder in Windows 11. This post from MiniTool tells you how to do that.
After creating a virtual machine on VirtualBox, there may be times when you need to share files between the host and guest operating systems to install applications or work with documents. You can set up a virtualization solution to allow you to drag files into the virtual machine, or you can share files from folders created on the host.
How to Create a VirtualBox shared folder in Windows 11
There are 2 steps to creating a VirtualBox shared folder in Windows 11.
1. Create VirtualBox Shared Folder
Step 1: Open VirtualBox. Right-click the desired virtual machine in the left pane and select the Settings… option.

Step 2: Select the Shared Folders option in the left pane, then click the folder with the plus sign in the top right corner.

Step 3: Click the arrow symbol on the folder path option to confirm the folder path you want to share. In the Folder Name field, make sure the auto-generated name matches the file you want to share. If you do not want your virtual machine to be able to save files in this folder, you can check the Read-only box and click OK.
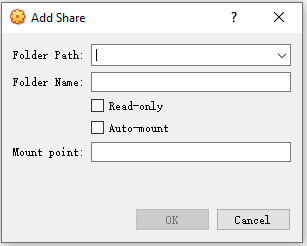
Step 4: At last, click the OK button.
2. Create the VirtualBox Mapped Drive
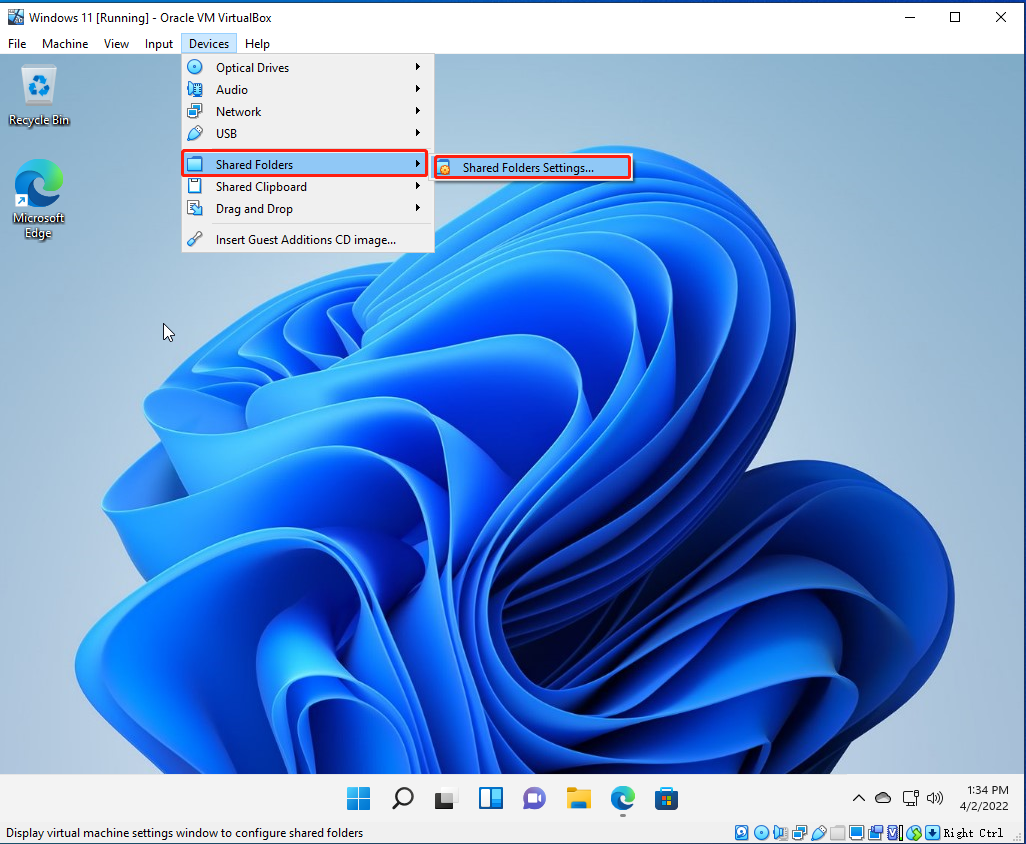
Step 1: Open VirtualBox. Select Devices > Shared Folders and click the Shared Folder Settings… option.
Step 2: Select the Shared Folder option and double click to select the newly added folder.
Step 3: Check the Auto-Mount box, input the drive alphabet corresponding to the shared folder location in the mount point field, check the Make Permanent box, and click OK.
Step 4: At last, click OK to finish.
How to Acess the VirtualBox Shared Folder on Windows 11
You can access the folder from the Network or This PC pages.
Network page
If you created a shared point, access the files using these steps:
- Open File Explorer.
- Click Network.
- Double-click the VBOXSVR device.
- Double-click the shared folder to access the files.
This PC page
If you mounted the folder as a drive, access the files using these steps:
- Open File Explorer.
- Click This PC.
- Under the Network locations section, double-click the drive letter assigned to the mount point to access the files.
How to Delete the VirtualBox Shared Folder on Windows 11
How to delete the VirtualBox shared folder on Windows 11? Follow the guide:
Step 1: Open VirtualBox.
Step 2: Right-click the virtual machine and select the Settings option.
Step 3: Click Shared Folders.
Step 4: Select the shared folder or mapped drive and click the Remove selected shared folder button.
Final Words
How to create a VirtualBox shared folder in Windows 11? I hope now you have got the answer. Besides, you can know how to access and delete the VirtualBox shared folder in Windows 11.
User Comments :