Have you ever encountered the “Disk Cleanup not deleting files” issue when you try to remove temporary files, downloaded files, etc.? If yes, you can read this post given by MiniTool to find the most effective solutions for resolving the Disk Cleanup not working problem.
Issue: Disk Cleanup Not Deleting Files Windows 10/11
Disk Cleanup is a Windows utility that frees up hard disk space by searching and cleaning disk files, thereby improving system performance. It can clean system junk files, application cache files, temporary Internet files, download files, log files, and more. Although it is powerful, sometimes it faces some challenges, such as “Disk Cleanup not deleting files”.
Generally speaking, Disk Cleanup not deleting temporary Internet files or other types of files may be due to the following reasons:
- Disk Cleanup is not granted administrator privileges.
- The current account does not have permission to delete a certain file.
- There are corrupted system files.
- Third-party applications interfere with Disk Cleanup.
Next, we will walk you through how to resolve the “Disk Cleanup not deleting files” issue.
MiniTool Power Data Recovery FreeClick to Download100%Clean & Safe
Fix 1. Run Disk Cleanup as Administrator
Running Disk Cleanup as administrator provides high-integrity permissions for functions that may require additional access to your Windows files. It is an effective solution if Disk Cleanup is not deleting your files.
First, type Disk Cleanup in the Windows search box. Second, right-click Disk Cleanup and select Run as administrator from the context menu.
Then you can follow the on-screen instructions to remove unnecessary files by using Disk Cleanup and check if it works as expected.
See Also: Top 7 Fixes to Disk Cleanup Stuck on Windows Update Cleanup
Fix 2. Get Permission to Delete Files
The failure of the file to be deleted by Disk Cleanup may also be related to the permissions set on the file. Here’s how to check and modify file permissions:
Step 1. In File Explorer, right-click on the file that cannot be deleted and select Properties from the context menu.
Step 2. Move on to the Security tab, then select the current user account and check if it has Full control permission. If not, click the Edit button.
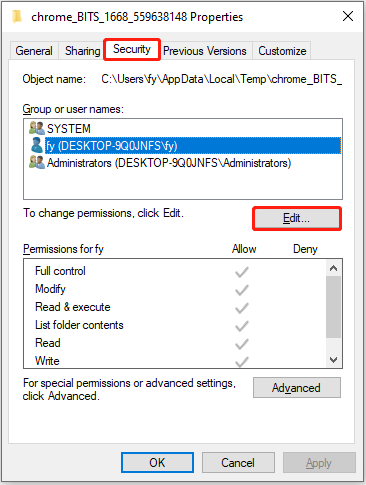
Step 3. In the pop-up window, select your account and make sure the Full control permission is set to Allow.
Step 4. Click Appy > OK. After that, run Disk Cleanup again and check if the target files can be deleted successfully.
Fix 3. Run DISM and SFC
Corrupted system files can also be responsible for the “Disk Cleanup not deleting files” issue. To detect and repair missing or corrupted system files, you can choose to run the DISM and SFC command lines.
Step 1. In the Windows search box, input cmd and right-click Command Prompt from the best match result to select Run as administrator.
Step 2. Select the Yes option in the UAC window. If you cannot see Yes, find solutions from this post: How to Fix UAC Yes Button Missing or Grayed Out?
Step 3. In the command line window, input DISM.exe /Online /Cleanup-image /Restorehealth and press Enter.

Step 4. Next, type sfc /scannow and press Enter. After executing the command lines, you can check if the issue still exists.
Fix 4. Delete Temporary Files Manually
If Disk Cleanup cannot delete temporary files, you can choose to delete temporary files manually.
Step 1. Right-click the Windows logo button to select Run.
Step 2. In the text box, type %temp% and press Enter.
Step 3. Press the Ctrl + A key combination to select all temporary files, then right-click on them to select Delete.
Fix 5. Use Disk Cleanup Alternatives
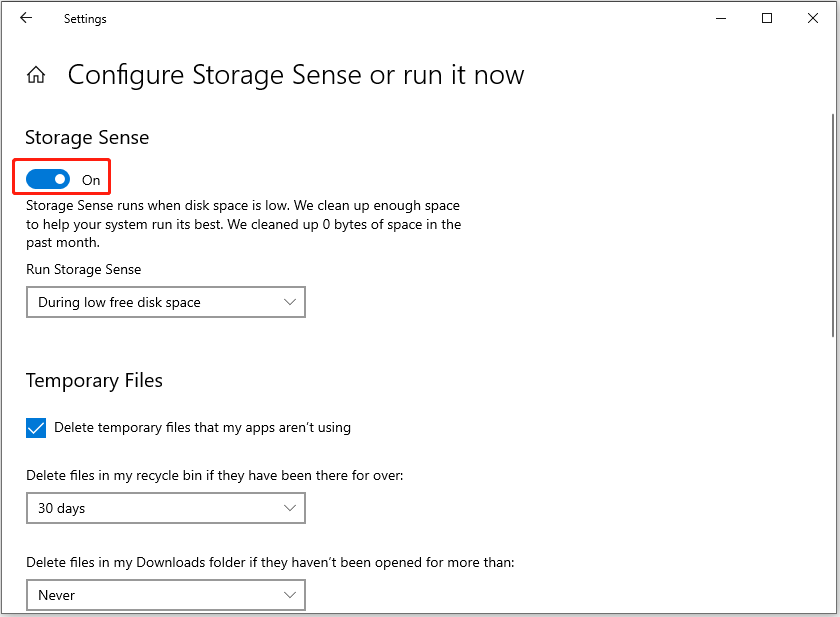
In addition to Disk Cleanup, many tools can be used to remove unnecessary files and free up disk space on Windows. For example, you can use the Storage Sense feature to delete temporary files, delete files in the Recycle Bin, delete files in the Downloads folder, and so on.
To configure Storage Sense settings, you need to go to Windows Settings > System > Storage. In the right panel, click Configure Storage Sense or run it now.
On the next page, you can turn on Storage Sense and set which files to delete.
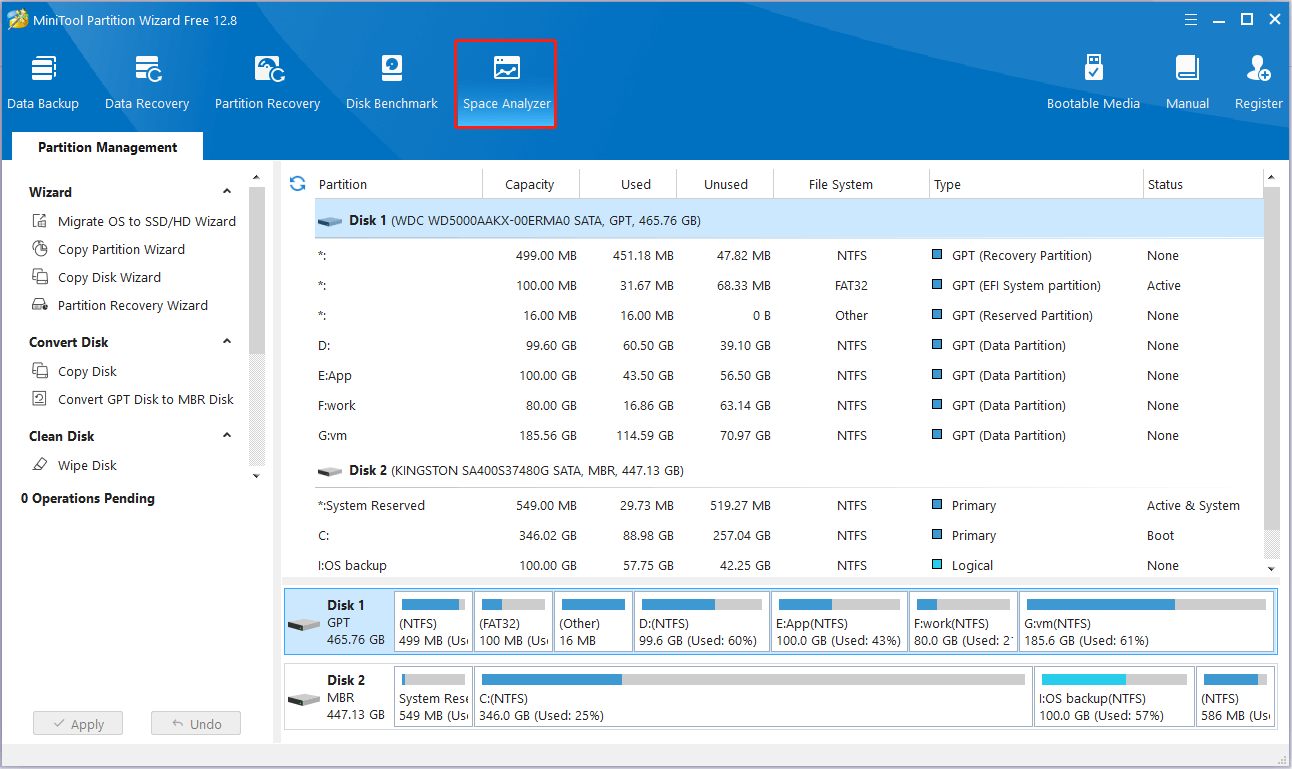
Apart from Storage Sense, professional PC partition management tools can used to delete files. MiniTool Partition Wizard is such a reliable and free partition manager. Its Space Analyzer feature (totally free) can help to scan your hard drive and display hard drive space usage, then you can view and clean up junk files.
You can download MiniTool Partition Wizard and try it out for free.
MiniTool Partition Wizard FreeClick to Download100%Clean & Safe
Wrapping Things Up
Disk Cleanup not deleting files? Try to run it as administrator, change the file permission, run DISM and SFC, or you can use Disk Cleanup alternatives to remove unwanted files.
Should you have any questions about this post or MiniTool software, feel free to contact us at [email protected].
About The Author

Position: Columnist
Shirley holds a bachelor’s degree in English and has been an editor at the MiniTool Team for many years. She specializes in IT-related content, with a focus on data recovery, file backup, disk management, and other technical topics. She is committed to delivering clear, accurate, and practical solutions to help users resolve common computer issues.
User Comments :