Do you know how to enable Folder Merge Conflicts in Windows 10/11? If not, you come to the right place. This post from MiniTool talks about how to show Confirm Folder Replace. At the same time, you can get the ways to recover accidentally merged folders here.
How to Enable/Disable Folder Merge Conflicts
What does it mean to turn on the folder merge conflict prompt? It means when you copy or move a folder to a target folder that already contains a folder with the same name, a prompt box will pop up asking you whether you want to merge these files as shown below.
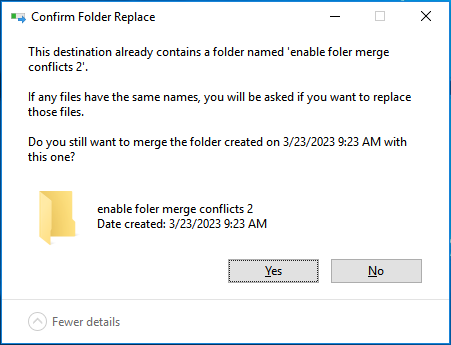
In Windows 10/11, the Folder Merge Conflicts prompt is turned off by default. In this case, if the destination folder has a folder with the same name, the warning box will not be displayed. Here you can enable this feature by following the ways below.
Way 1. Enable Folder Merge Conflicts Using Folder Options
Step 1. Press Windows + E key combinations to open File Explorer.
Step 2. Click View > Options.
Step 3. Move on to the View tab and uncheck Hide folder merge conflicts. Then click OK to save your changes.
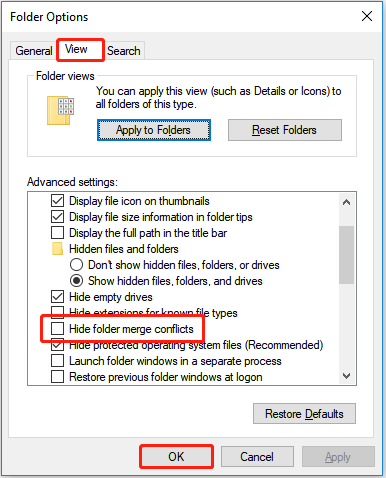
Now you can see the Confirm Folder Replace dialog box when you move a folder to another one that contains a folder with the same name. To disable Folder Merge Conflicts, you just need to check the Hide folder merge conflicts option.
Way 2. Enable Folder Merge Conflicts Using Registry Editor
Step 1. Press Windows + R key combinations to open Run.
Step 2. In the input box, type regedit and press Enter. Click Yes in the pop-up window.
Step 3. Navigate to the following path:
HKEY_CURRENT_USER\Software\Microsoft\Windows\CurrentVersion\Explorer\Advanced
Step 4. In the right panel, double-click HideMergeConflicts. Then change its value data to 0 and click OK.
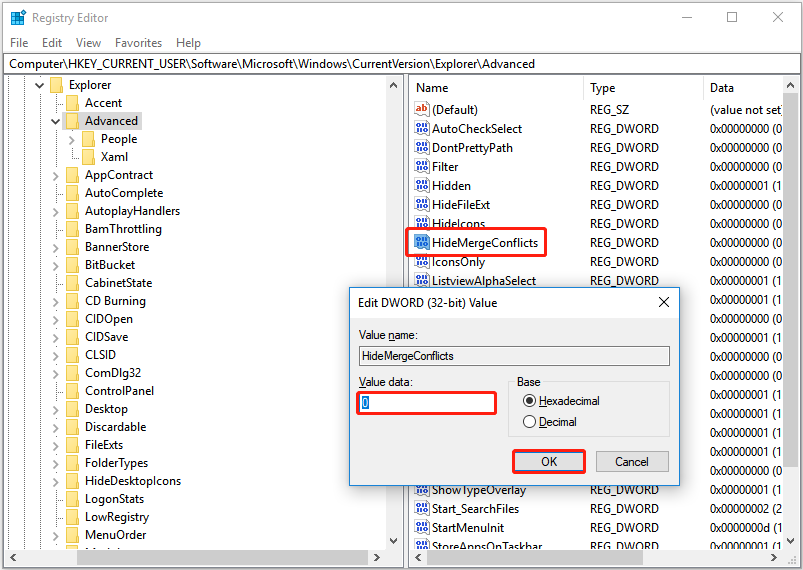
To disable Folder Merge Conflicts, you need to change its value data to 1.
How to Recover Accidentally Merged Folders
Now you should know how to enable and disable Folder Merge Conflicts. However, you may accidentally merge a folder and not know how to restore it. Here is a true example:
I had two folders I wanted to merge, and when asked what to do about the files that had the same names, I selected to replace all. However, I have now realized I still need some of them. Is there any way to recover these files or are they completely lost?
answers.microsoft.com
In this situation, you can make use of the feature “Restore previous versions” to recover your folders from a previous version.
Tip: To recover a folder to its previous version, you need to make sure that you have turned on File History before merging them. Otherwise, this way will not work.
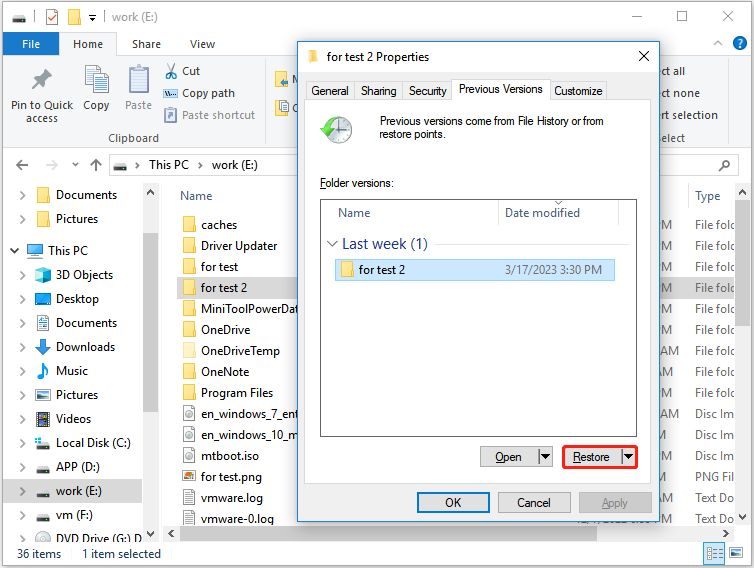
Step 1. In File Explorer, right-click the folder you want to restore to a previous version and select Restore previous versions.
Step 2. Select a wanted version and click Restore.
Top Recommendation
If your folders or files are accidentally lost during the merge process, here a piece of free data recovery software – MiniTool Power Data Recovery is recommended for you. This data restore tool can help you recover many types of files including documents, emails, videos, and so on.
Tip: MiniTool Power Data Recovery Free Edition allows you to scan and view all found files on your drives and recover no more than 1 GB of data for free. You can download it ad try it out to preview your files. If the wanted files or folders are displayed, you can choose the full edition to recover unlimited files.
MiniTool Power Data Recovery FreeClick to Download100%Clean & Safe
Here you can see the major steps to recover lost files.
Step 1. Launch MiniTool Power Data Recovery.
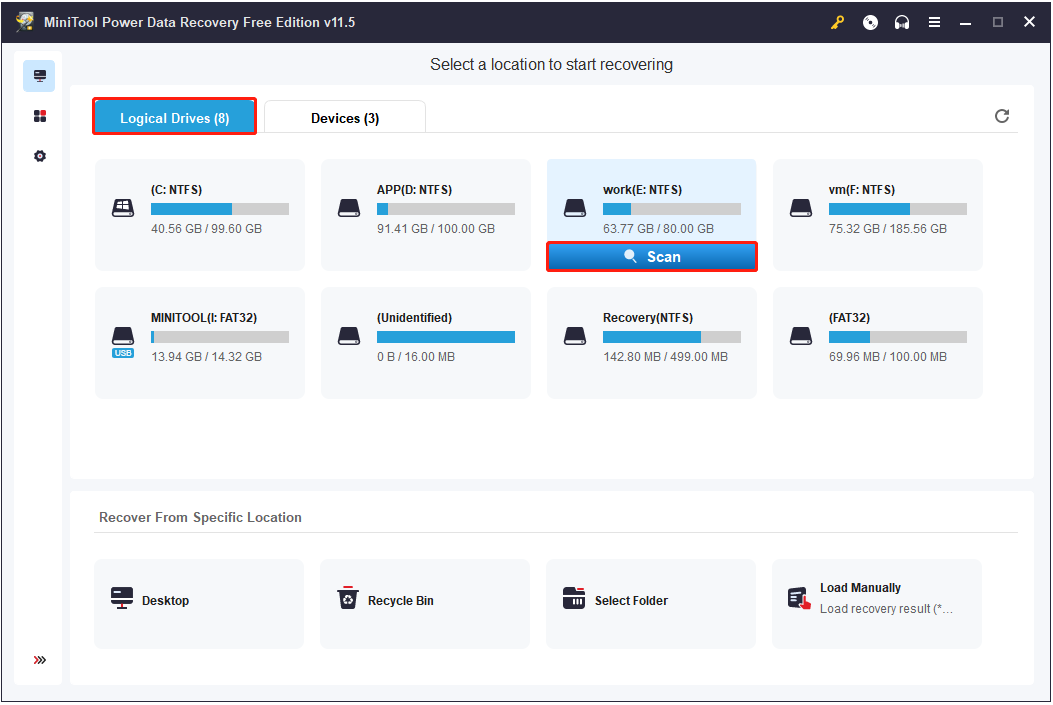
Step 2. Under the Logical Drives section, choose the target partition that contains your lost files or folders. Then click Scan.
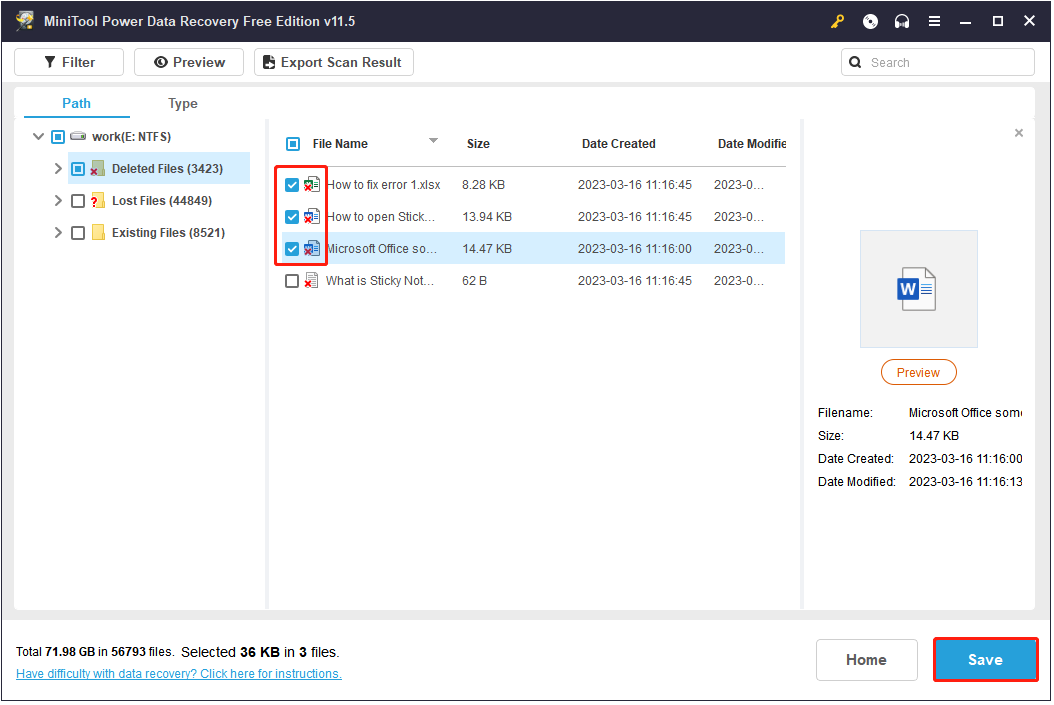
Step 3. Preview found files and select all needed folders or files. Then click Save to select a safe place separate from the original path to store them.
Wrapping Things Up
Now you have known how to disable and enable Folder Merge Conflicts in Windows 10/11. At the same time, you also know how to recover accidentally merged folders and deleted folders/files.
Should you have any questions about MiniTool data recovery software, you can leave your comments below.

User Comments :