Windows 10 File History can back up your previous versions of files on your computer. You can use it to recover your files if you delete some important files by mistake. But you need to manually enable previous versions in Windows 10 to activate this feature. In this MiniTool post, we will show you how to turn on previous versions in Windows 10 via 3 methods.
How to Enable Previous Versions in Windows 10?
Windows has many powerful features to recover deleted files or restore systems, such as Windows File Recovery for recovering deleted files, system restore point for system restore, File History for restoring a previous version of a file, and Shadow Copy for data backup and restore.
System Restore, File History, and Shadow Copy refer to an element: previous versions. In this post, we will show you how to turn on previous versions in Windows 10 using different methods. You can select a proper method according to your situation.

How to Make Your Windows 10 Enable Previous Versions for File History?
- Enable previous versions in Windows 10 using File History
- Enable previous versions in Windows 10 via Restore Point
- Enable previous versions in Windows 10 through Shadow Copy
Way 1: Enable Previous Versions in Windows 10 via Settings
Before enabling File History in Windows 10, you need to prepare an available drive to save the previous versions of files. You can use an external hard drive or a USB drive that has enough space. A network location is also supported.
- Click Start.
- Go to Settings > Update & Security > Backup.
- Click Add a drive.
- Select the drive you have connected to your computer.
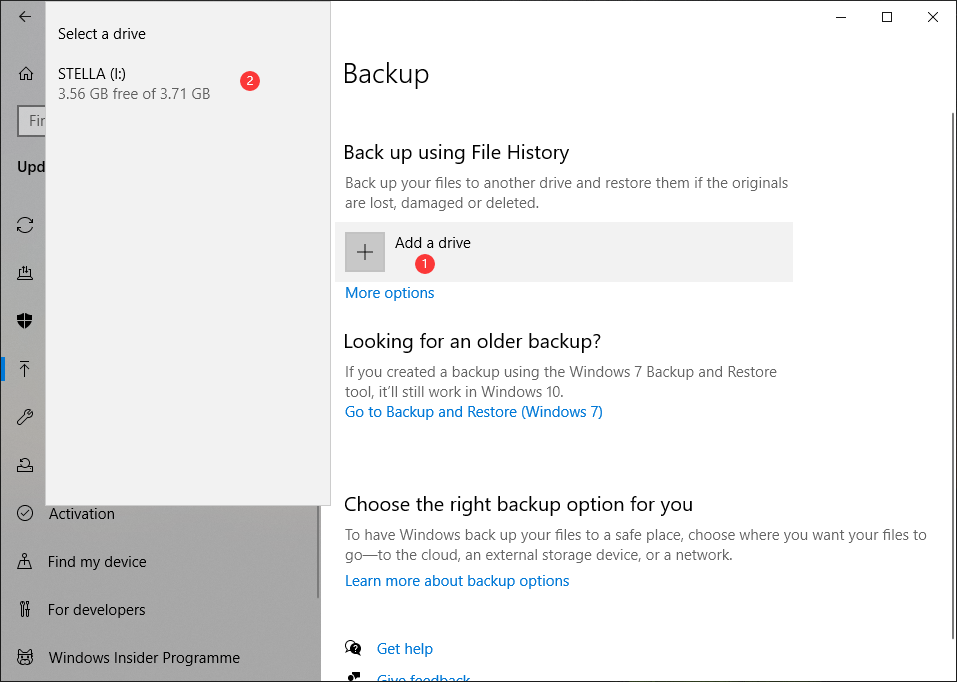
After these steps, previous versions in Windows 10 will be enabled and your computer will begin to back up using File History.
![[FIXED] Windows 10 22H2 Is Not Showing up or Installing](https://images.minitool.com/minitool.com/images/uploads/2022/10/windows-10-22h2-not-showing-up-installing-fixed-thumbnail.png)
Way 2: Enable Previous Versions in Windows 10 via Restore Point
Creating a system restore point can also save the previous version of your system. Here, you need to know a system restore point focuses on the system but not the non-system files on your computer. It is helpful when you encounter some system issues.
Here is how to enable previous versions in Windows 10 using the restore point.
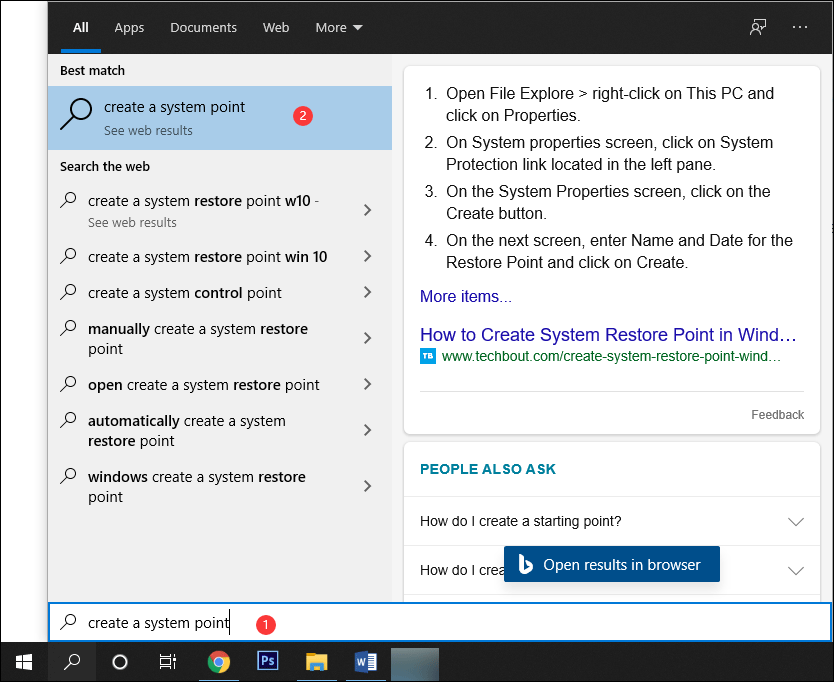
1. Use Windows search to search for create a system point and click the first search result to open System Properties.
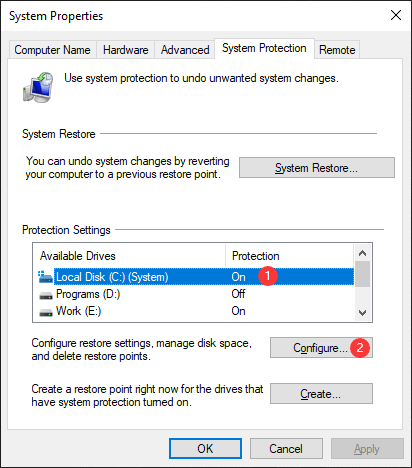
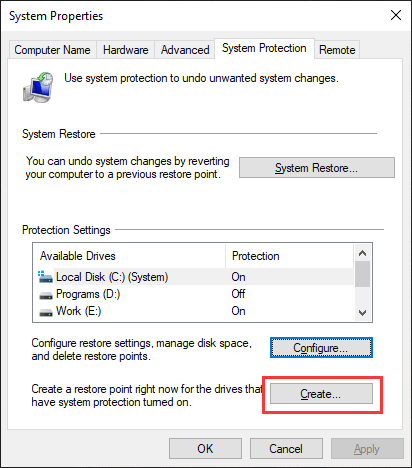
2. Select the drive you want to create a previous version of the system. Usually, it is the C drive. Then, click the Configure button to continue.
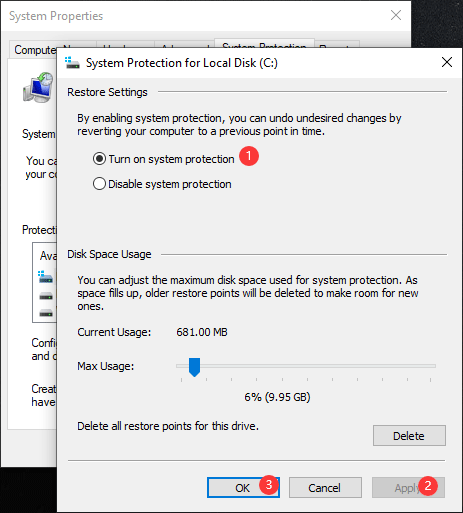
3. Make sure Turn on system protection is selected.
4. Click Apply if the button is available.
5. Click OK.
6. Click Create.
7. Type a description for the restore point for identification.
8. Click Create.

System protection will begin to create a restore point. You need to wait until the whole process ends. When your computer encounter system issues, you can perform a system restore using a restore point that you have created before.

Way 3: Enable Previous Versions in Windows 10 through Shadow Copy
Shadow Copy can be used to create snapshots of your data on your specific drive. The previous versions of your files are saved for data recovery.
Here is how to enable Windows 10 Shadow Copy and set it for creating data snapshots.
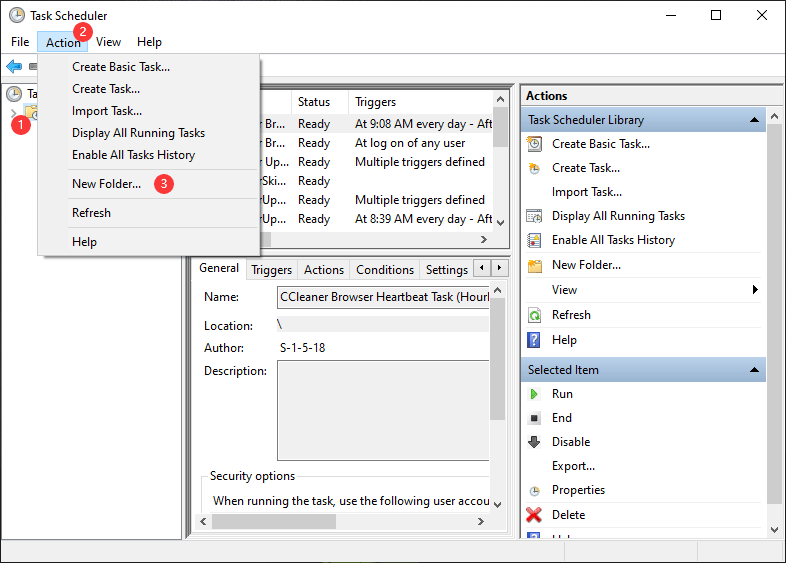
1. Use Windows search to search for Task Scheduler and select the first result to open it.
2. Click Task Scheduler Library and then go to Action > New Folder.
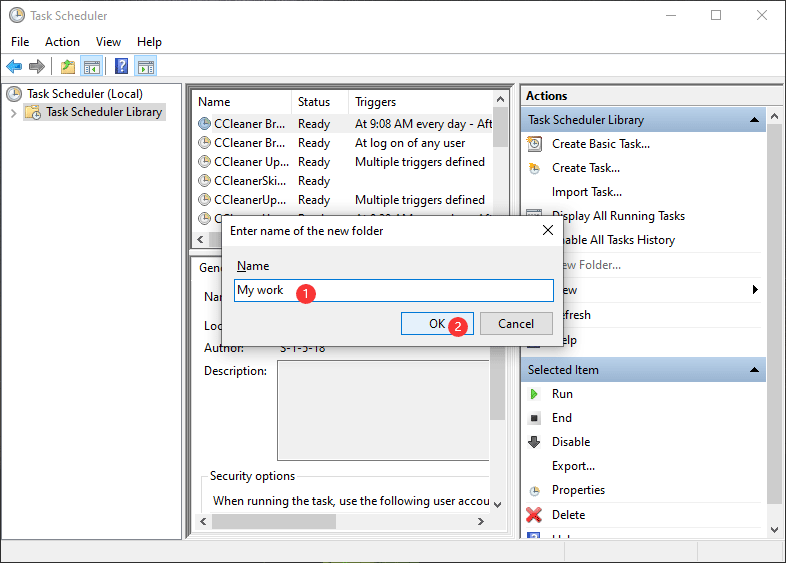
3. Name the new folder.
4. Click OK.
5. Expand Task Scheduler Library to find the newly created folder and select it.
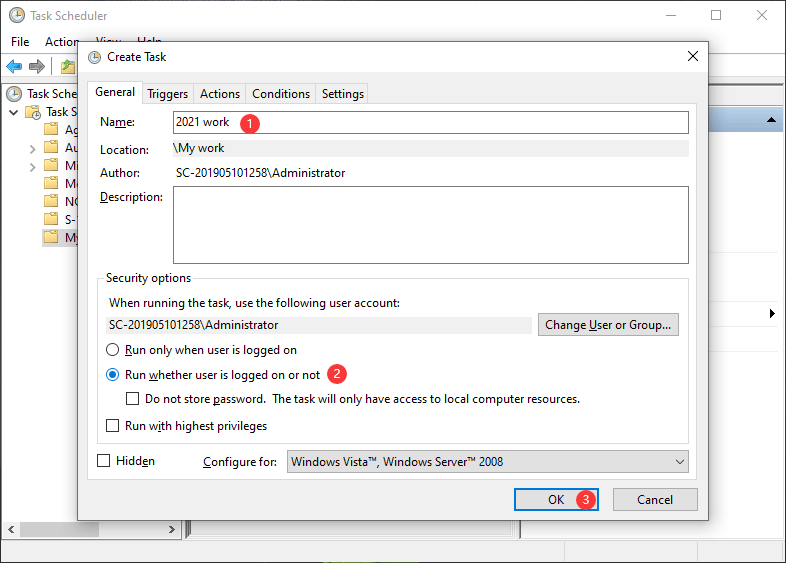
6. Go to Action > Create Task.
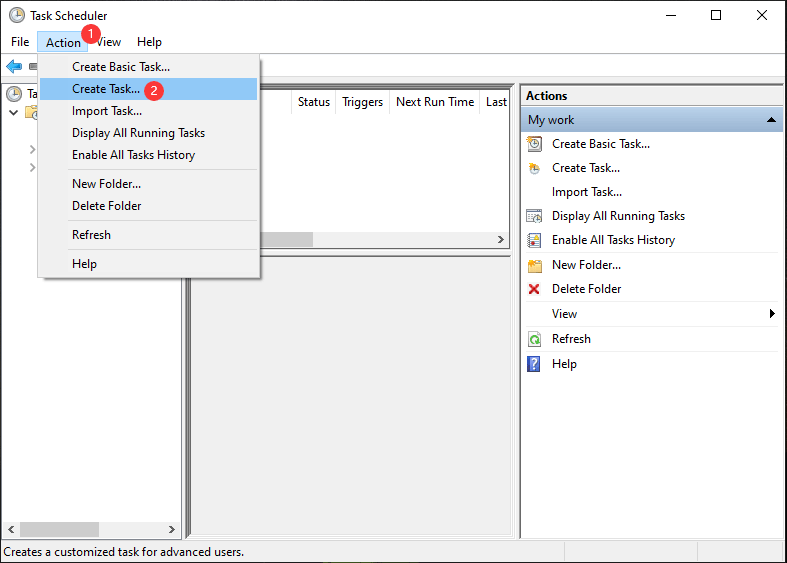
7. Name the new task and set when to run.
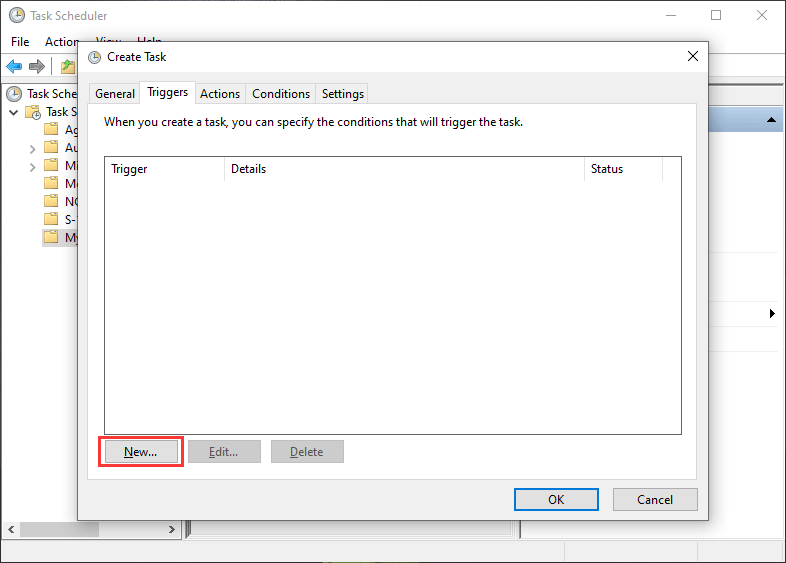
8. Switch to the Triggers tab.
9. Click the New button.
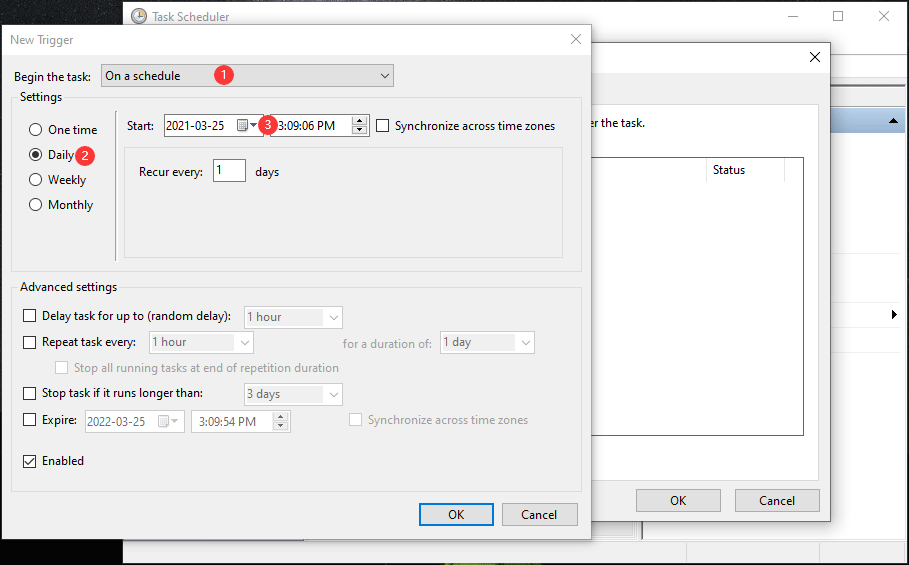
10. On the pop-up interface, you can modify the settings for the new trigger based on your requirements.
11. Click OK to save the settings.
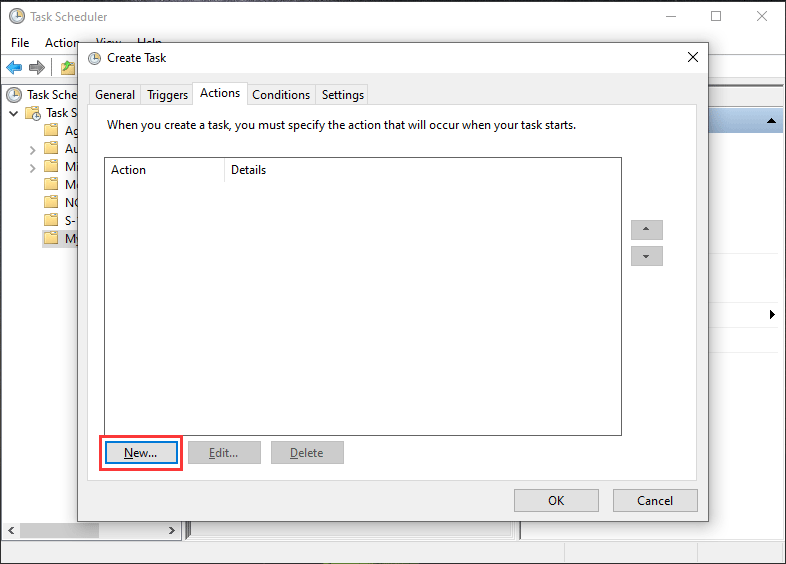
12. You can go back to the Create Task interface. Then, switch to the Actions tab.
13. Click the New button.
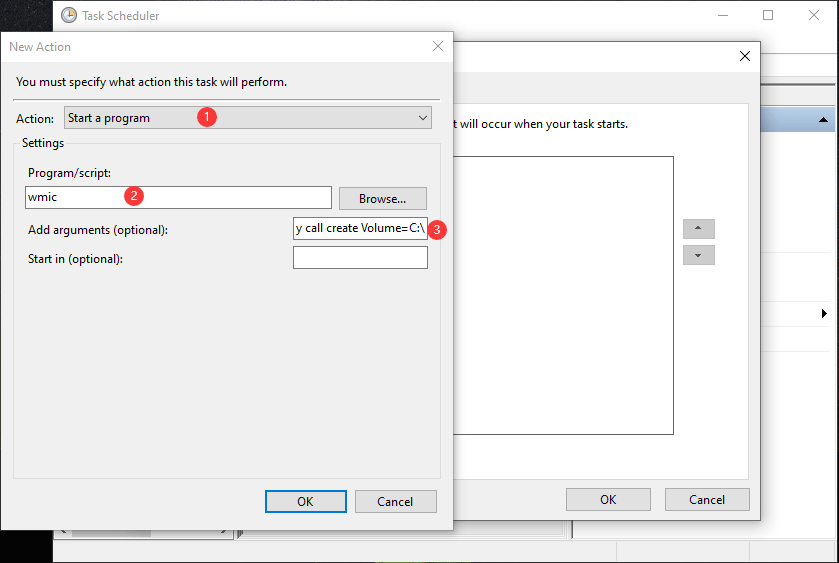
14. Make sure Start a program is selected for Action.
15. Type wmic for Porgram/script.
16. Type shadowcopy call create Volume=C:\ into the box next to Add arguments (optional). You can replace the drive letter according to your requirement.
17. Click OK to save the settings.
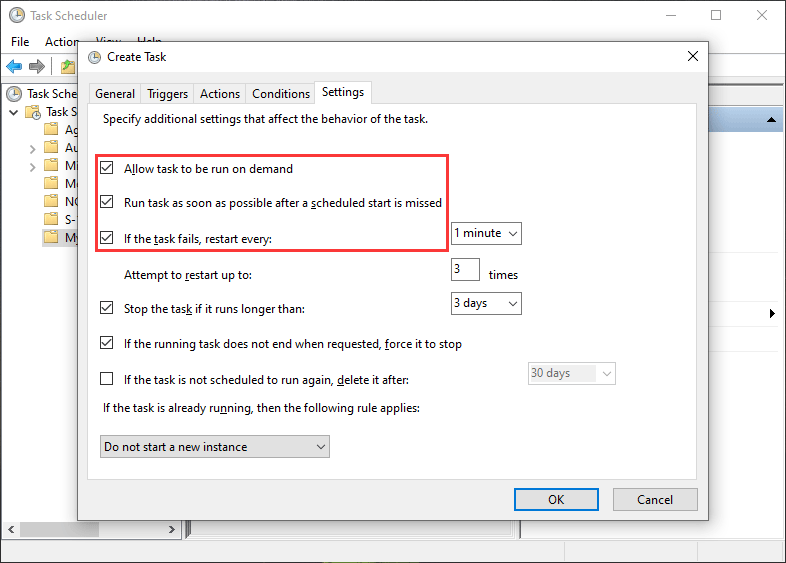
18. Switch to the Settings tab.
19. By default, the Allow task to be run on demand is selected. You still need to select these two options: Run task as soon as possible after a scheduled start is missed and If the task fails, restart every. Of course, you need to modify the settings according to your requirements.
20. Click OK.
21. Input your password if prompted.

22. Click OK to save all settings.
After these settings, Shadow Copy will begin to make the data snapshots for your files to keep their previous versions. When you delete some important files by mistake, you can use Shadow copies to recover them.

Bonus: Third-Party Data Recovery Software Recommendation
If you can’t use the above three tools to recover your lost or deleted files, you can use third-party data recovery software, MiniTool Power Data Recovery, to get them back.
You can first use the free edition of this software to scan the drive you want to recover data from and then check whether this software can find your needed files. You can even use this free file recovery tool to retrieve up to 1 GB of files.
MiniTool Power Data Recovery FreeClick to Download100%Clean & Safe
If you want to use this software to recover more than 1 GB of data, you need to use a full edition.
Summary
Now, you should know how to enable previous versions in Windows 10 for data recovery. Why not try these tool to protect your data. Should you have any related issues, you can let us know in the comments.
About The Author

Position: Columnist
Stella has been working in MiniTool Software as an English Editor for more than 8 years. Her articles mainly cover the fields of data recovery including storage media data recovery, phone data recovery, and photo recovery, videos download, partition management, and video & audio format conversions.
User Comments :