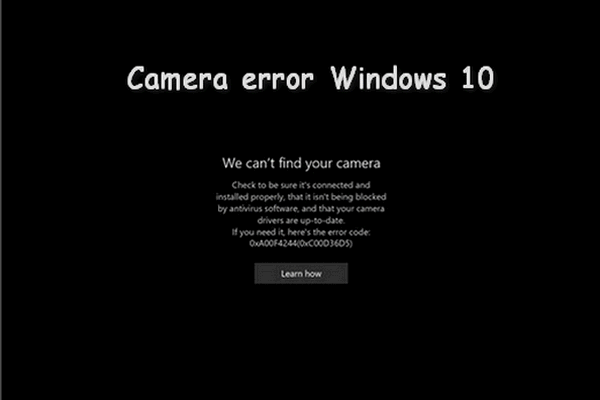
Nowadays, webcams are used not only for conference calls but also for creating YouTube videos. But you may get an error code 0xA00F425D when trying to connect your webcam with the Camera app on your computer. Here, MiniTool will walk you through five useful methods to fix the camera app error 0xA00F425D issue.
The error code 0xA00F425D on the Camera app appears commonly when you open the app to record a video and save it. I cite a real case on the internet and you can see whether your problem is the same as his.
I need to report an error on my Camera App on Win 10. I used DxDiag to help me. The photo is ok, and the Video preview too. When I click on the Record button, the error appears: "Unfortunately, we can't save the video. Error code: 0xA00F425D (0x80131500)" - Filipe Melloanswers.microsoft
If yes, you can try the following methods to fix the camera app error 0xA00F425D.
MiniTool Power Data Recovery FreeClick to Download100%Clean & Safe
Five Practical Ways to Fix the Camera App Error 0xA00F425D
Way 1: Run the Camera and Recording Audio Troubleshooters
For Windows 10
Step 1: Press Win + I to open the Settings window.
Step 2: Select Update & Security and shift to the Troubleshoot tab.
Step 3: Select Additional troubleshooters.
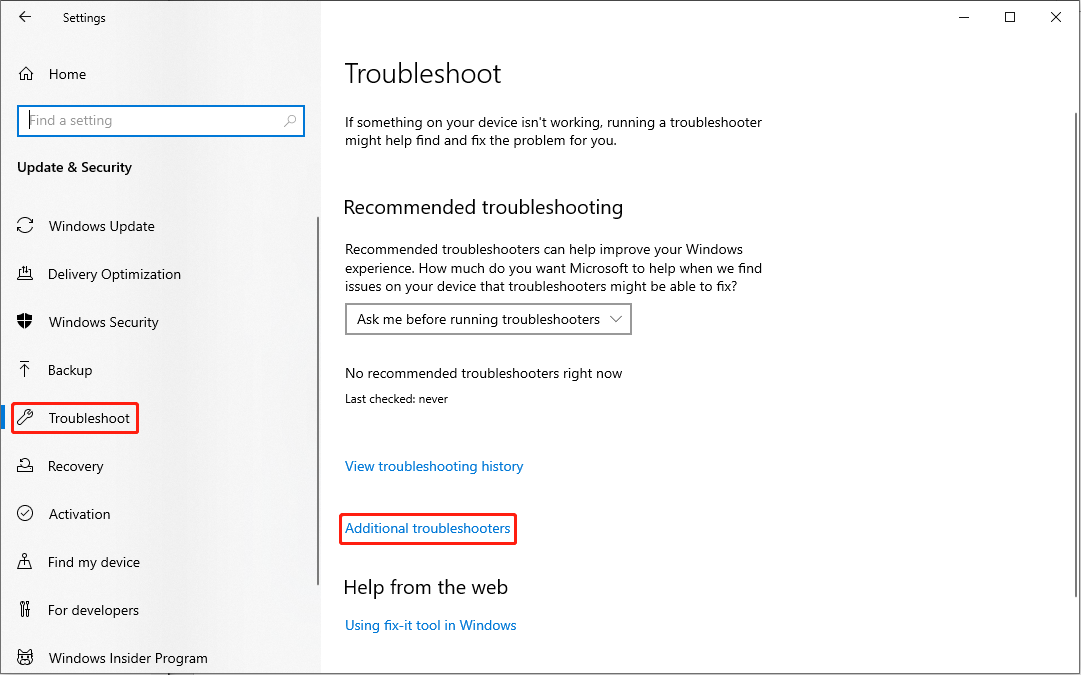
Step 4: In the following window, you can look for the Camera troubleshooter and Recording Audio troubleshooter. Running the two troubleshooters respectively to fix the camera app error 0xA00F425D.
For Windows 11, you can open the Settings window, choose System, and navigate to Troubleshoot > Other trouble-shooters to find and run the corresponding troubleshooters.
Way 2: Enable the Computer’s Microphone
Step 1: Press Win + X and select Device Manager from the WinX menu.
Step 2: Double-click on Audio inputs and outputs to expand the device list.
Step 3: Right-click on the Microphone device and choose Enable device if there has the choice.
Step 4: Open the Settings window and go to Privacy > Microphone.
Step 4: Toggle the switch to On under the Allow apps to access your microphone.
Step 5: Scroll down to find the Camera choice and allow it to access your microphone.

Way 3: Update Imaging Driver
Step 1: Press Win + X and choose Device Manager from the WinX menu.
Step 2: Find and expand Imaging devices.
Step 3: Right-click on the webcam’s entry and choose Update driver.
Step 4: Click Browse my computer for software driver in the prompt window.
Step 5: Select Let me pick from a list of device drivers.
Step 6: Check Show compatible hardware.
Step 7: Choose USB Video Device and click Next to start the update.
After the process is completed, you can restart your computer to see if the error is fixed.
Way 4: Uninstall Recently Installed Windows Update
Step 1: Press Win + I to open the Settings window.
Step 2: Choose Update & Security and click on the Windows Update button.
Step 3: Click on the View update history choice.

Step 4: Click Uninstall update at the top of the window.
Step 5: Right-click on the recently installed update and choose Uninstall from the context menu.
Way 5: Add the Related Key in Windows Registry
Step 1: Press Win + R to open the Run window.
Step 2: Type regedit into the text box and hit Enter to open Registry Editor.
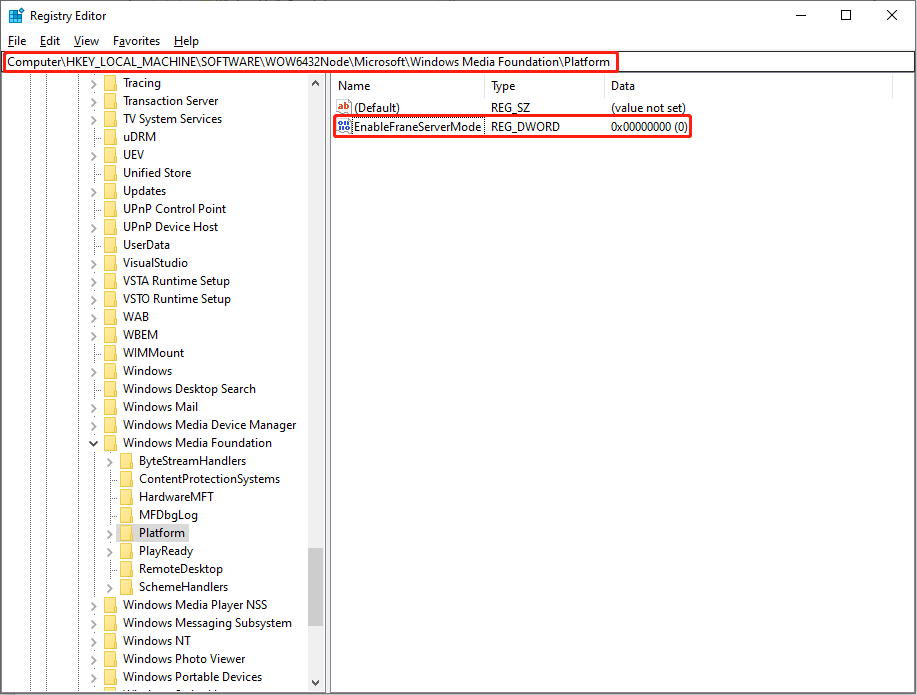
Step 3: Navigate to HKEY_LOCAL_MACHINE > SOFTWARE > Microsoft > Windows Media Foundation > Platform.
Step 4: Right-click on the right blank space and choose New > DWORD (32-bit) Value to create a new subkey.
Step 5: Rename it as EnableFrameServerMode.

Step 5: Double-click on the new key, then change the Value Data to 0.
Step 6: Click OK to save the change.
Step 7: Copy and paste the following path to the address bar.
HKEY_LOCAL_MACHINE > SOFTWARE > WOW6432Node > Microsoft > Windows Media Foundation > Platform
Step 8: Repeat steps 4-6 to create another new subkey.
Then, you can connect your webcam to the Windows Camera app again to see whether the error code 0xA00F425D will appear again.
Bottom Line
Hope you can find one method among them that can fix the camera app error 0xA00F425D on your computer. Besides, the free edition of MiniTool Power Data Recovery only supports 1GB file recovery.
MiniTool Power Data Recovery FreeClick to Download100%Clean & Safe
If you prefer a larger capacity, please go to this page to get a suitable advanced edition. Welcome to try MiniTool Power Data Recovery.
User Comments :