MiniTool Power Data Recovery TrialClick to Download100%Clean & Safe
Sometimes you may feel that someone is logged into your computer, but you are not sure. Well then, is it possible to check if someone logged into your Windows computer? Of course, yes. Windows 10/11 has an Audit logon events policy that allows you to view login history on Windows 10/11. However, this policy is not enabled by default on your device. So, you need to manually enable it. Then you can see the Windows login log to know which has logged into your PC.
How to Check Computer Login History on Windows 10/11?
Step 1: Enable Audit Logon Events on Windows 10/11

The following guide is based on Windows 11. If you are running Windows 10, the steps are the same.
- Click the search bar from the taskbar and search for gpedit.msc.
- Click the first result to open Local Group Policy Editor.
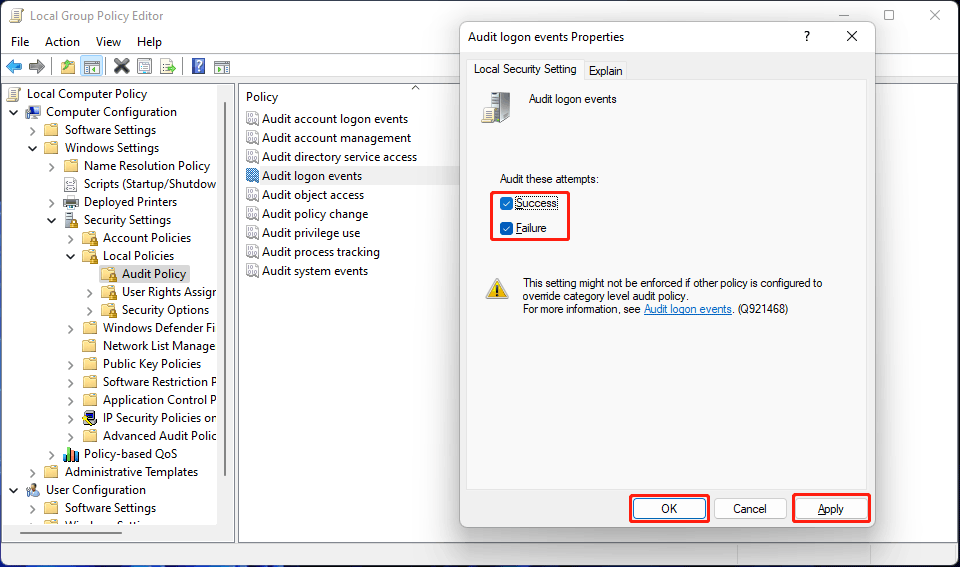
- Go to this path: Computer Configuration > Windows Settings > Security Settings > Local Policies > Audit Policy.
- Find Audit logon events from the right panel. Then, double-click it to open Properties.
- Check both Success and Failure under Local Security Setting.
- Click Apply.
- Click OK.
After these steps, your Windows computer will begin to track the login attempts no matter it is successful or not.
Step 2: Find out Who Is Logged into Your Computer
You can use the Event Viewer to check who is logged into your computer and when. Here is a guide on how to find out who is logged into your computer:
- Right-click Start and select Event Viewer.
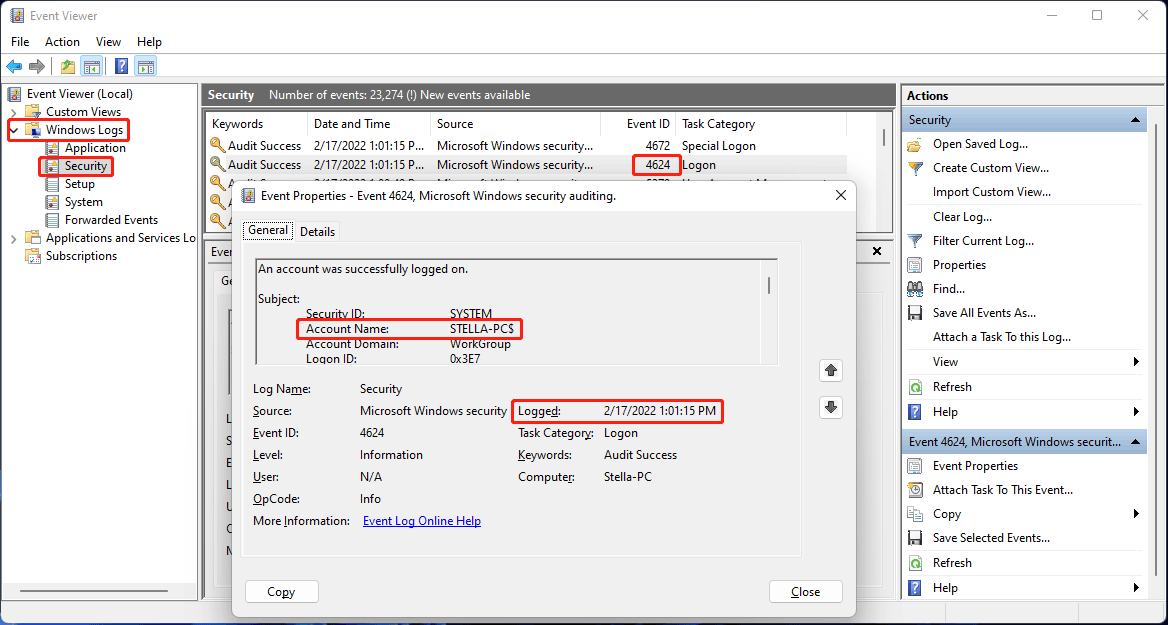
- Go to Windows Logs > Security.
- Find the 4624 event ID and double-click it to open it.
- Under the General section, check the Account Name. It is the account who have logged into your device. You can see when that account was logged in the computer under Logged.
After clicking Security, you can see that there are many logon reports. It may take some time to find your needed log. Fortunately, you can use the filter feature of Event Viewer to make the task easier.
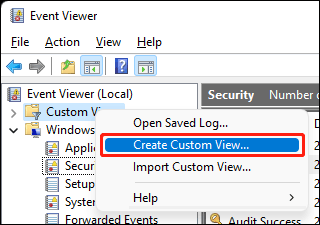
1. Right-click Custom Views and click Create Custom View.
2. Under the Filter section, you need to:
- Select a time range for Logged.
- Select By log and then select Security under Windows logs for Event logs.
- Type 4624 in the All Event IDs box.
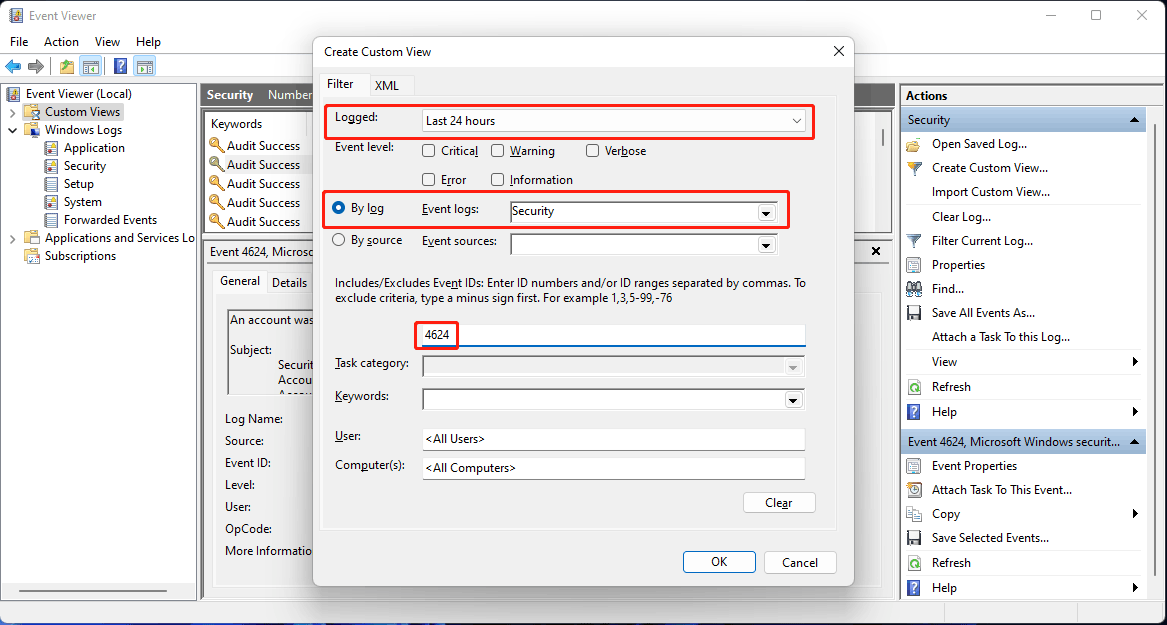
3. Click OK to save the changes.
Now, you can easily find the Windows 10/11 login history.
About The Author

Position: Columnist
Stella has been working in MiniTool Software as an English Editor for more than 8 years. Her articles mainly cover the fields of data recovery including storage media data recovery, phone data recovery, and photo recovery, videos download, partition management, and video & audio format conversions.
User Comments :