If you need to disable IPv6 on Windows 11 or Windows 10 to fix the issue you are facing, you can find a guide to do this from this MiniTool post. In addition, if you want to recover deleted files on Windows 11/10, you can try MiniTool Power Data Recovery.
By default, Windows 10 and Windows 11 use the Internet Protocol Version 6 (TCP/IPv6) and Internet Protocol Version 4 (TCP/IPv4) protocols in a dual-stack configuration. It is good to use two protocols in local networks.
However, some users report that IPv6 is causing issues in some situations. For instance, PC Game Pass games not syncing or installing could be caused by IPv6. You can directly disable IPv6 on Windows 11 or Windows 10 to solve the problem.
This post will introduce some ways to turn off IPv6 on Windows 11 or Windows 10.
Download MiniTool Power Data Recovery Free Edition for data recovery.
MiniTool Power Data Recovery FreeClick to Download100%Clean & Safe
How to Disable IPv6 on Windows 11?
Here is a quick video guide:
Way 1: In the Network and Internet Settings
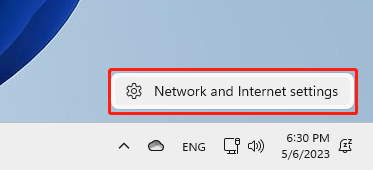
Step 1: Right-click the network icon from the taskbar and select Network and Internet settings.
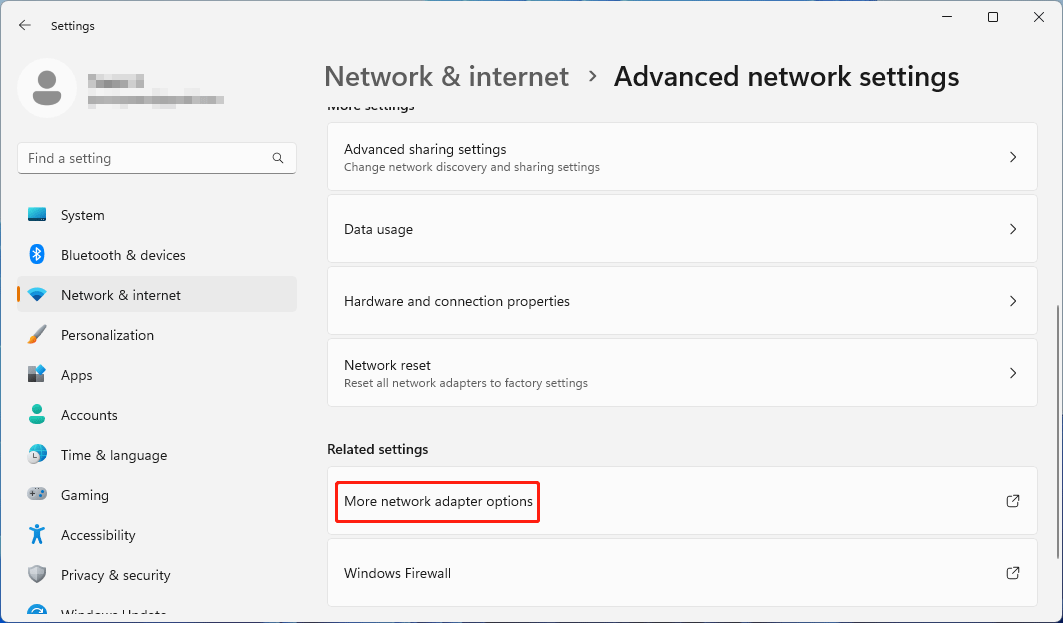
Step 2: In the Settings app, click Advanced network settings, then select More network adapter options to continue.
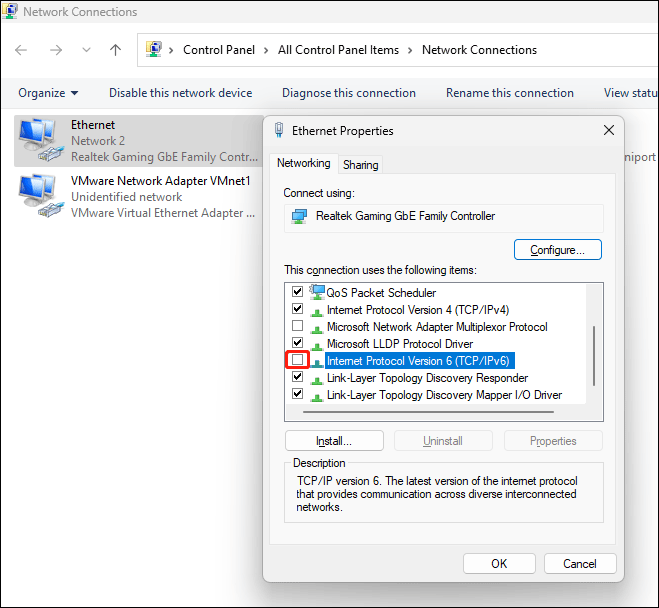
Step 3: Right-click Ethernet and select Properties.
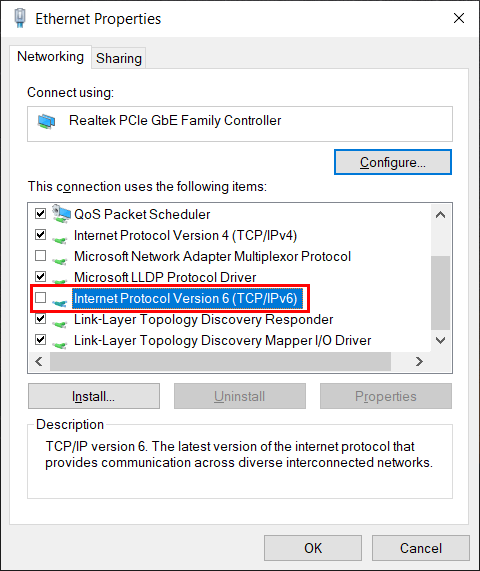
Step 4: On the pop-up interface, clear the checkbox next to Internet Protocol Version 6(TCP/IPv6).
Step 5: Click OK to save the change.
Step 6: Restart your computer.
If you want to re-enable Internet Protocol Version 6(TCP/IPv6), you can select the checkbox in step 4.
Way 2: Use Command Prompt
Step 1: Click the search icon from the taskbar and search for cmd.
Step 2: Right-click Command Prompt and select Run as administrator. This will run Command Prompt as administrator.
Step 3: Enter the following command and press Enter:
reg add “HKEY_LOCAL_MACHINE\SYSTEM\CurrentControlSet\Services\Tcpip6\Parameters” /v DisabledComponents /t REG_DWORD /d 255 /f

If you want to re-enable IPv6, you can run this command:
reg delete “HKEY_LOCAL_MACHINE\SYSTEM\CurrentControlSet\Services\Tcpip6\Parameters” /v DisabledComponents /f
Step 4: Close Command Prompt.
Step 5: Restart your computer.
Way 3: Use Windows PowerShell
You can also run special commands in Windows PowerShell to make Windows 11 disable IPv6.
Here is the guide on how to turn off IPv6 on Windows 11 using Windows PowerShell:
Step 1: Search for PowerShell using Windows Search and select Run as administrator.
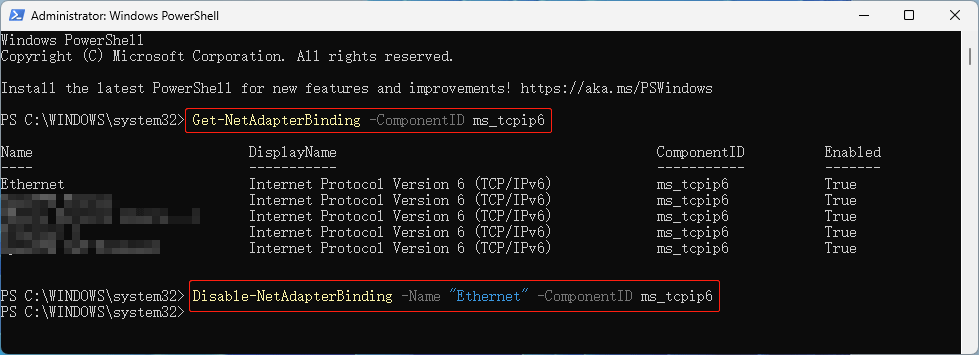
Step 2: Run the following command, which can determine the state of IPv6 and the network adapter name.
Get-NetAdapterBinding -ComponentID ms_tcpip6
Step 3: Run the following command to disable IPv6 on Windows 11:
Disable-NetAdapterBinding -Name “Ethernet” -ComponentID ms_tcpip6
If you want to re-enable IPv6 using this method, you should run this command:
Enable-NetAdapterBinding -Name “Ethernet” -ComponentID ms_tcpip6
Step 5: Close Windows PowerShell.
Step 6: Restart your computer.
How to Disable IPv6 on Windows 10?
You can also make Windows 10 disable IPv6 in the Network & Internet settings. Here is how to turn off IPv6 on Windows 10 using this way:
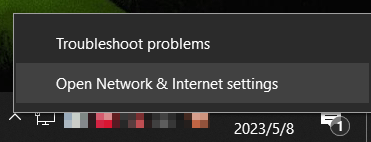
Step 1: Right-click the network icon from the taskbar and select Open Network & Internet settings.
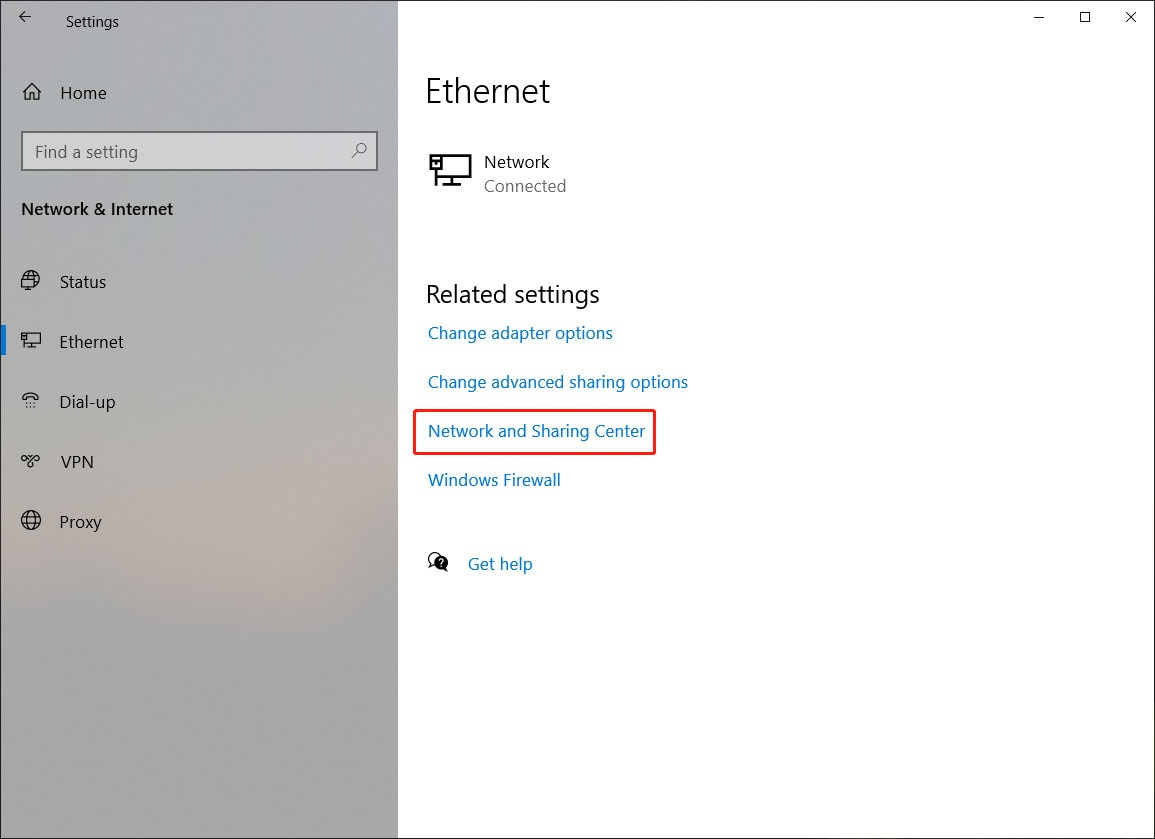
Step 2: On the next page, scroll down to click Network and Sharing Center to continue.
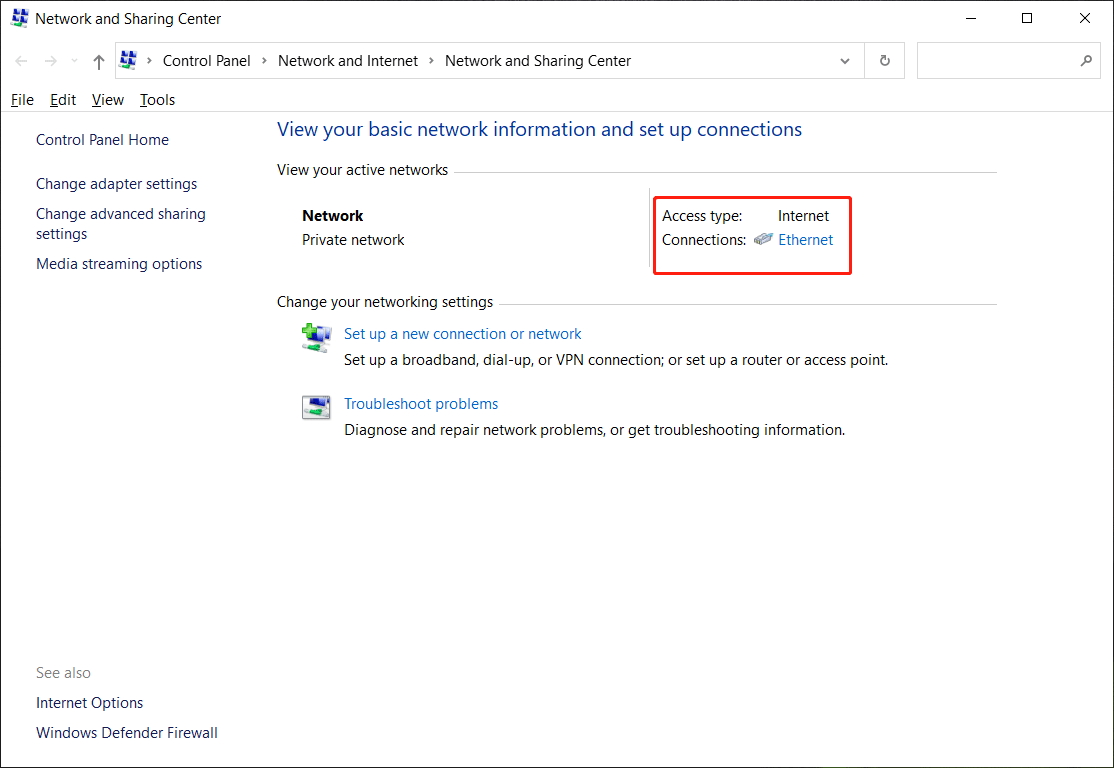
Step 3: Click your network adapter under View your active adapters to continue.
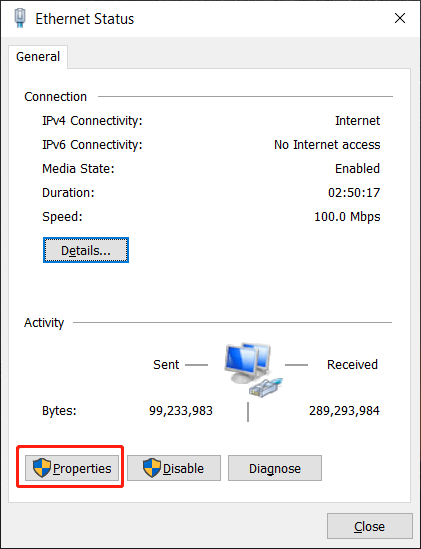
Step 4: Click the Properties button to continue.
Step 5: Clear the checkbox next to Internet Protocol Version 6(TCP/IPv6).
Step 6: Click OK to save the change.
You’d better restart your computer after these steps.
Recover Lost and Deleted Files on Windows 11/10
You might delete some important files while using a Windows computer and you want to get them back. In a situation like this, you can use MiniTool Power Data Recovery to perform data recovery.
This is a special data recovery software that can work on all Windows versions. You can use it to recover lost and deleted files from computer’s internal hard drives, external hard drives, SSDs, SD cards, memory cards, USB flash drives, and other types of storage devices.

You can first try the free edition of this software and see if this tool can find the files you want to recover. You can also recover 1 GB of files with this freeware.
MiniTool Power Data Recovery FreeClick to Download100%Clean & Safe
Bottom Line
Want to disable IPv6 on Windows 11 or Windows 10? You can find out how to do this in this post. You also get a professional data restore tool to help you recover files from different drives. We hope this post is the one you want to see.
About The Author

Position: Columnist
Stella has been working in MiniTool Software as an English Editor for more than 8 years. Her articles mainly cover the fields of data recovery including storage media data recovery, phone data recovery, and photo recovery, videos download, partition management, and video & audio format conversions.
User Comments :