For some reason, you may need to remove NVIDIA drivers from your Windows 10 computer. If you don’t know how to do this work, you can read this MiniTool guide to learn how to uninstall NVIDIA drivers. There are three different methods. You can select one that is suitable for you.
As you know, NVIDIA develops software drivers for Windows computers. The NVIDIA drivers can be used to control graphics cards and graphics processing units (GPUs).
If you want to install a new GPU from another manufacturer or you just want to remove NVIDIA drivers from your Windows computer, you can do the job using Control Panel. Besides, you can also uninstall NVIDIA drivers by deleting the NVIDIA folder or deleting the NVIDIA registry keys.
MiniTool System Booster TrialClick to Download100%Clean & Safe
How to Uninstall NVIDIA Drivers?
- Uninstall NVIDIA drivers via Control Panel
- Delete the NVIDIA folders
- Delete the NVIDIA registry keys
In this MiniTool post, MiniTool Software will show you how to uninstall NVIDIA drivers in different ways. You can select a suitable one based on your own situation.
Method 1: Uninstall NVIDIA drivers via Control Panel
This is the most commonly used method to uninstall a program from your computer.
You can follow these steps to do the job:
- Search for control panel using the search box and then select the first search result.
- Click Programs and Features to continue.
- You will see the Uninstall or change a program interface where you can find the software you have installed on your computer. Then, you can right-click on the NVIDIA driver you want to uninstall and then select Uninstall from the pop-up menu to uninstall the NVIDIA driver. You can also select that NVIDIA driver and then click Uninstall/Change next to Organise to uninstall that NVIDIA driver.
If you want to uninstall all NVIDIA drivers, you can repeat steps 3 to remove them from your computer one by one.

Method 2: Delete the NVIDIA Folders
You can also delete the NVIDIA folders on your computer to remove NVIDIA drivers. Usually, some NVIDIA folders are hidden folders on your Windows 10 computer. You should first make your computer show hidden files and then find the NVIDIA folders to delete them.
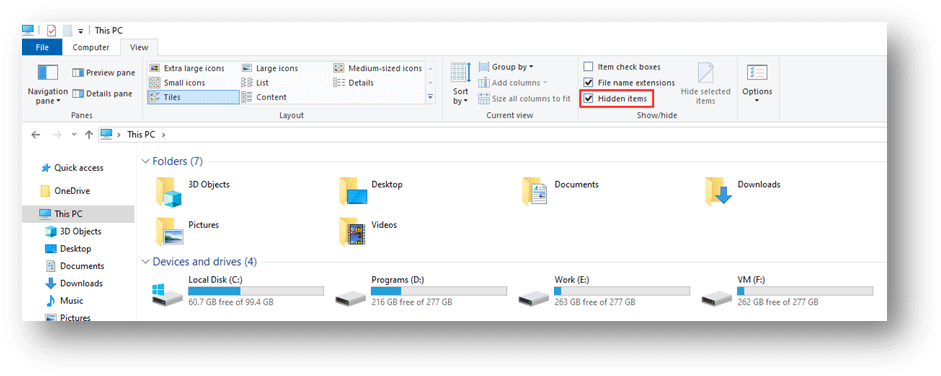
Here is a guide on how to make your computer show the hidden files:
- Open File Explorer.
- Click View on the top take bar.
- If the Hidden items option is not checked, you need to check it to make Windows show you the hidden files.
If you can’t use this method to show hidden files, you can refer to this post to solve the issue: [SOLVED] Show Hidden Files Button Not Working on Windows 10 – Fix.
Then, it’s time to delete the NVIDIA folders.
- Go to This PC.
- Access drive C and you may discover that there is an NVIDIA folder. You need to right-click it and then select Delete from the pop-up menu to delete that folder.
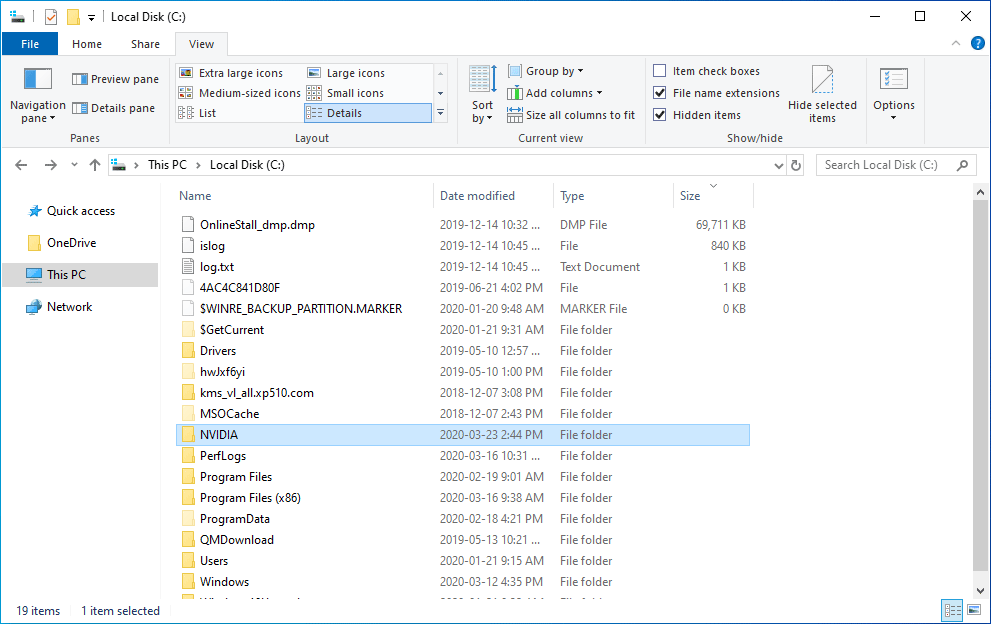
You also need to go to the ProgramData/Program Files/Program Files (x86) folders to check whether there are NVIDIA folders. If yes, you can delete them when necessary.
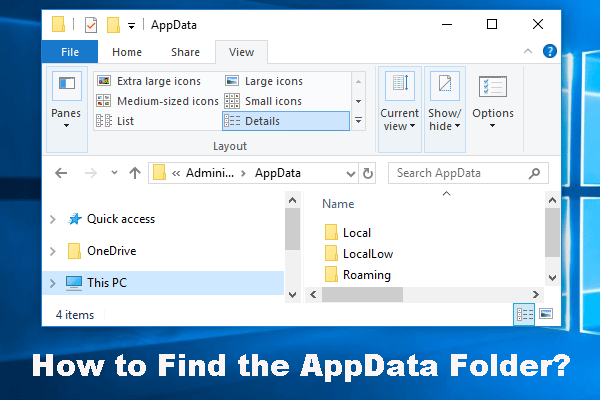
Besides, you need to go to Users > [Your username] > AppData > Local/Roaming to delete the NVIDIA folders.
Method 3: Delete the NVIDIA Registry Keys
This method is for advanced users. Before modifying the registry keys, you’d better back them up to keep them safe.
- Search for regedit using the search box and select the first search result to open the Registry Editor.
- Go to HKEY_CURRENT_USER\Software and then delete any NVIDIA folders that you find there.
- Go to HKEY_USERS\.DEFAULT\Software and then delete any NVIDIA folders that you find there.
At last, you need to restart your computer to check whether the NVIDIA drivers have been removed from your computer.
If You Want to Install NVIDIA Drivers
If you want to reinstall NVIDIA drivers, you can go to the NVIDIA official download site to search for your needed ones to download and then install them on your computer.
Bottom Line
All of these three methods can be used to remove NVIDIA drivers from your Windows 10 computer. You can just select a suitable one according to your requirements. Should you have any questions when uninstalling NVIDIA drivers, you can let us know in the comments.
About The Author

Position: Columnist
Stella has been working in MiniTool Software as an English Editor for more than 8 years. Her articles mainly cover the fields of data recovery including storage media data recovery, phone data recovery, and photo recovery, videos download, partition management, and video & audio format conversions.
User Comments :