Can I Move Overwatch to Another Drive without Installation?
What Is Overwatch?
Overwatch is a team-based multiplayer first-person shooter that is developed and published by Blizzard Entertainment. It is not a free game. You need to pay for it and then you can play it using your PC, Nintendo Switch, PS4, or Xbox One.
Is It Possible to Move Overwatch to Another Drive?
Like other games, this game can take much disk space on your drive. So, it can generate a problem as follows:
Space on my SSD is getting really low and Overwatch patches are so huge that I need to move the game to my other SSD. Is this possible without completely downloading the game another time? Can I somehow just move the folder to my other SSD? Downloading with my internet will take very long so I don’t really want to do it. If it is possible to simply move the folder, is there a special way to do it? Like is there an instruction for this? Source from us.forums.blizzard.com.Source from us.forums.blizzard.com.
This user wants to move Overwatch to SSD. It is a very common issue. Many of you are facing it currently or in the near feature. To help you solve the issue, we collect some useful methods. You can try one of them to solve your issue.
How to Move Overwatch to SSD?
- Use MiniTool ShadowMaker
- Use MiniTool Partition Wizard
- Use Copy & Paste
Move Overwatch to Another Drive via MiniTool ShadowMaker
The best way to move Overwatch to another driver like an SSD is to use a professional data transformation tool. MiniTool ShadowMaker is a good choice.
MiniTool ShadowMaker is a dedicated free data backup software. You can use it to back up files, folders, partitions, and the whole disk to another drive. You can consider the backup process as a data transfer process. So, you can use it to move Overwatch to SSD without reinstallation.
Now, you can press the following button to get the trial edition of this software and use it for free within 30 days.
MiniTool ShadowMaker TrialClick to Download100%Clean & Safe
Now, you can follow this guide to perform a Overwatch move:
1. Connect the destination drive with your computer.
2. Open MiniTool ShadowMaker.
3. Click Connect in the Local section to continue.
4. Click SET UP BACKUP.
5. On the Backup interface, click the Source section.
6. Click Folders and Files.

7. Select the game installation folder from your computer and click OK to continue.
8. Click the Destination secction.
9. Select the destination drive and click OK.
10. Click Back up Now.
The backup process will begin. You need to wait until the whole process ends. After that, the game is moved to the destination drive successfully.
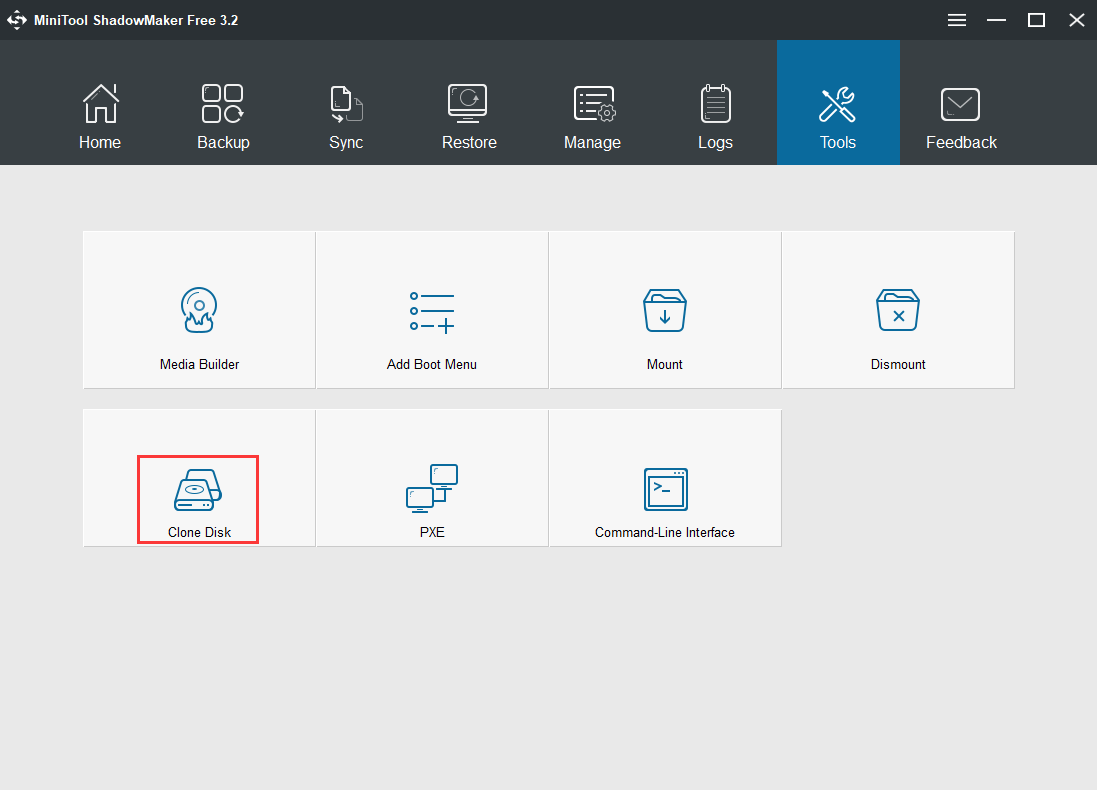
On the other hand, if you want to move the whole drive that contains the game installation folder to another drive, you can also use this software. This time, you need to go to Tools to use the Clone Disk feature to do the job.
Move Overwatch to Another Drive via MiniTool Partition Wizard
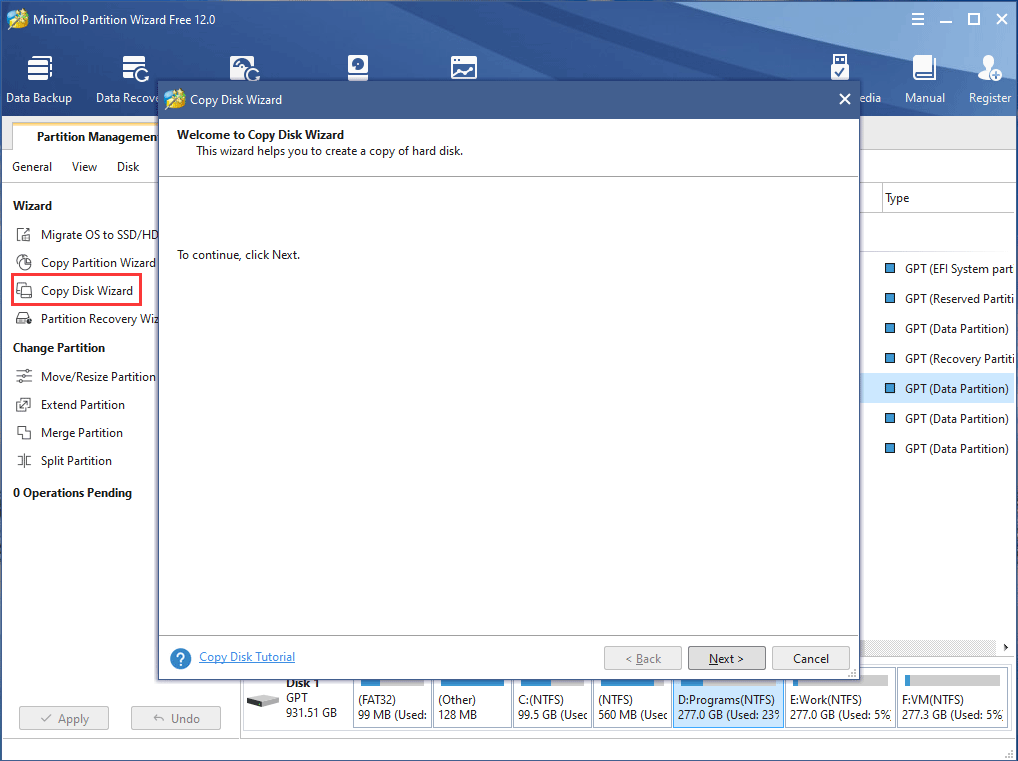
If you want to move the entire drive to another drive, you can also try MiniTool Partition Wizard and its Copy Disk feature. It is also a free software. But if you want to move the system disk, you need to pay for it.
MiniTool Partition Wizard FreeClick to Download100%Clean & Safe
After downloading and installing this software on your computer, you can open it, click Copy Disk Wizard, and follow the wizards strictly to move Overwatch to another drive.
Move Overwatch to Another Drive via Copy & Paste
You can also just copy and paste the game installation folder to the destination drive.
- Open the Overwatch section in the Battle.Net Launcher.
- Go to Options > Show in Explorer, and then you access the installation location of the game.
- Right-click on the folder and select Copy.
- Go to the drive you want to move Overwatch to.
- Right click on it and select Paste.
- Click Install.
- Modify the installation location to the destination path.
- Click Install.
After these steps, you can play Overwatch as normal.
Now, you should know how to move Overwatch to another drive using different methods. Should you have some other issues, you can let us know in the comment.
About The Author

Position: Columnist
Stella has been working in MiniTool Software as an English Editor for more than 8 years. Her articles mainly cover the fields of data recovery including storage media data recovery, phone data recovery, and photo recovery, videos download, partition management, and video & audio format conversions.
User Comments :