What to do when you try to access the Prefetch folder but fail? How can you open the Prefetch folder? This MiniTool post shares with you three useful methods to resolve the Prefetch folder not opening issue.
The Prefetch folder stores all the traced files, including data required by computer bootup and application launch. However, some people cannot access the Prefetch folder normally, either by double-clicking or using the Run dialog. In this case, how to resolve the Prefetch folder not opening issue? Keep reading to discover solutions.
How to Fix the Prefetch Folder Not Opening
Some people cannot access the Prefetch folder because the system files are corrupted or missing, while others are due to insufficient rights to the folder. Therefore, you can try the following three methods to resolve your problem.
Fix 1. Run the SFC and CHKDSK Command Lines
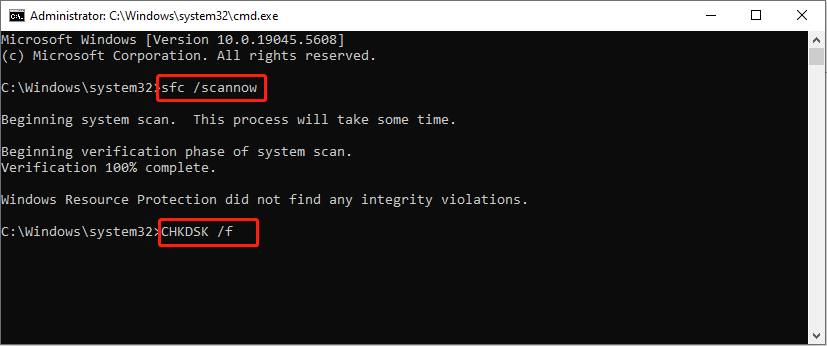
The SFC and CHKDSK command lines are capable of finding and repairing corrupted system files. You can execute them on the Command Prompt. Here are detailed steps.
Step 1. Press Win + R to open the Run window.
Step 2. Type cmd into the dialog and press Ctrl + Shift + Enter to run Command Prompt as administrator.
Step 3. Type the following command lines and press Enter at the end of each one.
- sfc /scannow
- CHKDSK /f
When both command lines are complete, you can try to open the Prefetch folder again in File Explorer. If you still can’t open the Prefetch folder, move on to the next method.

Fix 2. Take Full Control of the Folder
When your current account has no read or write rights to the Prefetch folder, you will find the folder is inaccessible as well. Go to grant the necessary rights to your account with the following guide.
Step 1. Press Win + E to open File Explorer and then head to C:\Windows to find the Prefetch folder.
Step 2. Right-click on the folder and choose Properties from the context menu.
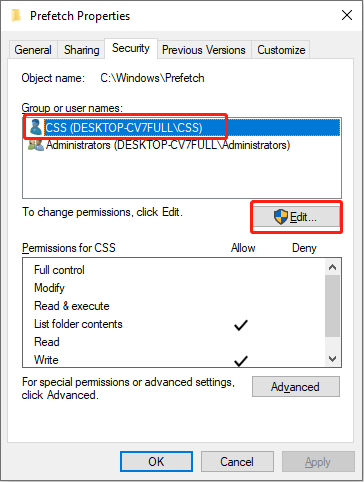
Step 3. Change to the Security tab. Then, you need to choose the proper account under the Group or user names section and click Edit.
Step 4. In the following window, tick the Allow box of the Full control option.
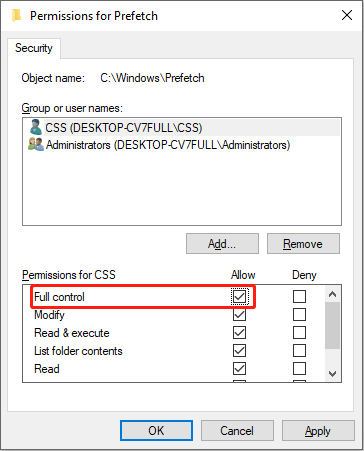
Step 5. Click Apply and OK to make those changes take effect.
Fix 3. Change the Ownership of the Folder
The last way is to change the ownership of the Prefetch folder to everyone.
Step 1. Find the Prefetch folder in File Explorer and right-click on it.
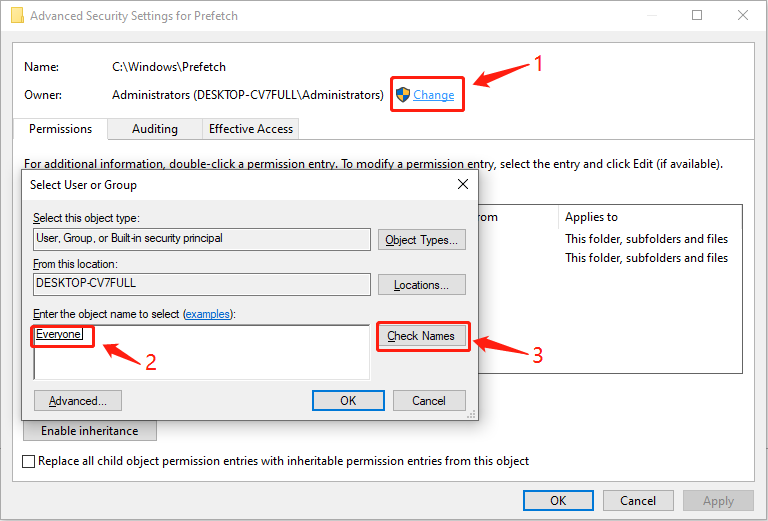
Step 2. Choose Properties. Then, change to the Security tab and click Advanced at the bottom of the window.
Step 3. Click Change next to the Owner section. In the Select User or Group window, type everyone and click Check Names.
Step 4. Click OK, and then you will find that the owner of this folder changes to Everyone. Click Apply and OK in sequence.
Step 5. Right-click on the Prefetch folder and choose Properties again.
Step 6. Change to the Security tab and click Edit.
Step 7. Select Add and type Everyone into the box. Click Check Names.
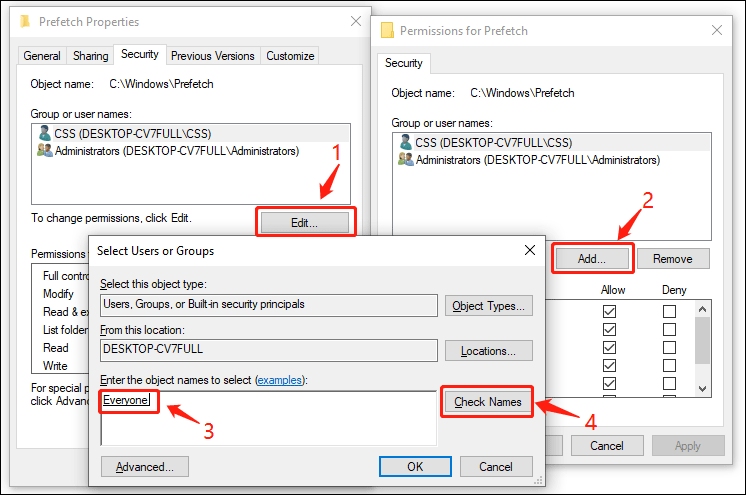
Step 8. Click OK to add the Everyone account. Afterward, you can repeat the steps in Fix 2 to give full rights to the Everyone account and try to open the Prefetch folder again.
Bonus Tip:
When you fail to open other important folders on your computer, you can recover files from them before fixing the not opening issue. MiniTool Power Data Recovery is able to recover files that are lost or inaccessible in diverse situations. Get the free file recovery software and give it a try!
MiniTool Power Data Recovery FreeClick to Download100%Clean & Safe
The Final
This is all about how to fix the Prefetch folder not opening issue on a computer. In a nutshell, we focus on the privileges of the account for this folder. You can follow this detailed guide to resolve the problem by yourself. Hope this guide works for you!
User Comments :