In Windows 11, Microsoft makes its TPM Diagnostics tool as its optional feature. Administrators can query the information stored on the TPM chips. How can you enable and use Windows 11 TPM Diagnostics tool? Go to this post and you can find some details given by MiniTool.
If you plan to install Windows 11 on your computer, you may take notice of the minimum system requirements of this new operating system. One important point is that your PC must support Trusted Platform Module (TPM) version 2.0 and you should also make sure TPM is enabled for Windows 11.
TPM is a piece of secure hardware that is used to protect user credentials, encryption keys, and other sensitive data to prevent attackers from tampering with that data. To know details stored on the TPM chip, Windows 11 comes with a new tool called TPM Diagnostics. It is an optional feature. This means you can install it. It is not mandatory.
How can you enable and use the TPM Diagnostics tool to query a TPM for stored information? Proceed to the next part.
How to Enable TPM Diagnostics Tool Windows 11
In Windows, a Trusted Platform Module Management Console (tpm.msc) is included by default. But you can only use tpm.msc to find a bit of basic information about the TPM.
To get much information including Endorsement Key certificates, Windows Attestation Identity keys, other keys stored in the TPM, information about tasks that are running, boot counters, information about the TPM, etc., use Windows 11 TPM Diagnostics tool.
The following are the detailed instructions focusing on how to enable this tool.
Step 1: Press Win + I keys on your keyboard to open Windows Settings. Alternatively, you can click the Windows icon and choose Settings to get the Settings interface.
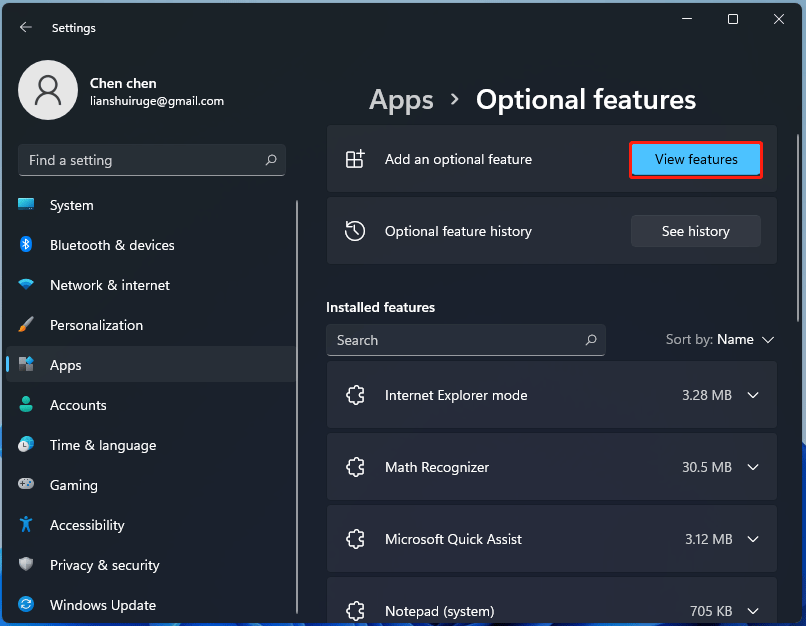
Step 2: In the left sidebar, click Apps.
Step 3: Go to Optional features and click View features under the Add an optional feature section.
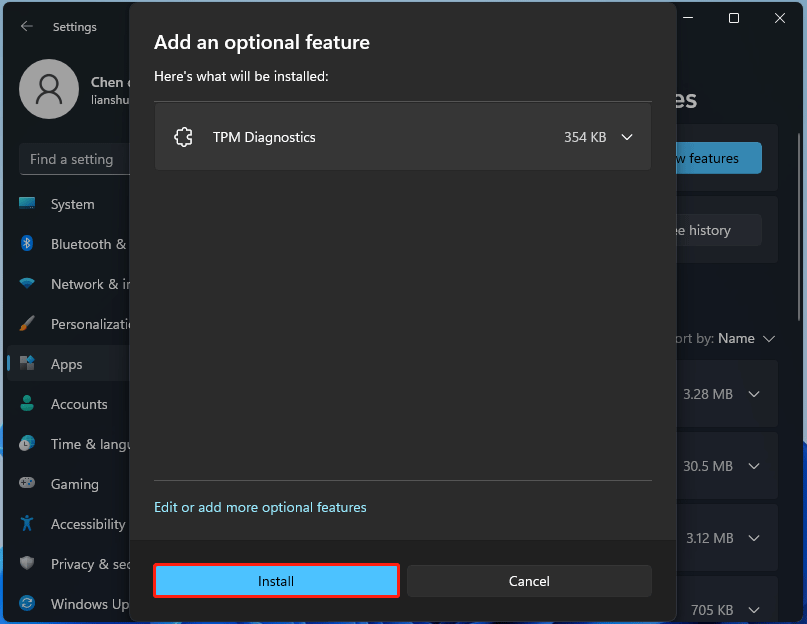
Step 4: Type tpm into the search box, check the box of TPM Diagnostics, and click Next to continue.
Step 5: In the new window, click the Install button. This installation process will take several minutes.
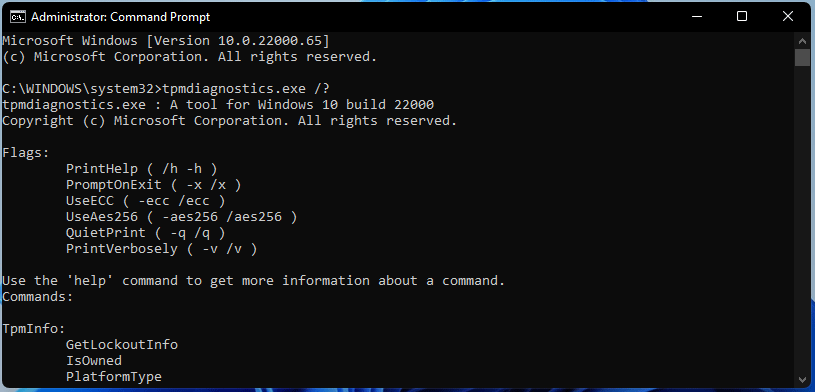
After installing Windows 11 TPM Diagnostics tool, you can go to the C:\Windows\System32 folder and find a new tpmdiagnostics.exe executable. Or, you can run this program in Command Prompt.
1. Launch Command Prompt as administrator.
2. Type in the command tpmdiagnostics.exe /? and press Enter. Then, you can get all the commands that are available in the tpmdiagnostics.exe tool.
For example, if you want to know the TPM version, use the command tpmdiagnostics.exe getdeviceinformation.
How to Uninstall Windows 11 TPM Diagnostics Tool
If you need to uninstall this tool from your Windows 11 computer, follow these steps below:
Step 1: Open Windows Settings by pressing Win + I.
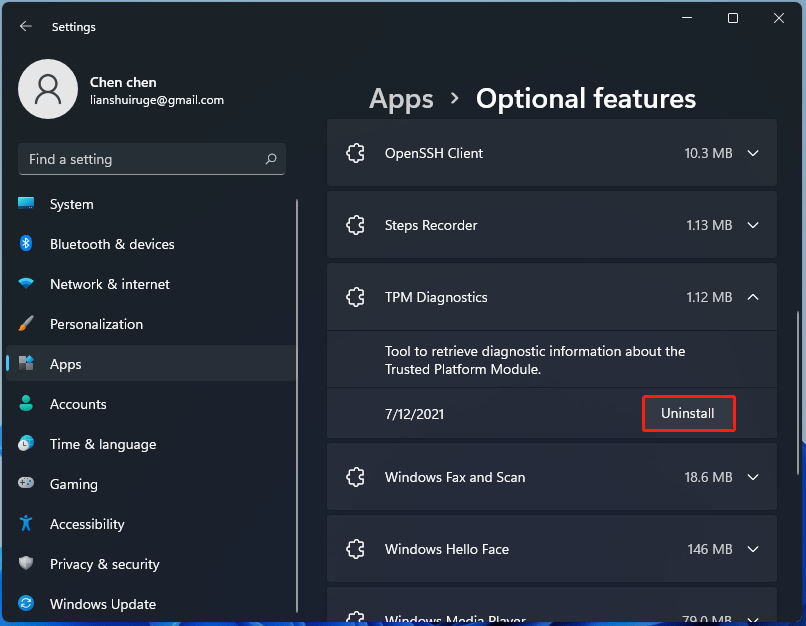
Step 2: Go to Apps > Optional features.
Step 3: Under the Installed features section, find TPM Diagnostics, click it and then click the Uninstall button.
Final Words
This is all the information about the TPM Diagnostics tool in Windows 11. If you have a need, install and use it by following the detailed instructions above. As well, uninstall it when needed by following the given way.
About The Author

Position: Columnist
Vera has been working at the MiniTool Team for over 10 years as a technical editor and content writer. She mainly focuses on disk and partition management, data recovery, Windows backup and restore, and PC troubleshooting. Through in-depth software testing and hands-on experience, she has helped users solve a wide range of computer problems and better protect their data on Windows devices.
User Comments :