Update: The official Windows 11 is already available since October 5, 2021.
No matter in which way you get current Windows 11, by upgrading from Windows 10 or fresh installation, you can roll back with one of the following solutions.
MiniTool System Booster TrialClick to Download100%Clean & Safe
#1 Uninstall Windows 11 from the Recovery Option
If you are with a certain number of days (say 10 days) after upgrading to Windows 11, you are able to uninstall the upgrade and go back to the previous Windows operating system (Windows 10 for example).
Before you can uninstall the newly installed Windows 11, you need to check for Windows.old and $WINDOWS.~WS two folders, which include everything to revert to the old version of the system. Just go to the root location of the system C drive (the usual location of those 2 folders), if the folders are there, you are ready to uninstall.
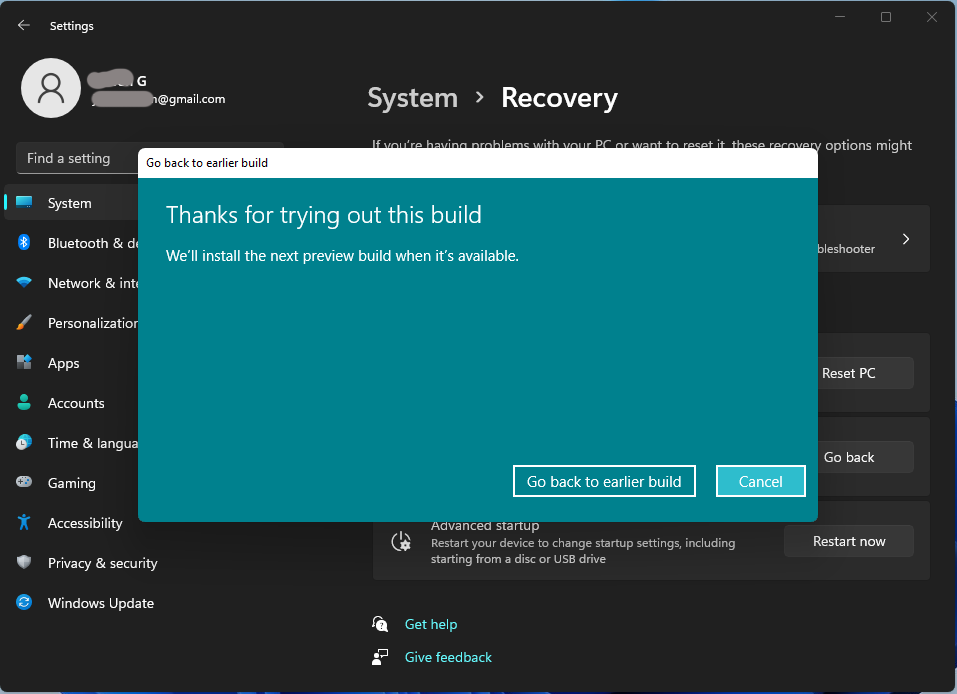
1. Navigate to Start > Settings > System > Recovery.
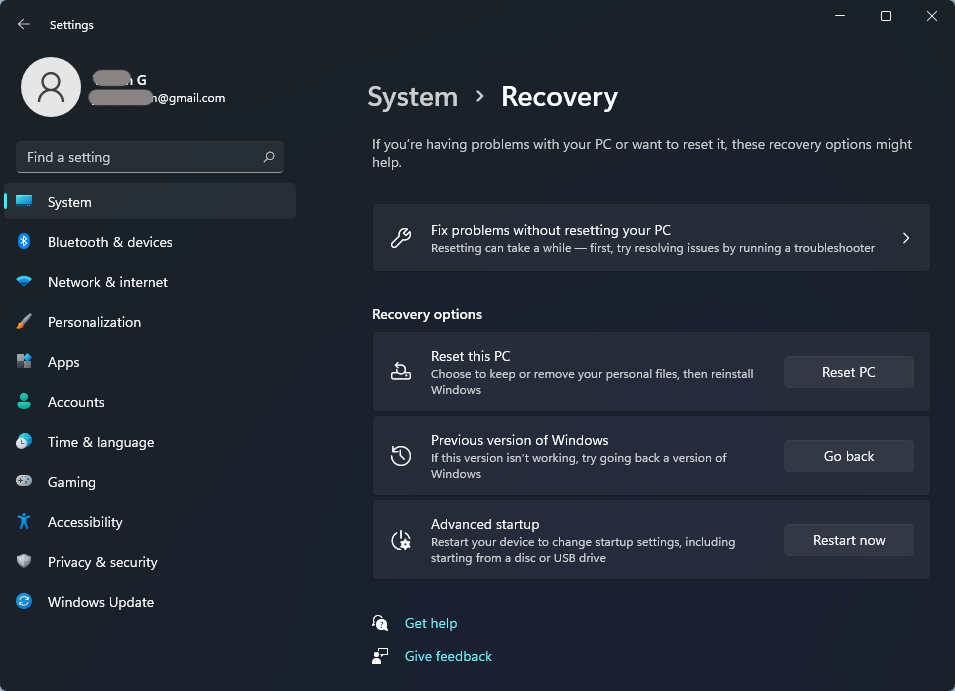
2. If you are still within the reverting period, the Go back button within the Previous version of Windows is available. Just click on it to go on.
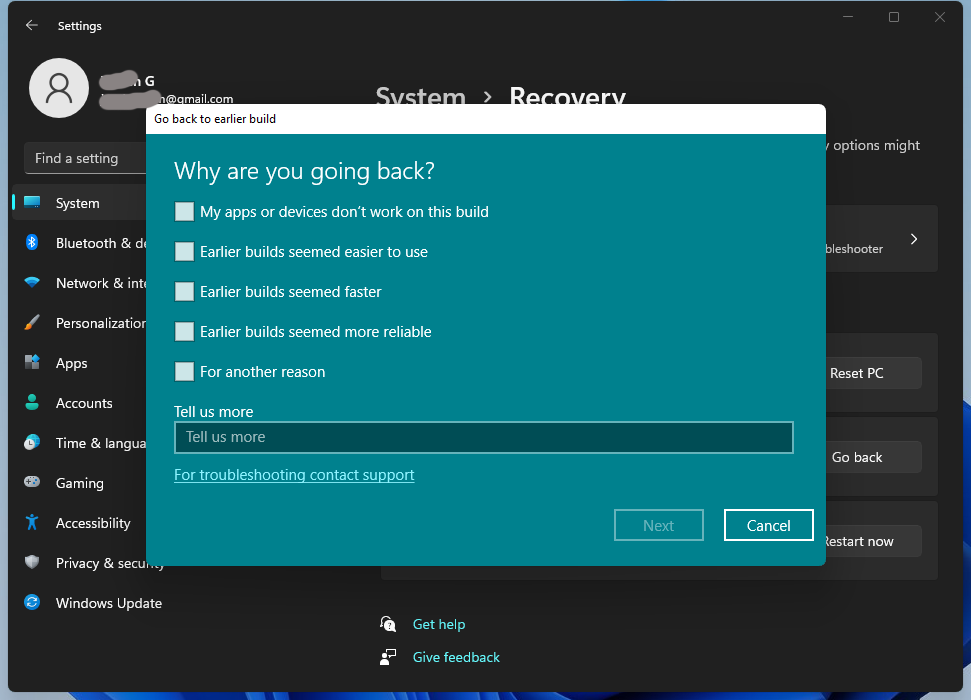
3. Select the reason for going back.
4. Before you go back, you will be offered a choice to install updates (if available) to try to fix the possible problem. If you decided to downgrade windows 11 to 10, just click No, thanks to continue.
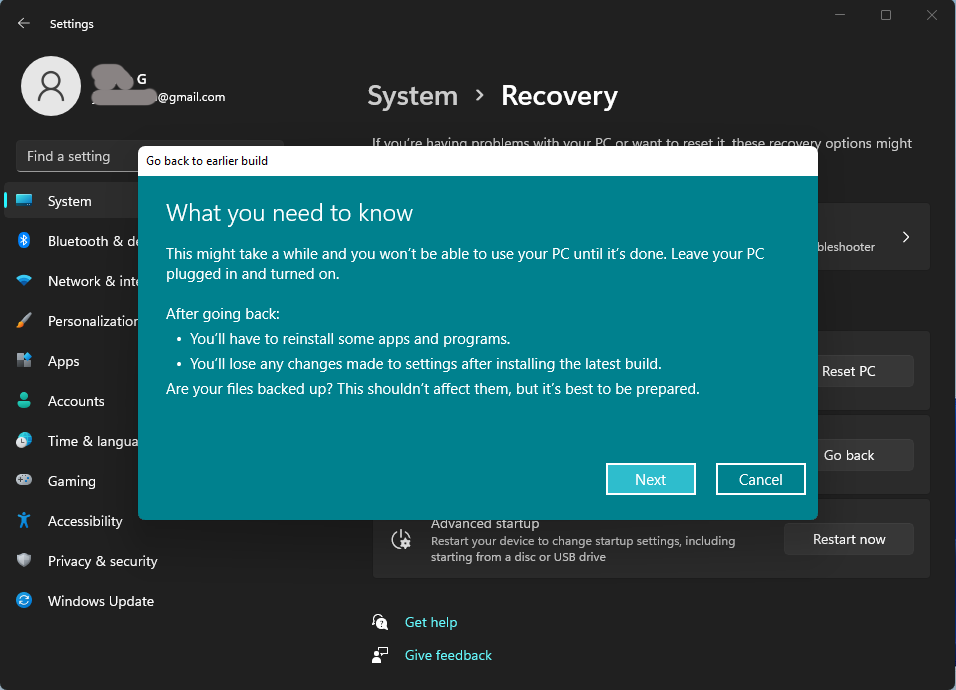
5. You will be informed about what will happen with your apps and settings after going back to Windows 10. Click Next to proceed.
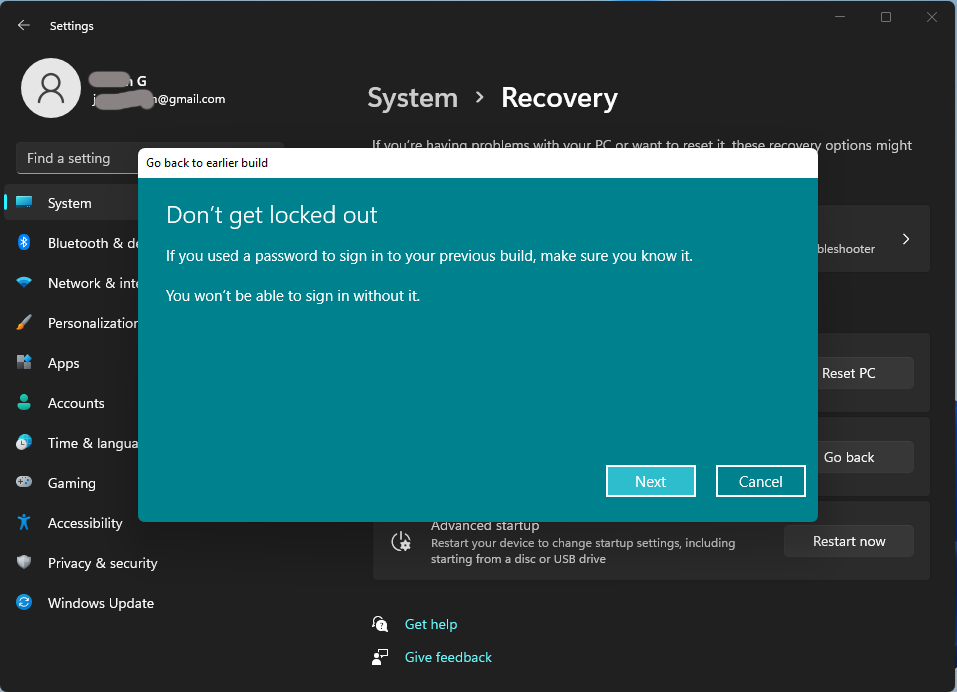
6. If you use a different password to sign in to your Microsoft account on the previous version of the system installation, you’ll need that password to sign in after you go back.
7. Finally, click the Go back to Windows 10 button to start the uninstalling process.
If the Get Back button within the Previous version of Windows section isn’t available, it is either you are out of the uninstalling Windows 11 period or there is something else wrong with your computer. for that case, just try the following solutions.
#2 Uninstall Windows 11 from Windows 10 Backup
If you have ever backed up your previous Win10 and still have the system image, you can go back to Windows 10 relying on the OS image. Yet, you need a repair disc to boot your computer into the Windows Recovery Environment to restore the previous version. If you don’t have one yet, you can create one using the Create a system repair disc feature in Backup and Restore.
Besides, you should back up your files in Windows 11 with a backup tool like the previously mentioned MiniTool ShadowMaKer, which is also a system backup and recovery program.
Once your repair disc is ready and your files are backed up, let’s start.
1. Connect the storage device that contains the previous system backup to your computer. If the backup image is on the local hard drive, just skip to the next step.
2. Reboot your PC with the repair disc.
3. On the Setup screen, click Next to go on.
4. Select Repair your computer.
5. Go to Troubleshoot > Advanced options > System Restore.
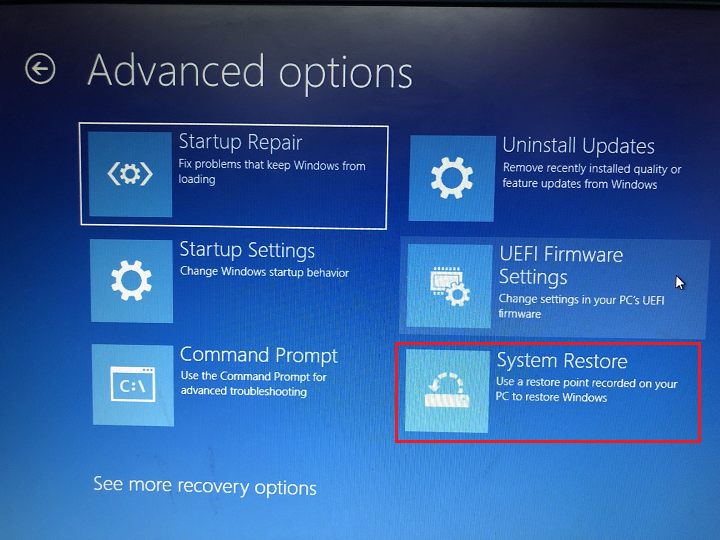
6. Sign in with your user account.
7. Choose the backup you’d like to restore and click Next.
8. Then, follow the on-screen instructions to finish the recovery process.
After you have successfully restored to your previous Windows 10, you may have to reinstall some apps that you installed after upgrading to Windows 11. Also, you need to restore the files to your machine.
![[5 Ways] Downgrade Windows 10 Enterprise to Pro Without Data Loss](https://images.minitool.com/minitool.com/images/uploads/2021/12/downgrade-windows-10-enterprise-to-pro-thumbnail.png)
#3 Uninstall Windows 11 by Clean Installing Windows 10
If none of the above solutions available for you. You still have the last option to fresh install Windows 10. Yet, you’ll have to provide the product key and everything on your computer will be erased including settings, apps, as well as files.
There, before starting, you must back up at least your crucial data with a professional data backup tool such as MiniTool ShadowMaker mentioned above.
MiniTool ShadowMaker TrialClick to Download100%Clean & Safe
Step 1. Get Windows 10 Installation Files
First of all, you need to acquire the installation files of the previous Win10, which you can download from the official webpage. You will be asked to provide your product key to download the Windows 10 ISO for free.
Step 2. Fresh Install Windows 10
When the above preparations are done, you can clean install the previous Windows.
- Double-click on the Win10 ISO and double-click the Setup file within.
- On the Setup screen, specify the language, time, and keyboard you prefer. Then click Next.
- Select Install now.
- Input the product key and click Next to go on.
- Choose a hard drive to install Windows 10.
- Accept Microsoft Software License Terms.
- Choose Custom: Install Windows only (Advanced).
- Finally, it will start installing the system.
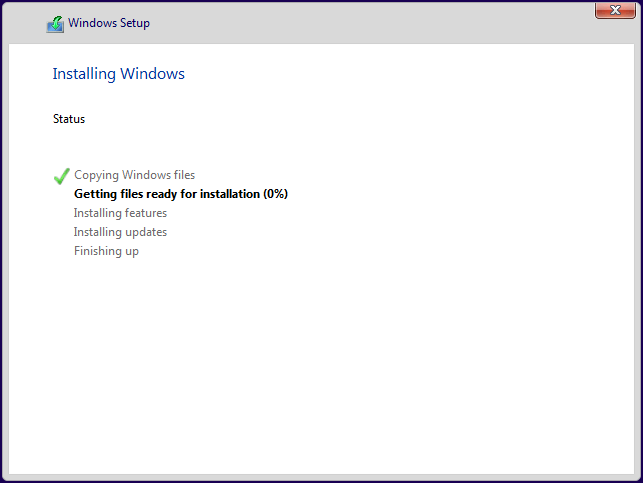
After installation, you will go through the initial settings of the OS.
About The Author

Position: Columnist
Helen is a tech writer with over 10 years of experience. She specializes in creating easy-to-follow guides for video editing, media file conversion, and computer performance. Helen doesn't just write—she tests every software herself and listens to feedback from users and experts. Her goal is to make complex programs simple so that everyone can solve their tech problems with confidence.
User Comments :