This post from MiniTool explains the definition and use of an ISO image, why you need to create Windows 10 ISO image from existing installation, and how to create it. Besides, you can get some other information from its FAQ.
Quick Answer
You can create a Windows 11 or Windows 10 ISO image from an existing installation.
- Use Media Creation Tool if you need an official installation ISO.
- Use DISM together with Sysprep to create a WIM image to capture a customized Windows installation.
- Create a full system backup if you need to perform disaster recovery instead of reinstalling Windows.
What Is a Windows ISO Image & What Can It Do
A Windows ISO image is a computer disc image file with the extension .iso. It contains the disc’s contents and file system, acting like a virtual disc that can be mounted or burned to physical media. Also, it can be loaded via a virtual drive or burned to a physical disc. Here are the key characteristics:
- Identical to the source: ISO file is not compressed. It is a direct, bit-for-bit copy of the original optical disc, retaining the same storage size and structure.
- Standardized format: The ISO format is based on ISO 9660 (and ISO 13346), a standard for optical media, ensuring compatibility across different operating systems and software.
- Mountable as a virtual drive: ISO file can be “mounted” by an operating system or software. When mounted, the ISO behaves exactly like a physical disc in a drive, allowing you to access its contents without burning it to media.
- Bootable: An ISO file is used to create bootable media for installing operating systems or recovery tools. The boot information is an essential part of the disc image, and when written to a physical disc or USB drive, it allows a computer to boot from it.
ISO files can be commonly used for software distribution, system installation, backup, and recovery. The main uses of ISO files include:
- Software distribution: Many software and operating system installers are provided as ISO files.
- Backing up optical discs: You can create an ISO file to back up your CDs, DVDs, or Blu-ray discs, preserving their data in a single, manageable file.
- Sharing and archiving: ISO files offer a convenient method for sharing and storing large collections of files from an optical disc.
Why Do You Need to Create Windows 10/11 ISO Image from Existing Installation
Creating a Windows 10/11 ISO image from an existing installation can be useful for several reasons, especially for advanced users, system administrators, or anyone who wants to maintain or deploy consistent Windows environments. Here’s why you might want to do this:
- Perfect for a clean or custom installation: You can create an ISO image that includes essential software and drivers, eliminating the need for manual installations during clean installs.
- System backup and disaster recovery: You can also create an ISO image as a backup for your current Windows setup. If anything goes wrong with your original installation, you can utilize this ISO to restore your system to its precise state before any problems occurred.
- Suitable for large-scale deployments: You can use the ISO to replicate your configured system—software, updates, drivers, and settings—on other computers, saving installation time. It ensures a consistent and efficient deployment across the network.
- Reinstall your existing system easily: If you want to migrate the OS to a new computer or upgrade hardware, the ISO file allows you to reinstall your existing system easily.
- No internet or limited bandwidth: ISO files are ideal for offline system installations, allowing users to set up the system locally without internet access. So, it is necessary for those who frequently reinstall Windows OS in areas with limited connectivity.
- Perform testing in a virtual environment: You can use an ISO file to create a virtual machine that replicates your current environment for testing purposes. This allows you to test software or updates in a controlled environment that mirrors your system before implementing them.
How to Create Windows 10/11 ISO Image from Existing Installation
Best Ways to Create Windows ISO Image from Existing Installation
If you’re not sure which method is right for you, refer to the comparison table below. It outlines the key differences to help you quickly choose the right approach for your situation.
| Method | Difficulty | Best for |
| Media Creation Tool | Easy | Official ISO download |
| DISM + Sysprep | Advanced | Custom deployment |
| Windows Backup and Restore | Medium | System image backup |
| MiniTool ShadowMaker | Easy | Complete system protection |
Method 1. Use Windows Media Creation Tool
Applies to: Users who want to create official Windows installation media for clean installation, in-place upgrade, or system repair.
The Windows Media Creation Tool is an official tool that can help users create an ISO file and bootable installation media (USB or DVD) for Windows 10 and 11. To create a Windows 10/11 ISO image with the following steps:
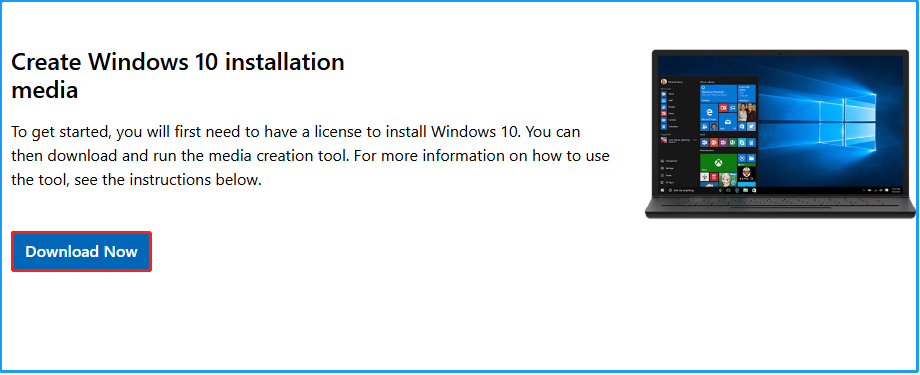
Step 1. Open your browser and navigate to the Microsoft Windows 10 download page.
Step 2. Click the Download Now button to get the Media Creation Tool.
Step 3. Run the downloaded tool, read the Applicable notices and license terms, and then click Accept.
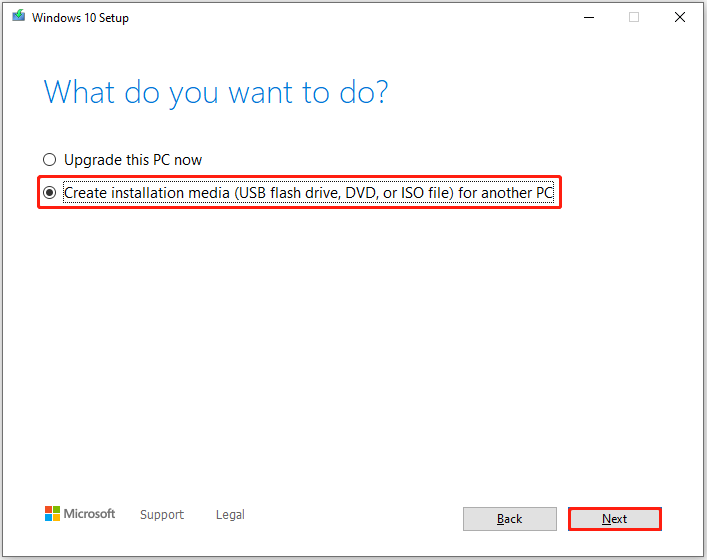
Step 4. Select Create installation media (USB flash drive, DVD, or ISO file) for another PC and click Next.
Step 5. Select language, architecture, and edition, and then click Next.
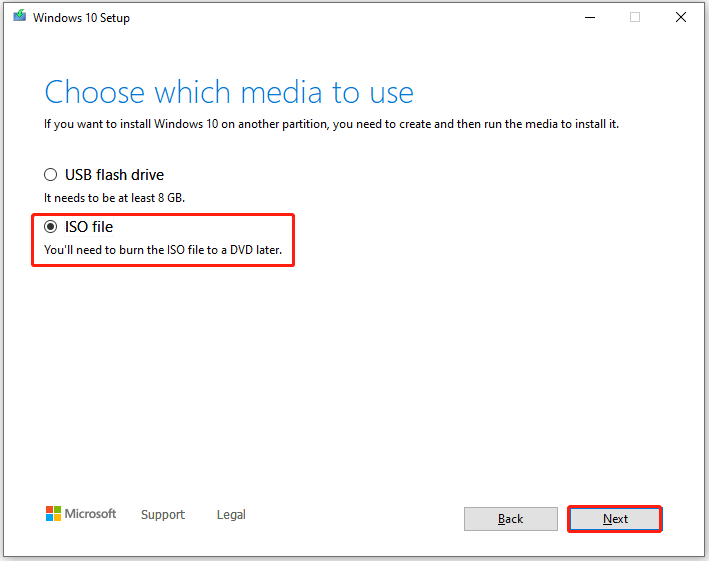
Step 6. Select the ISO file and click Next in the Choose which media to use window.
Step 7. Select a location to save the ISO file and click Save to move on. Then, the tool will start to create the Windows 10 ISO image.
Once the process is complete, you can find the generated Windows 10 ISO image in the location you’ve just selected.
However, an ISO is unable to help you revert your Windows system to its normal status with its data. If you want to revert Windows status without losing any data, you’d better choose to make a backup of your Windows system.
Method 2. Use the DISM Command-Line Tool
Applies to: Users who want to capture a customized Windows installation for deployment or future installations.
The DISM command-line tool is very powerful. With particular commands, it can create an image of your current setup, including your apps and settings, which is more advanced and should be used for future custom deployments or clean installs.
Here’s how to use it to create Windows ISO:
Step 1. Clean up your installation.
- Uninstall unnecessary programs.
- Remove temporary files.
Step 2. Run Sysprep.
- Press the Win + E keys to open the File Explorer window.
- Navigate to this path: C:\Windows\System32\Sysprep.
- Find the sysprep.exe file.
- Double-click the file to run it.
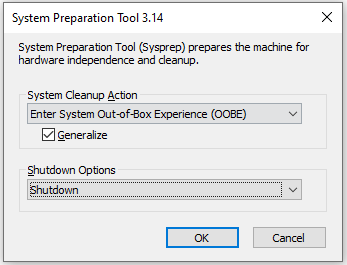
- Select Enter System Out-of-Box Experience (OOBE).
- Check Generalize.
- Choose Shutdown from the shutdown options.
- Click OK to confirm.
Step 3. Run DISM commands to capture the image.
- Boot your computer from a Windows Preinstallation Environment (WinPE) or Windows Recovery Environment (WinRE) media.
- Navigate to Command Prompt.
- Run DISM command: DISM /Capture-Image /ImageFile:C:\custom_image.wim /CaptureDir:C:\ /Name:MyCustomImage.
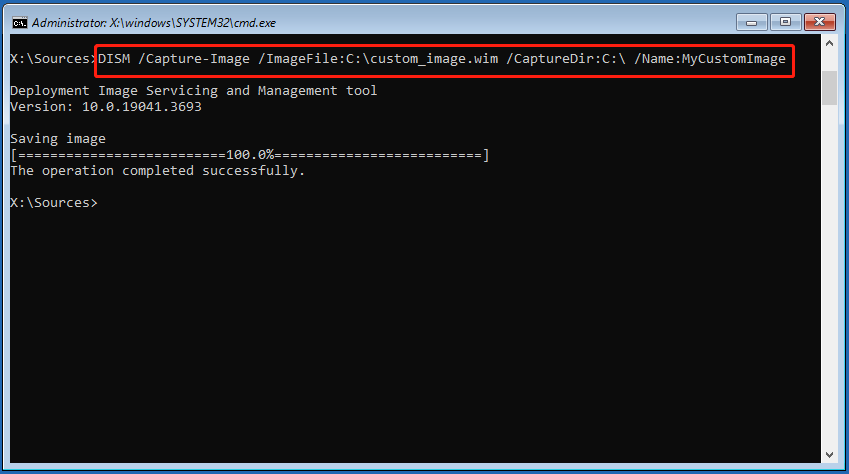
Step 4. Once done, the Windows 10 ISO from the current installation is ready.
Method 3. Use the Built-In Windows Backup and Restore (Windows 7)
Applies to: Users who prefer using Windows’ built-in tool to create a system image for backup and recovery.
Windows Backup and Restore (Windows 7) is a built-in feature that creates backups of your files or a full system image to prevent data loss from hardware failure or malware. Therefore, you can also use this feature to create Windows 10 ISO image from existing installation:
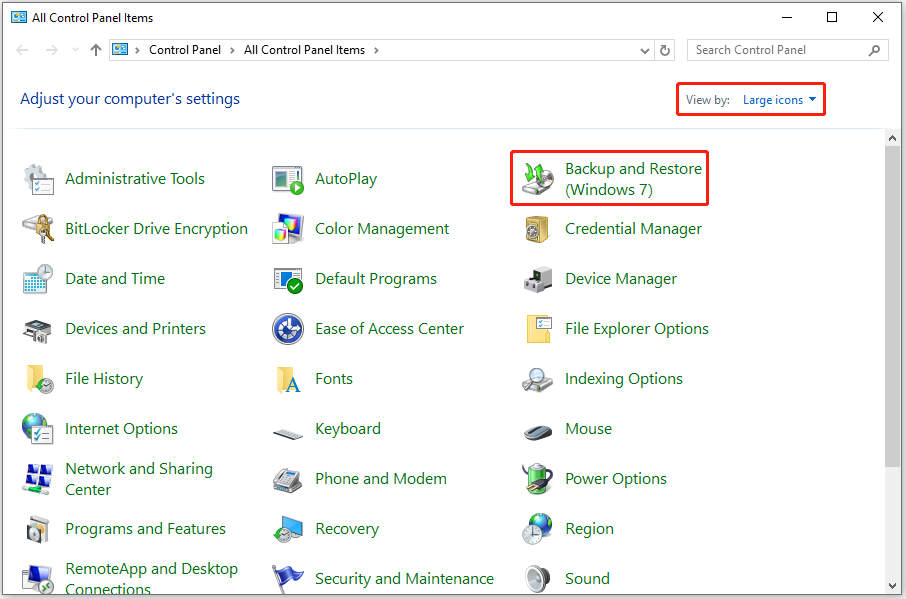
Step 1. Open Backup and Restore (Windows 7).
- Press the Win + S keys to open the Search window.
- Type “control panel” and press Enter.
- Set View by to Large icons.
- Find Backup and Restore (Windows 7) from the settings list and click it.
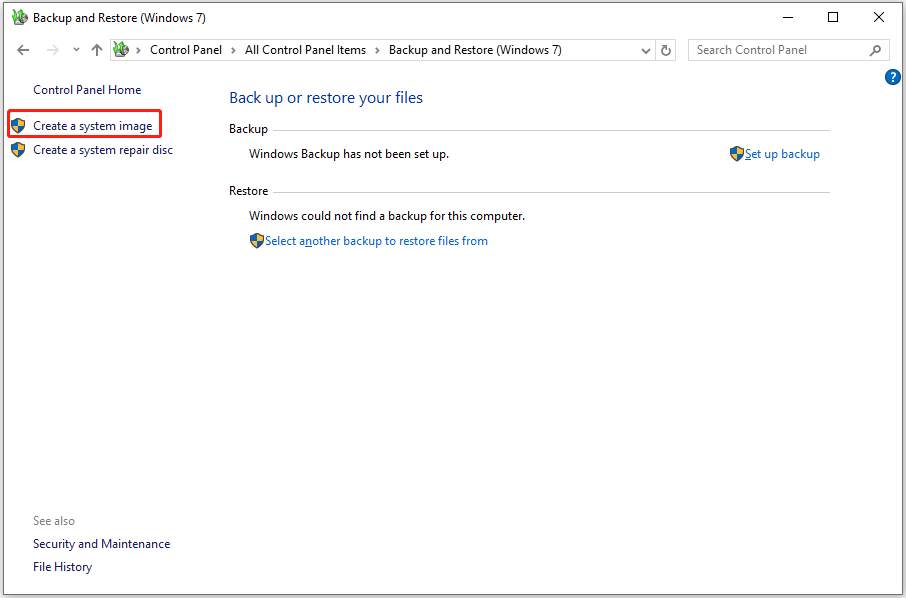
Step 2. Select Create a system image from the left panel.
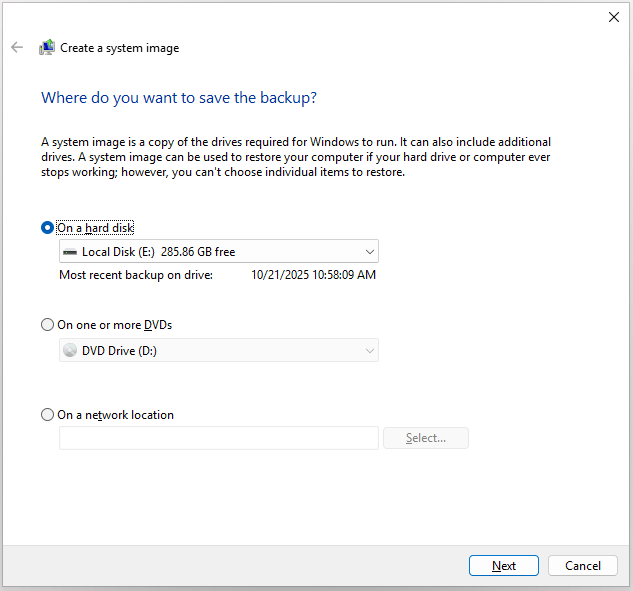
Step 3. Choose a location to save the backup and click Next.
Step 4. Choose which drives you want to include in the backup and click Next. Normally, all the system drives are checked by default, such as System Reserved, C drive, and Windows Recovery Environment.
Step 5. Confirm your backup settings and click Start backup. Then, wait for the backup process to complete.
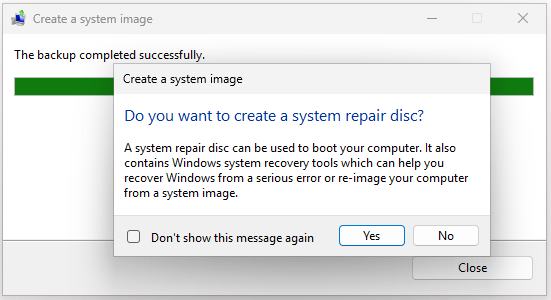
Step 6. Once done, you can see the message “The backup completed successfully.” Click Close to confirm. If you are the first time to create a system image, you can receive a pop-up window asking whether you want to create a system repair disc. If you don’t want to do so, click No.
Now, you have created the system image successfully, and you can find it in the selected location.
Method 4. Use MiniTool ShadowMaker
Applies to: Users who need an easier way to create, schedule, and restore Windows system image backups.
...how do I create a Windows 10 ISO from my current state of PC with all installed software, drivers (optional), and configured apps so that I can restore back to the same state of creation whenever I want, in case the PC is unable to start up in case of an error...https://www.reddit.com/r/Windows10/comments/rwkr8m/how_do_i_create_windows_10_iso_from_my_current/
Do you also have the same needs? No worries. MiniTool ShadowMaker is a professional backup tool that provides a Backup feature to help you back up your system easily.
Also, if you installed the Windows system and software on the same disk, the restored backup will include the system and software.
Here’s how to use this software to create a backup image:
Step 1. Download and install MiniTool ShadowMaker on your PC. Then, launch this software to enter its main interface.
MiniTool ShadowMaker TrialClick to Download100%Clean & Safe
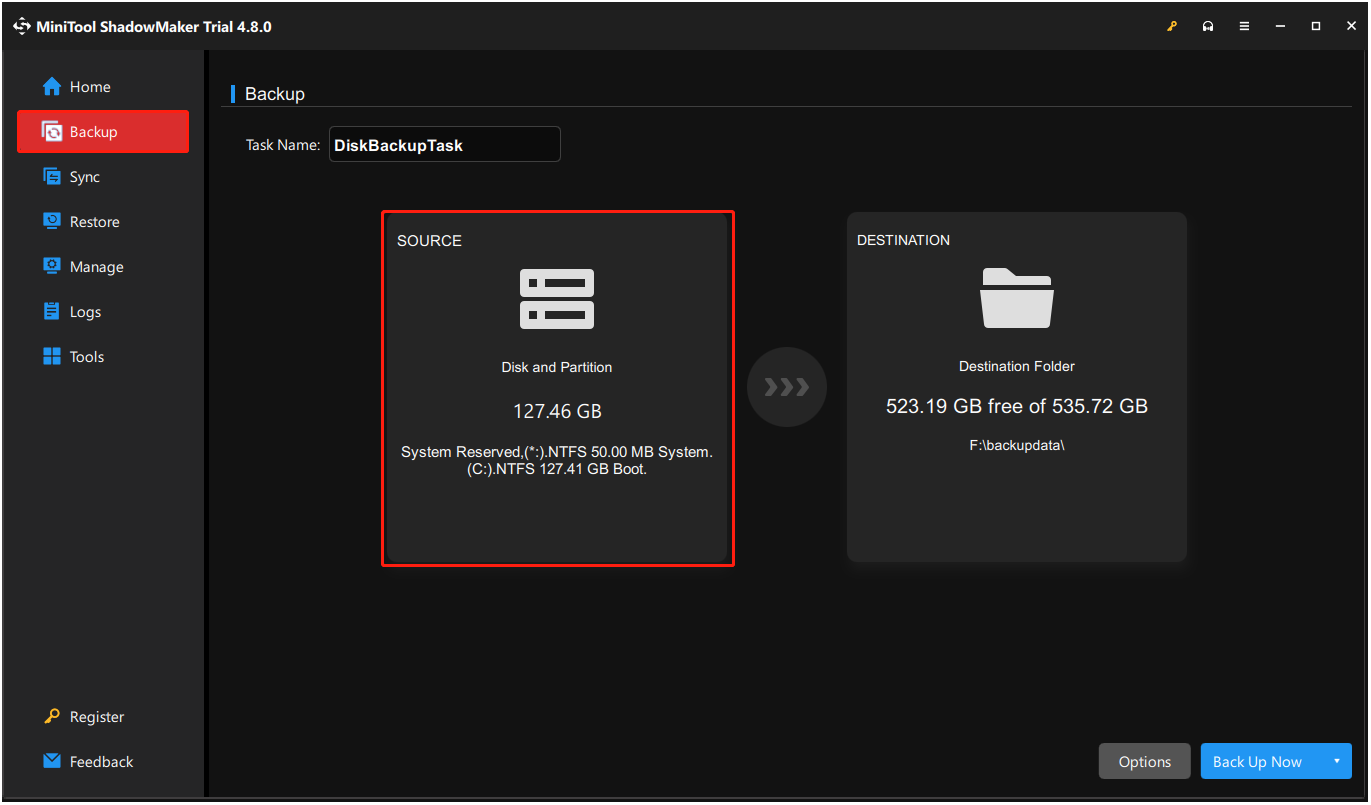
Step 2. Select Backup from the left panel and click Source.
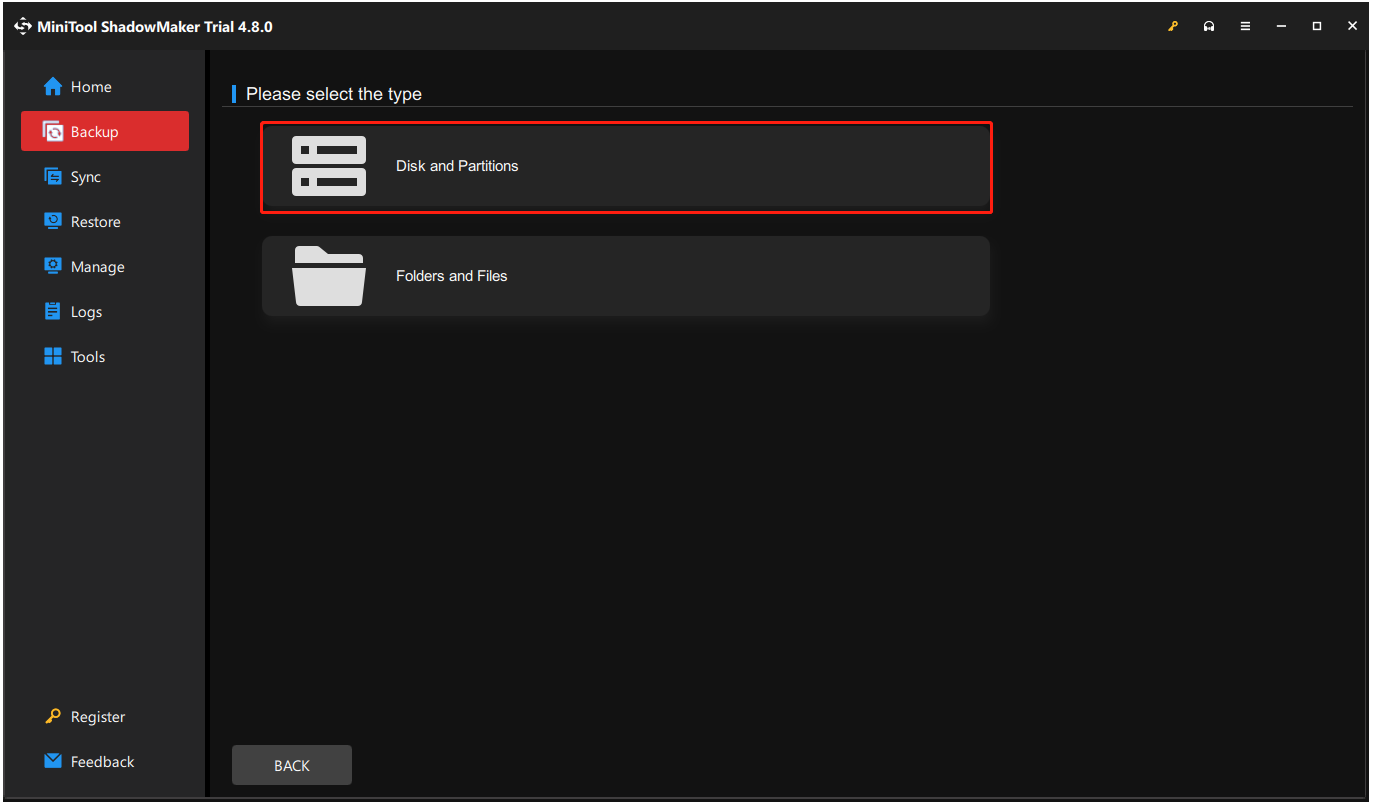
Step 3. Choose Disk and Partition in the next screen.
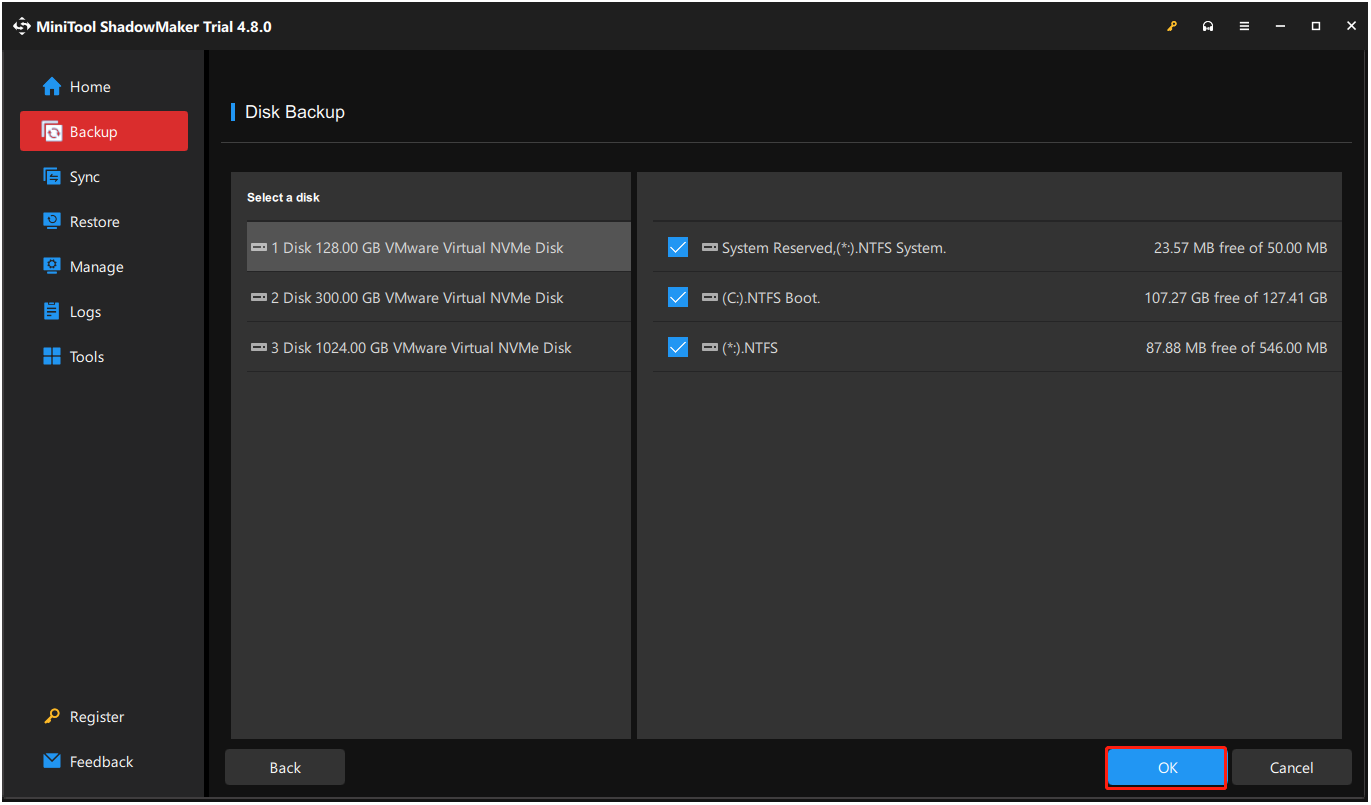
Step 4. Select the system disk and then check all the partitions. Next, click OK to continue.
Step 5. Select Destination, choose a location to save the backup file and click OK.
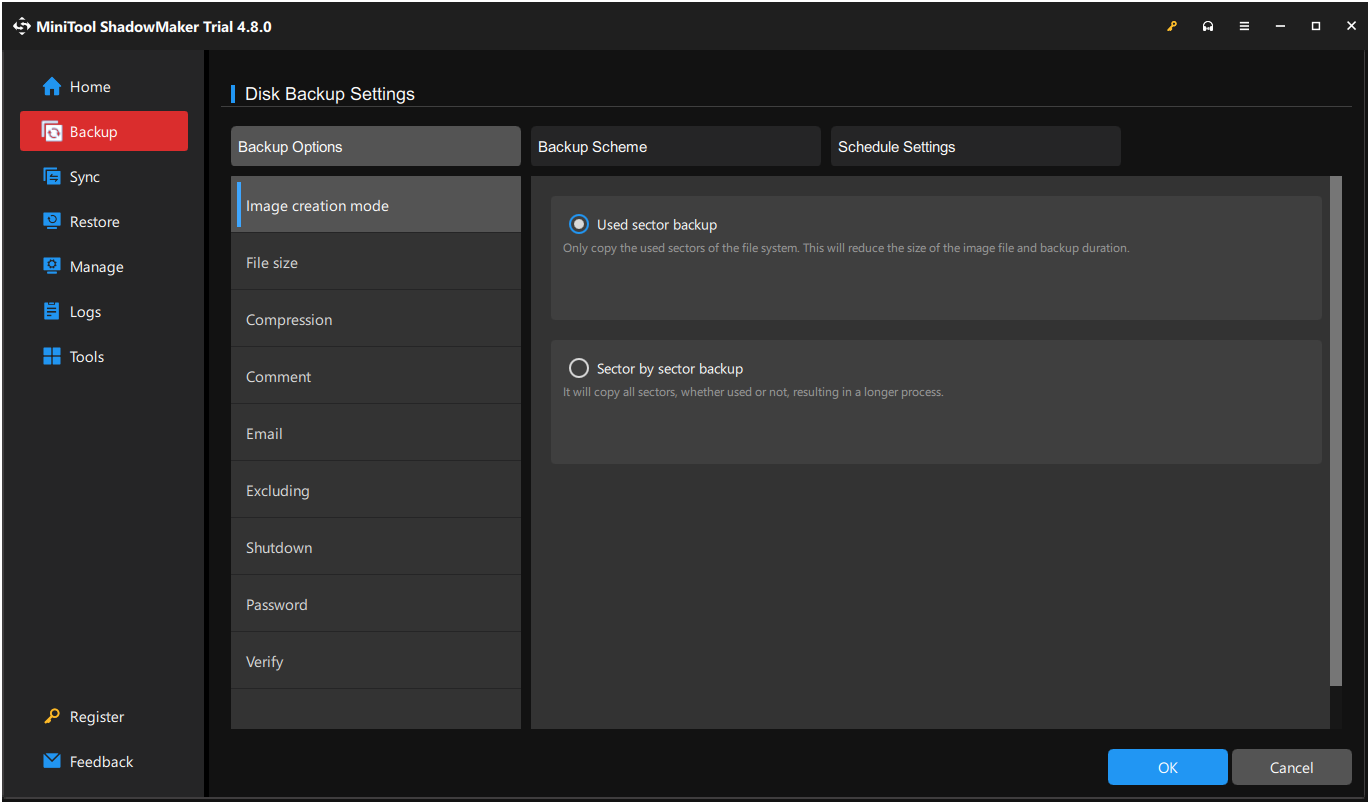
Step 6. Click Options at the bottom-right corner, and then you can set backup options according to your needs. After that, click OK.
- Backup Options: Under this section, you can set Image creation mode, File Size, Compression, Comment, Email, Excluding, Shutdown, Password, and Verify.
- Backup Scheme: You can choose a backup scheme from Full, Incremental, and Differential under this section.
- Backup Schedule: You can set your backup schedule for Daily, Weekly, Monthly, or On Event.
Step 7. Click Backup Now and OK sequentially to perform the backup operation. Then, you may see the process in the Manage tab. Once done, you have backed up your system successfully.
ISO vs System Image
While both ISO and system images facilitate Windows reinstallation and recovery, they serve distinct purposes. The table below highlights their key differences.
| Feature | Windows ISO | System Image |
| Best used for | Reinstalling, upgrading, or repairing Windows | Restoring the entire system after OS corruption |
| What it includes | Windows installation files | Operating system, installed applications, system settings, and personal files |
| Installed apps and settings | Need to be reinstalled or reconfigured after a clean installation | Restored automatically with the system image |
| Creation method | The official Media Creation Tool | Windows Backup and Restore or MiniTool ShadowMaker |
Bottom Line
This post gives a complete guide on creating a Windows 10/11 ISO image from an existing installation. It introduces a powerful backup tool – MiniTool ShadowMaker, to help you back up your existing installed system.
What’s more, if you encounter any issues or have any suggestions while using MiniTool ShadowMaker, you can contact us by sending an email to [email protected]. We will reply to you as soon as possible.
Create Windows 10 ISO Image from Existing Installation FAQ
About The Author

Position: Columnist
Vera has been working at the MiniTool Team for over 10 years as a technical editor and content writer. She mainly focuses on disk and partition management, data recovery, Windows backup and restore, and PC troubleshooting. Through in-depth software testing and hands-on experience, she has helped users solve a wide range of computer problems and better protect their data on Windows devices.
User Comments :