The Start menu is the main port of call for navigating Windows 10, but there still are some issues with it. If your PC or laptop’s Start menu tiles are not showing on Windows 10, you can click this post from MiniTool to get the methods to fix the issue.
How to Fix Windows 10 Start Menu Tiles Not Showing
Method 1: Perform a System Restore
The first solution is to perform a System Restore, which will restore your operating system to a point in the past to help you fix the Windows Start menu tiles not working issue.
Method 2: Restart the Windows Explorer
You can restart Windows Explorer to fix the Windows Start menu tiles not working issue. Here are the steps.
Step 1: Right-click the taskbar and click Task Manager to restart Windows Explorer.
Step 2: Go to the Processes tab and scroll down the tab to find Windows Explorer.
Step 3: Right-click Windows Explorer and select Restart.
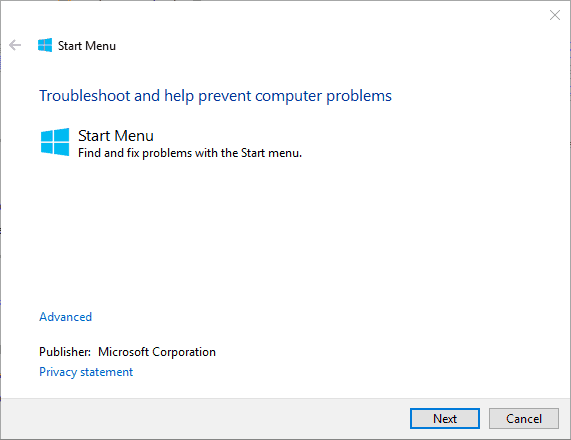
Method 3: Open the Start Menu Troubleshooter
Start Menu Troubleshooter can help you fix that Windows 10 Start menu tiles are blank. However, there is no Start Menu Troubleshooter in Windows 10. You can go to the official website and download the Start Menu Troubleshooter. Open its window below, click the Apply repair automatically option and press the Next button.
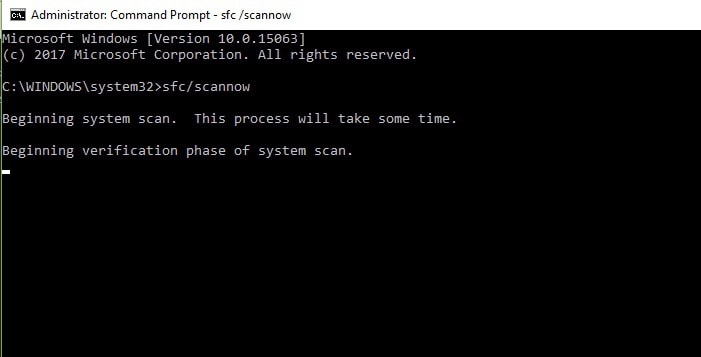
Method 4: Run a System File Scan
Corrupted system files can cause Windows 10 Start menu tiles not showing. Thus, System File Checker is probably the best Windows tool for fixing the issue.
Step 1: Open the Command Prompt (Admin) shortcut.
Step 2: In the Command Prompt, input DISM.exe /Online /Cleanup-image /Restorehealth and press the Enter key.
Step 3: Then input sfc /scannow and press Enter to scan system files. The scan process could take between 20-30 minutes. You need to wait for it patiently.
Step 4: Restart your computer to see if the issue is still existing.
Method 5: Reset Start Menu Apps
Windows 10 has a Reset feature that you can reset a selected app’s data. You can use it to fix the Windows 10 Start menu tiles not showing issue. Here are the steps:
Step 1: Input apps in the search box and open it.
Step 2: Select Apps & features to open the window and select an app that has a blank Start menu tile.
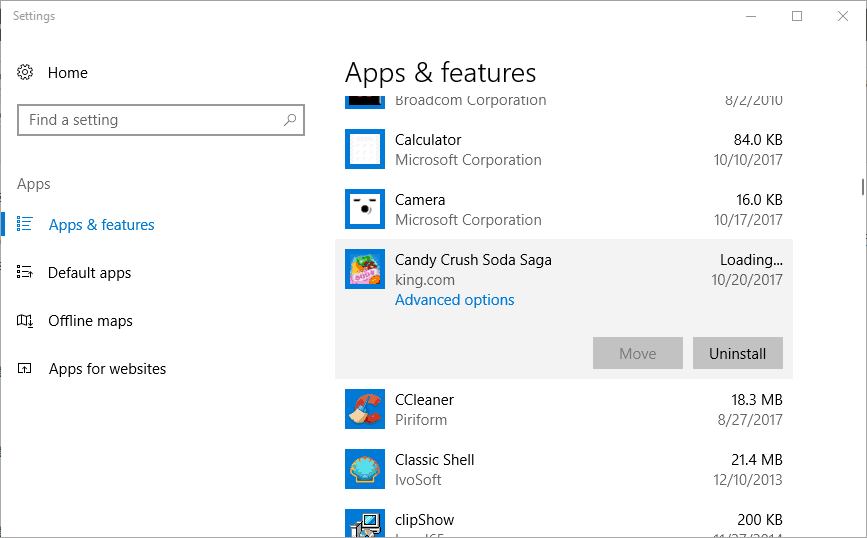
Step 3: Click Advanced options to open the Reset option.
Step 4: At last, click the Reset button, and click Reset again to confirm.
Method 6: Pin the Tiles to the Start Menu Again
You can try pinning the tiles to the Start menu again.
Step 1: Right-click an app tile on the Start menu and select Unpin from Start.
Step 2: Scroll to the app on the Start menu’s app list, right-click it and select Pin to Start to pin the tile back on.
Final Words
All of the useful methods that can help you fix the Windows Start menu tiles not working issue are here. If you encounter such an issue, you can try the above methods one by one. I hope this post can help you a lot.
User Comments :