Do you receive WMI repository verification failed after running winmgmt /verifyrepository in Command Prompt? If you have the same issue, have a look at the solutions mentioned in this post on MiniTool Website and your worries will be gone.
WMI Repository Verification Failed 0x80070005/0x80041003
Windows Management Instrumentation is a set of specifications that allows you to manage different Windows environments including Remote Systems. At times, you might have some issues with WMI and receive errors like WMI repository verification failed 0x80041003 or 0x80070005. The detailed error message is listed as follows:
WMI repository verification failed
Error code: 0x80041003, 0x80070005
Facility: WMI
Description: Access is denied.
The error suggests that the account you are using to access the WMI Namespace doesn’t have the WMI-level security permissions. To fix WMI repository reset failed on Windows 10/11, we will show you 2 ways step by step for you.
During the troubleshooting process, you cannot be too careful because it is easy to make mistakes. Any small mistakes during the operation might lead to great data losses. Therefore, you had better back up your important data with a reliable backup software – MiniTool ShadowMaker as a precaution.
MiniTool ShadowMaker TrialClick to Download100%Clean & Safe
How to Fix WMI Repository Verification Failed on Windows 10/11?
Fix 1: Reset WBEM Repository
Resetting the WBEM Repository seems a good choice to fix WMI repository verification failed. Here’s how to do it:
Step 1. Press Win + S to evoke the search bar.
Step 2. Type cmd to locate Command Prompt and right-click on it to choose Run as administrator.
Step 3. Type the following command and hit Enter.
net stop winmgmt
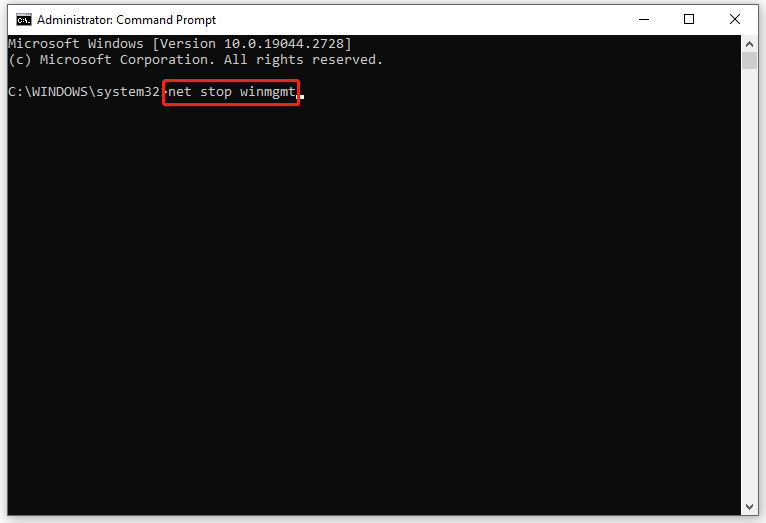
Step 4. After the command is executed successfully, run this command:
C:\Windows\System32\wbem\Repository*
Step 5. After the process is done, type exit and hit Enter to quit Command Prompt.
Fix 2: Rebuild the WMI Values
WMI repository verification failed will crop up when you don’t have permission to perform an operation in WMI. To address this issue, you can try rebuilding WMI values and then checking the WMI permissions.
Move 1: Rebuild the WMI Values
Step 1. Open your Notepad. Copy and paste the following content into it.
@echo on
cd /d c:\temp
if not exist %windir%\system32\wbem goto TryInstall
cd /d %windir%\system32\wbem
net stop winmgmt
winmgmt /kill
if exist Rep_bak rd Rep_bak /s /q
rename Repository Rep_bak
for %%i in (*.dll) do RegSvr32 -s %%i
for %%i in (*.exe) do call :FixSrv %%i
for %%i in (*.mof,*.mfl) do Mofcomp %%i
net start winmgmt
goto End
:FixSrv
if /I (%1) == (wbemcntl.exe) goto SkipSrv
if /I (%1) == (wbemtest.exe) goto SkipSrv
if /I (%1) == (mofcomp.exe) goto SkipSrv
%1 /Regserver
:SkipSrv
goto End
:TryInstall
if not exist wmicore.exe goto End
wmicore /s
net start winmgmt
:End
Step 2. Save this file and name it as WMI.bat.
Step 3. Right-click on WMI.bat and select Run as administrator. This operation will rebuild the WMI values.
Move 2: Check the WMI Permissions
Step 1. Open File Explorer > right-click on This PC > select Manage in the drop-down menu.
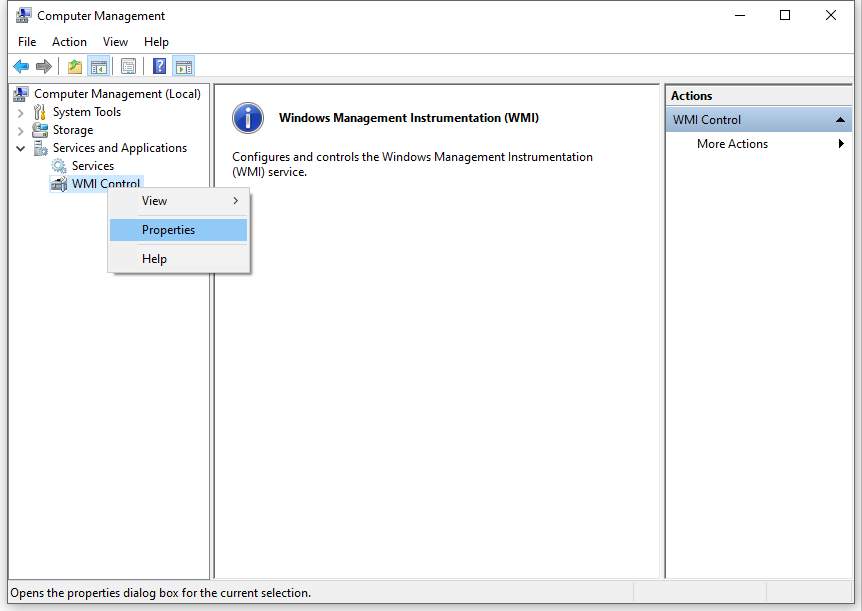
Step 2. Double-click on Computer Management (Local) on the left side > expand Services and Applications > right-click on WMI Control and choose Properties.
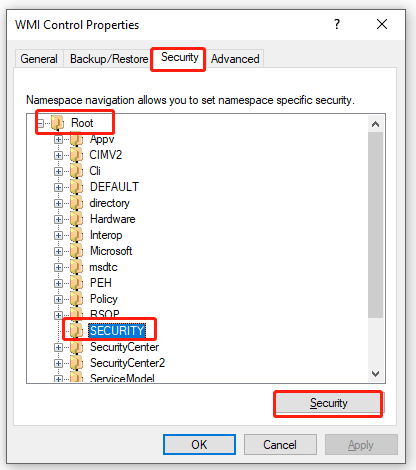
Step 3. Under the Security tab, expand Root > SECURITY and hit the Security button.
Step 4. Click on Authenticated Users, enable these permissions:
- Execute Methods
- Provider Write
- Enable Account
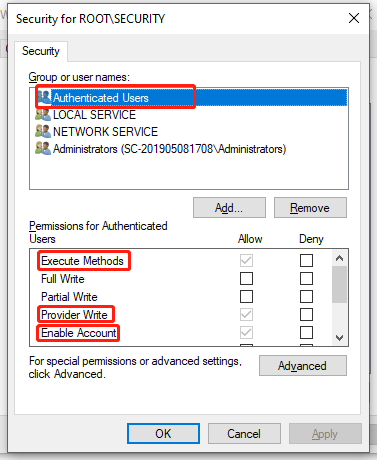
Step 5. Hit OK and then reboot your computer.
User Comments :