How to Hide Apps on Windows 10/11 (Quick Answer)
Try the following methods to hide the Windows applications:
- Hide apps via the Settings page
- Hide apps from Control Panel by editing the group policy
- Hide the entire partition for maximum privacy with MiniTool Partition Wizard
- Use Registry Editor to hide specific apps
- Use a third-party tool for easier management
- Create a hidden folder for portable apps and shortcut-based programs.
When to Hide Programs Windows 10/11
Installed programs can be found in the Windows Start menu, Control Panel, and desktop. To protect your privacy, it is recommended to hide installed apps in the following situations:
- You share your computer with friends, family, or coworkers.
- You want to prevent your child from changing or uninstalling certain programs.
- You need to reduce the clutter in the app list.
- You need to protect work-related or sensitive apps.
How to Hide Apps on Windows 11/10
Method 1: Hide Apps in Start Menu via Windows Settings
As mentioned, you can view installed apps on Windows 10 via a lot of tools. The Start menu is one of the easiest ways, and you just need to click the Windows button on the bottom left corner or press the Windows key.
Here I would like to introduce how to hide programs on Windows 10 Start menu by using Windows Settings. And you can follow the steps below.
Step 1: Press Win + I to open Windows Settings quickly.
Step 2: Go to the Personalization category. Then select Start in the left pane.
Step 3: In the right pane, toggle off the option Show app list in Start menu.
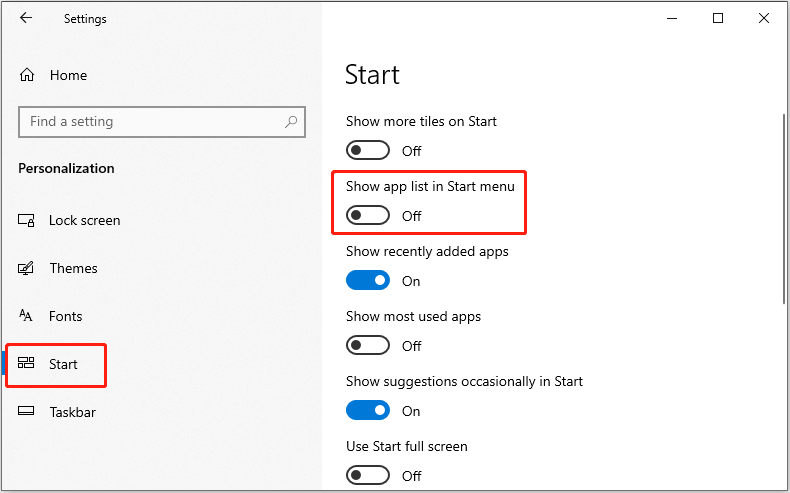
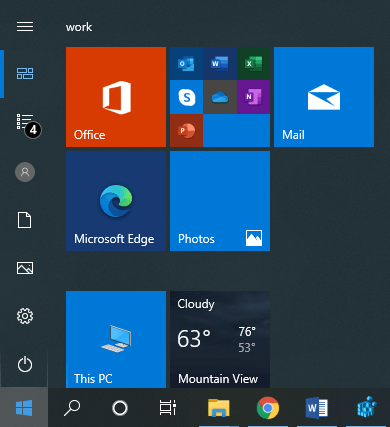
Now, open the Start menu and you will be unable to see the app list including the app you want to hide from others.
Best for: Beginners for basic privacy needs.
Limitations: The app can still be accessed via search; This method only hides the app list, not the apps themselves.
Method 2: How to Hide All Apps on Windows 10/11 via Group Policy Editor
In addition to the Start menu, users can also view installed programs and features via Control Panel. They just need to go to Control Panel > Programs > Programs and Features.
If you want to hide all apps in Control Panel on Windows 10/11, you can try modifying Group Policy Editor, a tool in Windows to help the administrator manage various settings with Group Policy Objects.
Here are the detailed steps about how to hide all apps on Windows 10/11 Control Panel via Group Policy Editor.
Step 1: Press Win + R to invoke the Run window. Then input gpedit.msc and press Enter to launch Local Group Policy Editor.
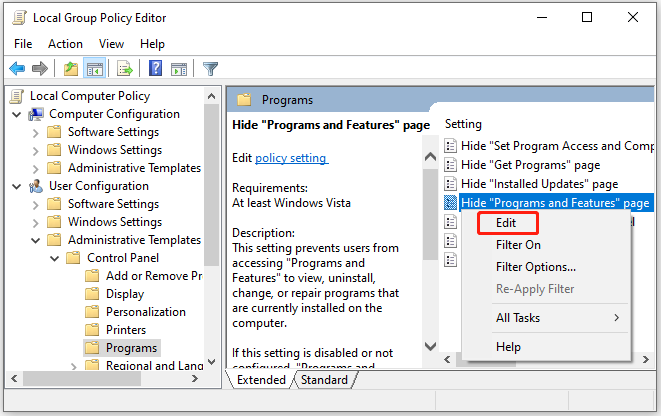
Step 2: In Local Group Policy Editor, select User Configuration > Administrative Templates > Control Panel > Programs folder in the left pane.
Step 3: In the right pane, right-click Hide “Programs and Features” page and select Edit.
Step 4: In the pop-up window, select the Enabled option. Then click Apply and OK to keep the changes you have made.
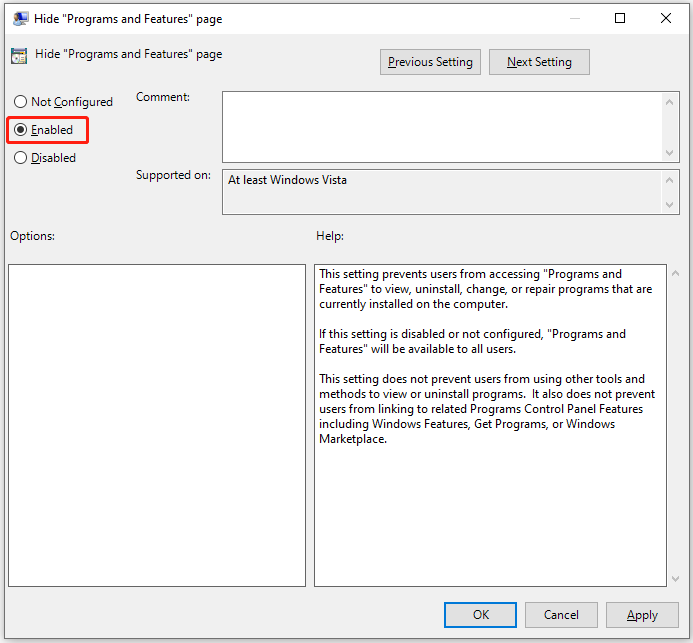
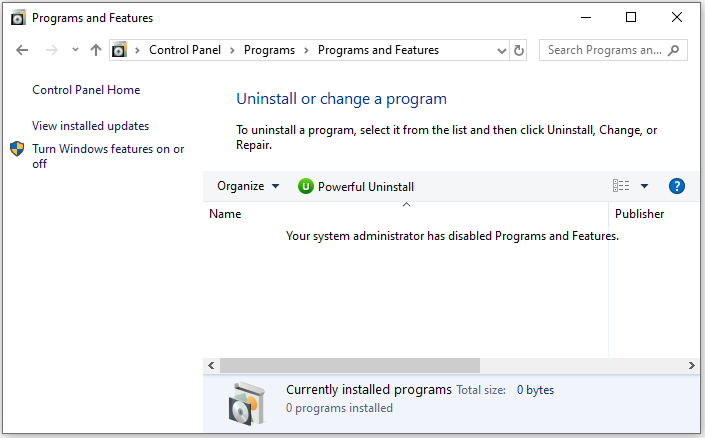
After you enable the Hide “Programs and Features” page feature, others would see the following message when they try to view your installed programs and features in Control Panel: your system administrator has disabled Programs and Features. Therefore, it is obvious for people who use your computer to know that you have hidden your programs and features.
Best for: Admin-level control in Windows 11/10 Pro or above editions.
Limitations: Does not fully hide apps from system access; others can find the hidden app from the Start menu.
Method 3: Hide Apps on Windows 10/11 by Hiding a Partition
Another way to hide apps on Windows 10/11 is to hide the whole partition that contains the apps you want to hide. Usually, you can hide a partition by removing its drive letter in Disk Management. It is easy to operate but others can access the partition once they add the missing drive letter back.
To make sure others cannot access the files and programs stored on the partition, you can use a professional partition manager to hide the partition. Here I recommend MiniTool Partition Wizard, a reliable tool that can be used to create, move, resize, delete, wipe, and hide partitions, recover lost files, repair the corrupted file system, etc. It hides a partition by changing the partition type ID (on a MBR disk).
Now, let’s see how to hide apps on Windows 10/11 by hiding the partition with MiniTool Partition Wizard.
Step 1: Click the following button to download MiniTool Partition Wizard. Then install and launch it.
MiniTool Partition Wizard FreeClick to Download100%Clean & Safe
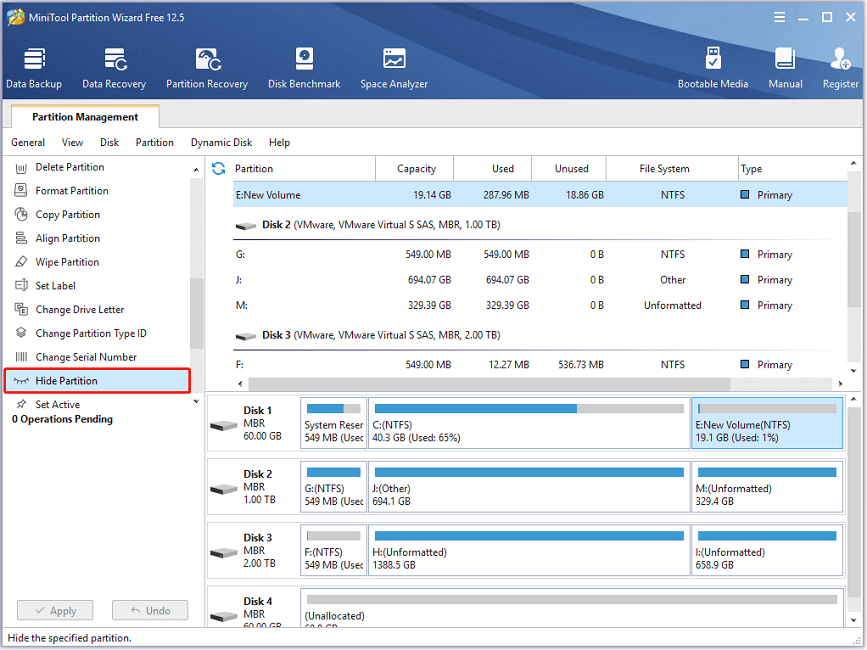
Step 2: When you see the main interface of MiniTool Partition Wizard, select the partition you need to hide and click Hide Partition from the left action panel.
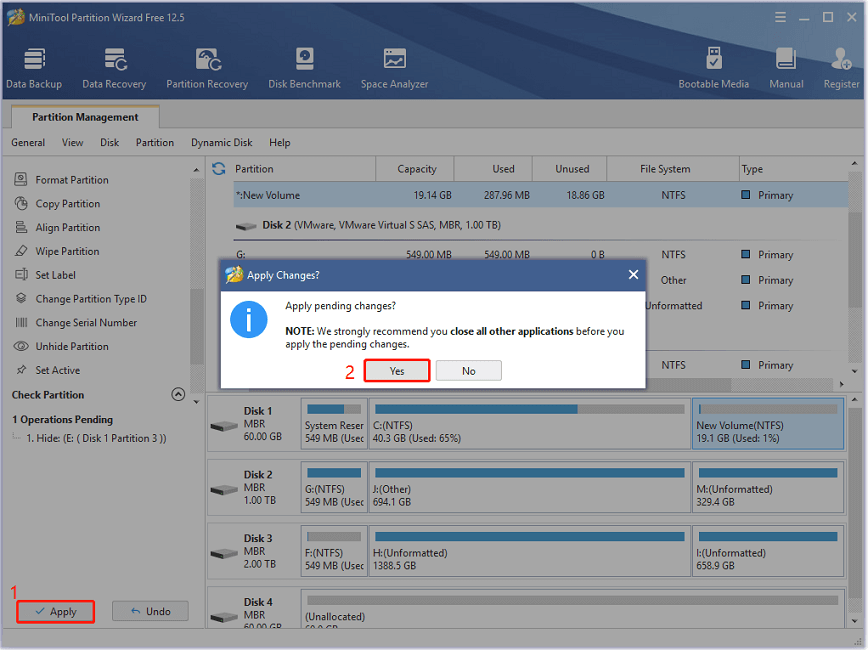
Step 3: Click Apply to start hiding the partition. In the pop-up window, click Yes to confirm the operation.
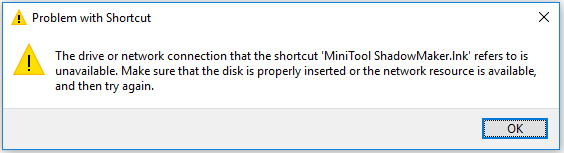
Step 4: Delete the shortcuts of the apps you want to hide on your computer. If there are shortcuts on the desktop or other drives, others can still find the apps you hide by searching in the Windows Search utility. But they can’t launch the hidden apps as they will receive an error message “problem with shortcut” when they double-click the shortcut.
Step 5: After hiding the partition, your apps are still available in Control Panel. To hide it perfectly, you need to:
- Go to Control Panel > Programs > Programs and Features.
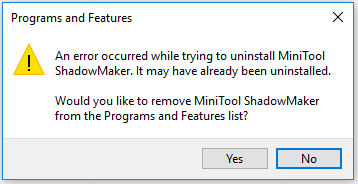
- Right-click an app in the hidden partition and select Uninstall. Then you will receive a message that an error occurred.
- You just need to click Yes to remove the app from the Programs and Features list. Don’t worry. You won’t lose your app in this step.
After the above steps, your apps have been hidden successfully. When you need to use the hidden apps, you just need to unhide the involved partition via MiniTool Partition Wizard and find the executable file of your apps in the installation folder to launch them.
Best for: Users who want a simple and very safe solution, preventing unauthorized access.
Limitations: Requires unhiding the partition to access the apps again; Needs to install additional software.
Method 4: Hide an Individual Application via Registry Editor
As you can see, the first two methods are better when you want to hide all apps on Windows 10/11.If you want to hide an individual app in Control Panel and wish others to be unaware of it, you can use Registry Editor.
Now, let’s see how to hide apps on Windows 10 and 11 via Registry Editor.
Step 1: Press Win + S to open the Windows Search utility. Then search for Registry Editor and open it.
Step 2: Navigate to the following path in Registry Editor:
HKEY_LOCAL_MACHINE\SOFTWARE\Microsoft\Windows\CurrentVersion\Uninstall
Step 3: Click File > Export. Then select a location and click Save to back up the involved Registry keys.
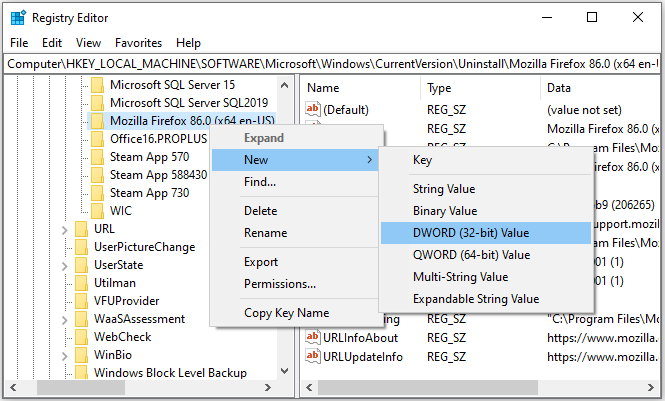
Step 4: Scroll down and find the app you want to hide under the Uninstall folder. Then right-click the app and select New > DWORD (32-bit) Value. Here I set Firefox as an example.
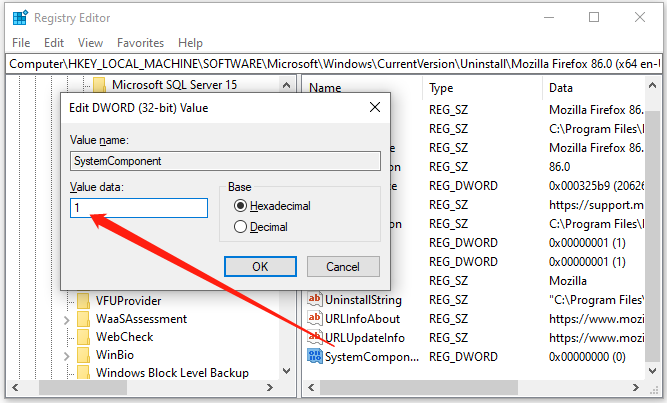
Step 5: Name the new value as SystemComponent and right-click it and select Modify to change the value.
Step 6: In the pop-up window, change its Value data from 0 to 1.
After changing the Registry key, you can close Registry Editor and open Control Panel. Go to the list of your installed programs and features, and the hidden app won’t show in the list.
Best for: Advanced users who need to hide specific apps.
Limitation: Only suitable for hiding specific apps visually rather than preventing access entirely; requires technical knowledge.
Method 5: Use a Professional Program to Hide Apps on Windows 10/11
Additionally, using a third-party tool can be a more efficient and safer option to hide apps in Windows 11/10, especially for beginners.
Compared with manual methods like Registry or Group Policy, the professional tool can manage multiple apps in one place, even completely hide access, not just visibility. And there is no need to configure each app individually.
WinHider, App Hide, or Winaero Tweaker can be your practical options. Get one and follow the on-screen instructions to finish the app hiding task.
Best for: Users who want a quick and convenient solution to hide Windows installed programs.
Limitations: Includes potential security risks from unverified tools; requires installing additional software.
Method 6: Create a Hidden Folder
Additionally, the PC has some portable apps, and you want to hide them to protect your privacy.
Follow these steps to create a hidden folder to hide these programs.
Step 1: Right-click the desktop and choose New > Folder to create a new folder.
Step 2: Move app shortcuts into this folder.
Step 3: Right-click the folder and choose Properties.
Step 4: Check Hidden and click Apply > OK.
Best for: Users who want to hide portable apps and shortcut-based programs.
Limitations: Not suitable for installed programs listed in Control Panel or Start menu; very low security.
Choose the Best Way to Hide Apps on Windows (Comparison Guide)
| Method | Difficulty | Best For | Privacy Level |
| In Windows Settings | Easy | Beginners, quick hiding | Low |
| Via Group Policy | Medium | Admin control | Medium |
| Use MiniTool Partition Wizard (hide the entire partition) | Easy | Maximum privacy, multiple apps | Very high |
| Use Registry Editor | Advanced | Advanced users, specific apps | High |
| Use third-party tools | Easy | Convenience, batch management | Medium |
| Create a hidden folder | Easy | Portable apps, basic hiding | Very low |
How to Hide Apps on Desktop Windows 11/10
A clean desktop with fewer icons can improve focus and reduce visual clutter. For these purposes, hiding desktop apps is an effective method.
Follow the instructions below.
- Hide all icons: Right-click an empty area on the desktop, choose View, and unselect Show desktop icons.
- Hide individual icons: Right-click on the app shortcut, select Properties, choose Hidden, and click Apply to save the change.
Bottom Line
This post introduces how to hide apps on Windows 10 and Windows 11. If you have more ideas, you can share them with us in the following comment zone. For any problems with MiniTool software, you can contact us via [email protected] for solutions.
How to Hide Apps FAQ
About The Author

Position: Columnist
Vera has been working at the MiniTool Team for over 10 years as a technical editor and content writer. She mainly focuses on disk and partition management, data recovery, Windows backup and restore, and PC troubleshooting. Through in-depth software testing and hands-on experience, she has helped users solve a wide range of computer problems and better protect their data on Windows devices.
User Comments :