Causes of the Error Code 0x8007025D
The error code 0x8007025D often occurs when users attempt to install the Windows operating system via USB, or even when updating Windows. this error code often shows you a notification that Windows cannot install required files.
Since this setup error 0x8007025D only happens in some specific situations, we can infer some triggering factors for your consideration, such as faulty hardware and corrupt drivers, faulty memory, corrupt update cache, damaged ISO image file, etc.
Now, there are some tips you can try to get rid of the error code 0x8007025D.
- Remove all connected external devices.
- Download a new Windows ISO image file.
- Clear your update cache and junk files.
- Try another USB flash drive or cable.
- Remove the one if you have two RAM sticks installed in the PC.
If they can’t be helpful, you can proceed to the next part to learn the troubleshooting methods.
Solutions of the Error Code 0x8007025D
Solution 1: Reduce the Drive Size and Format It
Reducing the drive size is mainly used to minimize the chance of the space being corrupted. In this way, you can avoid faulty hardware and corrupt drivers to fix 0x8007025D. However, before you start this method, you need to make sure your important data won’t get lost during this process.
Move 1: Back up Data
To protect your data, you can prepare a data backup with MiniTool ShadowMaker if you prepare to format a drive. With this tool, the data can be quickly retrieved no matter what causes a data loss, such as format, drive failure, deletion, system crashes, etc.
MiniTool ShadowMaker is a professional backup software dedicated to this field for many years and has attracted a bunch of fans. This trustworthy software develops many features, such as backup schemes, schedules, password protection, etc., to optimize the user experience.
Get this 30-day free trial version by clicking this button to download and install it and click Keep Trial to enter the interface.
MiniTool ShadowMaker TrialClick to Download100%Clean & Safe
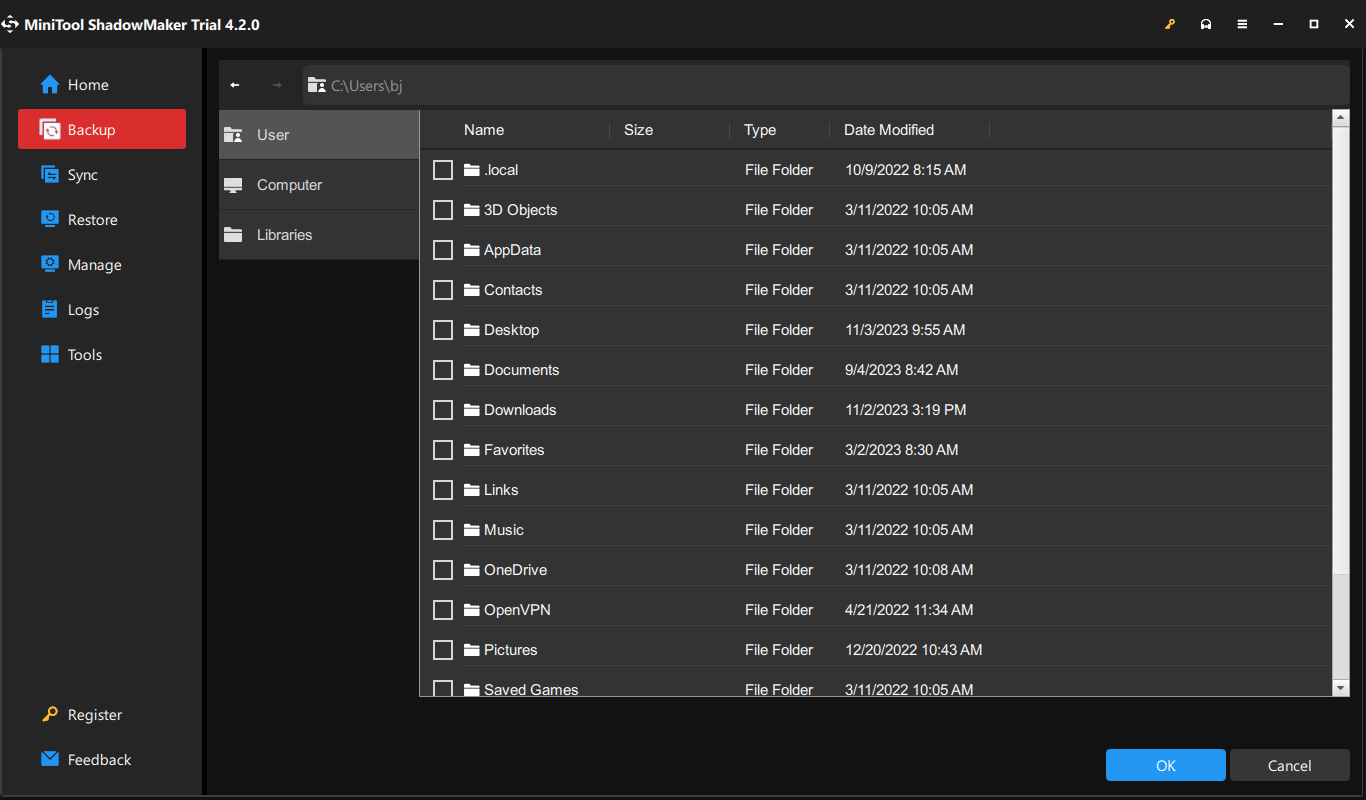
Step 1: In the Backup tab, click the SOURCE section and go to Folders and Files to choose your important files.

Step 2: Then go to the DESTINATION section to choose where to store the backup. When everything has been done, click Back Up Now to perform that immediately.
Apart from the Backup feature, you can use the Clone Disk feature in the Tools tab to clone SSD to larger SSD or perform a sector by sector cloning.
Move 2: Reduce the Drive Size and Format It
As of this move, we find some users use a 480GB SSD with the Windows installation, but it turns out the process failed. However, it worked when they changed the SSD to a smaller one, such as performing the Windows installation on the 125GB partition. In this way, you may change your driver to a smaller size and try the steps.
Step 1: Please enter WinRE first and then click Troubleshoot > Advanced options > UEFI Firmware Settings > Restart.
Then your PC will be prompted to restart and boot into BIOS. Since the BIOS settings are different, the following options are for reference.
Step 2: Once you get in there, find the Boot tab or System Configuration tab and enable the Boot Mode to Legacy supported. Then confirm the choices and exit to follow the on-screen instructions.
Step 3: For the next page, when you see a Boot Manager page, choose USB hard drive (UEFI). Then choose your OS version and wait for the files to load.
Step 4: In the next Windows Setup window, click on a custom option, choose the wanted partition, and click on New > Apply. Then click Format to format both of your new and primary partitions.
Step 5: Click Next to finish the installation process and see if the error code 0x8007025D appears again.
Solution 2: Disable Antivirus Temporarily
Antivirus can protect your computer from virus infection, but sometimes, its aggressive functions can cause conflicts with your operations, such as Windows updates or software installation. In this way, you can temporarily disable your third-party antivirus and Windows Defender, and try the installation again.
After the test, no matter whether the Windows error code 0x8007025D can be removed, please remember to restore the protection of your antivirus.
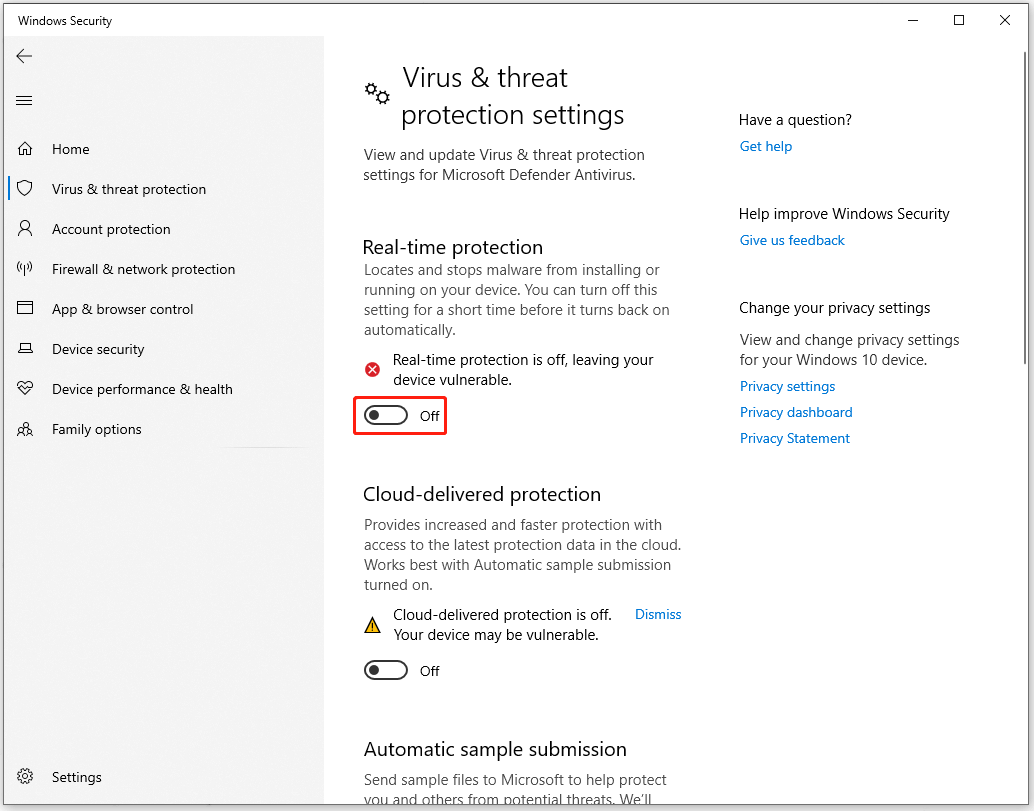
Step 1: Type Virus & threat protection in Search and open it.
Step 2: Click Manage settings under Virus & threat protection and turn off the option of Real-time protection.

Solution 3: Run the Windows Update Troubleshooter
Windows Update Troubleshooter can resolve the issues and errors stopping users from downloading or installing Windows updates. You can follow the next steps to run the troubleshooter.
Step 1: Open Settings by pressing Win + I and click Update & Security.
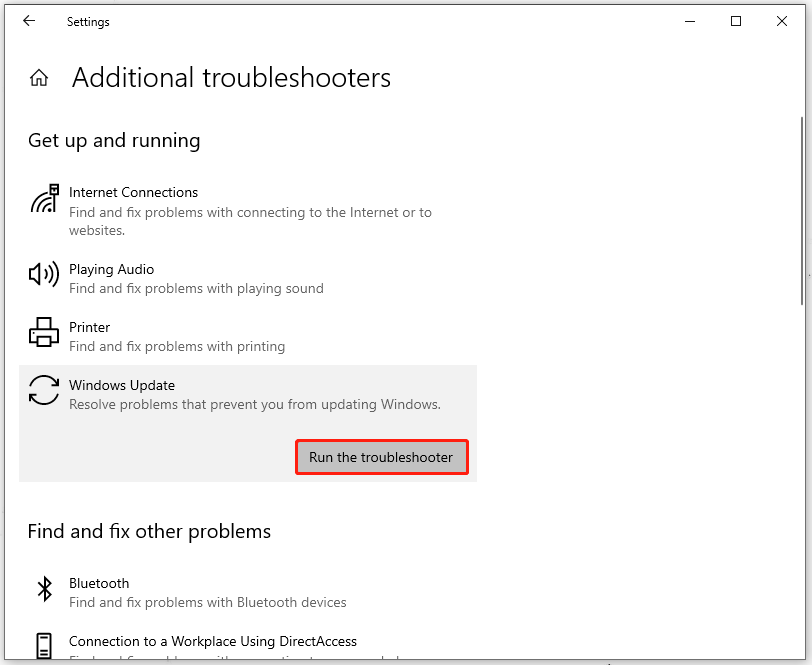
Step 2: In the Troubleshoot tab, click Additional troubleshooters. Then select Windows Update under Get up and running to click Run the troubleshooter.

Solution 4: Run a Memory Diagnostic
In case the faulty memory issue triggers 0x8007025D, you can run a memory diagnostic for your RAM. If it detects any bad RAM, please replace it with a new one and retry the installation.
Please boot into BIOS as we taught in solution 1. If you want to try other ways, you can read this post: How to Enter BIOS Windows 10/8/7 (HP/Asus/Dell/Lenovo, any PC).
When you get in, please choose Diagnostic and then Memory Test.
Please press Enter to start the test and wait for the diagnosis to complete.
Bottom Line:
This post is dedicated to resolving the error code 0x8007025D. If you find the “The installation was canceled” box pops up to stop you from the installation, you can try the above methods. Apart from the above methods, you can use MiniTool ShadowMaker to protect your data.
If you encounter any issues with MiniTool ShadowMaker, you can contact us via [email protected].


User Comments :