About Windows 10/11 Critical Error Start Menu Isn’t Working
The Critical Error is a common Windows 10/11 issue in which the Start menu, taskbar, or Cortana becomes unresponsive. It often displays a message to sign out to fix it, such as:
1. Critical Error – Your Start menu isn’t working. We’ll try to fix it the next time you sign in.
2. Critical Error – Start menu and Cortana aren’t working. We’ll try to fix it the next time you sign in.
This error often occurs after updating or installing new software, rendering the UI unresponsive. Additionally, it can be caused by the following reasons:
- Registry permission issues
- Corrupted system files
- Faulty updates
- Third-party software conflicts
- Failed user profile
- Failed app updates/installations
Back Up Data Before Solving Windows 10/11 Critical Error
Before applying the solutions to fix the Windows 10 Start menu error, it is essential to back up your important data since some solutions may lead to file loss.
To do that, it is highly recommended to use MiniTool ShadowMaker. This PC backup software is widely compatible with Windows 7/8/8.1/10/11 and is good at file backup and Windows backup.
Here’s how to use this software to back up files:
Step 1. Download and install MiniTool ShadowMaker on your PC. Then, launch it.
MiniTool ShadowMaker TrialClick to Download100%Clean & Safe
Step 2. Navigate to the Backup page, go to SOURCE, and click Folders and Files.

Step 3. Choose the files that you want to back up and click OK.
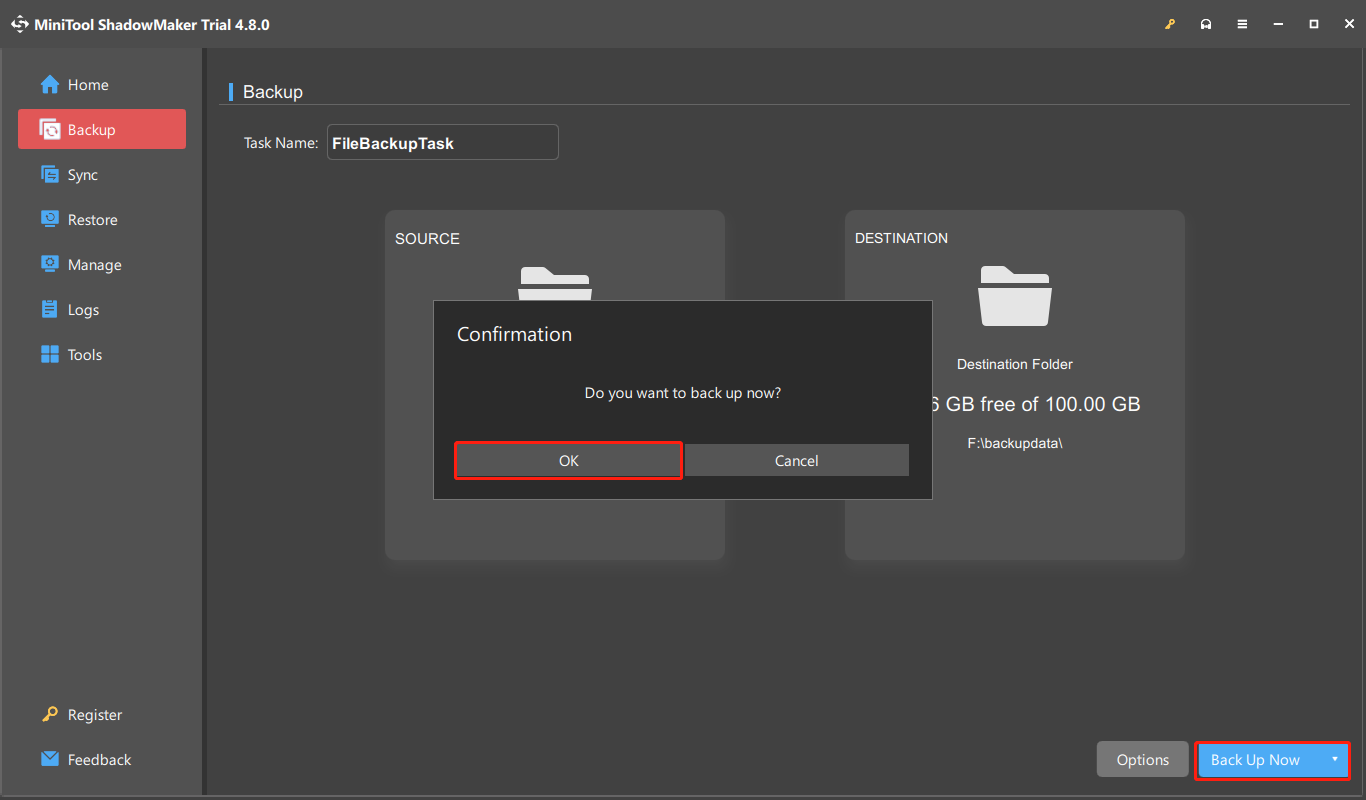
Step 4. Go to DESTINATION, select the backup destination, and click OK.
Step 5. Click Back Up Now and OK to confirm.
How to Fix Critical Error in Windows 10/11
To resolve the Critical Error in Windows 10 or 11, first try restarting Windows Explorer, signing out and back in, or performing a forced restart. If the issue persists, run system repair tools like SFC and DISM; if these fail, proceed to advanced troubleshooting fixes.
Immediate & Short-Term Solutions
If you want to get rid of the Windows Start menu not working error immediately on your PC, try the following solutions.
Solution 1. Restart Windows Explorer
Windows Explorer (explorer.exe) manages the taskbar, desktop, and file navigation. If any of these elements freeze, restarting the explorer.exe process in Task Manager often fixes the issue. Here’s how to do that:
- Press Ctrl + Shift + Esc to open Task Manager.
- In the Processes tab, find Windows Explorer.
- Right-click it and select Restart.
- Now, open the Start menu again to check if the error persists.
Solution 2. Sign Out and Back in Your Account
A temporary glitch with your account may also cause the Windows 10/11 Start menu Critical Error. To fix this error, try signing out of your account and then back in. Here’s how to perform that:
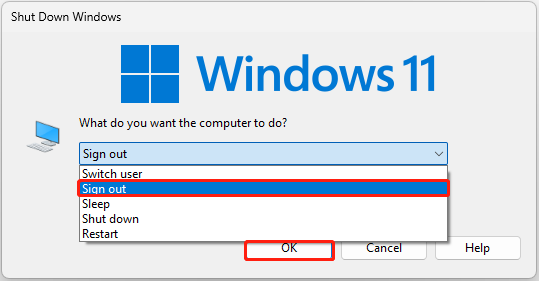
- Press Alt + F4 to open the Shut Down Windows dialog.
- Choose Sign out from the drop-down menu and click OK.
- Wait for a few seconds. Then, sign in again to your account.
- Check if your fix the error successfully.
Solution 3. Re-register Start Menu Components
Re-registering the Windows Start menu fixes unresponsive, broken, or missing Start menu issues. Follow these steps:
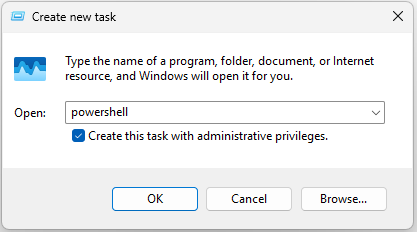
Step 1. Open Task Manager and click Run new task.
Step 2. Type powershell and check the Create this task with administrative privileges box.
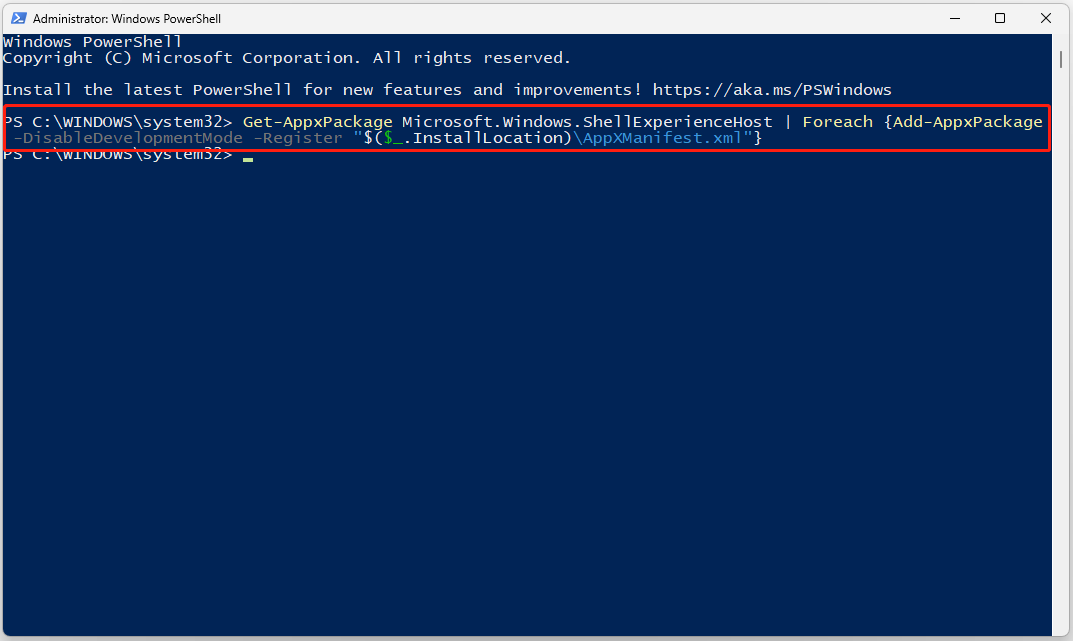
Step 3. Copy and paste the following command in the prompted window and press Enter:
Get-AppxPackage Microsoft.Windows.ShellExperienceHost | Foreach {Add-AppxPackage -DisableDevelopmentMode -Register “$($_.InstallLocation)\AppXManifest.xml”}
If you receive the error message “Critical Error – Start menu and Cortana aren’t working. We’ll try to fix it the next time you sign in.”, continue and execute the following command in Windows PowerShell.
Get-AppxPackage -AllUsers Microsoft.549981C3F5F10 | Foreach {Add-AppxPackage -DisableDevelopmentMode -Register “$($_.InstallLocation)\AppXManifest.xml”}
Step 4. Restart your computer and check if the error has been resolved.
System Maintenance Solutions
The following are some system maintenance solutions to the Start menu Critical Error in Windows 10/11.
Solution 1. Run SFC/DISM Scans
This Windows 10/11 Start menu Critical Error can also occur due to corrupt system files. To fix this issue, run SFC and DISM.
SFC restores missing or damaged protected system files. DISM repairs the underlying Windows component store.
Step 1. Press Win + S to open Search, type cmd, right-click Command Prompt under Best Match, and then select Run as administrator. Click Yes in the User Account Control window.
Step 2. In the pop-up window, initiate a DISM scan by running the commands below:
- DISM.exe /Online /Cleanup-Image /ScanHealth
- DISM.exe /Online /Cleanup-Image /CheckHealth
- DISM.exe /Online /Cleanup-Image /RestoreHealth
Step 3. Once completed, type sfc /scannow and press Enter. Restart your computer and check if the error is fixed.
Solution 2. Install the Recent Windows Update
Microsoft releases updates for Windows OS regularly to patch security vulnerabilities, and improve system performance. An outdated Windows may cause the Start menu not working error easily.
To resolve that, install the recent update with the following steps:
Step 1. Press Win + R to open Run, type ms-settings: and press Enter.
Step 2. In Settings, select Windows Update and click Check for updates.
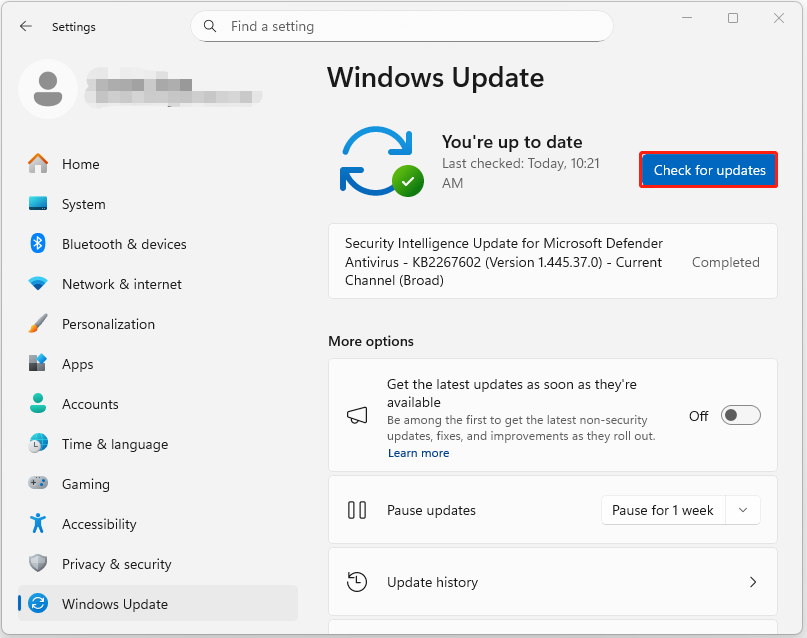
Step 3. Download and install any available updates and restart your computer if prompted to apply them.
Solution 3. Uninstall Recent Updates
If the Start menu Critical Error in Windows 10/11 occurs after an update, the faulty update can be the culprit. Uninstall it with the following steps:
Step 1. Open Search, type control panel, and press Enter.
Step 2. Set View by to Large icons and select Programs and Features.
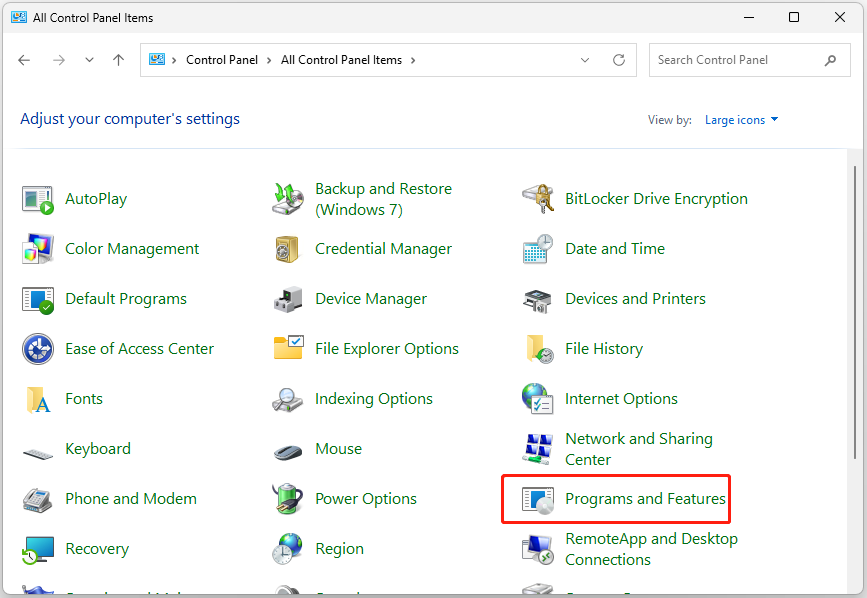
Step 3. Click View installed updates from the left panel.
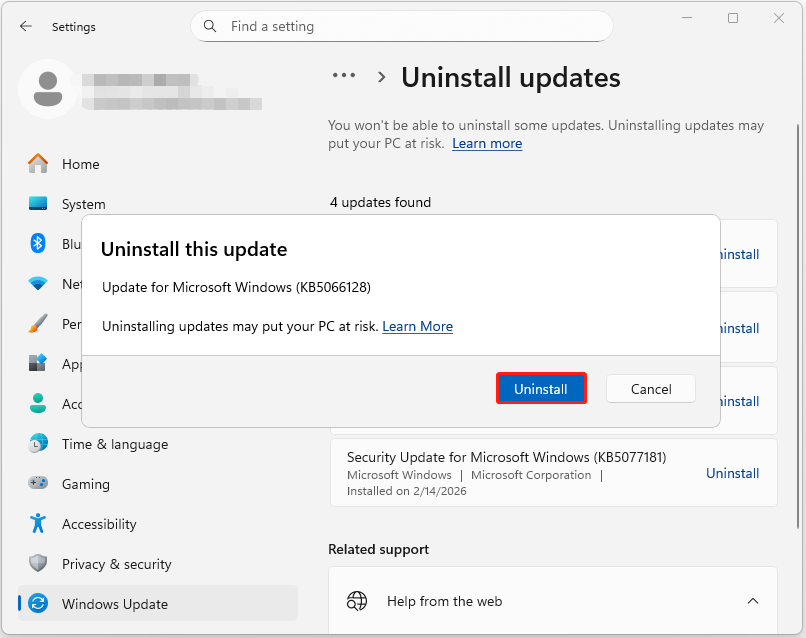
Step 4. Find and locate the latest update from the list and click Uninstall next to it.
Step 5. Click Uninstall in the prompted Uninstall this update window.
Solution 4. Remove Conflicting Software
Sometimes, apps like Dropbox or third-party antivirus software can cause this error. Uninstalling it may resolve the Start menu Critical Error in Windows 10/11. Here’s the guide to uninstall Dropbox:
Step 1. Open Settings, go to Apps > Installed apps.
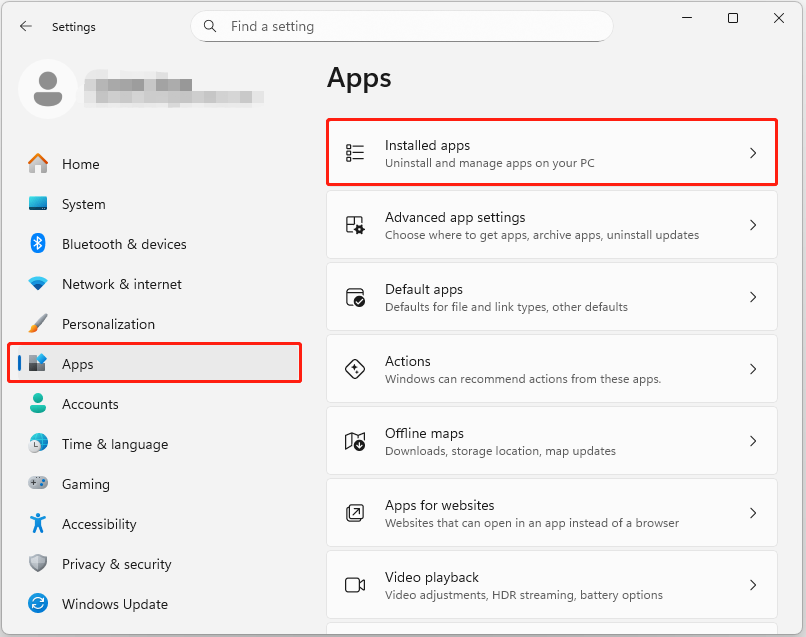
Step 2. Find Dropbox from the list, click the three dots next to Dropbox, and choose Uninstall.
Step 3. Follow the on-screen instructions to complete the uninstallation process.
Now, check if the error has been resolved. If not, uninstall other third-party apps or antivirus software.
Solution 5. Perform a Clean Boot
A clean boot starts the system with minimal drivers and startup programs to isolate software conflicts. If you don’t know which app causes the Start menu Critical Error in Windows 10/11, perform a clean boot on the computer. Here’s the tutorial:
Step 1. Type msconfig in Run, and click OK to open System Configuration.
Step 2. Go to the Services tab and check the Hide all Microsoft services option. Then, click Disable all and click Apply.
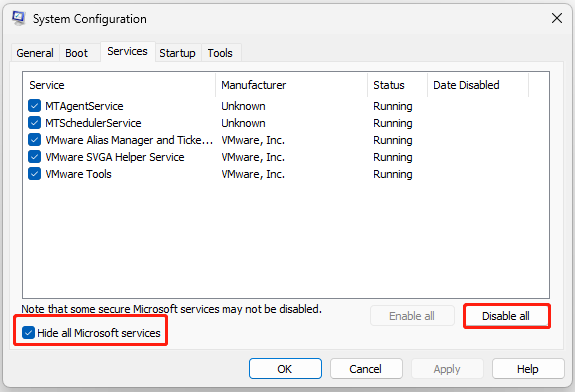
Step 3. Go to the Startup tab and click Open Task Manager.
Step 4. Right-click the startup apps you suspect and select Disable. Then, exit Task Manager and click OK.
Then, your computer will restart into a clean boot environment. Now, try launching the Start menu again and check if the error persists.
Solution 6. Disable Internet Explorer
Some people report that disabling Internet Explorer helps them fix Windows 10 Start menu Critical Error successfully. Try it as follows:
Step 1. Open Control Panel, set View by to Large icons,and navigate to the Programs and Features page.
Step 2. Click the Turn Windows features on or off link from the left panel.
Step 3. In the prompted Windows Features window, uncheck the Internet Explorer 11 box.
Step 4. Click OK to save the changes. If a window pops up, click Yes.
Step 5. Restart your computer, launch the Start menu, and then check if the error has been resolved.
Advanced Troubleshooting Fixes
The following are last resorts to troubleshoot the Windows 10 Start menu Critical Error:
Solution 1. Boot in Safe Mode
Safe Mode is a diagnostic startup state that loads the operating system with only essential drivers, services, and minimal functionality.
Some people report that they fix the Start menu not working error successfully by booting into Safe Mode and then restoring to the normal state.
Follow the tutorial:
Step 1. Power on your PC, then force a shutdown as soon as the Windows logo appears. Repeat 2–3 times to trigger the Preparing Automatic Repair screen.
Step 2. In the Automatic Repair screen, click Advanced options.
Step 3. Choose Troubleshoot > Advanced options > Startup Settings and click Restart.
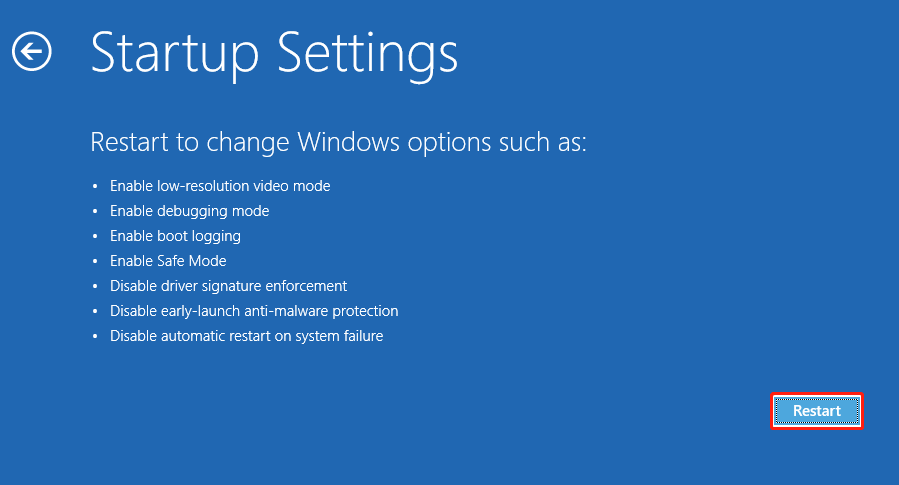
Step 4. Press 5 or F5 to enter Safe Mode with networking.

Step 5. If you have a password set, enter it and press Enter to log in. Then, you are in Safe Mode successfully. Restart your computer to the normal state and the problem may be resolved.
Solution 2. Create a New User Account
A corrupted user account may trigger the Windows Start menu Critical Error as well. To fix this, create a new user account and check if the Start menu works in this account. Here’s how to do that:
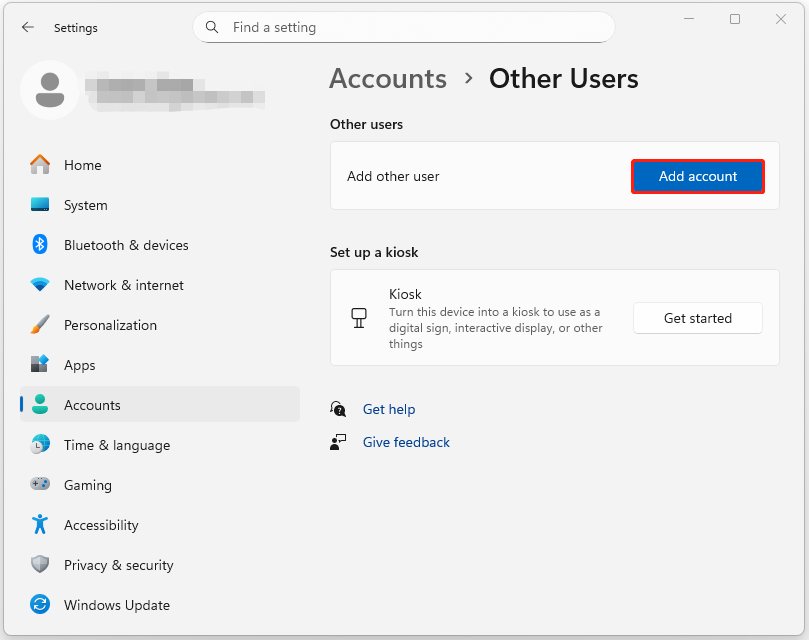
Step 1. Open Settings and go to Accounts.
Step 2. Scroll down and select Other users (or Family & other users in some versions). Then, click the Add account button.
Step 3. Follow the on-screen guide to enter the credentials of the account to proceed.
Step 4. Change Account Type to Administrator.
- Click the down arrow next to the new account under Other users.
- Click Change account type.
- Under Account type, select Administrator and click OK.
Step 5. Sign out of your original user account and sign in with the new account. Then, check if the error is fixed.
If the menu works on a new profile, your original user profile may be corrupted.
Solution 3. Perform a System Restore
System Restore is a Windows feature that can revert system files, registry keys, installed apps, and drivers to a previous working state without affecting personal files.
If you have created a restore point before you encounter the Windows 10 Start menu error on your PC, try this method:
Step 1. Open Settings, go to System > About. Then, scroll down and select System protection.
Step 2. In the pop-up window, click Next.
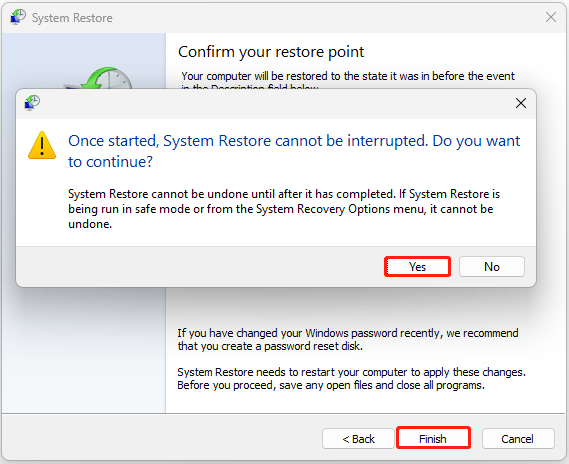
Step 3. Select a proper restore point from the list and click Next.
Step 4. Confirm your restore point on the next page. Then, click Finish and Yes sequentially to proceed.
Solution 4. Reset PC
If none of the above solutions can help you resolve the Windows Start menu Critical Error, resetting the PC can be the final option.
Resetting your PC performs a clean reinstallation of Windows, wiping all files and applications to restore the system to its factory defaults.
Here’s how it proceeds:
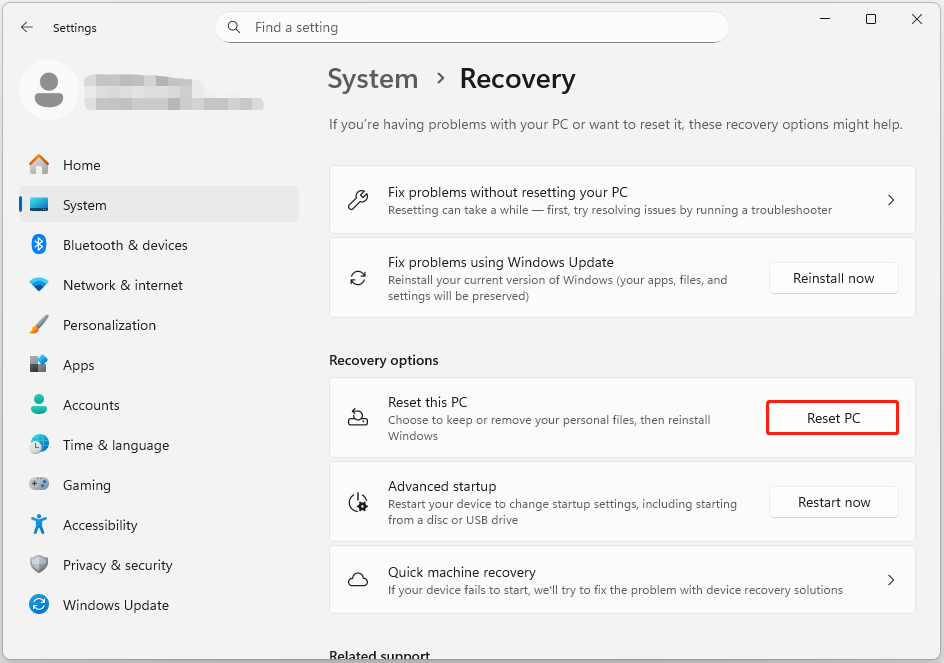
Step 1. Open Settings and go to System > Recovery.
Step 2. Locate the Recovery options section. Then, click the Reset PC button next to Reset this PC.
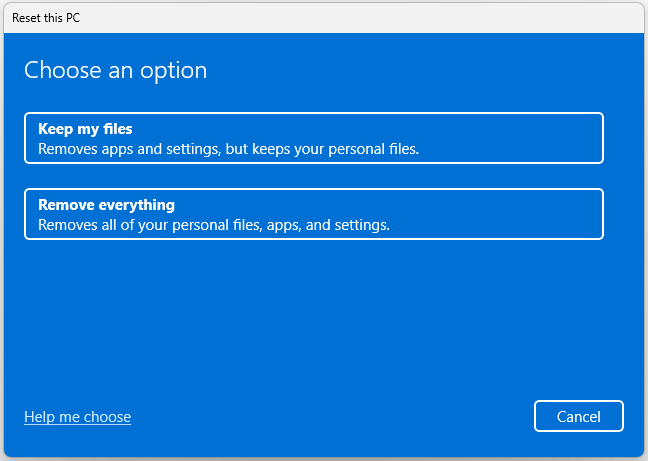
Step 3. In the Choose an option window, choose the option you like:
- Keep my files: Removes apps and settings, but keeps your personal files.
- Remove everything: Removes all of your personal files, apps, and settings.
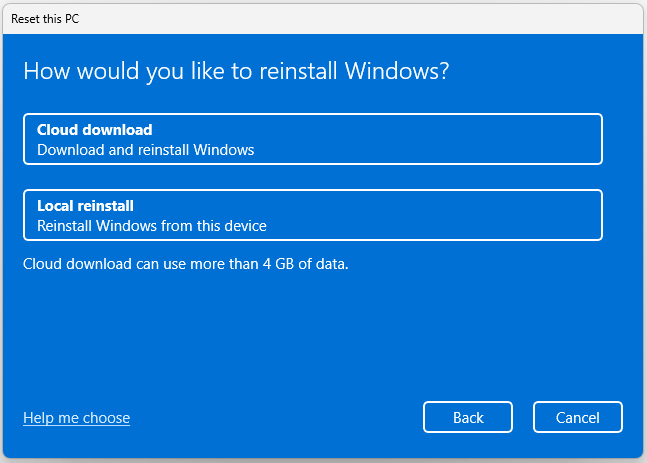
Step 4. Choose a method from Cloud download and Local reinstall to reinstall Windows.
Step 5. Follow the on-screen guide to complete the resetting process. Once done, launch the Start menu again and check if the error is fixed.
Wrapping Things Up
By following the above guide, you should be able to fix the Critical Error on your Windows 10/11.
Backing up data with MiniTool ShadowMaker before performing advanced methods is necessary. If you have any questions when using MiniTool software, you can directly contact our support team via [email protected].
Critical Error FAQ
Alt + F4: On the desktop, press Alt + F4, select Restart, and click OK.
Win + X menu: Press Win + X, select Shut down or sign out > Restart.
Ctrl + Alt + Delete: Press Ctrl + Alt + Delete, click the Power icon > Restart.
Run Command: Press Win + R, type shutdown /r /t 0, and click OK.
Physical Button: Press and hold the Power button on the computer case for a few seconds.
Get-AppxPackage Microsoft.Windows.StartMenuExperienceHost | Reset-AppxPackage
Alternatively, open Registry Editor, navigate to: HKEY_CURRENT_USER\Software\Microsoft\Windows\CurrentVersion\CloudStore\Store\Cache\DefaultAccount. Then, delete the DefaultAccount folder and restart Windows Explorer via Task Manager.
To get more information about this error, refer to the Critical Process Died guide.
To get more useful solutions for this error, refer to the Critical Service Failed guide.
About The Author

Position: Columnist
Charlotte is a technology columnist with a strong focus on the Windows operating system, specializing in disk management, backup, and data recovery. She is passionate about analyzing computer errors, identifying root causes, and delivering practical solutions. In her free time, she stays updated on the latest developments in computer systems and hardware while continuously learning new technologies to broaden her expertise. Her writing style is clear and easy to understand, making complex technical topics accessible even to users with limited computer knowledge.
User Comments :