The Hard Disk 1 Quick 303 can be caused by a broken IDE/SATA controller chip, a damaged hard disk, or other reasons. This post of MiniTool offers some troubleshooting steps, including backing up data, checking disk cables, and replacing the hard disk.
Some HP users report that they received the Hard Disk 1 Quick (303) and Hard Disk 1 Full (305) errors on their computer. These errors will start with a problem when powering on and then appear when the hard disk test fails.
Have you also encountered the same error? If so, continue reading to get the reasons and solutions to this error.
Overview of Hard Disk 1 Quick 303 and Full 305 Errors
SMART test failed error code 303 and 305 are both warnings that your hard disk is faulty and needs to be replaced. Here’s the main definition of them:
- Hard Disk 1 Quick 303 indicates that a rapid self-test of the hard drive has failed. This signifies an issue that necessitates attention.
- Hard Disk 1 Full 305 denotes that a comprehensive self-test has also failed. This strongly implies that the drive is nearing complete failure.
Causes of Hard Disk 1 Quick 303 and Full 305 Errors
SMART test failed error code 303 and 305 can be caused by various reasons, including:
- Physical or mechanical failure: It is the most common cause. The drive itself is physically damaged due to age, manufacturing defects, or sudden jolt or impact.
- Bad sectors: There are unreadable areas in the disk. This makes it unable to store or retrieve data correctly.
- SMART failure: The drive’s self-monitoring system has detected a potential issue, alerting you about possible failure. The quick 303 and full 305 tests are included.
- Corrupted data: There are logical errors in the data, which triggers a hard drive error.
- Controller chip issue: A faulty IDE/SATA controller chip on the motherboard can cause communication problems with the hard drive.
- Incorrect BIOS settings: Outdated or misconfigured BIOS settings can sometimes interfere with the hard drive’s operation, though this is less common than physical failure.
- Virus attack: Malicious software can damage the file system and trigger drive errors.
- Overheating: Due to inadequate ventilation or obstructed cooling fans, the drive’s temperature is higher than its permissible range. This damages the drive and causes HP hard disk errors.
- Power surges: Unexpected power outages, improper shutdown, and voltage spikes corrupt the drive.
- Loose connection: A Loose connection can cause HP hard disk errors.
Suggestion: Back Up Your Data Immediately
As above, Hard Disk error 303 and 305 indicate the hard disk has failed and needs to be replaced. Therefore, you’d better back up your data immediately.
To do that, I highly recommend MiniTool ShadowMaker. It is Windows backup software that can help you perform file backup with ease. Here’s how to use this software:
Step 1. Connect a USB flash drive to a working computer. Then, download and install MiniTool ShadowMaker on this PC.
MiniTool ShadowMaker TrialClick to Download100%Clean & Safe
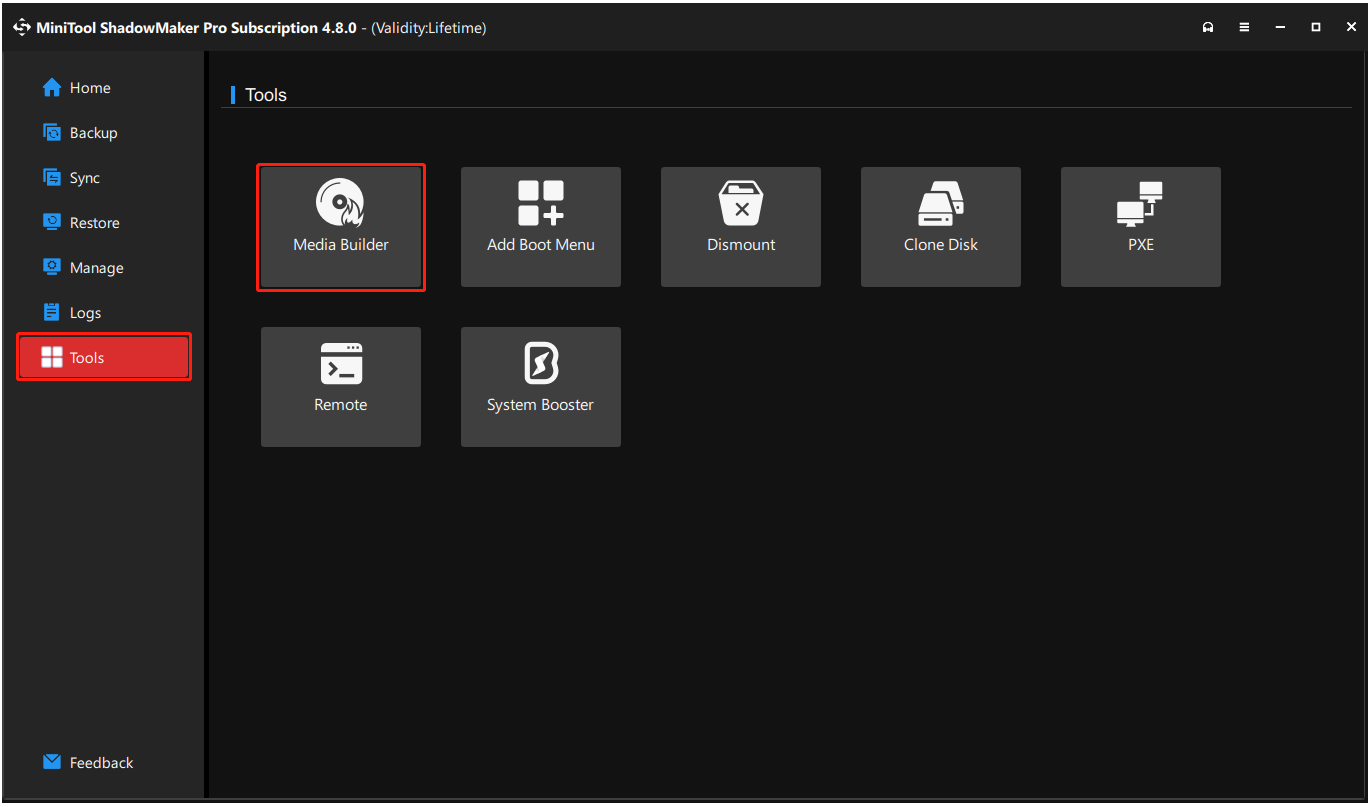
Step 2. Launch it and navigate to the Tools tab. Then, click Media Builder.
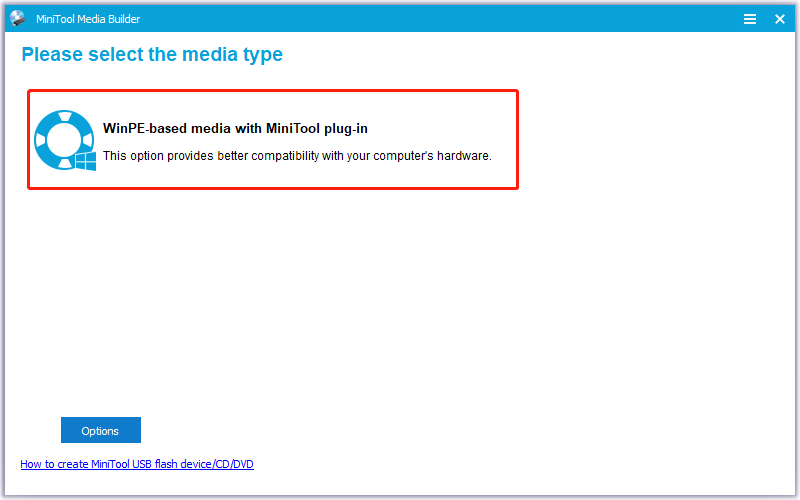
Step 3. Click WinPE-based media with MiniTool plug-in in the prompted MiniTool Media Builder window.
Step 4. Select USB Flash Drive and click Yes in the pop-up window.
Step 5. Wait for the process to complete. Then, click Finish after successfully burning.
Step 6. Connect the USB flash drive to your PC, and boot from the MiniTool USB bootable drive. Then, launch MiniTool ShadowMaker in WinPE.
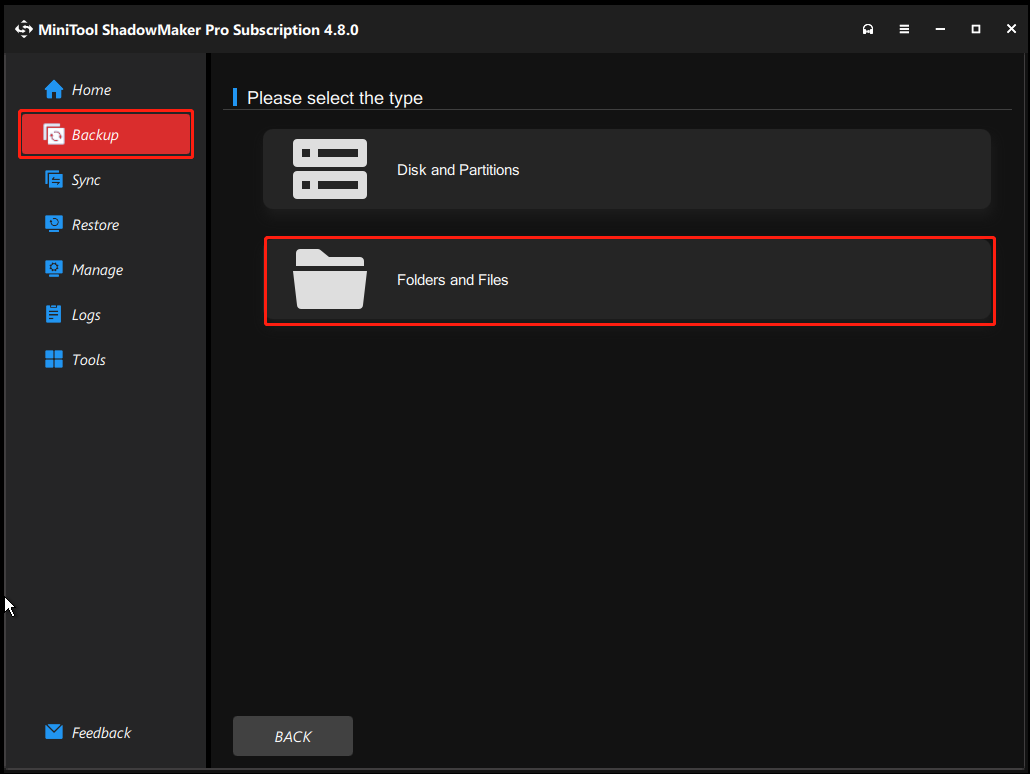
Step 7. Select Backup from the left panel, go to SOURCE, and click Folders and Files.
Step 8. Check all your important files and click OK.
Step 9. Go to DESTINATION and choose a target location to save the backup. Don’t save it to the original location or the corrupted disk.
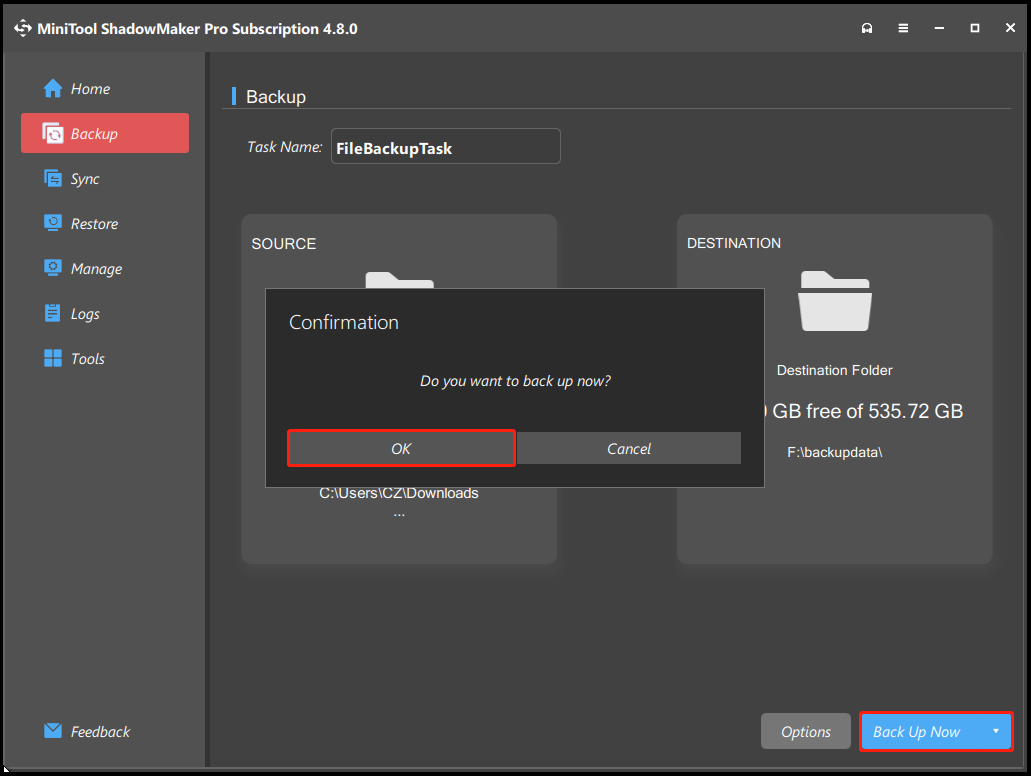
Step 10. Click the Back Up Now button at the bottom right corner and click OK in the Confirmation window.
Step 11. Once the process is completed, the backup has been created and saved successfully.
How to Fix Hard Disk 1 Quick 303 and Full 305 Errors
To fix Hard Disk error 303 and 305, you should divide the whole process into five stages: check the connection, examine the computer warranty, check disk errors, replace the drive, and reinstall the operating system.
Here’s the detailed breakdown:
Stage 1. Check Connection
Occasionally, a loose USB, SATA, or power cable can lead to booting problems and subsequent SMART errors. Reseating the cables is advisable and requires only a few minutes. Here are the detailed steps:
- Power off your HP PC and unplug it from the power source.
- Open the computer case and find the hard drive.
- Check whether the SATA or IDE cables are firmly connected to the hard drive, the corresponding ports on the motherboard, and the power supply.
- If the cables are damaged, replace them with new ones.
- Close the PC case and restart the HP computer to check if the hard disk test failed SMART error 303 or 305 has been resolved.
Stage 2. Examine Your Warranty
If your HP laptop or computer is still under warranty, contact HP support for assistance with a free replacement. To examine the HP computer warranty, use the HP Support Assistant app or the HP Warranty Support Website.
Stage 3. Check Disk Errors
If your HP laptop or computer is not under warranty, you can try some fixes to check disk errors.
Part 1. Create a Windows installation media
Part 2. Run Repair Your Computer
Step 1. Boot your PC from the USB bootable drive and then follow the on-screen instructions to access the Windows 11 Setup window.
Step 2. Set the language settings and click Next.
Step 3. Configure keyboard settings and click Next.
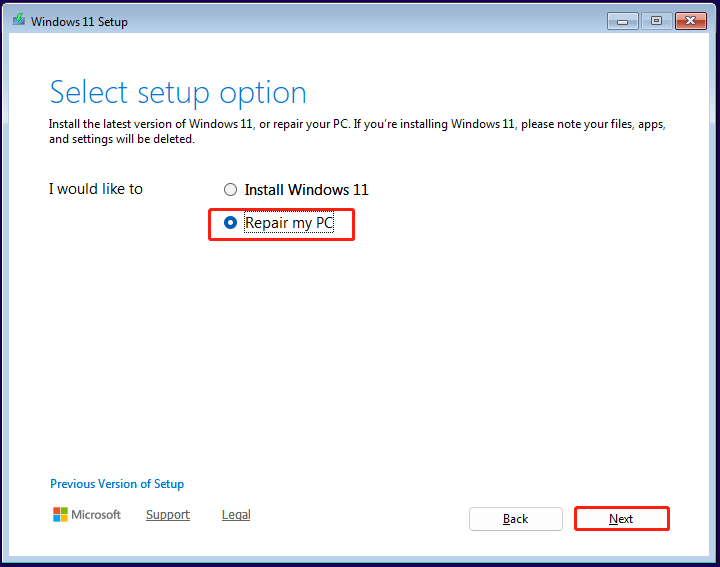
Step 4. In the Select setup option window, choose the Repair my PC option and click Next.
Step 5. In the next screen, choose your keyboard layout. Next, select Troubleshoot > Command Prompt.
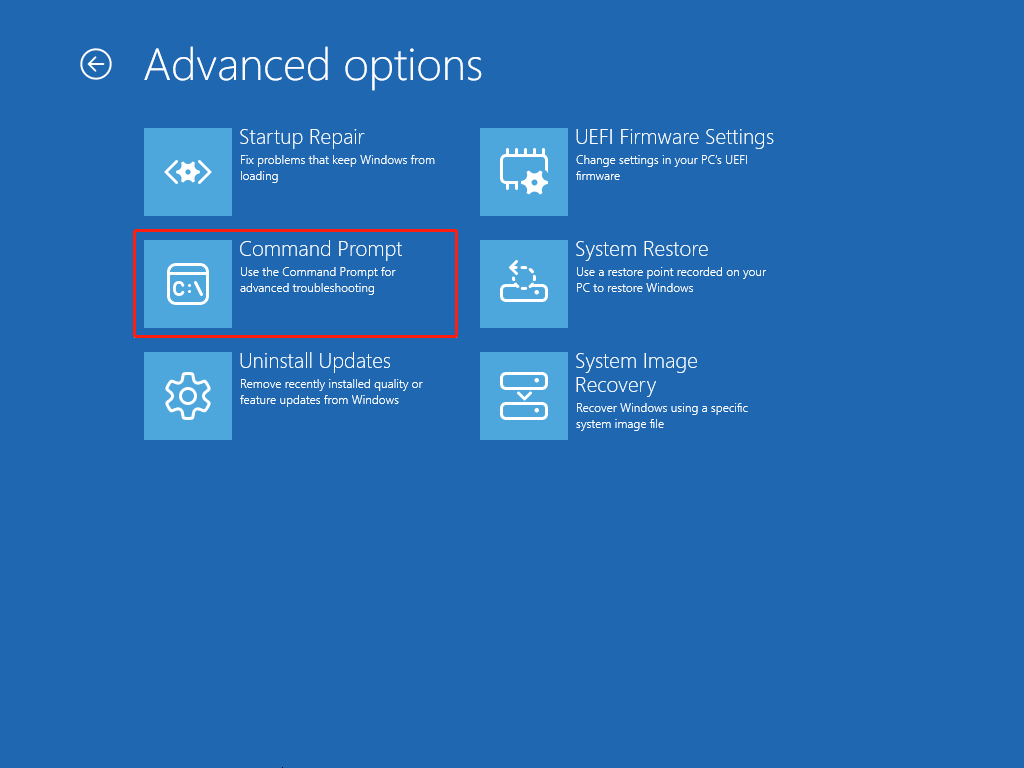
Step 6. Type “chkdsk c: /f” in the window and press Enter to check and fix logical file system errors. Then, execute the “chkdsk c: /r” to scan for file system errors and bad sectors, then attempt to recover readable information.
Once done, check if the hard disk test failed SMART error 303 or 305 has been fixed.
Stage 4. Replace the Drive
If the hard drive can’t be fixed with commands, you just need to replace it with a new one. Be aware that improper handling during disk replacement can cause more serious problems, such as damaging other motherboard components.
It is advisable to consult a professional since this is a complex process. If you choose to replace the drive yourself, please keep in mind these key precautions for hard drive replacement.
# 1. Before you begin:
You’d better back up all your important data to an external hard drive, cloud service, or another storage device before you begin. Additionally, you need to do the following preparations:
Gather your tools: Prepare all the necessary tools, like small screwdrivers and an anti-static wrist strap.
Power down completely: Shut down your computer and unplug all power cables.
Work in a suitable environment: Select a clean, well-lit area with a soft, non-carpeted surface, avoiding static-generating tables or grounding pads.
# 2. During the replacement:
After doing a good preparation, you can start the replacement. Here are some tips you should notice during this process:
- Ground yourself: Use an anti-static wrist strap and touch an unpainted metal part of the case to discharge static before handling components.
- Handle with care: Only touch the hard drive by its edges. Avoid touching the circuit board and other components.
- Be gentle: Avoid forcing any screws or parts. If something doesn’t seem to fit, re-check your steps or refer to the computer’s manual.
- Keep components organized: Label cables and take pictures of the connections to help with reassembly.
To replace the corrupted hard disk, please do the following steps:
Step 1. Power off your HP computer and unplug it from the power source.
Step 2. Open the case, find the hard drive, and unplug it from the motherboard.
Step 3. Take the new hard drive out of the packaging, install it in your PC properly, and then close the case.
Step 4. Connect the power source.
Stage 5. Reinstall the Operating System
Once you replace the drive successfully, you need to reinstall your operating system. Here are the detailed steps:
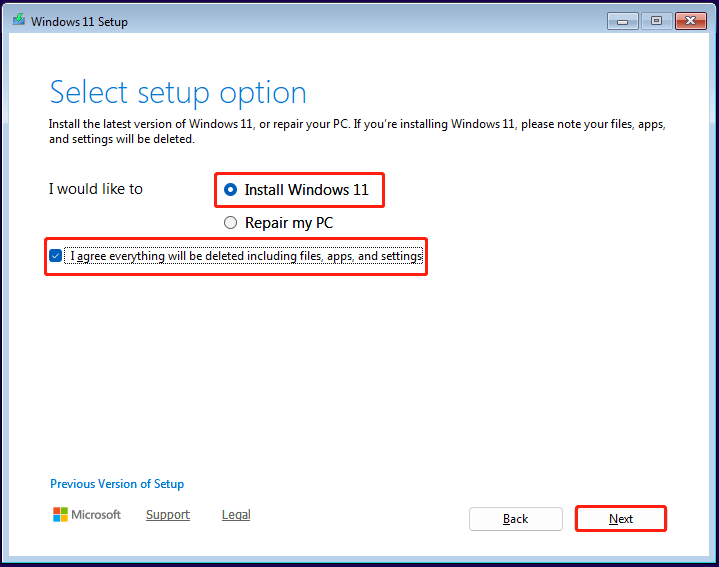
Step 1. Boot your PC from the Windows bootable media, and navigate to the Select setup option page in Windows 11 Setup.
Here, select the Install Windows 11 option, check the box of “I agree everything will be deleted including files, apps, and settings”, and then click Next.
Step 2. In the next window, enter your Windows product key under Enter Product key or click I don’t have a product key to activate Windows 11 later.
Step 3. Select the target edition and click Next. Then, read Applicable notices and license terms and click Accept.
Step 4. Select the location to install Windows and click Next.
Step 5. Click Install. Once done, you need to choose your country or region and click Yes.
Step 6. Choose your keyboard layout or input method and click Yes. Then, click Skip in the Add a second keyboard layout window.
Step 7. Name your device and click Next. After that, your computer will restart.
Step 8. Choose Set up for personal use and click Next. Then, follow the on-screen guide to sign in, create a PIN, choose your privacy settings, etc., to complete the initial setup.
Step 9. After entering the main interface of Windows 11, navigate to the motherboard manufacturer’s website to download and install the needed drivers.
Useful Tips to Avoid Hard Drive Failure in the Future
Although hard drive failure cannot be entirely prevented, as all hard drives have a finite lifespan. However, you can follow some useful tips to protect your data and extend your hard drive’s life:
- Back up data regularly: Regularly backing up your data is essential for data security. It is recommended to keep at least three copies of your data on two different types of media.
- Avoid physical shocks and vibrations: Handle computers with care, and avoid moving the computer case or laptop while the drive is spinning.
- Manage temperature and humidity: Ensure adequate airflow and cooling within your computer case to prevent overheating. Additionally, clean the dust from fans and vents regularly.
- Use a surge protector/UPS: Protect your system from power surges, spikes, and sudden power loss.
- Monitor drive health: Use the built-in S.M.A.R.T. system to check for potential issues.
- Avoid overloading the drive: Try to keep at least 20% of your total disk capacity free.
- Defragment regularly (HDDs only): Regularly defragment traditional hard drives to optimize performance and reduce mechanical strain. Don’t do that to an SSD.
Bottom Line
This post analyzes the reasons for Hard Disk 1 Quick 303 and Full 305 errors and offers a step-by-step guide to solving these errors. Follow the instructions to try the methods.
To keep data safe, we recommend running the powerful backup tool, MiniTool ShadowMaker, to back up important files.
What’s more, if you encounter issues while using this software or have any suggestions, contact us by sending an email to [email protected].
Hard Disk 1 Quick 303 FAQ
About The Author

Position: Columnist
Charlotte is a technology columnist with a strong focus on the Windows operating system, specializing in disk management, backup, and data recovery. She is passionate about analyzing computer errors, identifying root causes, and delivering practical solutions. In her free time, she stays updated on the latest developments in computer systems and hardware while continuously learning new technologies to broaden her expertise. Her writing style is clear and easy to understand, making complex technical topics accessible even to users with limited computer knowledge.
User Comments :