MiniTool explains how to make Windows 11 faster in detail. To achieve this, disable startup apps, clean up your disk, change your power mode, disable visual effects, run a malware scan, update drivers & Windows, and try other optimization tips.
Why Make Windows 11 Faster
Computer hardware and software continue to evolve, and Windows is no exception. Windows 11 introduces new features and visual enhancements designed to improve the overall user experience.
At the same time, these changes may increase system resource usage, especially on devices with limited hardware capabilities. As a result, optimizing Windows 11 can help maintain smooth performance and responsiveness.
Below are some key reasons.
- Resource intensity: Windows 11 uses more RAM and has more background processes, which can increase overall resource usage, especially on PCs with less memory.
- Security overhead: Enhanced security features, such as virtualization-based security (VBS) and BitLocker encryption, can impact performance. The influence is noticeable in CPU-intensive tasks, particularly in gaming.
- Visual effects: Animations, shadows, and transparency can exert pressure on older GPUs and CPUs, resulting in performance degradation.
- Pre-installed software: Pre-installed apps, such as OneDrive, Microsoft 365, Photos, Xbox app, and Edge, can consume system resources (RAM, CPU, and disk usage).
- Outdated hardware: Windows 11 is designed for modern CPUs. However, with proper optimizations, it can still run smoothly on older machines.
To make Windows 11 faster, follow these key steps: manage background processes, adjust system & appearance settings, perform system cleanup & maintenance, and upgrade hardware.
Follow the instructions below to maximize your productivity and enhance your experience.
#1. Manage Background Processes
Managing background processes helps significantly free up RAM and CPU usage by limiting unnecessary apps and services running in the background. This can boost overall performance and make the computer more responsive to games or work.
Option 1: Disable Startup Apps
Some programs may run in the background without your awareness, consuming system resources.
Disabling unnecessary startup apps can reduce boot time and free up CPU and RAM, improving overall system performance.
Take these steps:
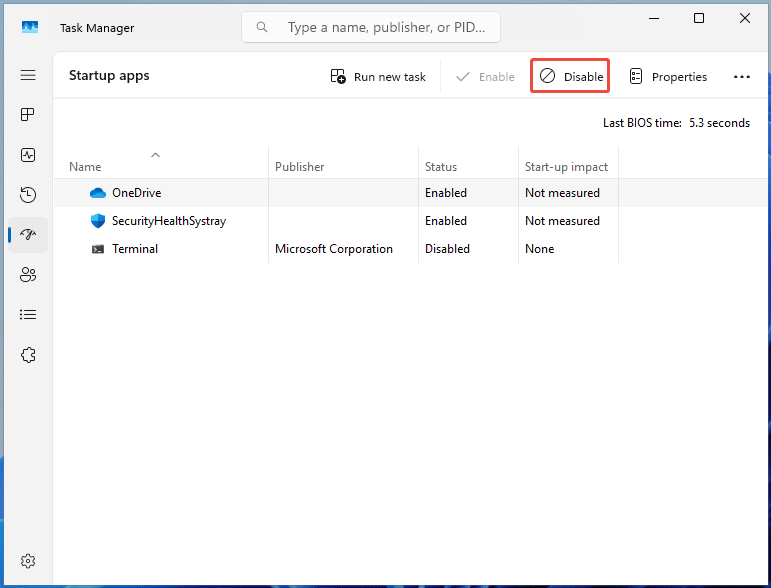
Step 1: Right-click on the Taskbar and choose Task Manager.
Step 2: Head to Start-up apps, choose the startup programs one by one, and click Disable.
Option 2: Control Background Apps
There may be a number of applications running in the background, consuming valuable system resources, thereby slowing down the system.
To make Windows 11 faster, follow the steps to manually control background apps.
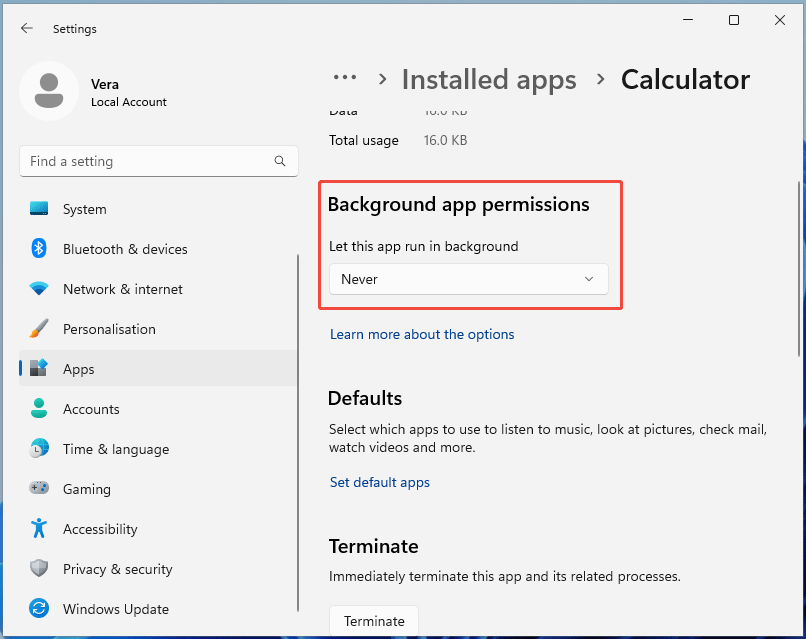
Step 1: Press Win + I to open Settings.
Step 2: Navigate to Apps > Installed apps.
Step 3: Select the program you want to control, click three dots, and choose Advanced options.
Step 4: In the Background app permissions section, select Never from the dropdown menu of Let this app run in background.
Step 5: Repeat step 3 and 4 to disable all unnecessary background processes.
Option 3: Enable Efficiency Mode
Efficiency Mode is a resource-saving feature in Windows 11’s Task Manager. It can reduce system resources for specific apps by lowering their priority. This action improves overall system responsiveness, extends battery life, and reduces heat.
Here is how to enable Efficiency Mode for some applications:
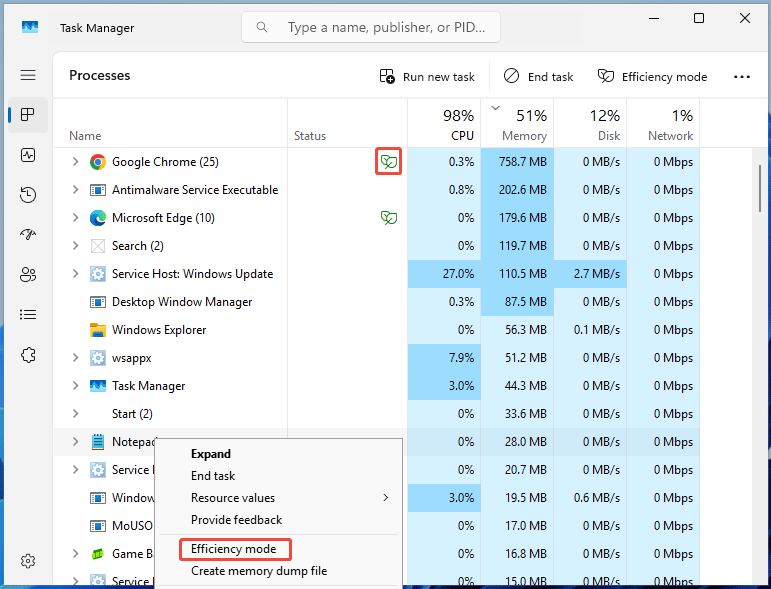
Step 1: Press Ctrl + Shift + Esc to open Task Manager.
Step 2: Under the Processes tab, right-click an eligible process and select Efficiency mode.
#2. Adjust System & Appearance Settings
In addition to managing background processes, tweaking system and appearance settings can help speed up Windows 11.
Follow the instructions to disable visual effects & transparency, limit Search Indexing, change the power option, and turn off notifications.
Option 1: Disable Visual Effects
Visual effects place a heavy load on system resources, especially on older hardware, resulting in low PC performance. To mitigate this impact, disable visual effects.
Step 1: Type advanced in the search box and click View advanced system settings.
Step 2: Choose Settings from the Performance section.
Step 3: In the Visual Effects tab, select Adjust for best performance.
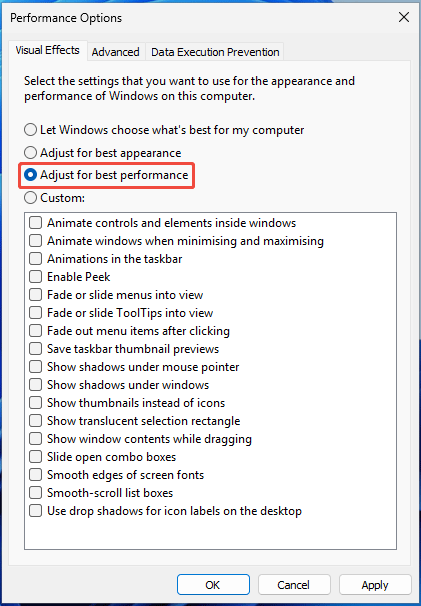
Step 4: Click Apply and OK to save the changes.
After disabling, the interface is snappier, and Windows 11 can have improved performance.
Option 2: Disable Transparency
Transparency is applied to some UI elements, such as the Taskbar, Start Menu, and Settings, in Windows 11. It provides the frosted glass effect and creates an immersive and visually appealing interface.
However, the transparency effect can increase CPU/GPU strain and cause lag.
To make Windows 11 faster on your PC, disable it.
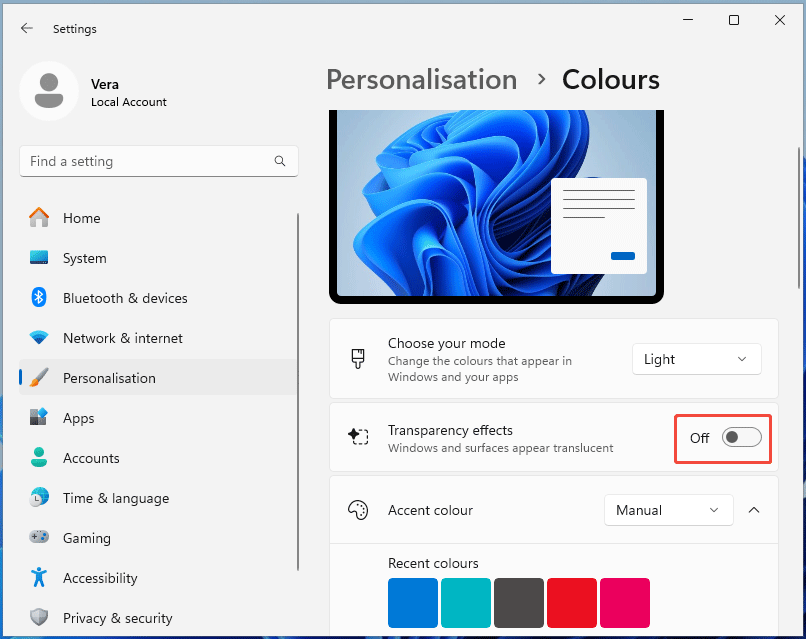
Step 1: Access the Settings page.
Step 2: Navigate to Personalisation > Colours.
Step 3: Disable Transparency effects.
Option 3: Limit Search Indexing
Search Indexing runs in the background to create a searchable database (index) of your files and folders, enabling quick searches. However, it can sometimes use high CPU and trigger system slowdowns.
Limiting indexing can reduce the indexer’s workload and allocate more system resources for other applications to speed up Windows 11.
Follow these steps:
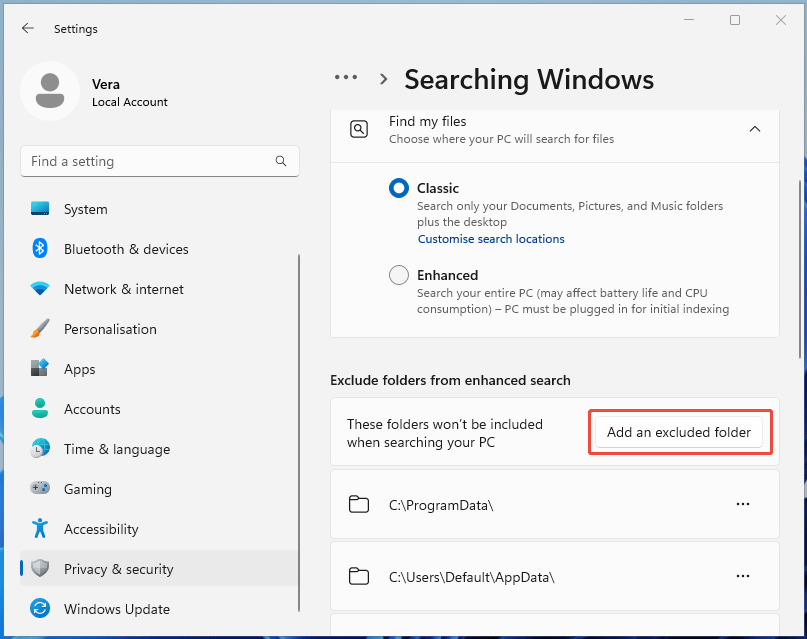
Step 1: Go to Settings > Privacy & security > Searching Windows.
Step 2: Ensure you use the Classic search mode instead of Enhanced.
In the Exclude folders from enhanced search section, click Add an excluded folder to stop specific folders or large data directories from being indexed.
Step 3: Scroll down and choose Advanced indexing options.
Step 4: Click the Modify button, deselect the entire drive, like C: or large folders you don’t want to search quickly, and choose OK.
Step 5: Select Advanced > Index Settings to customize file settings.
Then, go to File Types, choose specific extensions to index, and select an indexing method (Index Properties Only).
Step 6: Click OK to apply the changes.
Option 4: Change Power Mode
Enabling performance mode can prioritize speed over energy saving, which is ideal for demanding tasks such as video editing, 3D rendering, and gaming.
To make Windows 11 faster, change your power mode to Best performance or High performance.
Via Settings
Step 1: Head to Settings > System > Power & battery.
Step 2: Under Power mode, select Best performance.
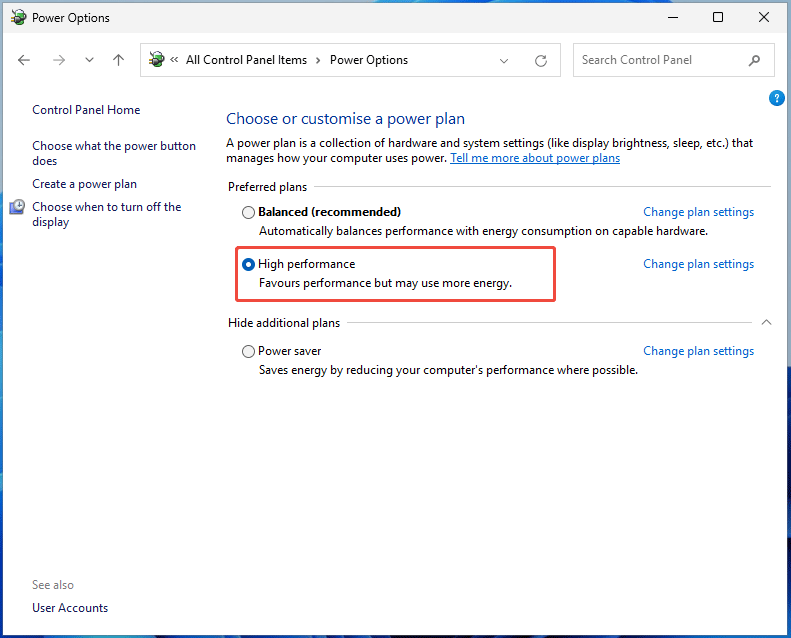
Via Control Panel
Step 1: Launch Control Panel via Windows Search.
Step 2: Select Large icons from the dropdown menu of View by.
Step 3: Choose Power Options and select High performance.
Option 5: Turn off Notifications
Windows notifications can consume system resources in the background, degrading system performance. Disabling notifications can help optimize Windows 11 for gaming and other tasks.
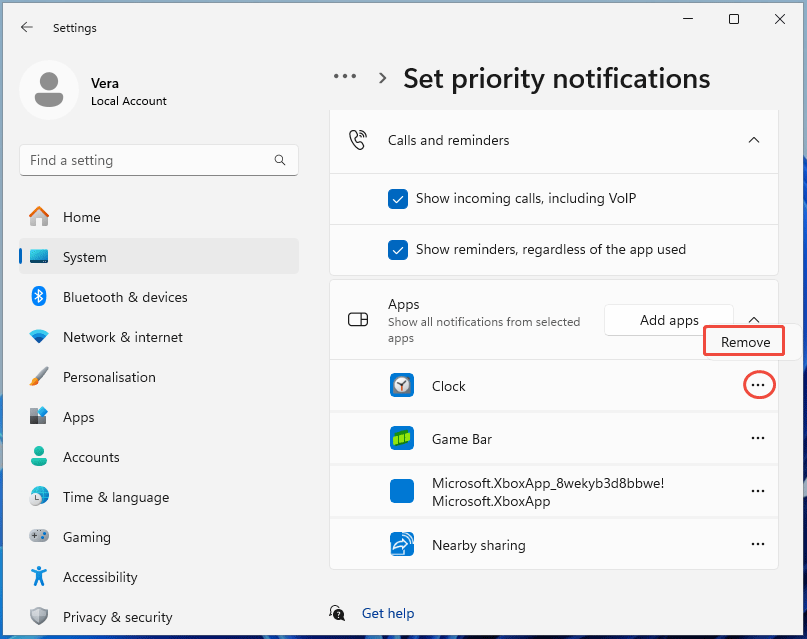
Step 1: Navigate to Settings > System > Notifications.
Step 2: Switch the toggle of Notifications to Off.
Step 3: Choose Set priority notifications, go to the Apps section, click three dots next to the app you want to disable notifications, and select Remove.
#3. Perform System Cleanup & Maintenance
To speed up your Windows 11 computer, it is necessary to clean up the disk and perform system maintenance.
Follow the steps to uninstall unwanted apps, delete temporary files with Storage Sense & Disk Cleanup, delete duplicate files, run a disk defrag, and run a malware scan.
Option 1: Uninstall Unnecessary Programs
There may be a lot of applications installed on your computer, and some run in the background, using massive system resources. To speed up Windows 11, uninstall those unused programs.
Here is how to uninstall apps:
Step 1: Launch Settings, click Apps, and select Installed apps.
Step 2: Locate the app you want to uninstall, click three dots, and choose Uninstall.
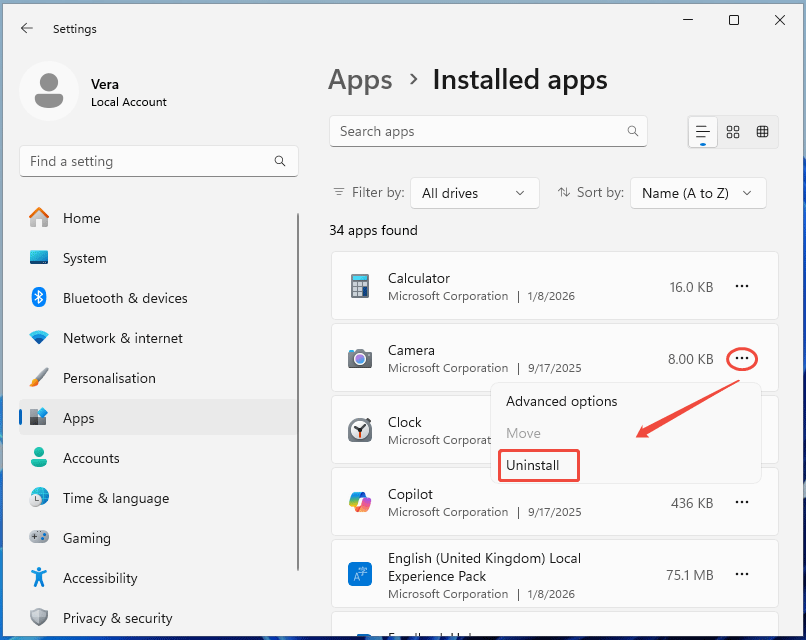
Step 3: Repeat step 2 to uninstall all the unwanted and pre-installed apps to free up system resources.
Option 2: Enable Storage Sense
Temporary files from software, browsing, and updates can accumulate over time, taking up storage and slowing down the computer.
Storage Sense is designed to automatically free up disk space by deleting unnecessary files, such as temporary data, making Windows 11 faster.
Follow these steps:
Step 1: Navigate to Settings > System.
Step 2: In Storage, ensure the Storage Sense option is On.
To configure cleanup schedules, click Storage Sense. Then, select During low free disk space from Run Storage Sense and configure when to delete files in the recycle bin.
To free up disk space immediately, choose Run Storage Sense now.
Step 3: Under Storage, click Temporary files, check the items that you wish to delete, and choose Remove files.
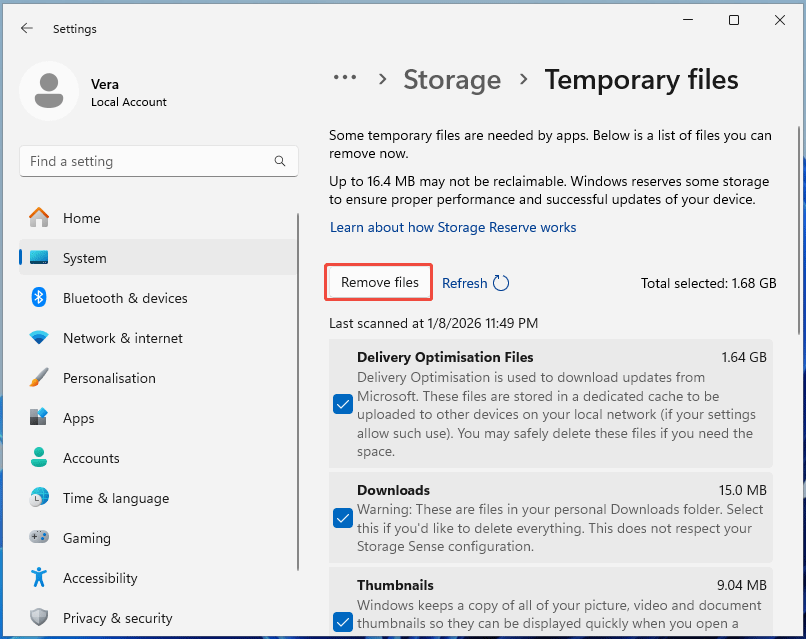
After deletion, you have a clean and faster system.
Option 3: Run Disk Cleanup
Disk Cleanup, the built-in cleanup tool in Windows, helps delete unnecessary files, including temporary internet files, Recycle Bin contents, old system files, and other cache data. This action effectively frees up storage space, greatly improving the system performance.
Learn how to make Windows 11 faster with Disk Cleanup.
Step 1: In the Windows Search box, type disk cleanup, and press Enter to launch it.
Step 2: Select C: from the dropdown menu.
Step 3: Choose the files you want to delete and click OK > Delete Files to confirm the deletion.
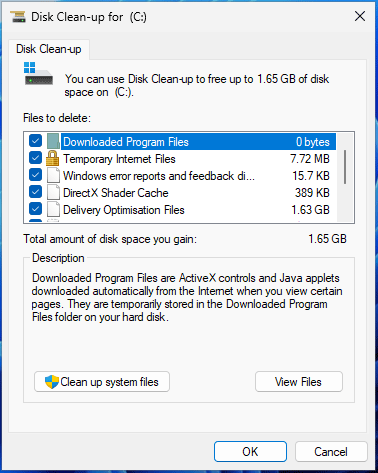
Step 4: Click Clean up system files, choose C:, select files to delete, and confirm the operation.
After deletion, the PC will obtain several gigabytes.
Option 4: Delete Duplicate Files
Accumulated duplicate files can occupy much disk space, resulting in downgraded system performance. It is highly recommended to check your computer for duplicate copies and delete them to speed up Windows 11.
For this purpose, use the third-party partition manager, MiniTool Partition Wizard. Its Duplicate Cleaner can seamlessly detect and delete duplicate files that are stored on your PC and external drives.
Here is how to run this feature:
Step 1: Download, install, and launch MiniTool Partition Wizard to access its main interface.
MiniTool Partition Wizard FreeClick to Download100%Clean & Safe
Step 2: Choose Duplicate Cleaner from the toolbar.
Step 3: Select the location you want to scan, filter the file type, and make advanced settings like minimum/maximum file size, comparison method, and some file protection configurations.
After the scan settings, click Scan Now to start a scan.
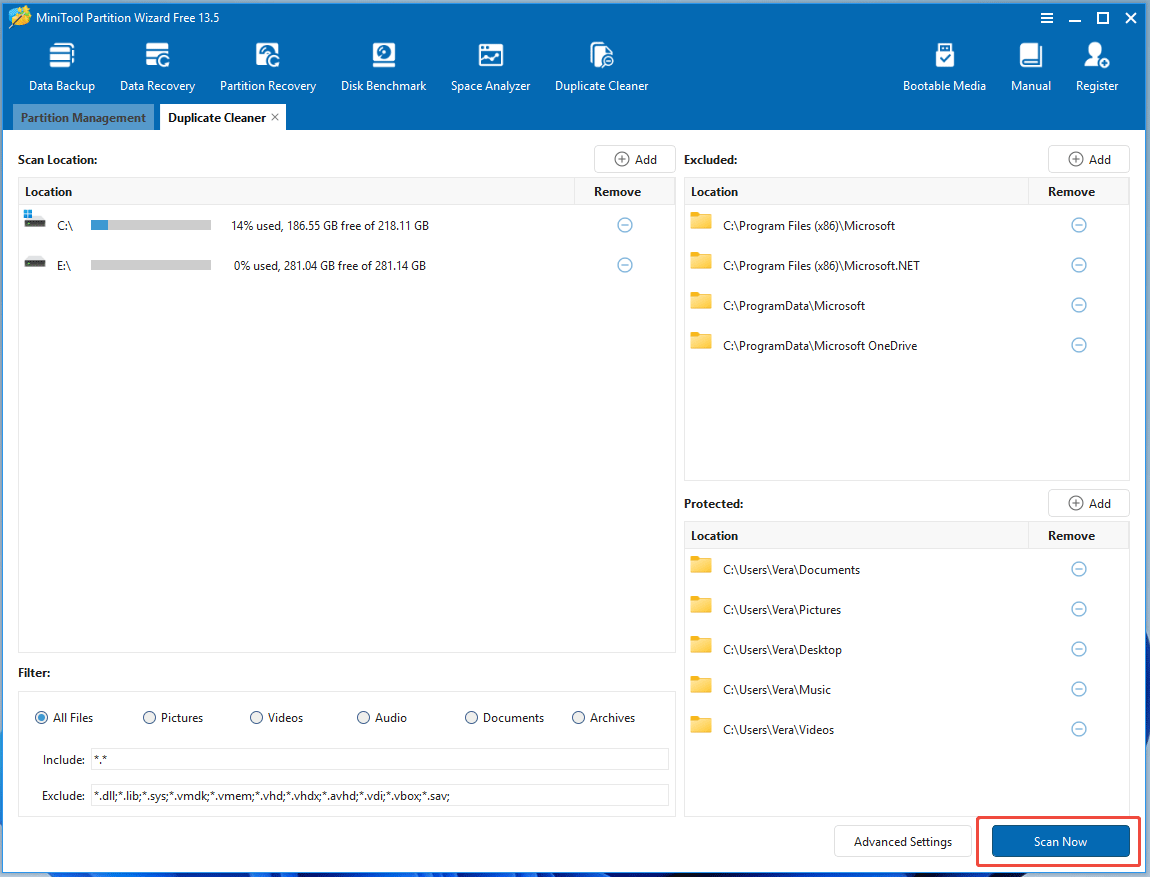
Step 4: Choose the duplicate files in the file list. Then, click the Deleted Selected Files button and select a deletion option to proceed.
Option 5: Defragment an HDD
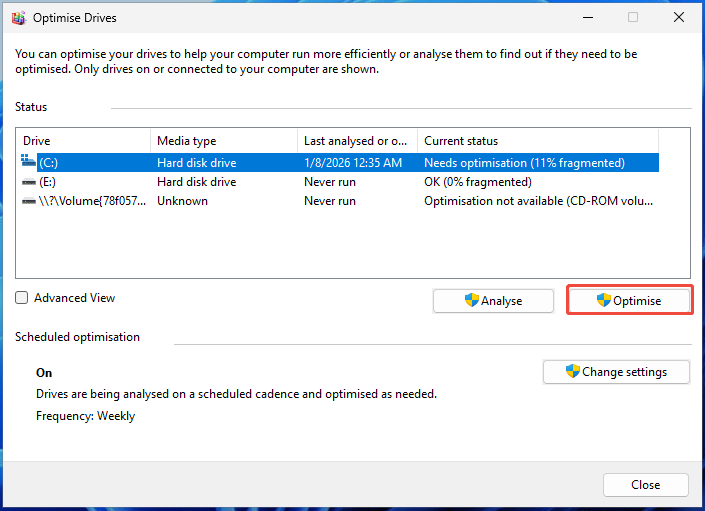
Fragmented files in a hard disk drive (HDD) can slow down read/write speeds, increase system latency, and cause apps to load slowly. Defragmenting the HDD is ideal for speeding up the Windows 11 computer.
The action can reorganize scattered data into contiguous blocks to improve file access speed and overall PC performance.
Here is how to optimize Windows 11 via a disk defrag.
Step 1: Type defrag into Search and choose Defragment and Optimise Drives.
Step 2: Select the drive that needs to be optimized and click Optimise to proceed.
Option 6: Run a Malware Scan
To make Windows 11 faster, performing a malware scan is a valid and crucial step.
Malicious software can run hidden in the background, using your RAM, CPU, and disk resources, thereby causing slowdowns. Moreover, infections can interfere with normal operations, triggering poor performance and system instability.
Follow the steps:
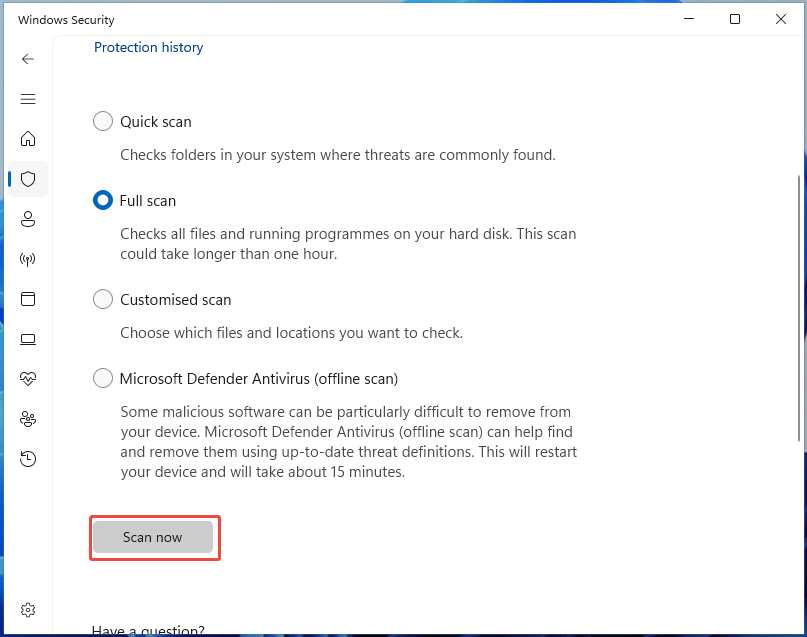
Step 1: Head to Settings > Privacy & security.
Step 2: Select Windows Security > Open Windows Security.
Step 3: Click Virus & threat protection > Scan options.
Step 4: Choose a scan method, such as Full scan, and click Scan now.
This method can take longer than one hour, as it checks all files and running programs on the hard drive.
Option 7: Disable Memory Integrity
This approach is highly recommended to optimize Windows 11 for gaming if you are a player.
Memory Integrity is a virtualization-based security (VBS) feature that creates a secure, virtual environment to isolate core system processes, protecting the PC from malware.
However, the virtualization can add CPU work and potentially cause poor performance, particularly in CPU-intensive applications.
Try disabling Memory Integrity:
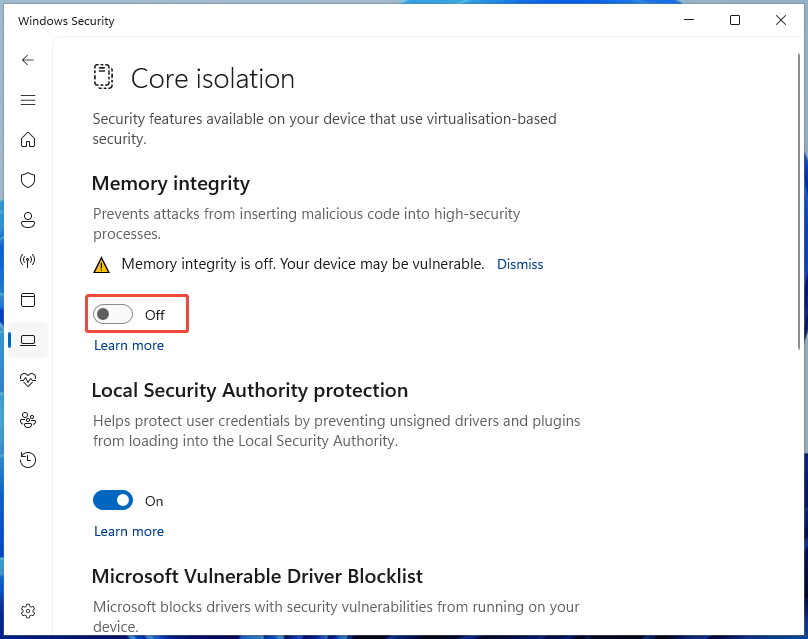
Step 1: In Windows Security, select Device security.
Step 2: Click Core isolation details and switch the toggle of Memory integrity to Off.
Option 8: Update Drivers
Outdated drivers can cause hardware to malfunction, giving rise to degraded system performance. Updating drivers is crucial for maintaining optimal system performance and stability.
To update Windows 11 drivers:
Step 1: Right-click on the Windows icon in the taskbar and choose Device Manager.
Step 2: Expand the category, for example, Display adapters or Network adapters, right-click on the device, and choose Update driver.
Step 3: Click Search automatically for drivers. Windows will search and install an available driver on the PC.
Step 4: If Windows says the best drivers are already installed, visit the manufacturer’s website, download a proper driver, and install it.
Option 9: Check Windows Updates
Windows updates include crucial security patches, bug fixes, and performance improvements. Installing available updates can keep the system secure and stable.
Here is how to optimize Windows 11 through system updates:
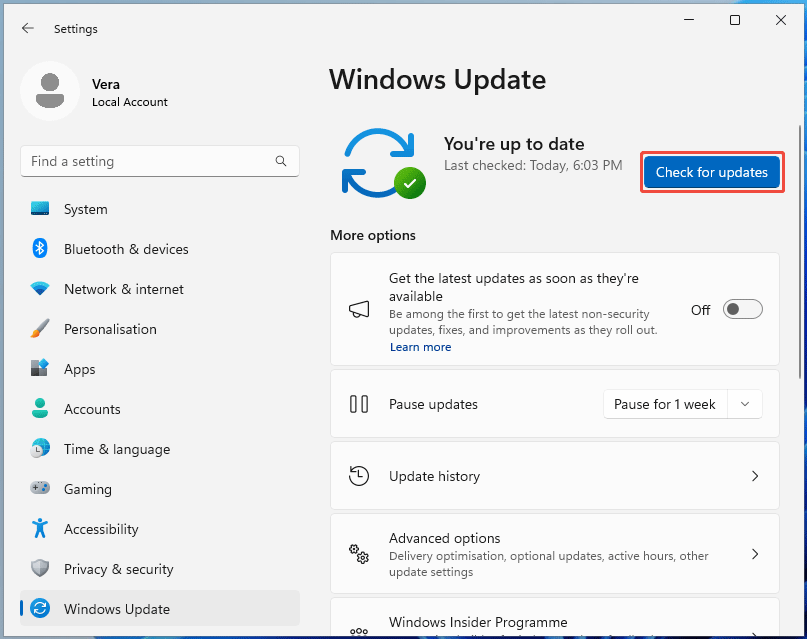
Step 1: Open Settings and choose Windows Update.
Step 2: Click Check for updates to begin the checking process.
Step 3: Follow the on-screen prompts to download and install updates on your computer.
After updates, Windows 11 may have improved performance.
#4. Upgrade Hardware
Additionally, consider hardware upgrades to make Windows 11 faster if the software optimizations cannot dramatically enhance the system performance. This involves upgrading to an SSD and increasing RAM.
Option 1: Upgrade to an SSD
Windows 11 can benefit significantly from an SSD rather than a traditional hard drive. By contrast, an SSD offers vastly superior read and write speeds, bringing about faster boot times, quicker app loading, and improved overall responsiveness.
If you install the system in an HDD, upgrading to an SSD is perfect. For this, run the hard drive cloning software, MiniTool ShadowMaker, to clone the existing system disk to an SSD.
Its Clone Disk feature supports cloning HDD to SSD and moving Windows to another drive.
Here are the steps for disk cloning:
Step 1: Connect a new SSD to the computer via a USB adapter.
Step 2: Download, install, and open MiniTool ShadowMaker. Then, use a license key to upgrade to Pro or higher.
MiniTool ShadowMaker TrialClick to Download100%Clean & Safe
Step 3: Head to the Tools tab and choose Clone Disk to proceed.
Step 4: Select your system disk as the source drive and the new SSD as the target drive. Then, click Start to begin cloning.
After cloning, open the computer case, remove the old disk, put the new SSD into the original slot, and boot Windows 11 from the cloned drive.
Alternatively, if you want to keep both the HDD and SSD, insert the SSD into the corresponding drive slot. Then, change the boot order in BIOS to run the system from that SSD.
The guide for disk copy introduces what you should do after disk cloning in detail.
Option 2: Increase RAM
Windows 11 can slow down mainly due to insufficient RAM usage. If you have a budget, consider adding an additional RAM stick to your computer or replacing the current RAM stick with a compatible one.
Be careful during the RAM installation since improper handling can damage hardware.
Learn how to upgrade or replace RAM.
Conclusion
It is vital to optimize the computer to improve gaming performance, enhance system responsiveness, and reduce resource consumption. From this post, you can find several tips to make Windows 11 faster. Try them to obtain optimum system performance.
If you encounter some issues when using MiniTool Partition Wizard to delete duplicate files or running MiniTool ShadowMaker to clone an HDD to SSD, contact us. It is available to send an email to [email protected].
Make Windows 11 Faster FAQ
1. Adjust your power plan
2. Disable unnecessary startup apps and background processes
3. Enable Turbo Boost in BIOS
4. Disable visual effects
5. Update BIOS
6. Improve CPU cooling
7. Overclock CPU
About The Author

Position: Columnist
Vera has been working at the MiniTool Team for over 10 years as a technical editor and content writer. She mainly focuses on disk and partition management, data recovery, Windows backup and restore, and PC troubleshooting. Through in-depth software testing and hands-on experience, she has helped users solve a wide range of computer problems and better protect their data on Windows devices.
User Comments :