Is Surface Pro X SSD upgradeable? Why upgrade SSD in Surface Pro X? How to upgrade the SSD? MiniTool gives a complete guide on the Surface Pro X SSD upgrade including its feasibility, the reason, preparations, and detailed steps.
Is Surface Pro X SSD Upgradeable?
Microsoft Surface has several models, such as Surface Pro 3/4/5/6/7/8/9, Surface X, Surface Studio, and more. Surface Pro X comes with a custom Microsoft SQ1 or Microsoft SQ2 ARM processor, 8 GB or 16 GB RAM, and 128 GB, 256 GB or 512 GB of storage. Sometimes you need to consider a Surface Pro X SSD upgrade.
On some devices like Surface Pro 5/6, the SSD is soldered directly onto the motherboard, making the SSD non-upgradable although the disk space is too small. In terms of “an SSD upgrade in Surface Pro X”, it is possible since the solid-state drive (SSD) is removable.
Why Upgrade SSD in Surface Pro X?
When it comes to Surface Pro X SSD upgrade, you may consider two main reasons – disk space and speed.
You want to gain more storage space: As stated above, the Surface device offers 512GB of maximum storage. If you deal with some intensive tasks on the PC, 512GB is also not enough. When considering the cost, you may purchase Surface Pro X with 128GB or 256GB and then buy another large SSD to replace the original one at a low price when the space is running out.
You want a slightly faster SSD: As per today’s standards for performance, the SSD in Surface Pro X is at best middle and low grade. To gain up to 500MB/s sequential read and write speed, consider a Surface Pro X SSD upgrade.
Which SSD for Surface Pro X to Choose
To successfully upgrade Surface Pro X SSD, you need to choose a proper SSD for the device but it is an intractable thing. It is different from buying a standard laptop SSD since this Surface PC uses an M.2 2230 PCle SSD (likewise, Surface Pro 8) that is smaller than most M.2 SSDs. The market for such SSDs is much tinier and sometimes you can find some on Amazon but not always available.
Then, which SSD is recommended for Surface Pro X? You can choose a series of Toshiba/Kioxia BG4 M.2 2230 PCIe SSDs that include 256GB, 512GB, and 1TB of storage. Pricing at the time of writing is around $139.00 for 1TB and $53.99 for 512GB. Purchase one as per your need.

Other Tools to Need
It is essential to prepare some tools for the Surface Pro X SSD upgrade besides an M.2 2230 SSD, including:
- T3 Torx3 screwdriver
- SIM ejection tool or paperclip
- A USB thumb drive that supports Type-C and 16GB of space or more

Recommended: Back up Crucial Files
Generally speaking, you have two options while talking about Surface Pro X SSD upgrade – replace the SSD and clean install Windows on the new SSD; clone the entire system disk to a new SSD and replace the SSD.
If you choose the first way, pay attention to data loss – make sure that you have backed up all your important files, documents, videos, and pictures before removing the old SSD. To back up PC data, we suggest running MiniTool ShadowMaker, an excellent and powerful backup software for Windows 11/10/8.1/8/7.
For file backup, system backup, disk backup, and partition backup, MiniTool ShadowMaker plays an important role. Moreover, it can effectively sync your files & folders and clone SSD to larger SSD.
To try it for data backup, download its Trial Edition via the button below now.
MiniTool ShadowMaker TrialClick to Download100%Clean & Safe
Step 1: Connect an external drive to your PC and run MiniTool ShadowMaker Trial Edition.
Step 2: After entering its main interface, click Backup. Then, tap on SOURCE > Folders and Files, choose all the files that need to be backed up, and click OK.
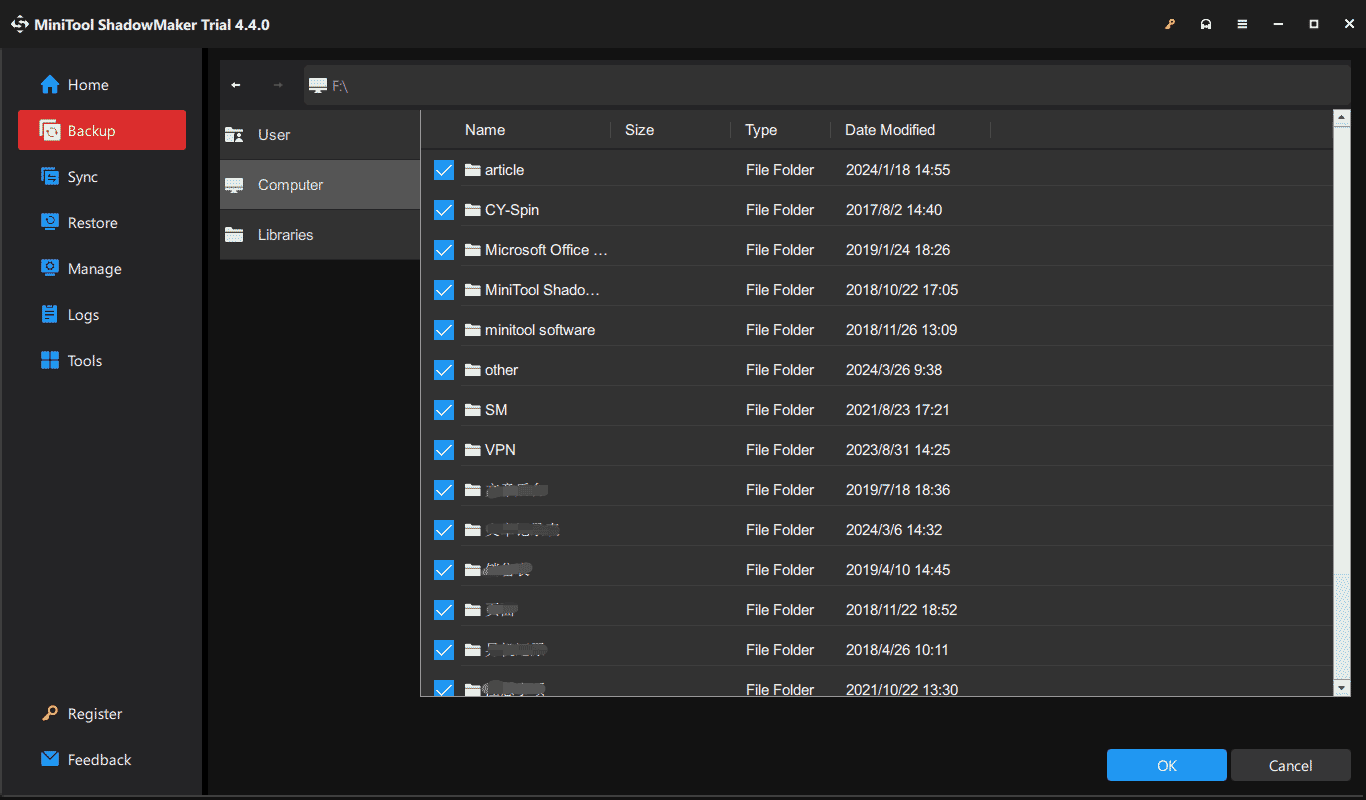
Step 3: Go back to Backup and click DESTINATION, then choose your external drive to save the image file.
Step 4: Finally, start the backup process by hitting Back Up Now.
Next, you can try to perform a Surface Pro X SSD upgrade by following the step-by-step guide.
Upgrade SSD in Surface Pro X via Windows Clean Install
If you focus on system performance, you can choose to clean install Windows, which can help to remove any accumulated junk files, installation files, temporary files, as well as some corruptions, errors & viruses. After replacing an old SSD, the new one doesn’t include an operating system and you need to reinstall the system. Then, reinstall some necessary apps and move data back to the PC.
See how to upgrade SSD in Surface Pro X in this way:
Step 1: To easily install Windows after replacing your SSD, you should prepare a recovery drive in advance and the simplest way is to load the official Surface Pro X recovery files to a USB drive. This can offer all the necessary drivers for Surface Pro X.
1. Connect a USB flash drive to your Surface and format it to FAT32.
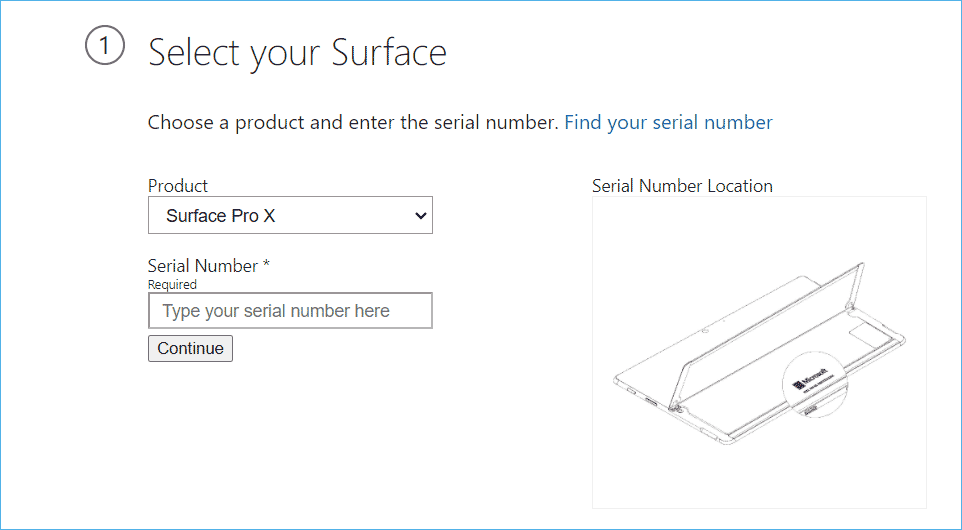
2. Go to the Surface Recovery Image Download page.
3. Choose Surface Pro X, enter your serial number, and click Continue to download a recovery image.
4. Type Create a recovery drive in the search box and open this feature.
5. Uncheck Back up system files to the recovery drive, click Next, choose your USB drive, and hit Next > Create to get a recovery drive.
6. Extract all the recovery files from the downloaded recovery image, copy them to the USB drive, and choose to replace the files in the destination.
7. Eject your USB drive.

Step 2: Swap the SSD in your Surface Pro X.
1. Shut down your device.
2. Open the rear SSD panel with a SIM tool.

3. Remove the single screw that holds in the SSD using a T3 Torx screwdriver.
4. Remove the small SSD from the M.2 slot.
5. Put your new and large SSD in the original place and secure it using a single screw.
6. Close the back lid.
Step 3: The last step of the Surface Pro X SSD upgrade/replacement is to reinstall Windows on the PC. Now, see how to reinstall Windows 11/10:
1. Connect your USB recovery drive that has been created beforehand to your Surface Pro X.
2. Press and hold the Power and Volume down buttons at the same time, then only release Power when seeing the Surface logo on the screen.
3. Keep holding Volume down for 10 seconds until the recovery menu appears.
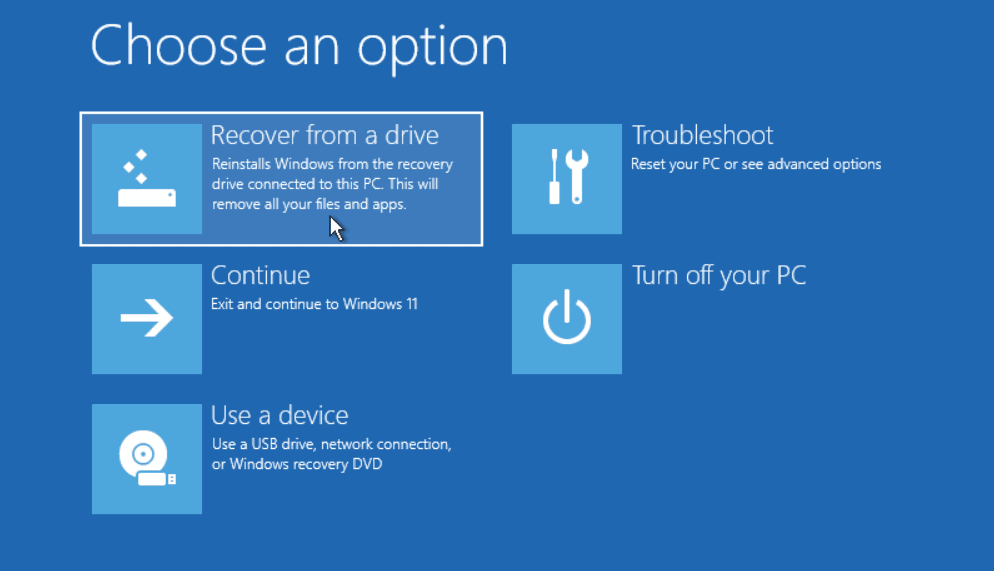
4. Choose your language from the Windows recovery menu.
5. Choose Recover from a drive under Choose an option.
6. Choose Just remove my files or Fully clean the drive and then finish the rest operations as per the prompts.
Now, you have completed the Surface Pro X SSD upgrade. This way requires many steps and you should be cautious to follow the instructions above for Surface Pro X SSD replacement.
If you are looking for a simple way to upgrade the SSD in your computer, use the disk cloning method, and let’s explore how to do it.
Also read: Want to Expand the Storage on Surface Pro 9? Here Is a Guide
Surface Pro X SSD Upgrade via Disk Cloning
To clone an SSD to another SSD, you need to connect the target SSD to your computer first. Since Surface Pro X SSD uses an M.2 2230 form factor, you should prepare a proper M.2 SSD NVMe SSD enclosure adapter to create a connection. You need to pay some money for this.
Speaking of hard drive cloning, we also recommend using MiniTool ShadowMaker. It supports cloning HDD to SSD and cloning a small SSD to a large one. If you want to perform sector by sector cloning, this cloning software can satisfy your need.
After the cloning, replace the old SSD with the new one, and then you can easily boot Surface Pro X from the large SSD without reinstalling Windows and apps.
To upgrade Surface Pro X SSD via the cloning method, get MiniTool ShadowMaker Trial Edition. Before the last step, you need to register this software using a license. For data disk cloning, the clone feature is fully free.
MiniTool ShadowMaker TrialClick to Download100%Clean & Safe
Step 1: After connecting the new M.2 2230 SSD to your computer using an enclosure adapter, launch MiniTool ShadowMaker and click Keep Trial to try the Trial Edition.
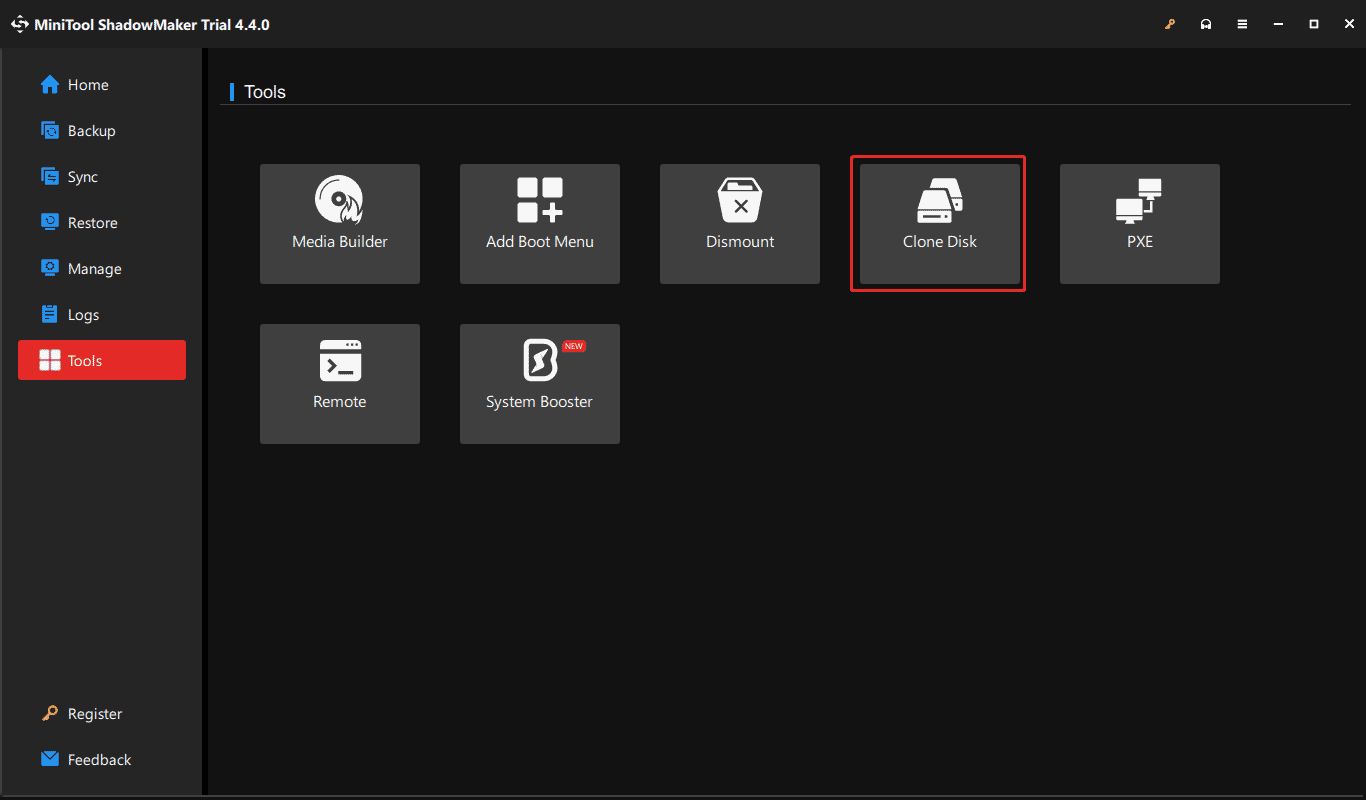
Step 2: Tap on Tools from the left pane and then click Clone Disk to continue.
Step 3: If you want to make some settings for the cloning, click Options. To perform sector-by-sector cloning, go to Disk clone mode and check Sector by sector clone. By default, MiniTool ShadowMaker uses a new disk ID for the target SSD to ensure a successful boot, so don’t change it.
Step 4: Choose the source disk (old SSD in Surface Pro) and target disk (new SSD). Then, click Start. For system disk cloning, you are required to register MiniTool ShadowMaker. Then, it begins cloning a small SSD to a large SSD.
Once cloning completes, you can shut down your Surface device, remove the original SSD, and put the new SSD in place. The detailed steps of swapping your Surface Pro X SSD can be found in the Upgrade SSD in Surface Pro X via Windows Clean Install part.
Till now, you have finished the Surface Pro X SSD upgrade without reinstalling Windows via disk cloning. Compared to the first way, this method is quite easy but you need to purchase an M.2 SSD enclosure adapter, which may be not economical. Just choose the proper way as per your actual situation.
Final Words
Is your SSD too small to store files in Surface Pro X? Want to gain improved SSD performance? You can consider a Surface Pro X SSD upgrade, which is possible.
Given that the SSD of this device uses an M.2 2230 form factor, prepare a similar solid-state drive like Toshiba/Kioxia BG4 M.2 2230 PCIe SSD with 1TB or 512GB. Then, perform a clean installation or disk cloning for Surface Pro X SSD replacement/upgrade by following the instructions above. Later, you have much storage space and the performance also greatly improves.
Do it when needed.
Surface Pro X SSD Upgrade FAQ
About The Author

Position: Columnist
Vera has been working at the MiniTool Team for over 10 years as a technical editor and content writer. She mainly focuses on disk and partition management, data recovery, Windows backup and restore, and PC troubleshooting. Through in-depth software testing and hands-on experience, she has helped users solve a wide range of computer problems and better protect their data on Windows devices.
User Comments :