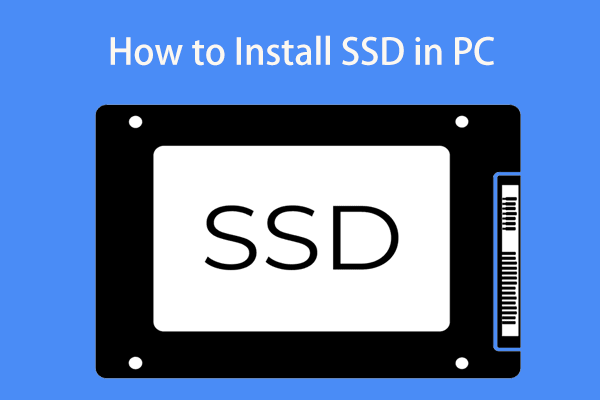
Surface Pro 8 Upgrade SSD to a Larger or Faster One
Surface Pro 8 is an excellent and the first consumer laptop-to-tablet PC produced by Microsoft that is based on the Intel Evo platform for i5 and i7 options. It aims at lighting up the best of Windows 11. Surface Pro 8 comes with the most significant and welcomed changes, for example, Thunderbolt 4 ports, 120Hz refresh rate, and the arrival of a portable SSD.
If you want to upgrade the SSD of Surface Pro 8 to a larger one (you want 512GB or even 1TB) or a slightly faster SSD, it is allowed. And the operation is not simple but you can make the thing easier if you follow the instructions here.

Best SSD for Surface Pro 8
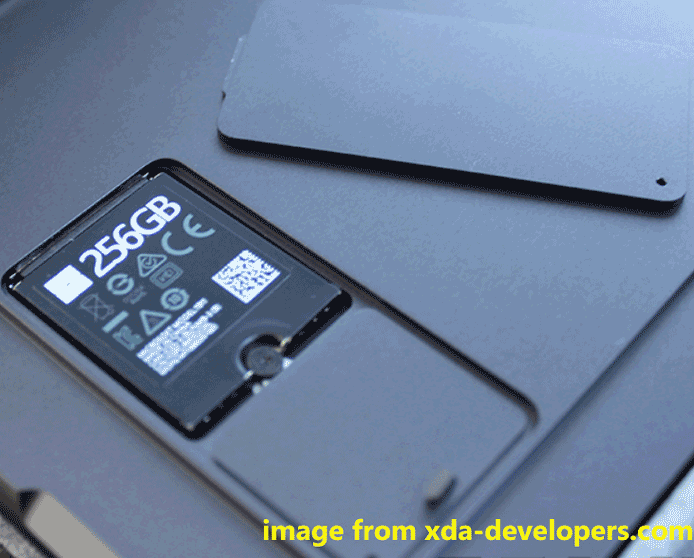
Before the Surface Pro 8 SSD upgrade, you need to prepare an SSD to replace the built-in one in the laptop. Pay attention to the SSD factor since the SSD of this laptop uses a 2230 design which is the only size it fits.
Which SSD should you purchase for Surface Pro 8? The Toshiba/Kioxia BG4 M.2 2230 PCIe SSD series including 256GB, 512GB, and 1TB are commended by many users. You can get one from eBay or Amazon. In addition, Samsung and SanDisk M.2 2230 SSDs are also recommended. Just search for one in Google Chrome and purchase it.

In addition to an M.X 2230 SSD, there is some other preparatory work:
- SIM ejection tool or paperclip
- T3 Torx3 screwdriver
- At least 16 GB USB flash drive that supports USB Type-C
Suggestion: Back up Your Important Files
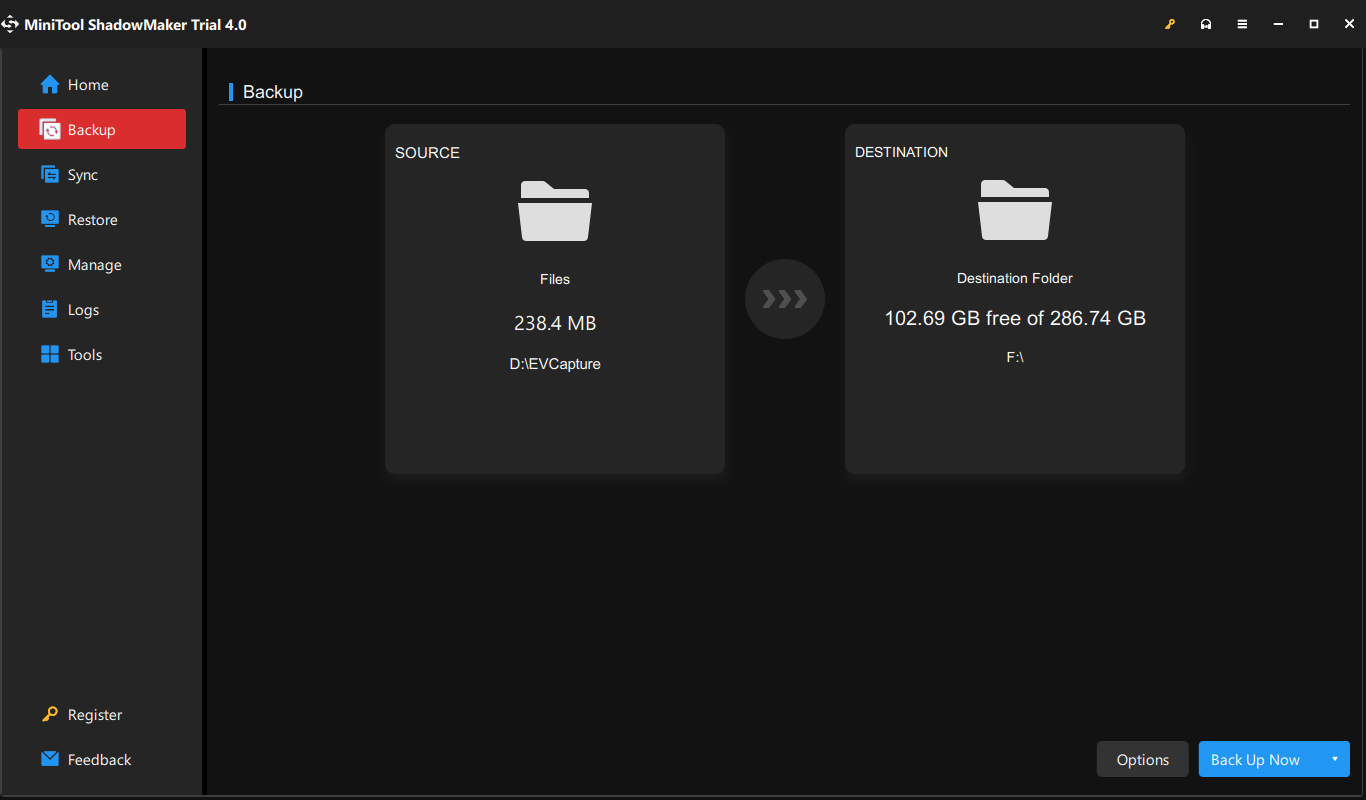
According to users, you had better back up all your vital files, photos, videos, and documents since the following upgrade or replacement of an SSD can lead to data loss. In terms of Windows 11 data backup, you can choose multiple ways, for example, back up your personal files to a cloud storage service like OneDrive, run Windows Backup and Restore to back up files, or use a professional file backup software – MiniTool ShadowMaker. Here, we recommend the last one.
As a backup program, MiniTool ShadowMaker allows you to backup up files, folders, disks, partitions, and partitions. With it, you can clone the entire hard drive to another disk and sync your folders & files. To back up your important data, click the download button below to get MiniTool ShadowMaker Trial Edition. Then, install it on your Windows 11 PC for backup.
MiniTool ShadowMaker TrialClick to Download100%Clean & Safe
Step 1: Launch this Windows 11 backup software.
Step 2: In the Backup interface, choose the files you want to back up and select a target path.
Step 3: Click Back Up Now to start the backup.
To know more details on Windows 11 backup, refer to these two posts.
- Best Windows 11 Backup Software for PC System & Data Protection
- How to Back up Windows 11 (Focuses on Files & System)?
Next, it is time to run the Surface Pro 8 SSD upgrade. How to upgrade Surface Pro SSD? The operations required some steps and let’s look through them one by one.
Steps of Microsoft Surface Pro 8 SSD Upgrade
Step 1: Make a Windows 11 Recovery Drive for Surface Pro 8
Since there is no operating system, you need to reinstall the Windows 11 system after you upgrade Surface Pro 8 SSD. One simple way is to get a Windows 11 recovery drive via the official Surface recovery image. This can offer all the necessary drivers for the Surface and doing that can restore the Surface to factory settings.
1. Visit the Surface Recovery Image Download page.
2. Scroll down this page, choose Surface Pro 8, enter the serial number (it can be found near the kickstand), and click Continue.
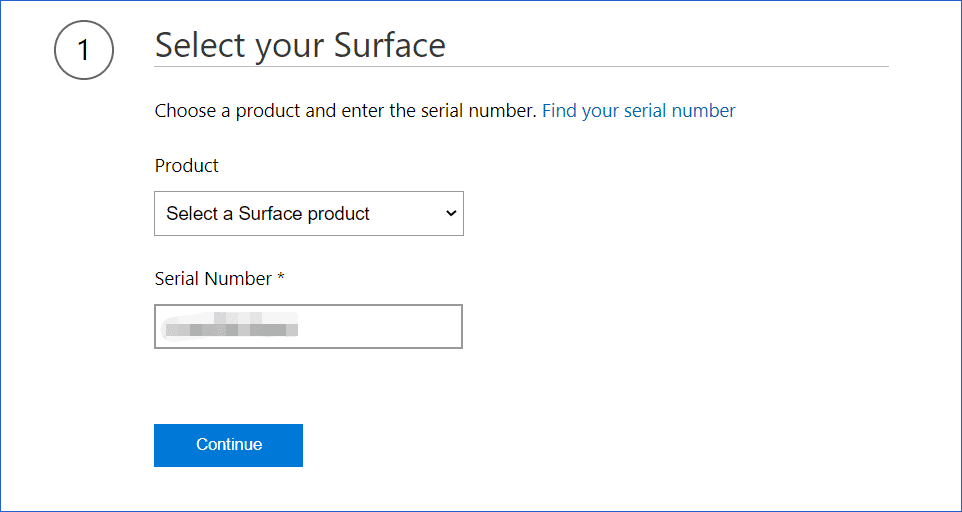
3. Download the recovery image. It is a .zip file.
4. Connect your USB flash drive to the Surface and format it to FAT32.
5. Type recovery drive to the search box of Windows 11 and click Create a recovery drive.
6. Uncheck the box of Back up system files to the recovery drive.
7. Select the USB drive and click Next > Create.
8. Click Finish after the recovery drive is prepared.
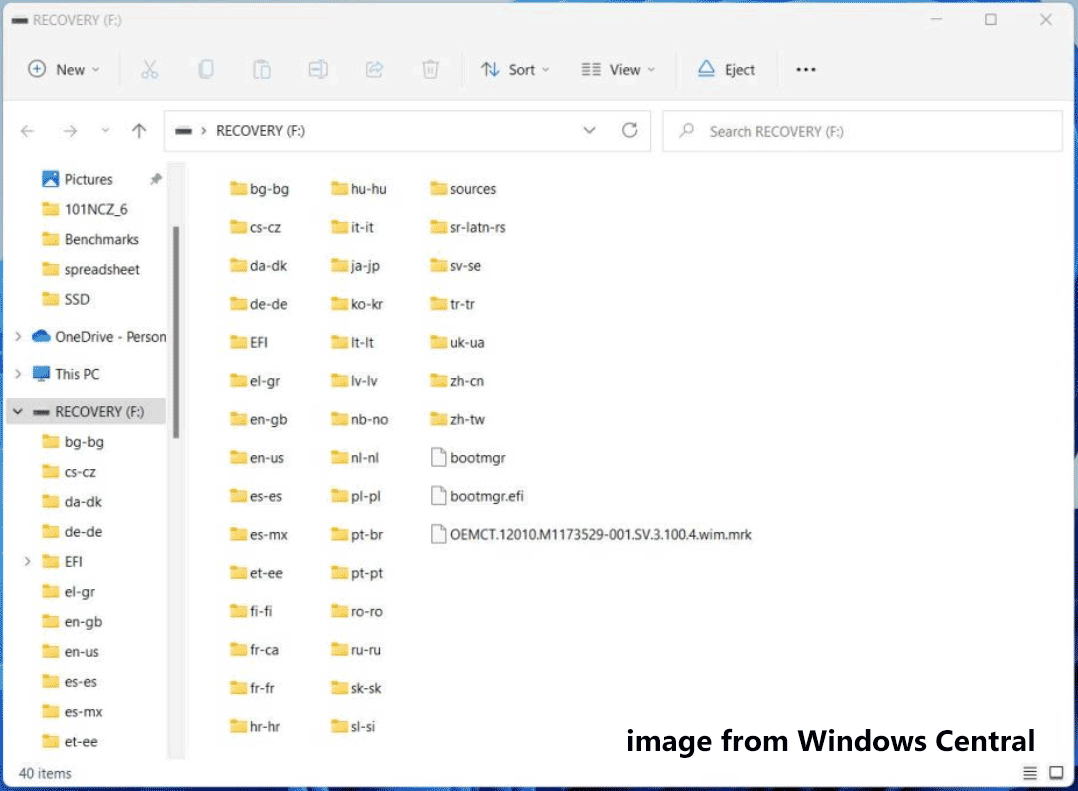
9. Extract all the contents from the zip file you have downloaded and copy all the recovery files to your USB drive, as shown below. Replace the files in the destination. After that, eject your USB drive and put it to the side.
Step 2: Swap Surface Pro 8 SSD
1. Turn off your Surface.
2. Use the SIM tool or paper clip to open the rear SSD panel/cover on the left side under the kickstand.
3. Remove the screw holding the SSD in place using a T3 Torx screwdriver.
4. Slide the old SSD out of its slot.
5. Put the new SSD in the original place and hold it in place.
6. Put the cover back and then you can set up your Surface Pro 8 as a new computer.
Step 3: Reinstall Windows 11 on Surface Pro 8
After you replace/upgrade Surface 8 Pro 8 SSD, the last thing is to reinstall Windows 11 since no system is installed on the new SSD. What should you do? Follow the instructions below.

1. Plug your Surface Pro 8 into the AC power.
2. Plug your USB recovery drive into the Type-C port of this laptop.
3. Press the Power button while holding down the Volume Down button.
4. Only release the Power button when you see the Surface logo.
5. Keep holding Volume Down (-) key for 10 seconds until you see the recovery options.
6. Choose the language and keyboard layout you want from the blue Windows recovery menu.
7. Go to Troubleshoot and tap on the option of Recover from a drive.
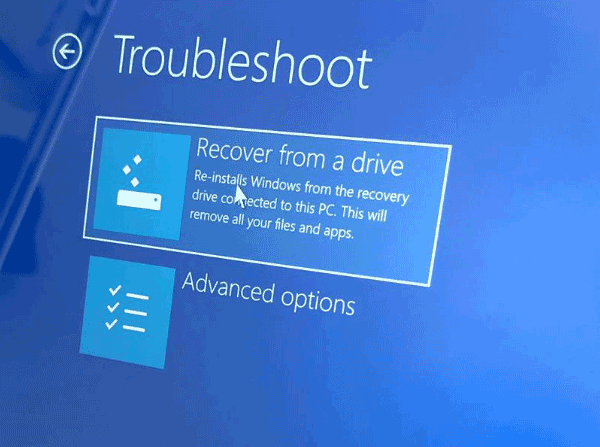
8. Select either Just remove my files or Fully clean the drive.
9. Follow the on-screen wizards to finish the process of Windows 11 reinstallation.

Not Recommended: Clone Surface Pro 8 SSD to Another One for Disk Upgrade
Now, these are all the steps for the Surface Pro 8 SSD upgrade. This method requires you to create a Windows 11 recovery drive firstly, swap the SSD and reinstall Windows 11. The operations are a little complicated. Then, you may ask: is there any way to upgrade Surface Pro 8 SSD without reinstalling Windows 11? Can you try disk cloning and directly boot the Surface PC from the cloned SSD?
The answer is not easy and difficult to operate. When searching for “Surface Pro 8 SSD upgrade” in Google Chrome, there is no search result about the disk cloning.
Since the SSD of Surface Pro 8 uses the M.2 2230 form factor and its replacement should also meet this specification. Besides, a proper M.2 SSD NVMe SSD enclosure adapter is required to use the M.2 SSD as an external drive. Then, you can use a cloning software to clone the Surface Pro 8 SSD to another new SSD for disk upgrade.
This behavior is complicated and not economic. Besides, it is not easy to select the proper M.2 NVMe SSD enclosure adapter that must support 2230 SSDs and USB Type-C. Thus, the above way to upgrade Surface Pro 8 SSD by making a recovery drive, switching the SSD, and reinstalling Windows 11 is strongly recommended.
Further Reading: Upgrade SSD via Disk Cloning
If you are not using a Surface Pro 8, you can easily connect your SSD to a laptop (for a SATA SSD, use a SATA adapter) and perform a disk upgrade via disk cloning. To do this work, run the hard drive cloning software – MiniTool ShadowMaker which offers a feature called Clone Disk. It enables you to clone the entire hard drive to another disk and everything is transferred to the target disk. After cloning, you can replace the source disk with the target SSD and boot your laptop from the cloned SSD.
1. Download MiniTool ShadowMaker Trial Edition and run it.
MiniTool ShadowMaker TrialClick to Download100%Clean & Safe
2. In the Tools tab, click Clone Disk.
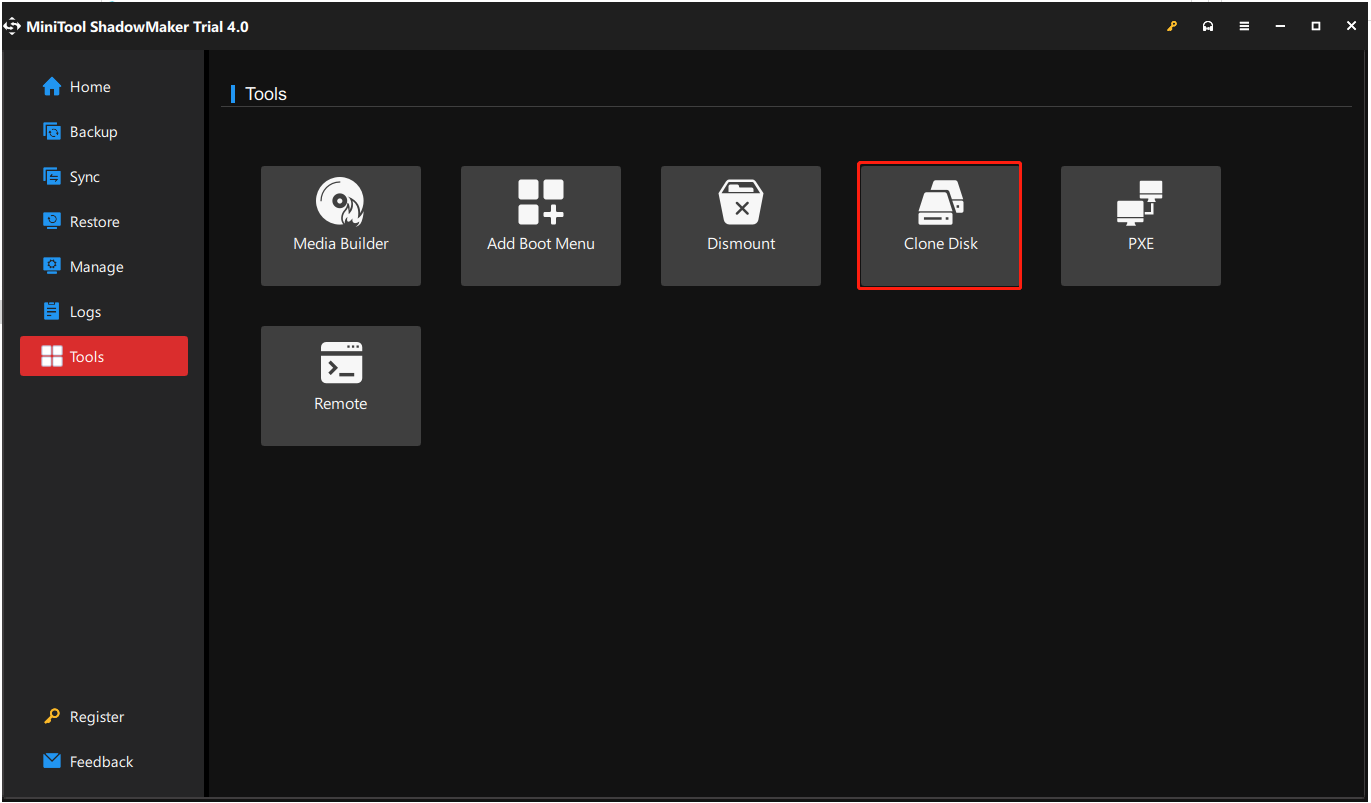
3. Select the source disk and target disk, then start cloning by clicking OK.

Surface Pro 8 Upgrade RAM
After knowing so much information about Microsoft Surface Pro 8 SSD upgrade, some of you may be curious about the Surface Pro 8 upgrade RAM. You cannot upgrade the system memory or RAM in your Surface Pro 8.
You should know that all the models of this Surface laptop have a soldered memory. That is, the memory chip is soldered directly to the motherboard, so there is no additional RAM slot for you to expand the memory size.
You should make sure you purchase the configuration with the right memory amount when first buying it since you cannot change or add additional RAM after a buy. Microsoft offers 3 memory configurations for Surface Pro 8, for example, 8GB, 16GB, and 32GB (LPDDR4x RAM).
Related articles:
- How to Add RAM to a Laptop? See the Simple Guide Now!
- How to Upgrade or Replace The RAM On Your Computer
Surface Pro 8 Tech Specifications
See the list to know more information about the specifications of Surface Pro 8.
- Storage – removable SSD: 128, 256, 512 or 1TB
- Dimensions – 287 mm × 208 mm × 9.3 mm (11.3” × 8.2” × 0.37”)
- Battery capacities – Battery Capacity Nominal (WH) 51.5Wh and Battery Capacity Min (WH) 50.2Wh
- Battery life – Up to 16 hours of typical device usage
- Display – 13” PixelSense™ Flow Display, up to 120Hz refresh rate (60Hz default), adaptive color, 3:2 aspect ratio, 2880 x 1920 (267 PPI), Dolby Vision® support, GPU Ink Acceleration, and 10 point multi-touch
- RAM – 8, 16 or 32GB
- CPU – Quad-core 11th Gen Intel® Core™ i5-1135G7 processor, i7-1185G7 processor, i5 and i7 options with storage 256GB and above built on the Intel® Evo™ platform
- Warranty – 1-year limited hardware warranty
- More…
Bottom Line
If you get a Surface Pro 8 with Windows 11, how to upgrade the SSD to a larger or faster one? After reading this post, you know the detailed guide on the Surface Pro 8 SSD upgrade. Besides, some related information about Surface Pro 8 is also introduced here. Hope this post can help you much.
Some suggestions or ideas about Surface Pro 8 1TB SSD upgrade or 512GB SSD update are welcome. Just leave a comment in the following section. Thanks.
About The Author

Position: Columnist
Vera has been working at the MiniTool Team for over 10 years as a technical editor and content writer. She mainly focuses on disk and partition management, data recovery, Windows backup and restore, and PC troubleshooting. Through in-depth software testing and hands-on experience, she has helped users solve a wide range of computer problems and better protect their data on Windows devices.
User Comments :