The Lenovo Legion Go SSD upgrade is not as easy as you expect. In this tutorial, you can learn how to upgrade Legion Go SSD by cloning Legion Go SSD to a larger one and replacing the old SSD for optimal PC performance. MiniTool introduces step-by-step instructions to you.
About Lenovo Legion Go
Lenovo Legion Go is a handheld gaming PC with Windows 11 Home that allows you to play games any time anywhere. It offers three modes, including Handled Mode, FPS Mode, and Detachable Mode, catering to every gaming need. It comes with 16GB 7500Mhz LPDDR5X RAM and a 512GB/1TB PCIe Gen4 SSD, making sure smooth multitasking.
Besides, Lenovo Legion Go offers a micro-SD card slot that supports up to 2TB card for easy expandable storage, without deleting old games for new ones. You can use the Legion Go as a computer via accessories, like a monitor, mouse, and keyboard.
Lenovo Legion Go Upgrade SSD
If you own a Lenovo Legion Go, the big issue lies in the data storage space. The built-in 512GB of disk space may be not enough for you since modern games require 100GB or more available space. This is why you consider the Lenovo Legion Go SSD upgrade. If you use the Legion Go with a 1TB SSD, you may still want to upgrade to a 2TB SSD to run a mass of games.
How to upgrade Lenovo Legion Go SSD? The steps are a bit complex. We will walk you through this task step by step including what you need before the upgrade, cloning Legion Go SSD to another one, and how to install the new SSD.
Move 1: Preparatory Work Before Legion Go SSD Upgrade
To simplify the process of SSD upgrade and achieve success, learning what you need is important. Be sure to make all the preparations.
Which SSD for Lenovo Legion Go
In terms of the Lenovo Legion Go SSD upgrade, one of the most important things is selecting a proper SSD to use in this gaming PC. The pre-installed SSD uses the PCIe 4.0 NVMe M.2 2242 form factor, thereby preparing a 2TB or larger M.2 2242 SSD.
Which is the best SSD for Legion Go? On Amazon, search for “2242 SSD Lenovo Legion Go” in the Search box and the page lists some.
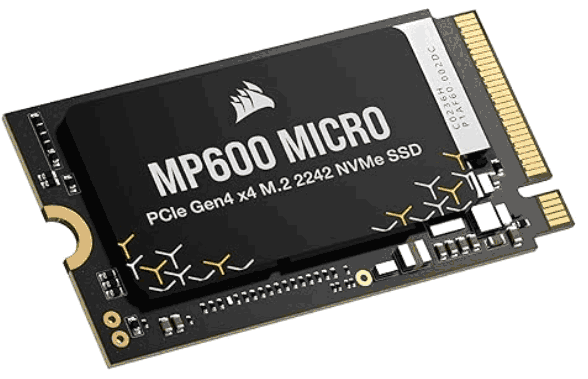
We recommend Corsair MP600 Micro M.2 2242 NVMe PCIe x4 Gen4 SSD that features 1TB and 2TB of capacity. It offers up to 7,000MB/sec sequential read and 6,200MB/sec sequential write speed to ensure rapid response times and extreme performance. Importantly, it is compatible with handheld devices such as Lenovo Legion Go.
Clone Software
When it comes to “Lenovo Legion Go SSD upgrade”, usually, we use the cloning method to transfer all the games from the original SSD to the new SSD and then replace the old one. That way, you won’t lose your game data.
As for disk cloning, use a piece of third-party disk cloning software such as MiniTool ShadowMaker. It works well in Windows 11/10/8.1/8/7 and Windows Server 2022/2019/2016. This tool features Clone Disk, capable of cloning HDD to SSD, cloning smaller SSD to larger SSD, moving Windows to another drive, cloning a USB drive to another one, etc.
MiniTool ShadowMaker TrialClick to Download100%Clean & Safe
Buy an Enclosure to Connect the New SSD
To perform disk cloning, you are required to connect the new SSD to the gaming PC. Here an SSD enclosure comes in handy. We recommend UGREEN SSD enclosure that supports 2230/2242 /2260/2280 SSDs and the USB 3.2 Gen2 type C interface.
Then, you can add the new M.2 2242 SSD to this enclosure and connect it to your Legion Go via a USB-C cable. It will function like a USB drive and you can clone the gaming PC to the plugged SSD.
But sometimes you can’t clone the drive because the new SSD keeps disconnecting when attached to Legion Go. To avoid such a case, an additional USB-C dock is necessary. Just connect the SSD enclosure to the dock and plug it into Legion Go. This is a suggestion from some Reddit users. When watching a YouTube video on the Legion Go SSD upgrade, you may notice that point.
Initialize Your SSD
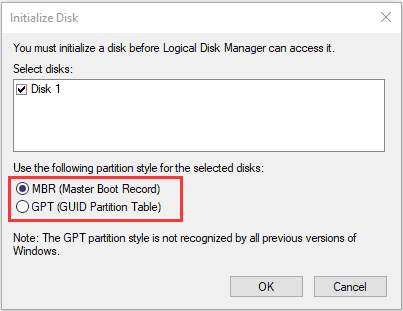
Before using any new disk, you should initialize it before the use. Then, you can format it and store files on it. To do this:
Step 1: Open Disk Management via the Win + X menu.
Step 2: Right-click on the new SSD and choose Initialize Disk.
Step 3: Select MBR or GPT and click OK.
Other Tools
In addition, you should also prepare a PH00 screwdriver and a PH0 screwdriver, as well as a plastic spudger to open the backplate of the Lenovo Legion Go.
Next, it is time to clone the old SSD to the new SSD and replace the old one.
Move 2: Clone SSD to Another SSD
As stated, MiniTool ShadowMaker plays an important role in Legion Go SSD upgrade as it has a powerful disk cloning feature. It can detect almost SSDs from various brands, including WD, Samsung, Corsair, Crucial, Sabrent, ADATA, and more as long as Windows Disk Management recognizes them.
Via sector by sector cloning, all the used and unused sectors on your old SSD will be copied. After the cloning process, the new SSD is bootable to start up Legion Go in the Windows 11 environment.
Aside from disk cloning, MiniTool ShadowMaker can serve as a piece of disk imaging backup software, enabling you to backup files, folders, disks, partitions, and Windows. Are you interested in it? Download and install it on your Lenovo Legion Go or regular PC. Then, begin the disk cloning operation.
MiniTool ShadowMaker TrialClick to Download100%Clean & Safe
Here are the instructions you should follow.
Step 1: Connect the new M.2 2242 SSD via an enclosure to your gaming PC. Discover the details in Move 1.
Step 2: Run MiniTool ShadowMaker Trial Edition and click Keep Trial to enjoy a 30-day free trial. This edition supports most features.
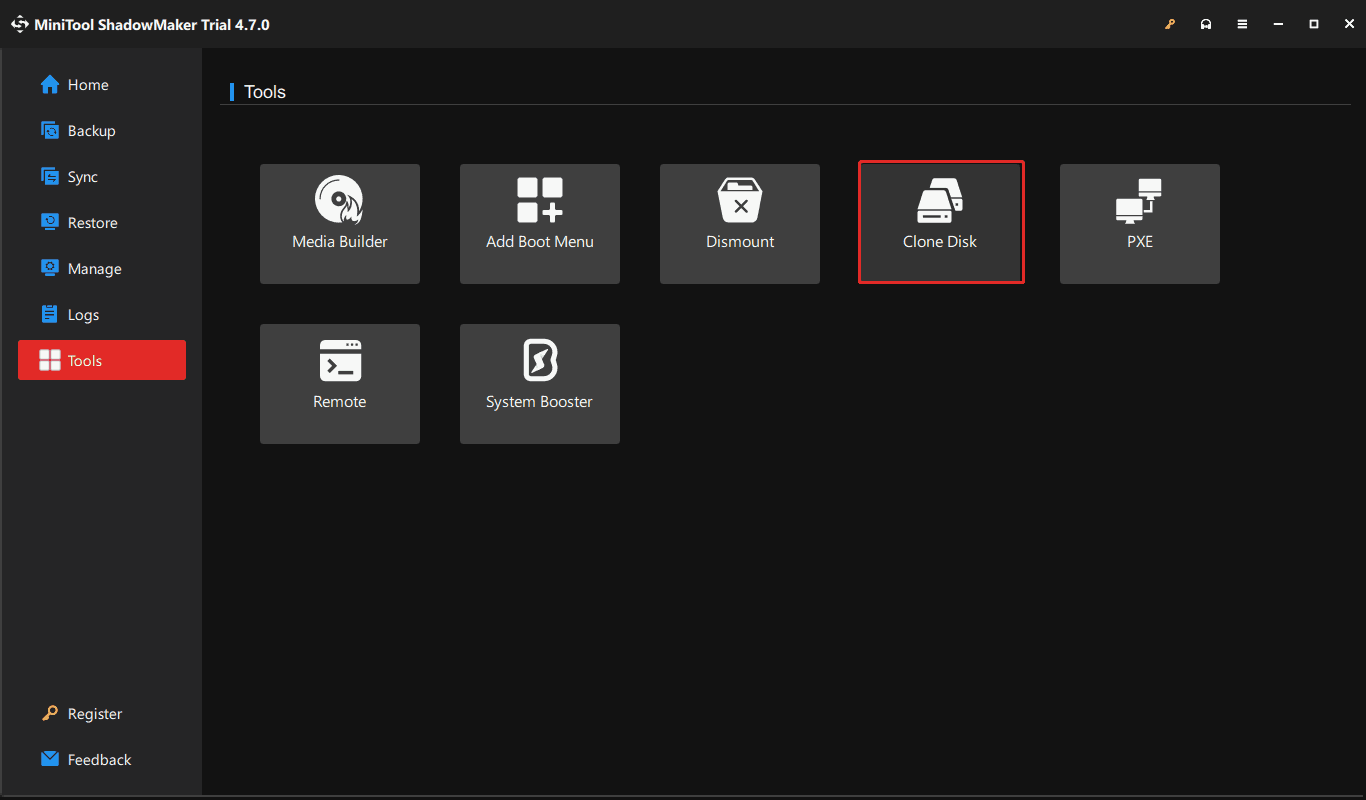
Step 3: To upgrade Legion Go SSD via disk cloning, access the Tools tab on the right side and click Clone Disk to continue.
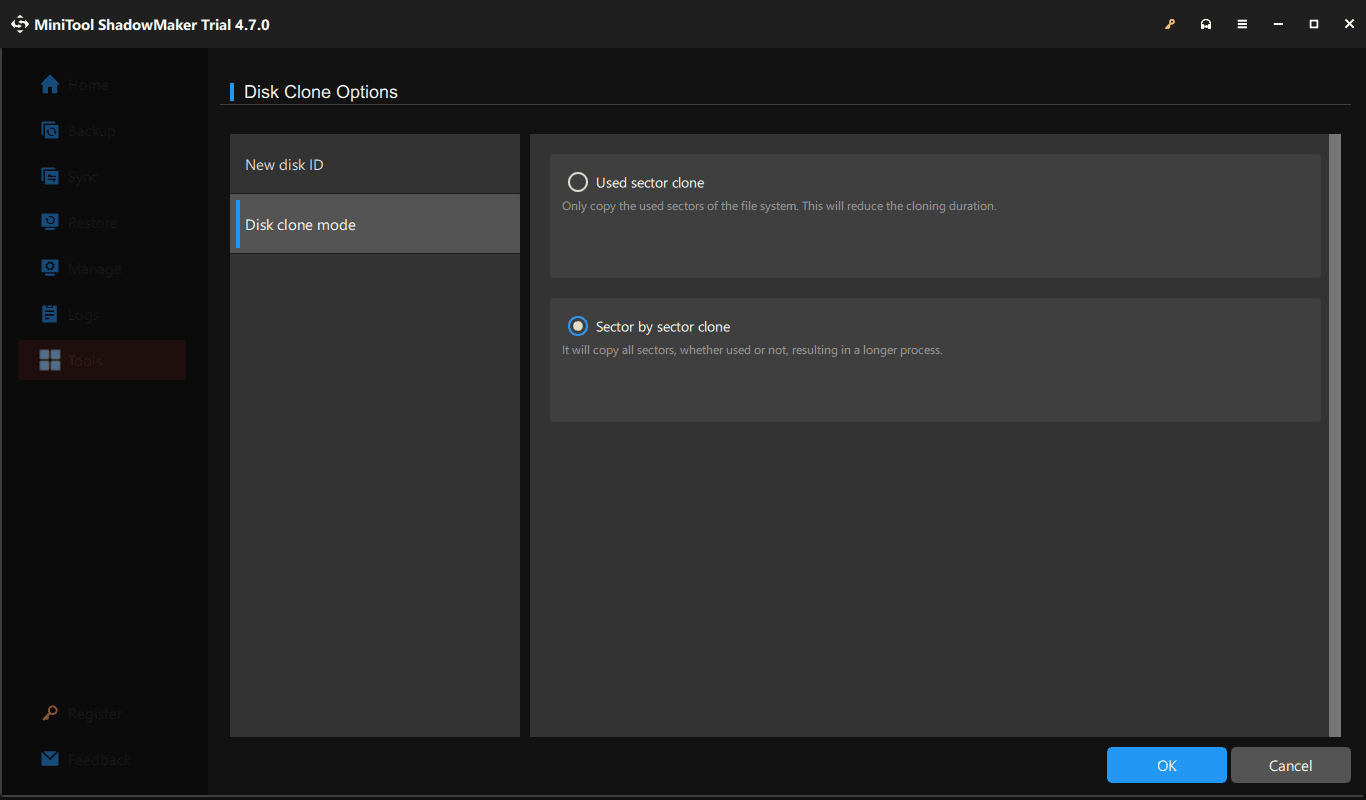
Step 4: If needed, make some advanced settings for your disk cloning task by hitting Options. By default, MiniTool ShadowMaker uses a new disk ID for the target drive to ensure a successful bootup from that disk. So, don’t change the disk ID. Or else, you will encounter a disk signature collision. To copy all the sectors, navigate to Disk clone mode, tick Sector by sector clone, and click OK.
Step 5: In the new window, choose the original Legion Go SSD as the source drive and select the new connected SSD as the target drive. Then, click the Start button to begin cloning an SSD to a larger SSD.
Once completed, it is time to replace the old SSD with the new one to accomplish the SSD upgrade in Legion Go. Let’s focus on the physical parts of the process of the Lenovo Legion Go SSD upgrade.
Move 3: Replace Legion Go SSD with New One
To install the new M.2 2242 SSD in your Legion Go, here are some steps you should take.
Step 1: Disassemble Legion Go
First, you need to open the back plate of your device:
1. Turn off the Legion Go.
2. Detach your two controllers from that device.
3. Use your PH00 screwdriver to unscrew the back screws.
4. Use a pry tool or plastic separating tool to get into the middle between the back plate and the shell of your device and lift the bottom panel. Do this carefully as the Lenovo Legion Go has a lot of other components. We suggest separating the panel starting from where the kickstand is.
Step 2: Disconnect the Battery
This step is simple but extremely delicate. You should be extra cautious!
On the right side of your Lenovo Legion Go, you can see a bit of tape covering the battery connector. Pull the tape downwards to disconnect the battery to avoid electrical issues. Don’t pull it too far away but keep it at a small distance.
Step 3: Remove Your SSD
Next up, it is turn to SSD. Follow these instructions to remove the old SSD to complete the rest of the Legion Go SSD upgrade.
1. A black tape covers the SSD, also, remove it.
2. Use your PH0 screwdriver to unscrew the SSD from the device and remove it carefully.
Step 4: Reassemble Legion Go
This is the last step of the Lenovo Legion Go SSD upgrade.
1. To prevent other components from interfering with the new SSD, don’t forget to put the metal foil that is on the old SSD around the new one carefully.
2. Put the new SSD back in the original place and screw it.
3. Connect the battery and tape it in place again.
4. Reinstall the back panel and screw it in place.
5. Turn on the Lenovo Legion Go.
It should start up from the new SSD if all goes well. Now, you have ample space for all your games after upgrading the Legion Go SSD to 2TB SSD.
Bottom Line
Now you have learned how to upgrade Lenovo Legion Go SSD through our easy-to-folly guide.
Doing this thing by yourself helps save much money and you can buy more games or a shiny new case using the saved budget. Although it is a little difficult to conduct the Legion Go SSD upgrade yourself, it is doable with a little dedication, the help of MiniTool ShadowMaker, and some tools.
Don’t hesitate. Do this job now!
Legion Go SSD Upgrade FAQ
About The Author

Position: Columnist
Vera has been working at the MiniTool Team for over 10 years as a technical editor and content writer. She mainly focuses on disk and partition management, data recovery, Windows backup and restore, and PC troubleshooting. Through in-depth software testing and hands-on experience, she has helped users solve a wide range of computer problems and better protect their data on Windows devices.
User Comments :