In this MiniTool guide, you can understand what User State Migration Tool (USMT) is, how to use USMT, other details, its alternative, and more. Are you interested? Let’s check it out!
What Is the User State Migration Tool?
The User State Migration Tool (USMT) is a command line utility program of Microsoft, which allows users to transfer files and settings between PCs.
This tool allows a high-volume, automated deployment of files and settings. It also plays an important role in migrating user settings and files during the OS upgrade.
USMT can help you transfer a lot of files, such as (but not limited to) :
- User information
- Files and folders
- E-mail messages, settings, and contacts
- Photos, music, and videos
- Windows settings
- Program data and settings
- Registry keys
Regarding the storage location, you can store the data in the following locations, depending on the size of the migration store:
- Remote storage.
- Local storage on a hard link migration storage, or on a local external storage device.
- Directly on the target computer.
There are some scenarios in which the use of USMT isn’t recommended, including:
- Migrations that require end-user interaction.
- Migrations that require customization on a machine-by-machine basis.
- Other scenarios where automated migration is unsuitable.
What Does USMT Consist of?
USMT consists of three main command-line tools: ScanState.exe, LoadState.exe, and UsmtUtils.exe. It also uses several XML files for customization, including MigApp.xml, MigDocs.xml, MigUser.xml, and a Config.xml file for excluding specific files or settings.
#Command-line Tools
- ScanState.exe: This tool scans the source computer for user data and settings, storing the information in a compressed migration file (often a .MIG).
- LoadState.exe: It takes the migration file (.MIG) created by ScanState and restores the user data and settings from the migration store to the destination computer.
- UsmtUtils.exe: This tool provides utility functions such as verifying or deleting migration stores.
#XML Files
- MigApp.xml: This file specifies which application settings should be migrated.
- MigDocs.xml: This file defines rules to automatically identify user documents for migration.
- MigUser.xml: This file tells which user-specific settings (like desktop background, saved passwords, etc.) should be migrated.
- Config.xml: This file allows administrators to modify migration rules, including excluding specific files, folders, or settings.
What Are the Key Benefits of USMT?
USMT provides the following benefits to users who are deploying Windows operating systems:
- Safely migrate user accounts and application settings.
- Reduce the cost of deploying Windows by preserving the user state.
- Decrease the downtime required for users to reconfigure their desktops and recover files.
- Reduce the number of calls to the service desk.
- Shorten the time it takes for users to get familiar with the new operating system.
At the same time, it also has some limitations, such as:
- Not suitable for migrations that require end-user interaction.
- Command interface that is unfriendly to beginners.
- May require machine-by-machine customization in some cases.
How to Use USMT on Windows?
In the following section, we are going to elaborate on how to use the Windows user state migration tool. Keep digging.
Step 1. Download and Install the USMT Tool
1. Download and install the Windows ADK with the USMT component for your source computer.
2. Once the Windows ADK installer is downloaded, run the installer and then make sure User State Migration Tool (USMT) is checked in the Select the features you want to install page.

3. Click on Install to continue.
Step 2. Back up Data with USMT
Note: Please close all applications. If the applications are running, the USMT tool may fail to migrate some files if applications are still running.
Here is how to back up files and settings from the source computer:
1. On your source PC, type cmd in the search box and open Command Prompt as an administrator.
2. Run the ScanState command below on the source device to collect files and settings. You should specify all of the .xml files that you want to migrate.
scanstate \\server\migration\mystore /config:config.xml /i:migdocs.xml /i:migapp.xml /v:13 /l:scan.log
Step 3. Restore the Files and Settings
1. Install the operating system on the destination computer.
2. Install all applications that were on the source computer. Installing all applications on the destination computer before restoring the user state can ensure that you can retain your settings.
3. After that, on the destination computer, close all applications.
4. Open Command Prompt as an administrator and run the following LoadState command.
loadstate \\server\migration\mystore /config:config.xml /i:migdocs.xml /i:migapp.xml /v:13 /l:load.log
When you have finished all steps, you have transferred files to another computer. In addition, it is normal that some settings, like fonts, wallpaper, and screen saver setting, do not take effect until you log on next time.
Best USMT Alternative – MiniTool ShadowMaker
From the above information, you can tell that the USMT tool is too complicated to use for computer beginners. Don’t worry! Here we will introduce you to a piece of free and powerful PC backup software – MiniTool ShadowMaker.
This freeware is compatible with almost all the Windows editions, including Windows 11/10/8.1/8/7. It is so powerful that it supports file backup, partition backup, disk backup, system backup, file sync, and disk cloning.
Furthermore, it also allows you to set image compression level, enable password protection, tweak image creation mode, exclude certain file types, set email notifications, and so forth.
If you want to transfer the OS or files to another computer, MiniTool ShadowMaker boasts the Clone Disk and System Backup and Restore features, which can help you achieve this goal. Without further ado, let’s see how to transfer files with it.
#System Backup and Restore
Step 1. Download, install, and launch MiniTool ShadowMaker and hit Keep Trial to enter the main interface.
MiniTool ShadowMaker TrialClick to Download100%Clean & Safe
Step 2. In the Backup page, you can select the backup source and backup destination.

- Backup source – go to the SOURCE section > Folders and Files to select what to back up.
- Backup destination – go to the DESTINATION > select a USB flash drive or external hard drive to store the backup image file.
Step 3. Click on Back Up Now to start the process at once or select Back Up Later to delay the task. To view the backup progress, you can go to the Manage page.
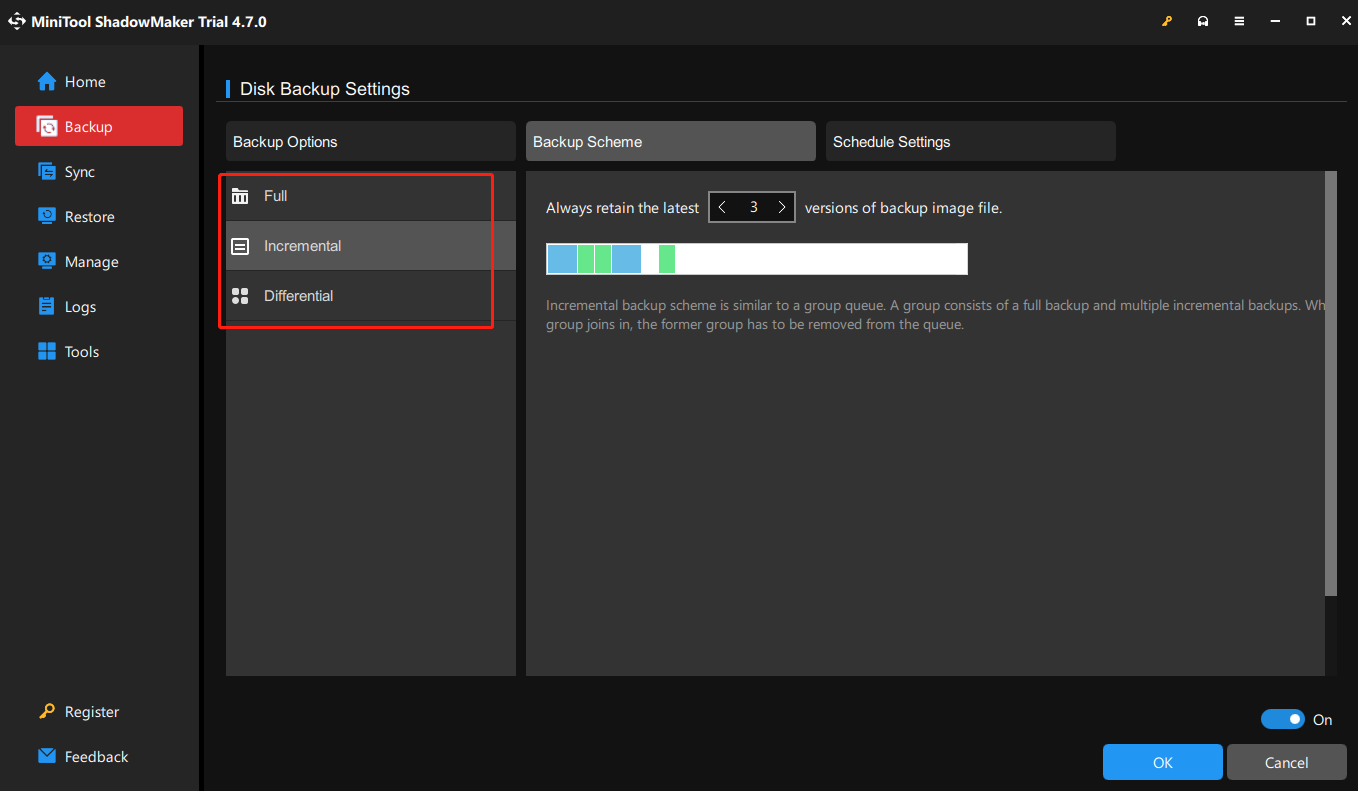
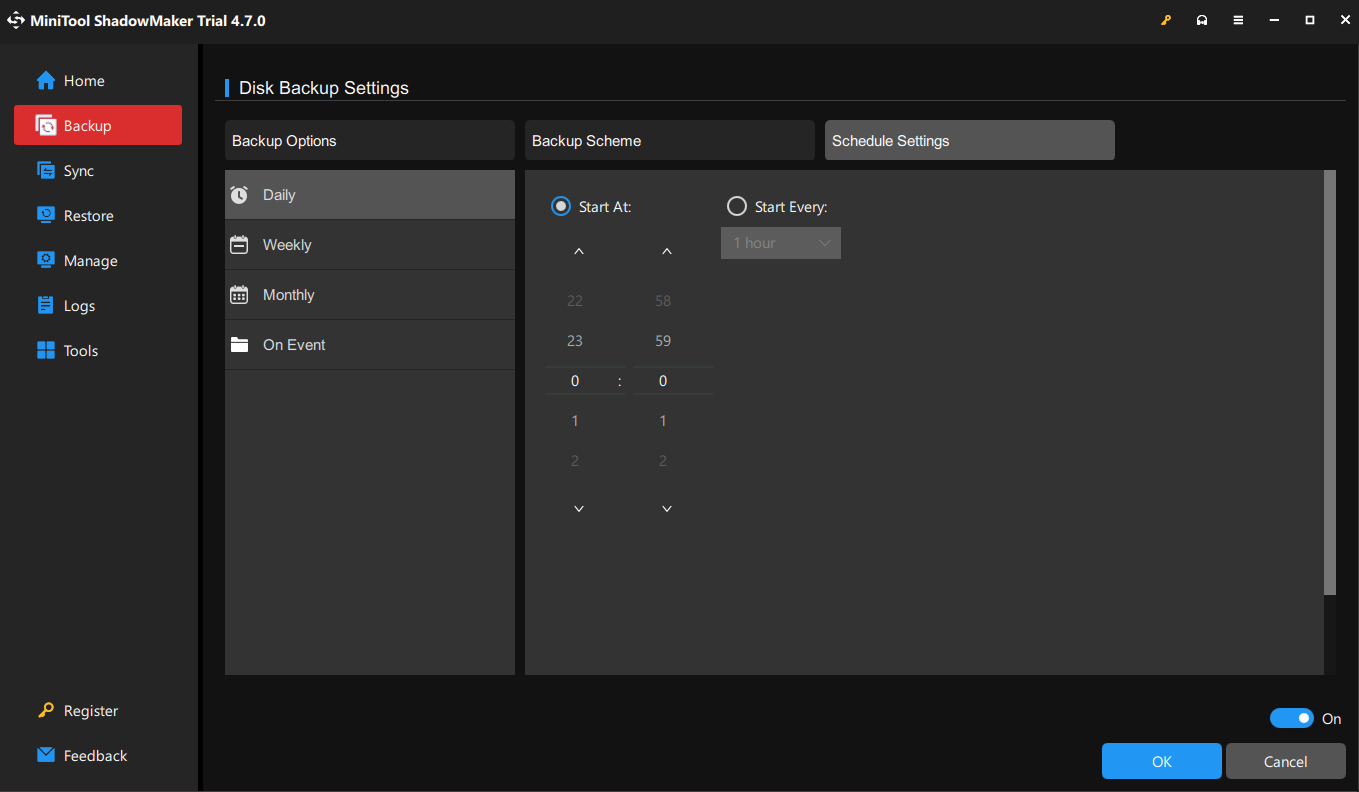
To customize backup schemes and backup schedules, you can click on Options in the lower right corner.
Backup Schemes – supports 3 types of backup schemes, including full backup, incremental backup, and differential backup. To manage disk space usage, select one scheme according to your needs.
Backup Schedule – toggle it on manually > select a specific point of a day, week, or month to create a backup automatically.
Step 4. After finishing the file backup, connect the target disk to your destination computer.
Step 5. Then, open MiniTool ShadowMaker and click Keep Trial.
Step 6. Go to the Restore tab and click Add Backup to import the image files you created.
You can follow the on-screen instructions to finish the restoration.
#Clone Disk
Before cloning, you need to prepare the target disk. If you plan to transfer the data to a desktop computer, you can remove the hard drive after shutdown and connect it to the source computer.
If you are using a laptop, then you may need an external hard drive or a USB hard drive.
Step 1. Launch MiniTool ShadowMaker on the source PC and hit Keep Trial to enter its homepage.
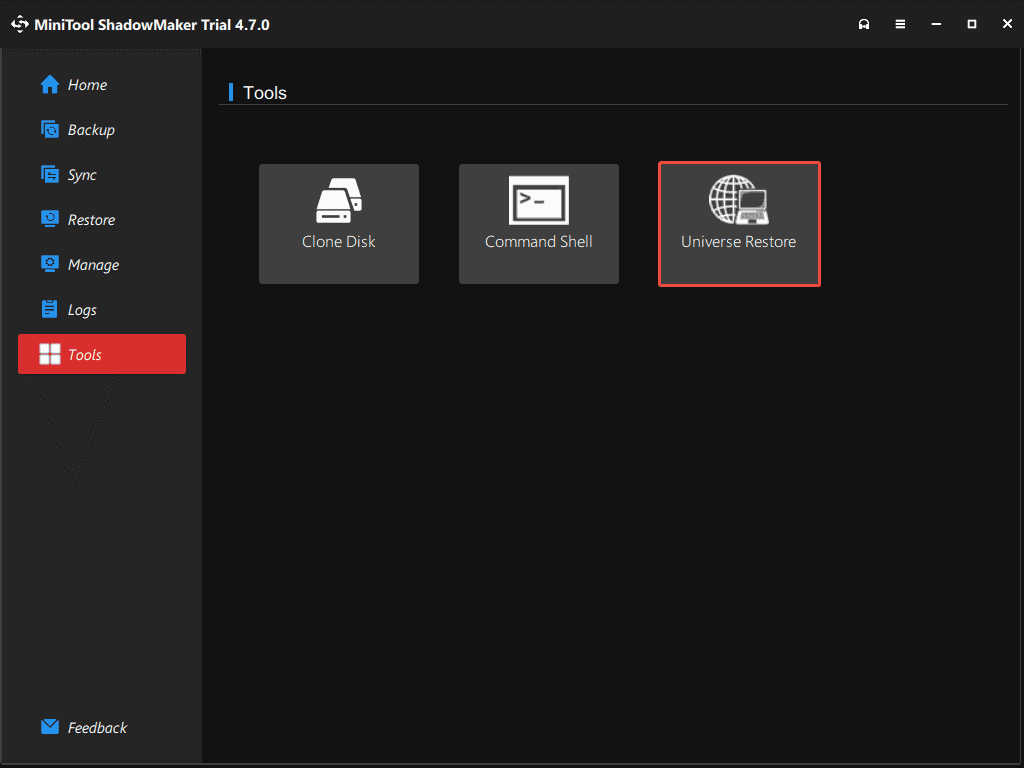
Step 2. Head to the Tools tab and choose the Clone Disk option.
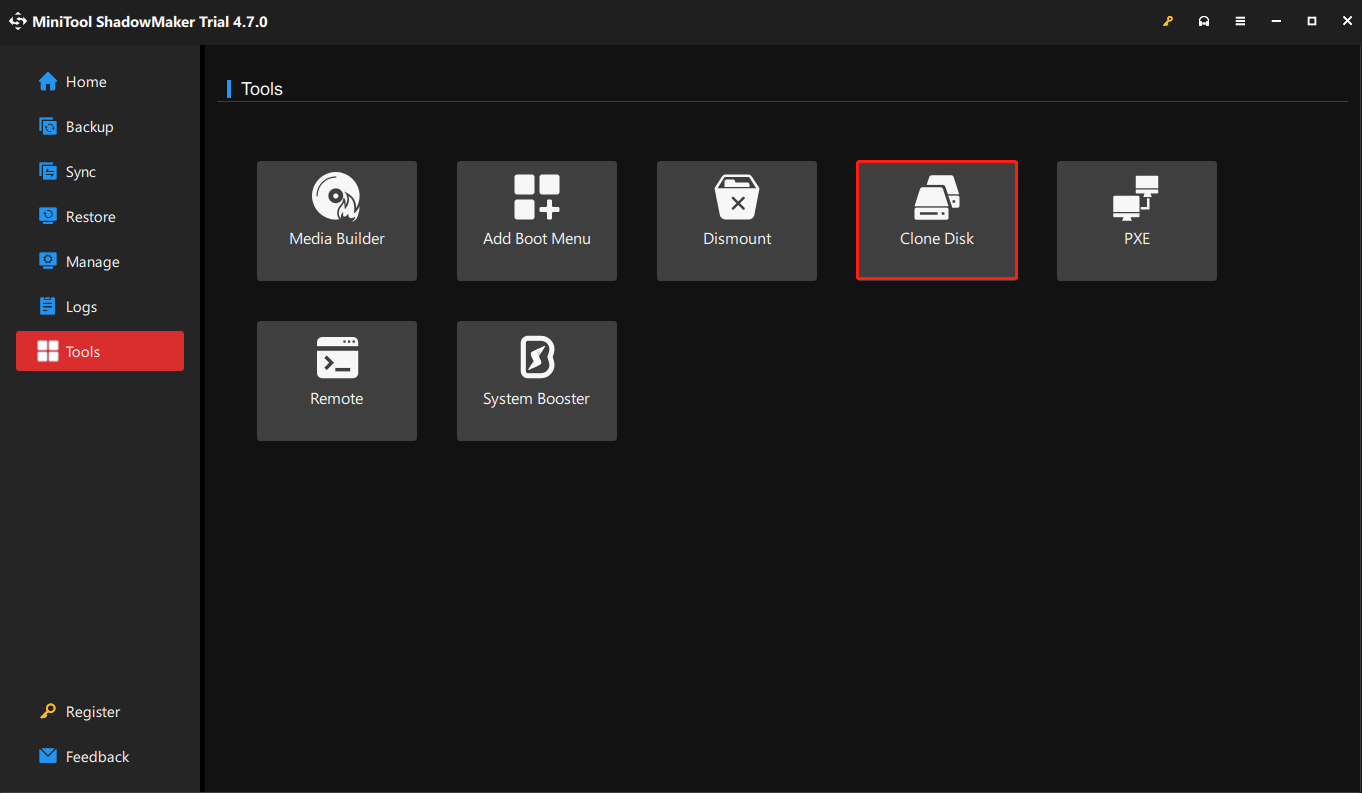
Step 3. Choose the system-related disk as the source disk > click Next > select a target disk.
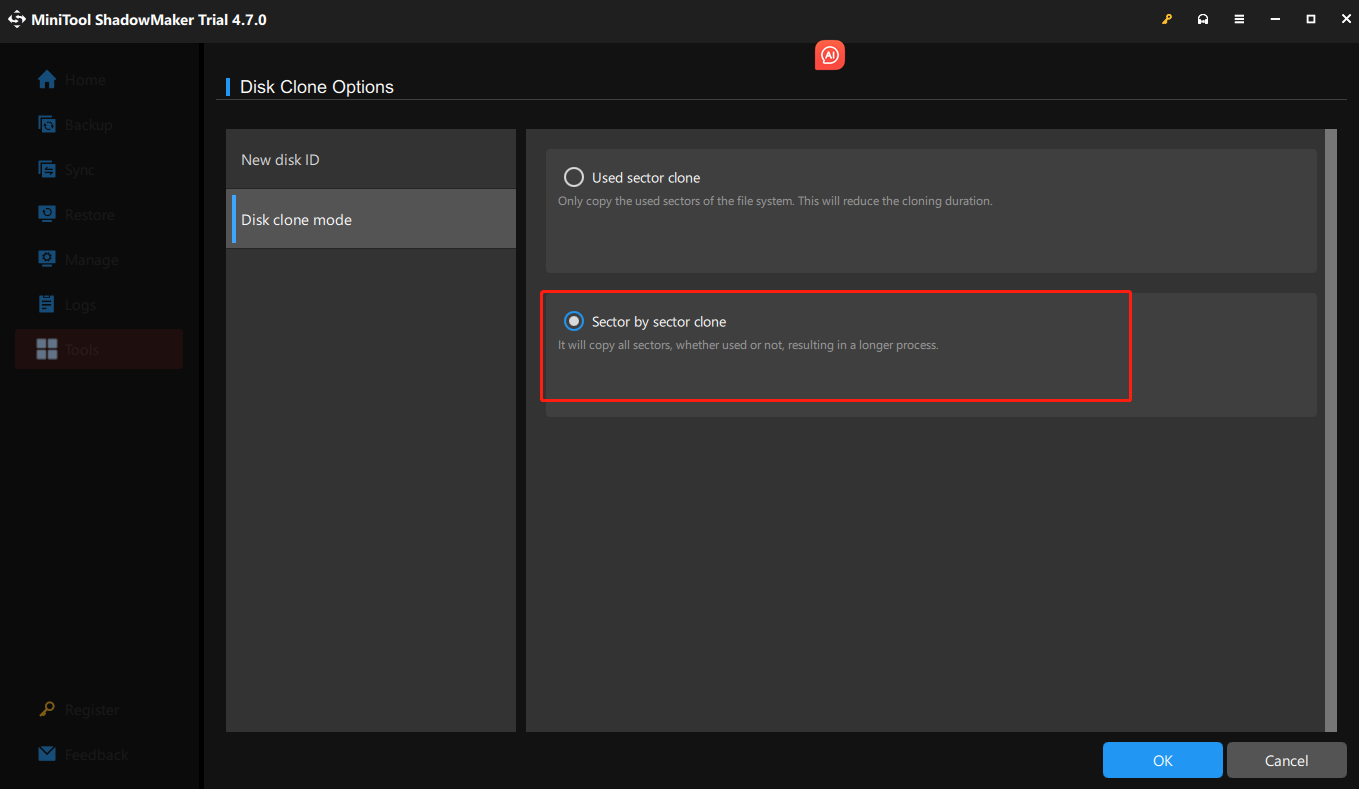
Step 4. Click Start to begin the clone. Please patiently wait for the process to be completed.
Step 5. When the disk cloning process is finished, insert the target disk into the other computer and boot it from the target disk.
If you encounter a boot problem due to incompatibility, MiniTool ShadowMaker has a useful feature – Universal Restore that can help you fix this issue easily.
To do that:
Step 1. In MiniTool ShadowMaker, navigate to Tools > choose Media Builder to create bootable media.
Step 2. Boot the target computer from the bootable media and enter WinPE created by MiniTool ShadowMaker.
Step 3. Go to Tools > select Universal Restore > hit the RESTORE button to handle the incompatibility issue.
Then you can migrate system or files from PC to PC successfully.
USMT vs MiniTool ShadowMaker
| User State Migration Tool (USMT) | MiniTool ShadowMaker | |
| Working Method | Command line tool | Graphical interface |
| Migration Content | User state (users accounts, settings, files, etc.) | System/disk/partition/file/folder backup and disk cloning |
| OS | Offline environment (WinPE) | Usually in a running original system |
| Flexibility | Extremely high: precisely define which application settings, files, and registry entries need to be migrated by the .xml file. | Medium: intuitively choose to back up the entire system, disk, a specific folder, or file. The customization is not as deep as that of USMT. |
| Price | Free (included in the Windows ADK) | Free for basic backup and restoration; Paid for advanced functions (e.g., system clone). |
| Scenario | Large-scale enterprise environment: Computer batch replacement; Windows upgrade. | Personal and small business: Restore and upgrade the hard disk (HDD or SSD); Regularly back up important data. |
In conclusion, if you need to automatically deploy the operating system and user data for multiple computers in batches, such as in large enterprises, USMT is the best choice.
If you are an individual, small office, or home user who wants to quickly and simply back up the system, disk, or files, MiniTool ShadowMaker should be more suitable.
Final Words
This guide illustrates what the Windows 10 migration tool is and how to use it. Obviously, it requires a high level of computer knowledge, and you need to be familiar with the relevant command lines.
If you make any mistakes during operation, it is very likely to result in data loss or system problems. That’s why we advise you to use MiniTool ShadowMaker, which is very friendly to computer beginners.
For more conducive ideas, welcome to share them with us via [email protected]. We will reply to you as soon as possible.
User State Migration Tool FAQ
2. Database Migration: This process is used to transfer data between different database systems or versions. Enterprises may perform such operations to upgrade to a new database management system (DBMS) or migrate internal databases to cloud-hosted databases.
3. Application migration: This refers to the transfer of data from one application to another, or the transfer between different environments.
4. Cloud migration: This specifically refers to the transfer of data from on-premises systems to a cloud infrastructure.
Microsoft uses PCmover as its recommended migration tool, especially for migrating from old Windows (such as Windows 7 or XP) to new systems (such as Windows 10). PCmover can migrate user configuration files, settings, data, and some applications.
User Comments :