What Is Xhunter1.sys
Xhunter1.sys is a driver that works at the core of the system. It is part of the XIGNCODE3 anti-cheat program. Many online games, such as PUBG, use it to stop cheating. This driver works like a security monitor.
It monitors system processes and keyboard input to detect cheating. However, it is often reported to cause Windows memory integrity issues, Blue Screen of Death (BSOD) errors, and conflicts with system security.
About Xhunter1.sys Blue Screen
The xhunter1.sys blue screen (BSOD) is typically caused by the Wellbia XIGNCODE3 anti-cheat driver. This driver often conflicts with Windows memory integrity or becomes corrupted, causing system instability.
What Causes Xhunter1.sys Blue Screen
In addition to the anti-cheat driver conflicts, some other reasons may also trigger the issue.
- Windows 11 incompatibility
- Outdated/corrupt driver
- Game conflicts
- Deep system access
- Malware protection conflicts
Suggestion: Back Up Important Data
Before you perform solutions to fix the xhunter1.sys blue screen issue, backing up important data first can secure your data. To do that, it is highly recommended to use MiniTool ShadowMaker.
This Windows backup software offers the Backup feature to help you perform Windows 10 backup and Windows 11 backup with ease.
Here’s how to use it to back up important data:
Step 1. Download and install MiniTool ShadowMaker.
MiniTool ShadowMaker TrialClick to Download100%Clean & Safe
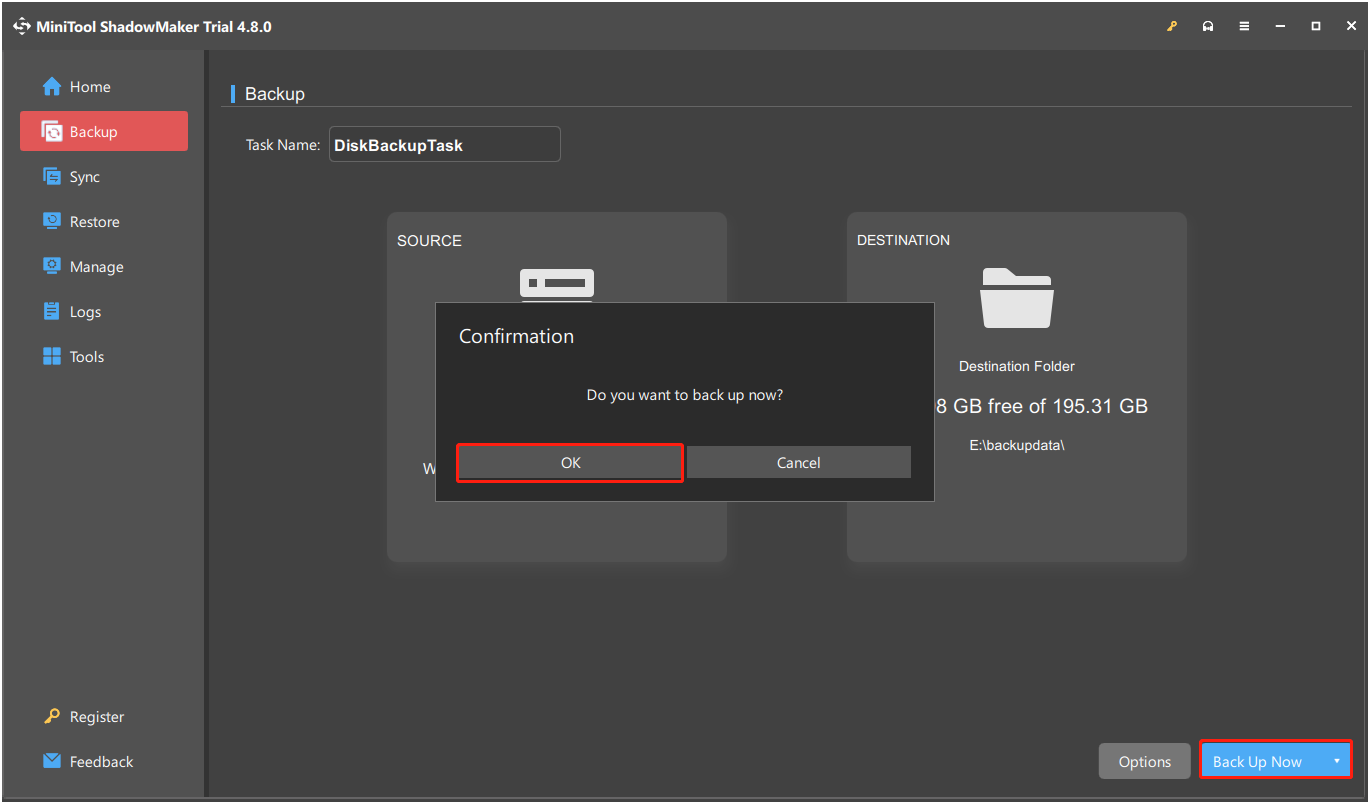
Step 2. Launch this software and select Backup.
Step 3. Enter SOURCE and choose Folders and Files. Then, choose the files that you want to back up and click OK.
Step 4. Go to DESTINATION, select a proper location to save the backup files, and then click OK.
Step 5. Click Back up Now and OK sequentially to confirm.
How to Fix Xhunter1.sys Blue Screen
To fix the xhunter1. sys BSOD issue, boot into safe mode, immediately uninstall the game/anti-cheat software, delete the xhunter1.sys file, or update the anti-cheat. Other fixes include running SFC and updating Windows.
Here’s the detailed breakdown:
Boot into Safe Mode
Safe Mode is a diagnostic startup state that loads the operating system with only essential drivers, services, and minimal functionality.
To fix the xhunter1. sys blue screen, follow these steps to boot into Safe Mode.
Step 1. Force-restart your PC 2–3 times at the Windows logo to trigger Automatic Repair.
Step 2. In the Automatic Repair screen, click Advanced options.
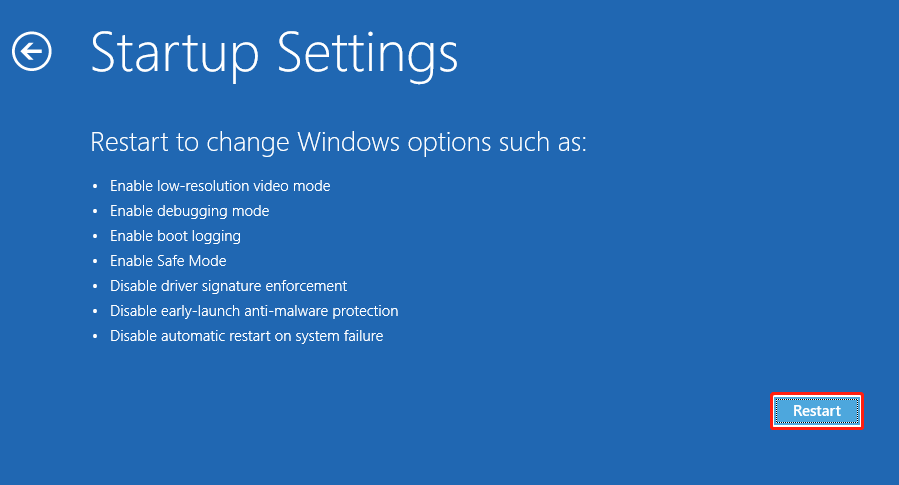
Step 3. Choose Troubleshoot > Advanced options > Startup Settings and click Restart.
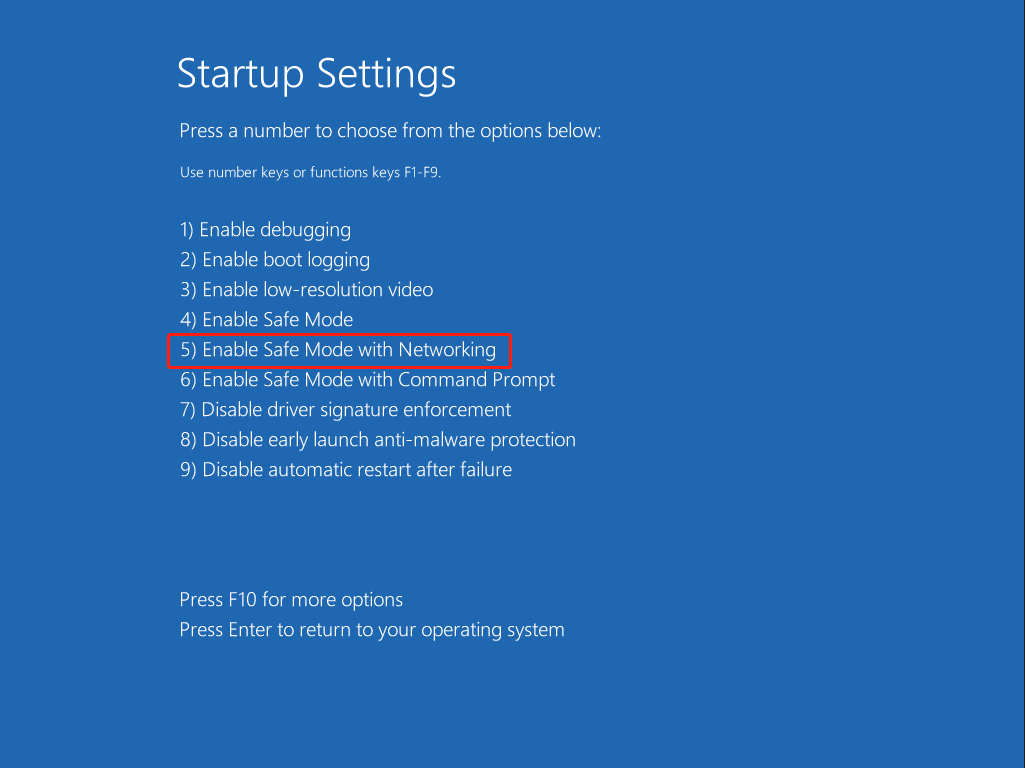
Step 4. Press number 5 or F5 to enter Safe Mode with networking.
Step 5. Enter your password and press Enter to log in. Then, you are in Safe Mode successfully.
Solution 1. Uninstall GameGuard/Anti-Cheat
Uninstalling the game is the most direct method to troubleshoot the xhunter1. sys BSOD issue. To do that, locate the game that uses XIGNCODE3 anti-cheat (e.g., PUBG) and uninstall it.
Step 1. Press Win + S to open Search, type control panel, and press Enter.
Step 2. Set View by to Category and click Uninstall a program under Program.
Step 3. Locate the target game, right-click it, and select Uninstall.
Step 4. Follow the on-screen guide to complete the process.
Solution 2. Delete the Xhunter1.sys File
Xhunter1.sys is the culprit causing the related blue screen. Thus, if you don’t play games that use it, you can safely delete the file. It will automatically reinstall if a game needs it later.
Step 1. In Safe Mode, locate the xhunter1.sys file from the following locations:
- C:\Windows\System32\xhunter1.sys
- C:\Windows\xhunter1.sys
- C:\Program Files (x86)\Common Files\Wellbia\xhunter1.sys
Step 2. Right-click the xhunter1.sys file and select Properties.
Step 3. Go to the Security tab and click Advanced. Then, change the Owner to your account and grant Full Control.
Step 4. Run Command Prompt as administrator and use the command to delete the xhunter1.sys file.
- Type cmd in Search.
- Right-click Command Prompt and select Run as administrator.
- Type the del /f /q C:\Windows\System32\xhunter1.sys command and press Enter.
Now, the file has been removed successfully.
Solution 3. Disable Memory Integrity
Disabling memory integrity can help fix the xhunter1.sys BSOD issue, because the anti-cheat driver from XIGNCODE3 System Guard often conflicts with this Windows security feature. Here’s how to do that:
Step 1. Open Search, type windows security, and press Enter.
Step 2. In the Windows Security window, click Device Security.
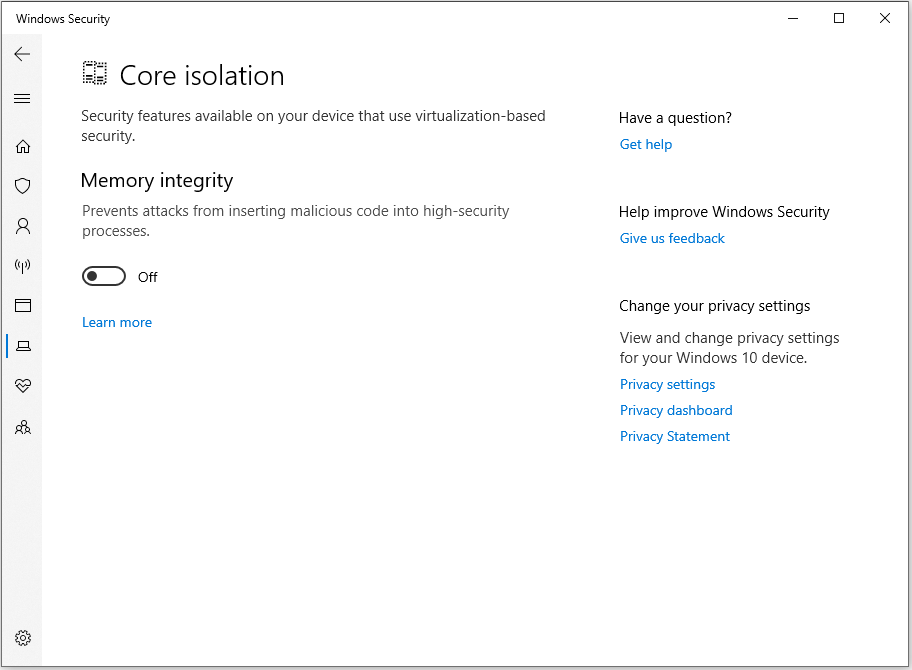
Step 3. Under Core isolation, click Core isolation details.
Step 4. Toggle the Memory integrity switch to off.
Solution 4. Run SFC and DISM
Some people report that running SFC and DISM helps them fix the xhunter1.sys blue screen issue successfully.
SFC scans and repairs corrupted or missing system files. DISM repairs the underlying Windows image (component store). Also, it can fix the corruption that prevents SFC from working.
Therefore, run DISM first and then SFC to troubleshoot the error:
Step 1. Run Command Prompt as administrator.
Step 2. In the prompted window, execute the following commands one by one to perform a DISM scan:
- DISM.exe /Online /Cleanup-Image /ScanHealth
- DISM.exe /Online /Cleanup-Image /CheckHealth
- DISM.exe /Online /Cleanup-Image /RestoreHealth
Step 3. Once the DISM scan is complete, type the following command and press Enter to start the SFC scan.
Then, it starts to scan all protected Windows system files and replace corrupt, missing, or changed versions with correct ones.
Step 4. Once done, restart the computer to check if the blue screen error persists.
Solution 5. Disable Automatically Manage Paging File Size
Disabling “Automatically manage paging file size” can sometimes help with xhunter1.sys BSOD errors. Here’s how to do that:
Step 1. Open Search, type advanced system settings, and press Enter.
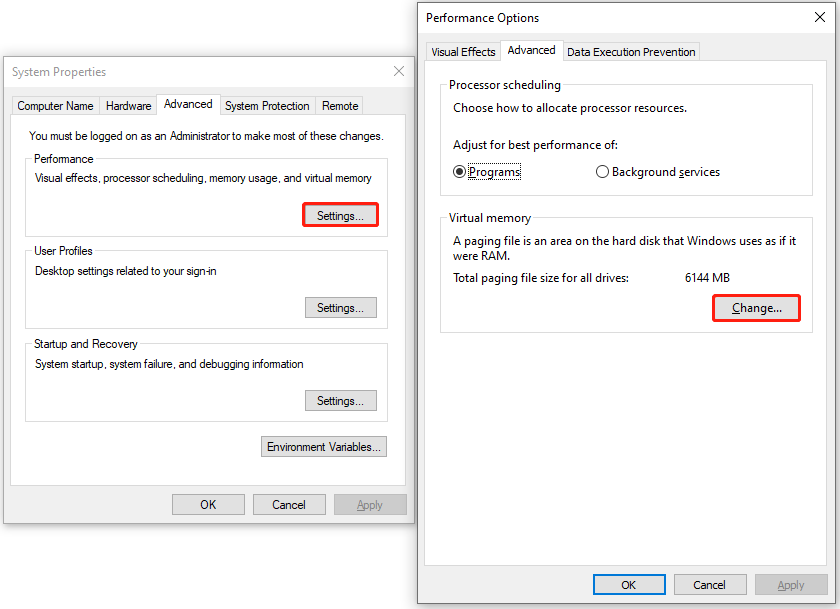
Step 2. In the System Properties window, click Settings from the Performance section under Advanced. Then, navigate to Advanced and click Change to open the Virtual Memory window.
Step 3. Uncheck the box of Automatically manage paging file size for all drivers and select No paging file.
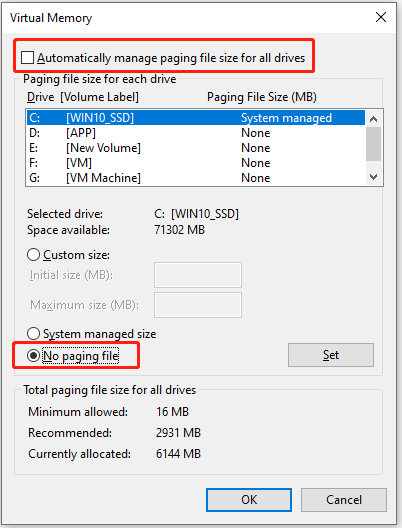
Step 4. Click Set and Yes sequentially to confirm.
Step 5. Click OK at last. Then, restart your PC to check if xhunter1.sys is fixed.
Solution 6. Install the Xhunter1.sys Driver in Compatibility Mode
Some users report that installing the anti-cheat driver itself in compatibility mode helps them fix the xhunter1.sys blue screen issue.
Step 1. Press Win + E to open File Explorer and find the driver setup file.
Step 2. Right-click it and select Properties.
Step 3. Click the Compatibility tab.
Step 4. Check the Run this program in compatibility mode option.
Step 5. Click the drop-down box and select Windows 7 or Windows 8.
Step 6. Click OK to save the change.
Now, install the xhunter1.sys driver on the system and check if the issue has been resolved.
Solution 7. Run Memory Diagnostics
Sometimes xhunter1.sys BSOD is caused by RAM issues. Run Windows Memory Diagnostic to check via the following steps:
Step 1. Press Win + R to open Run.
Step 2. Type mdsched.exe and press Enter.
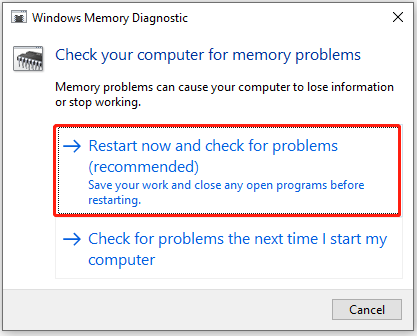
Step 3. In the prompted Windows Memory Diagnostic window, click Restart now and check for problems (recommended).
Step 4. The computer will restart and run the diagnostic tool automatically before Windows loads. The test may take 15–30 minutes or more.
Step 5. View the results in Event Viewer.
- Right-click the Start button and select Event Viewer.
- Navigate to Windows Logs > System.
- Find MemoryDiagnostics-Results in the list.
Step 6. If errors are detected, it may indicate a RAM hardware failure. In this case, you may need to test each RAM stick individually to identify the faulty module. If necessary, replace it.
How to Prevent Xhunter1.sys BSOD
Additionally, there are some useful methods to help you prevent xhunter1.sys BSOD issue:
- Keep drivers updated: Outdated components are a major cause of BSOD. Newer drivers improve compatibility with anti-cheat systems used in games.
- Avoid incompatible security settings: Memory integrity can conflict with xhunter1.sys. Thus, if the system remains stable, keep it on. If a crash or a BSOD occurs, turn it off temporarily.
- Maintain stable system configuration: Sudden memory changes can crash kernel drivers and result in xhunter1.sys BSOD issue. Thus, avoid frequent automatic resizing and use a fixed/custom paging file size if you’ve encountered a crash or a BSOD issue.
- Keep the game & anti-cheat updated: Many BSOD issues can be fixed in patches, therefore, always update your game client and anti-cheat.
- Avoid Overclocking: Overclocking can destabilize kernel drivers and cause xhunter1.sys blue screen. Thus, reset CPU/GPU/RAM to default settings.
Final Words
This post aims to solve xhunter1.sys blue screen caused by conflicts with the anti-cheat engine. It introduces various useful solutions, including deleting the xhunter1.sys file, disabling memory integrity, running SFC, and reinstalling the game.
Before applying the listed solutions, using MiniTool ShadowMaker to back up your important data is necessary.
What’s more, if you encounter issues or have any suggestions with this software, contact us via [email protected].
Xhunter1.sys FAQ
From there, uninstall new drivers, run sfc /scannow in the command prompt, or use System Restore to revert recent changes.
About The Author

Position: Columnist
Charlotte is a technology columnist with a strong focus on the Windows operating system, specializing in disk management, backup, and data recovery. She is passionate about analyzing computer errors, identifying root causes, and delivering practical solutions. In her free time, she stays updated on the latest developments in computer systems and hardware while continuously learning new technologies to broaden her expertise. Her writing style is clear and easy to understand, making complex technical topics accessible even to users with limited computer knowledge.
User Comments :