Issue: Internal/External Hard Drive Gets Corrupted
Hard drive failure is a common problem. Whether it’s an internal or external hard drive, the most direct impact is the inability to access data.
In addition, files may suddenly disappear, the disk may prompt for formatting, and the system may become abnormally slow.
Understanding the causes of hard drive failure can help you identify solutions more quickly.
- Connection issues: The data cable or USB port is loose or damaged, or the power supply is unstable.
- Improper insertion/removal: The external hard drive was not safely ejected.
- Bad sectors: The physical areas of the disk are aging or damaged.
- Virus/malware: Viruses or malware have corrupted the file system or boot sector.
- File system errors: System crashes or forced shutdowns have caused file system errors.
- Hard drive aging: Long-term use has led to degradation of mechanical or electronic components.
- Shock/drop: Mechanical hard drives are particularly vulnerable to physical impact damage.
After knowing the causes, it’s recommended to prioritize corrupted hard drive recovery. This is because continuing operations may overwrite existing data, making potentially recoverable data permanently lost.
Part 1. Perform a Crash Disk File Recovery
To recover data from failed hard drive, here are two scenarios. One is recovering data from a computer that cannot boot due to a crashed internal hard drive. And the other is recovering data from a damaged external hard drive.
Case 1: Recover Data from an Unbootable Computer (Crashed Internal Hard Drive)
The core files, startup files, and various data required for a computer’s operating system are stored on the internal hard drive.
If the internal system drive is damaged, the system will be unable to read critical data properly during startup or operation. It will result in situations such as freezing, blue screens, repeated restarts, or even an inability to boot into the system altogether.
To recover data from a non-booting PC, MiniTool Power Data Recovery is necessary. This software doesn’t rely on the original system running normally. Instead, it boots the computer directly from an external environment using bootable media.
This means that even if the system crashes or boot files are corrupted, this tool can still access the hard drive in an independent, pre-installed environment.
This crash disk file recovery software has the following functions:
- Supports common Windows file systems such as NTFS, FAT32, and exFAT.
- Compatible with Windows 11/10/8/8.1.
- Supports various file types, such as documents, pictures, videos, and more.
The free edition of this software does not support creating bootable disks. To use this feature, download MiniTool Power Data Recovery Bootable on a working PC. Now, start to recover data from a non-bootable computer.
Step 1: Create a bootable disk
1.1. Connect a blank USB drive to the working computer.
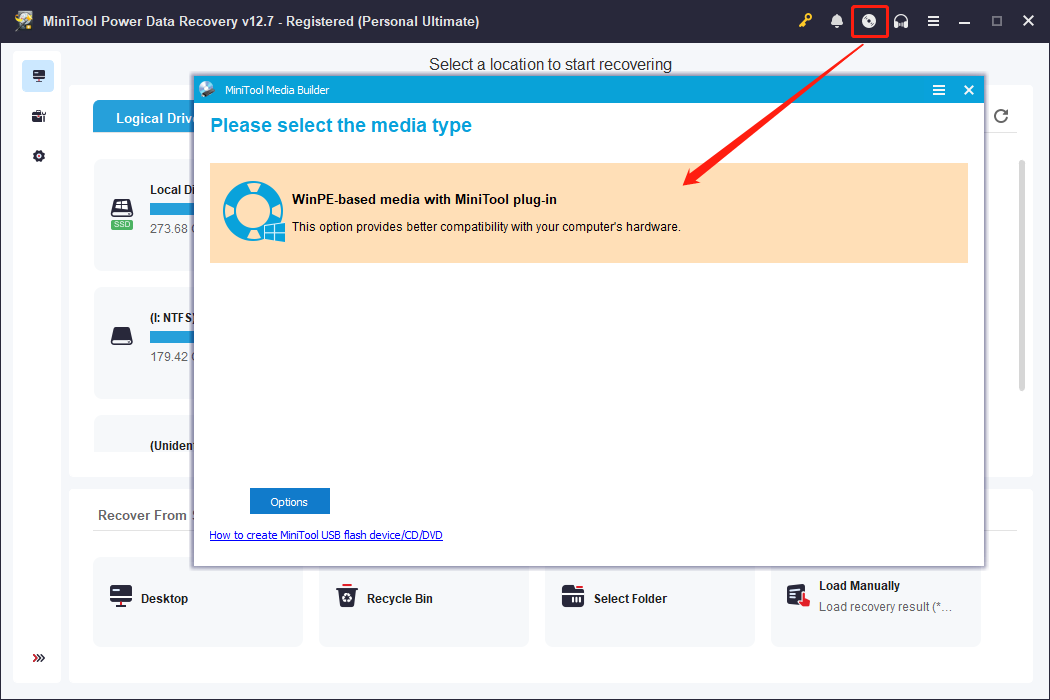
1.2. Launch this recovery software and click the disc icon at the top to open MiniTool Bootable Media Builder. Then, follow the on-screen instructions to create a bootable disk.
1.3. After the process completes, click Finish and remove the disk.
Step 2: Boot your computer from the bootable disk
2.1. Restart your crashed computer and press F2, F12, Esc, or Delete during startup to enter the BIOS settings.
2.2. Switch to the Boot tab and change the boot order to boot from the bootable USB disk.
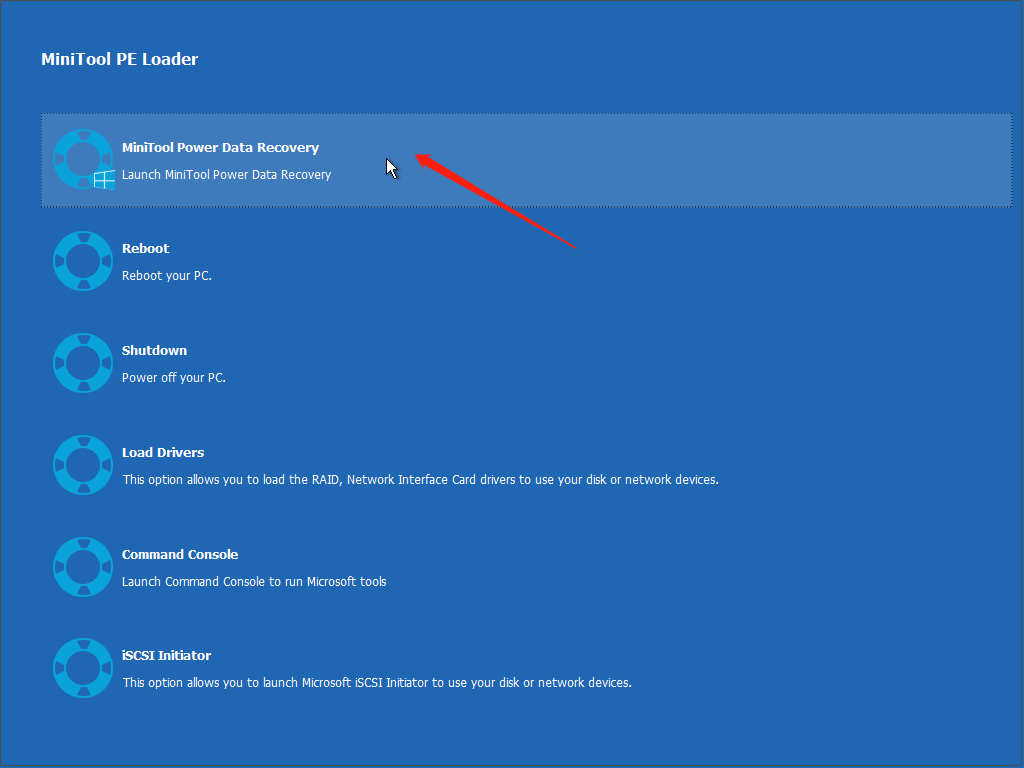
2.3. After booting, you will enter the MiniTool WinPE environment. Click MiniTool Power Data Recovery to run it, or let it start automatically.
Step 3: Scan the corrupted hard drive and recover files
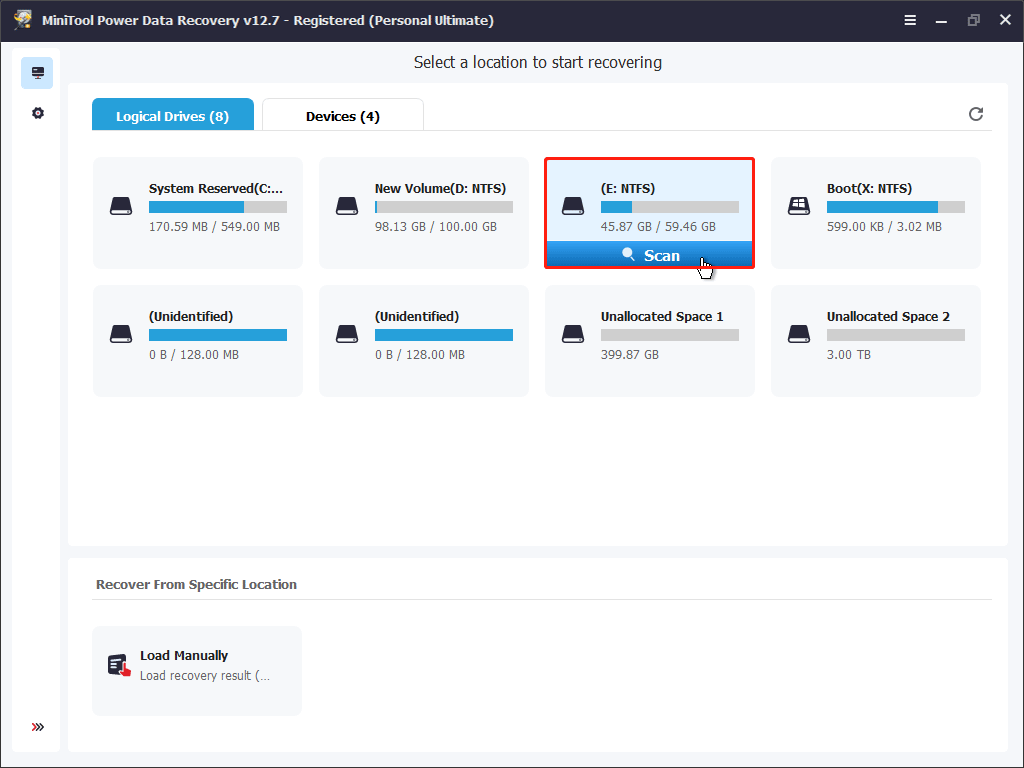
3.1. Under the Logical Drives tab, select the target partition and click Scan. Alternatively, switch to the Devices tab to scan the whole disk.
3.2. This scan process will take some time. Wait patiently for it to complete. After it ends, you need to locate the target files. Here are some features to help you find them quickly.
- The Path feature displays scan results organized by folder path. It’s especially useful when you remember where the files were originally located.
- The Type feature categorizes scan results by file type, such as documents, pictures, videos, and audios. It’s effective when you only remember the file type or format, but not the specific location.
- The Filter feature offers multi-dimensional filtering, including file type, modification date, file size, and file category. It can quickly remove irrelevant content from massive scan results, allowing you to see only files that meet your criteria.
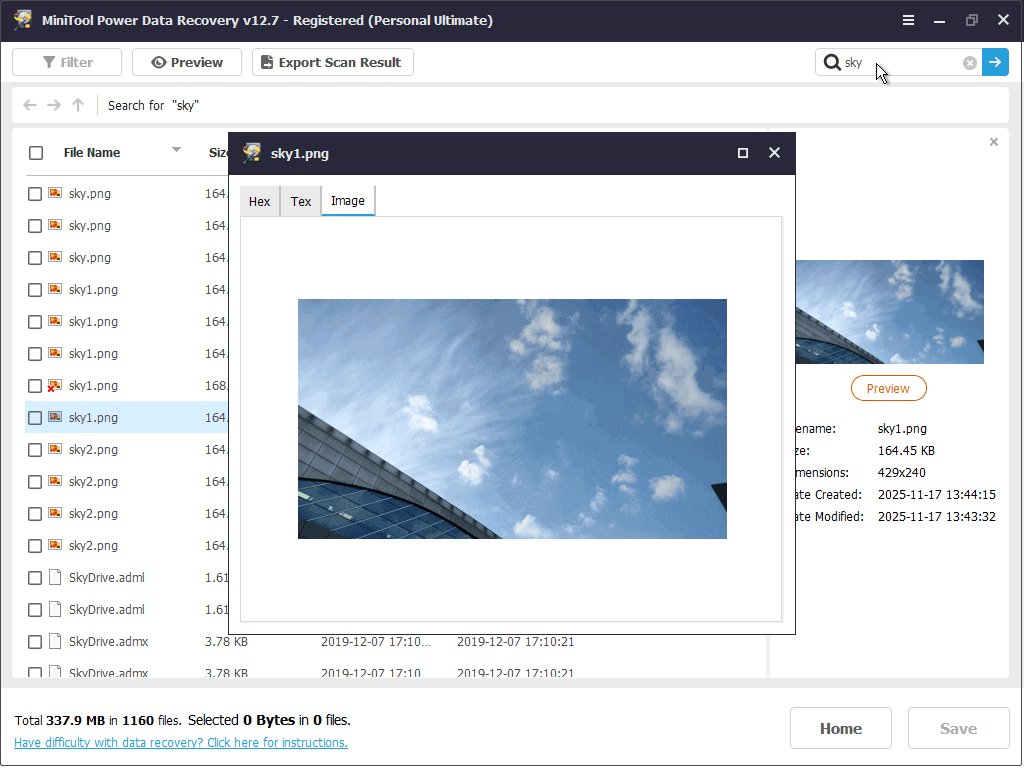
- The Search feature allows you to directly enter the filename or keywords to precisely find a specific file. It’s suitable for fast file search when you remember the filename (or part of the name).

3.3. When you find the target files, double-click them to preview. The Preview feature allows you to check pictures, videos, audios, and documents before recovery. This avoids unnecessary recovery operations, saving time and storage space.
3.4. After confirming the needed files, select them and click Save. Review the pop-up window, choose an external hard drive to store the recovered files, and click OK. The recovery will start.

When the crash disk file recovery completes, connect the external drive to the functioning computer and check the recovered files.
If there is no data or the drive is inaccessible, use MiniTool Power Data Recovery Free to scan it and recover files.
Case 2: Recover Data from a Damaged External Hard Drive
The second scenario involves recovering data from a damaged external hard drive. It only requires the free edition of this MiniTool recovery software.
MiniTool Power Data Recovery FreeClick to Download100%Clean & Safe
MiniTool Power Data Recovery Free allows you to restore 1 GB of files for free. Now, start to recover data from corrupted external hard drives.
Step 1: Open the software. Under Logical Drives, find the target drive and click Scan.
Step 2: When the scan ends, find the target files using Path, Type, Filter, and Search.
Step 3: After finding the files, double-click the target files to preview.
Step 4: After confirming the files, check all required ones and click Save.
Step 5: In the new directory window, choose a safe path and click OK.
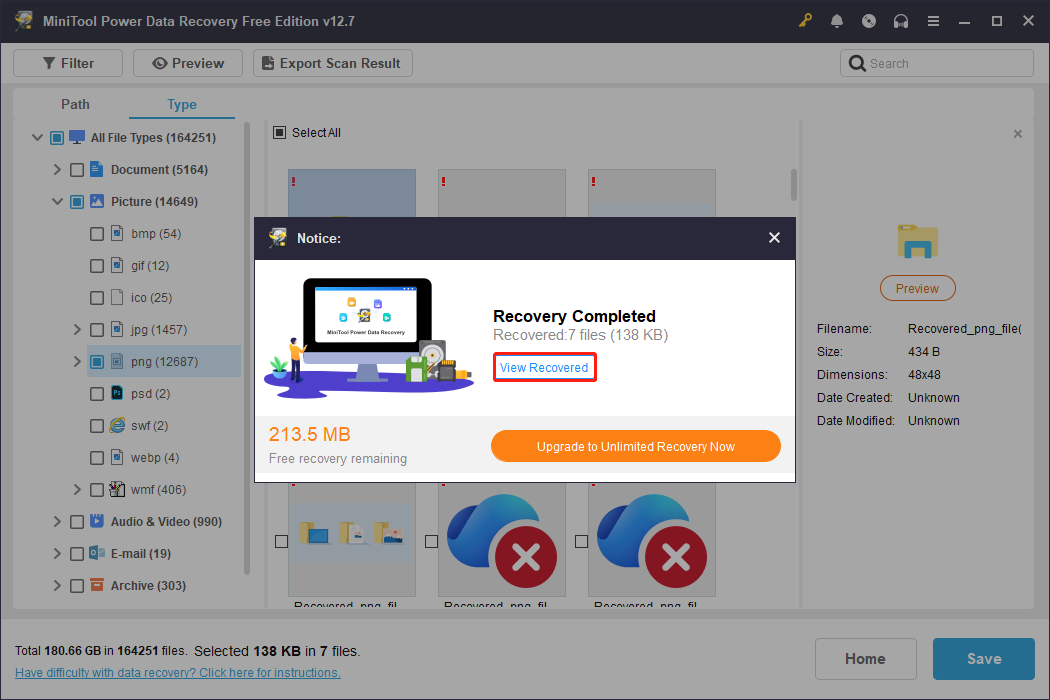
When the Recovery Completed window shows, click the View Recovered button to check your files.
After completing the crash disk file recovery, it’s time to repair your damaged hard drive.
Part 2. Repair Your Corrupted Hard Drive
This section teaches you how to fix corrupted hard drive by running CHKDSK, using the disk check tool, assigning or changing the drive letter, and formatting it.
Approach 1: Run CHKDSK
When a hard drive fails, running CHKDSK can help check for and repair errors at the file system level.
It scans the disk for logical problems, bad sectors, and corrupted file structures, and attempts to repair recoverable portions.
Here is how to run CHKDSK:
Step 1: Type Command Prompt in the Windows search bar, right-click the best match, and select Run as administrator.
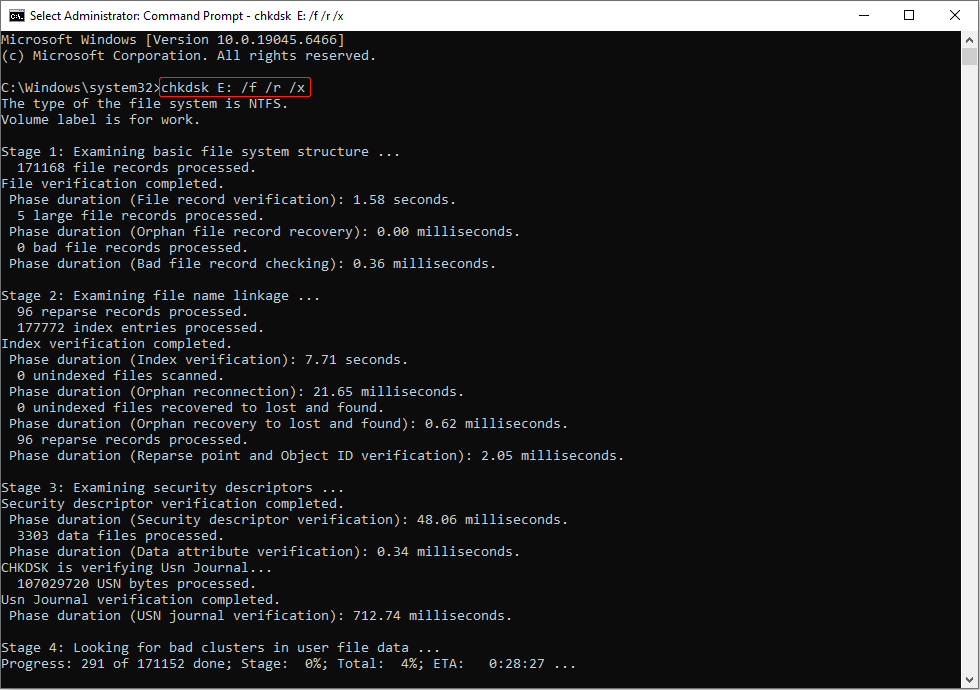
Step 2: Input chkdsk E: /f /r /x and press Enter. Replace E with your drive letter.
- /f: Repair disk errors.
- /r: Locate bad sectors and recover readable information.
- /x: If necessary, force unmount the volume first.
When the process ends, check your drive. If it doesn’t work, try the following methods.
Approach 2: Use the Disk Check Tool
Windows’ disk check tool can scan the disk structure, identify logical-level corruption, and attempt to repair it automatically. Using this tool can restore the readability and stability of the hard drive as much as possible.
Here are the steps:
Step 1: Press Win + E to open File Explorer.
Step 2: Under This PC, right-click your drive and choose Properties.
Step 3: Switch to the Tools tab and click Check.
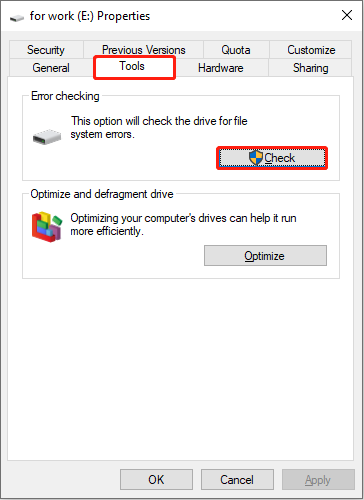
Step 4: Click Scan drive for the internal hard drive, or Scan and repair drive for the external hard drive.
If this method fails, proceed with the next one.
Approach 3: Assign or Change the Drive Letter
In some cases of disk corruption, the partition is undamaged but becomes inaccessible due to a missing or conflicting drive letter. This can happen due to improper ejection, system crashes, or software conflicts.
Assigning or changing the drive letter can help the system re-establish access to the drive and make it visible in File Explorer again.
Follow the steps below to assign or change the drive letter:
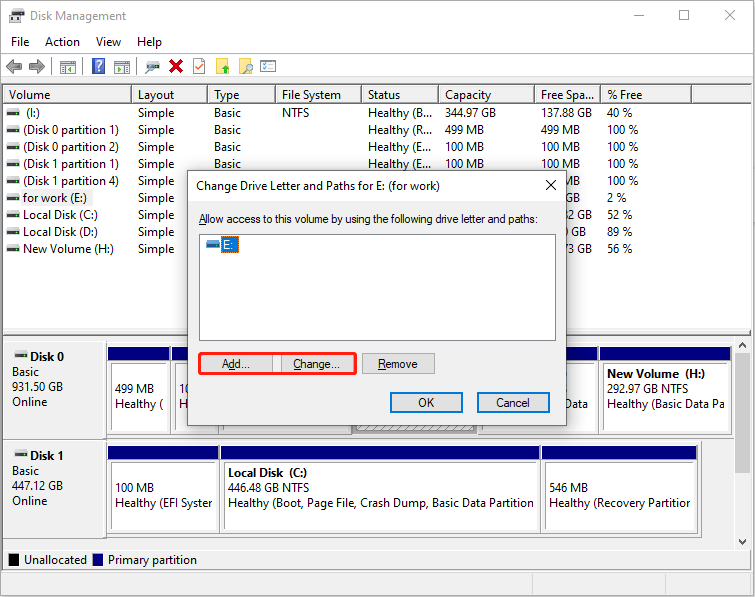
Step 1: Press Win + X and choose Disk Management.
Step 2: Right-click the target disk and choose Change Drive Letter and Paths.
Step 3: In the new window, do as follows:
- If there is no drive letter, click the Add button, select an unused letter, and then click OK.
- If there is a drive letter, click the Change button, select a new letter, and then click OK.
When the drive letter is assigned or changed, check if your hard drive can work normally.
Approach 4: Format Your Hard Drive to Normal
The last resort is formatting. Formatting rebuilds a completely new file system structure, clearing and reinitializing any corrupted directories, indexes, and allocation tables.
This restores the hard drive to a usable basic state, preventing further errors from spreading. It also provides a clean and stable starting point for subsequent repartitioning, system reinstallation, or writing new data.
Here are three formatting options.
Option 1: With File Explorer
Step 1: Open File Explorer, right-click the target drive, and select Format.
Step 2: Choose a file system, type a new name, and check the Quick Format option.
Step 3: Click Start > OK to start the formatting process.
Option 2: Through Disk Management
Disk Management is a Windows built-in disk management tool. It can be used to format your corrupted hard drive.
Step 1: Open Disk Management, right-click the target disk, and select Format.
Step 2: Enter a new volume label, choose a file system, and check the Perform a quick format option.
Step 3: Finally, click OK to apply this change.
Option 3: Via MiniTool Partition Wizard
If Windows cannot complete the formatting, MiniTool Partition Wizard is a good choice. This is a professional partition management tool. Formatting is one of its core disk management functions.
Step 1: Download and install MiniTool Partition Wizard on your computer.
MiniTool Partition Wizard FreeClick to Download100%Clean & Safe
Step 2: Launch the software, then find and select the target drive.
Step 3: Click Format Partition under Partition Management.
Step 4: In the pop-up window, type a partition label, choose a file system, and click OK.
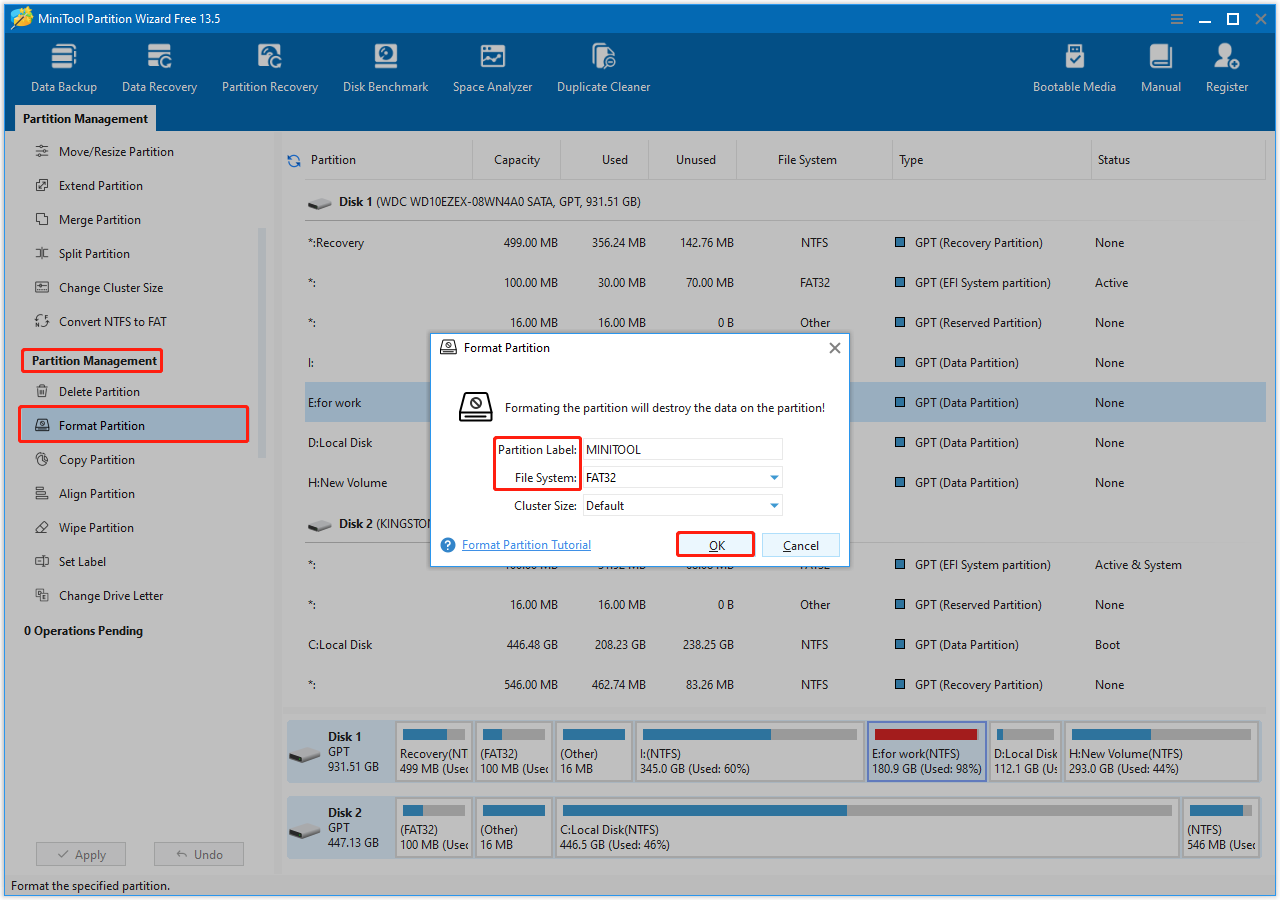
Step 5: In the bottom-left corner of the main interface, click Apply to make the change take effect.
After the formatting is complete, check and start using your disk.
To Conclude
When your internal or external hard drive gets corrupted, use MiniTool Power Data Recovery to perform a crash disk file recovery first.
There are two situations here. The first is to create a bootable media to recover data from a crashed PC. The second is to scan a damaged external hard drive and restore data from it.
After restoring data, run CHKDSK, use the disk check tool, assign or change the drive letter, or format the disk to repair your hard drive.
Should you have any questions regarding the MiniTool products, send messages to [email protected].
About The Author

Position: Columnist
Chelsea graduated from university with a major in English. She has a strong interest in English writing. It is this passion for writing that led her to become an English editor. Her articles mainly focus on data recovery and other computer industry news. As an energetic and outgoing girl, Chelsea enjoys listening to music, singing, riding bikes, and eating in her spare time.
User Comments :