When you plug in a removable device to the computer running Windows 10, 8.1, 8, 7, or Vista, an error may occur to inform you that you there’s a problem with this drive and you need to scan it & fix it. Naturally, most people are prone to start the scan and fix process as the system suggests.
- Sometimes, no error will be found after the scan.
- Yet, if any errors are found on this drive, Windows will advise you to repair the drive by offering an error checking window, on which you can click to Repair drive easily.
Now, here comes the question: what if Windows was unable to repair the drive? How are you going to deal with such a terrible situation? My advice is recovering data firstly when Window can’t repair this drive. Then, try any method that works to fix the issue properly.
Windows Was Unable to Repair the Drive: Error Occurs
Some of you may curious about: how do I scan and fix my drive, right? Actually, there is a check disk utility integrated into all Windows systems (the CHKDSK error checking) as many people know. To be specific, this disk checking tool aims at checking logical and physical errors on the file system and file system metadata of certain drive.
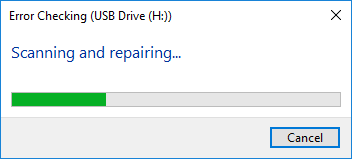
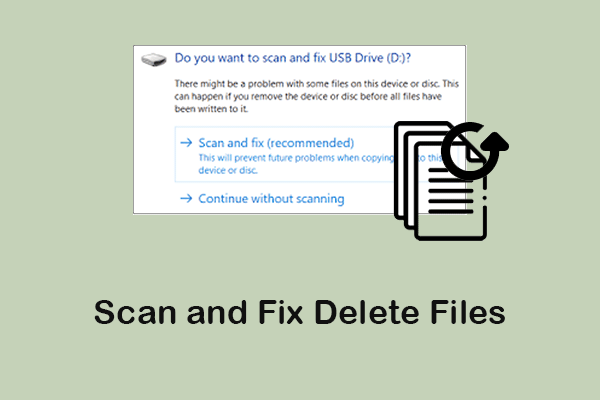
Well, does scan and fix delete files? Does repair drive erase data? Undeniably, it may do. So you are expected to read this so as to gain the skills of deleted files recovery after the scan and fix:
Though you can click to repair the drive after the error checking scan, you may end up in failure:
Error Messages
- There was a problem repairing this drive.
- There was a problem repairing this drive SD card.
- Windows was unable to repair the drive USB.
- Windows can’t repair the drive while it’s in use.
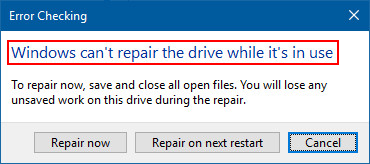
There Was a Problem Repairing This Drive
”There was a problem repairing this drive. Windows was able to repair the drive. Close this dialogue box, and then try to repair the drive again”. How to fix when you see this error?
- Eject the drive from your computer properly.
- Restart your computer.
- Connect it again after the PC restarted.
Most of the time, the quick restart won’t work. So you need to recover data from this drive immediately and then follow the solutions that will be mentioned later carefully.
Real Case
How to fix this error “There was a problem repairing this drive”?
I’ve looked all over the web, and can’t find a solution to this one. I have Windows 8 and get this error message every time I plug anything into my usb port: There’s a problem with this drive. Scan the drive now and fix it. Whether it’s my iPod, flash drive, any usb-I get this window in the upper right of the screen. Everything I plug in works and is fine, and there is no problems with the devices. At least the window goes away in about 5-6 seconds. Still, it would be nice if it didn’t show up at all. (It would also be nice to win the lottery, but I can’t always have everything I want!) Is there a way to not have this window pop up?– from bigoldcars in Microsoft Community
Recover Data at Once When Window Can’t Repair the Drive
Reasons for USB Drive Data Recovery
Why the USB data recovery from the check program error is necessary? Two main reasons are:
- It’s very likely that there will be some files lost during the scan and repair process.
- In order to fix the Window can’t repair this drive, you’ll need to accomplish a lot of operations, which can easily lead to data loss.
Steps of the USB Device Recovery
How to recover a deleted scanned document:
Step 1: find a piece of reliable data recovery software and get it downloaded properly (download it from the official website; don’t open some suspicious links at will). MiniTool Power Data Recovery is trusted by over 2 million people; if you doubt this, you may use the Trial Edition of version 8.1 at first.
MiniTool Power Data Recovery TrialClick to Download100%Clean & Safe

Step 2: install the trial edition by double clicking on the setup application. Then, launch it to see the following window.

Generally, this page will only appear for a few seconds and then you will be brought to the main interface of the software.
Step 3: please select an option from This PC, Removable Disk Drive, Hard Disk Drive, and CD/DVD Drive.
- This PC option helps to display all the partitions that are mounted to the computer.
- Removable Disk Drive is used to display all the removable devices, such as USB flash drive, USB external hard drive, or SD card (here’s how to recover deleted files from USB).
- In Hard Disk Drive, only the hard disk drives (both internal and external) will be shown.
- Obviously, the CD/DVD Drive option is designed for only the optical discs like CD and DVD.
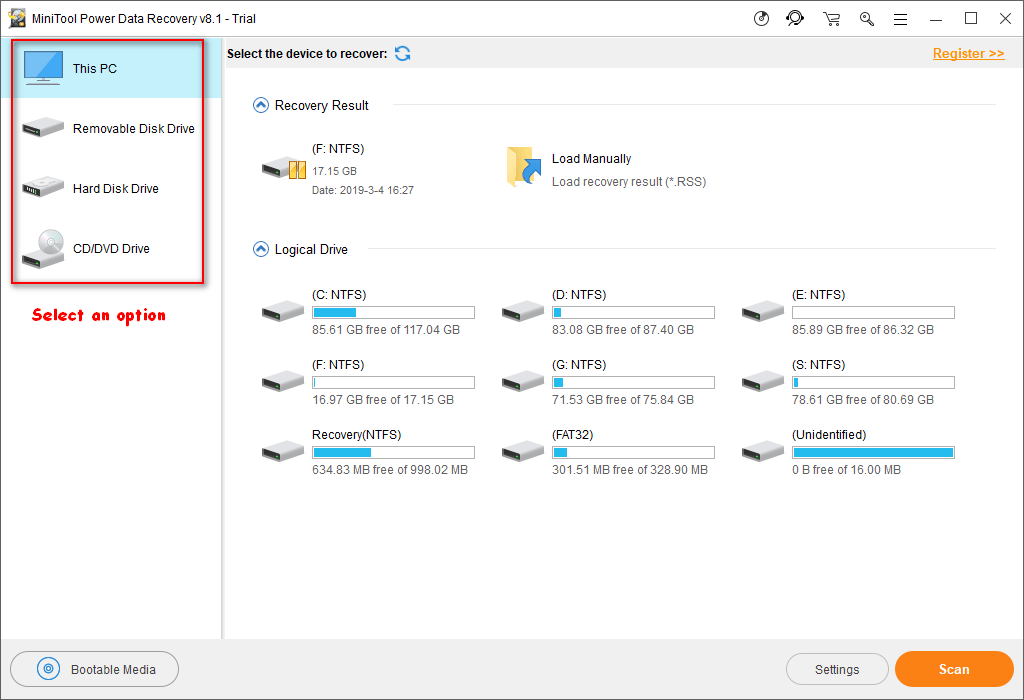
- Apparently, you should choose This PC if the target drive is only a partition on the internal/external hard disk, memory card, or the flash drive.
- Well, if the target device is a hard disk/flash disk that contains more than one partition, you may choose Removable Disk Drive or Hard Disk Drive.
Step 4: specify the drive that Windows prompts it can’t repair. Then double click on it or just click on the Scan button to start detecting files in it. Then, you’ll see the window as shown below.
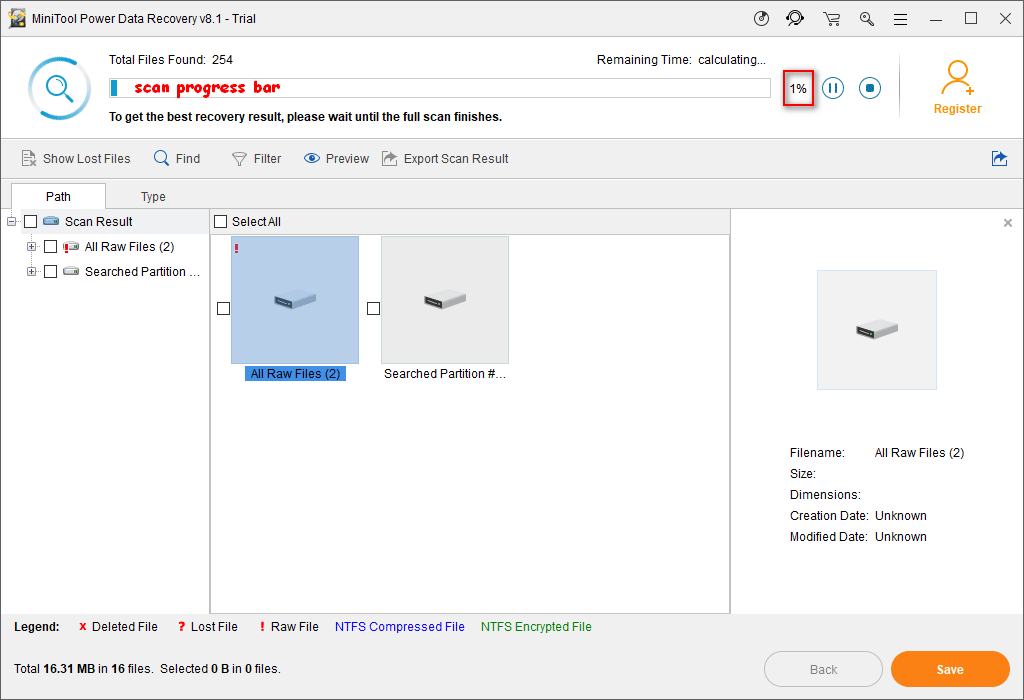
Here, you can click to browse the currently found files any time during the scan. Yet, as the prompt says, if you’d like to get the best recovery result, you may as well wait till the end of the scan.
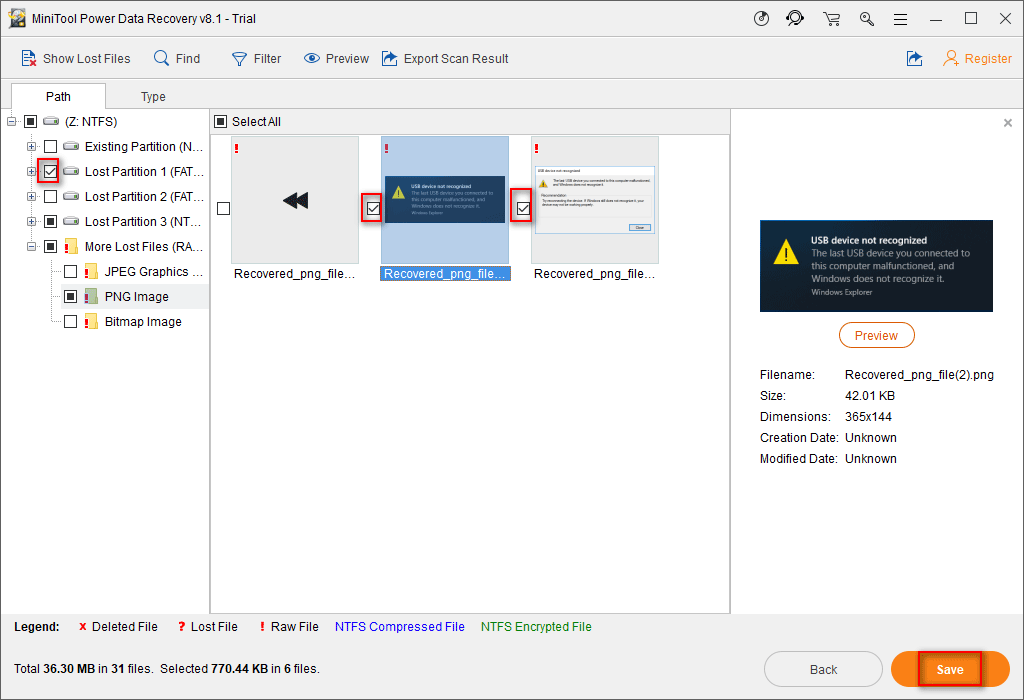
Step 5: once you have found the deleted scanned document that you need, you should add a check mark into the square box in front of it. Then, when you have selected all the files you need, you should click on the Save button to choose a safe storage path for them (don’t save them to the original place which Windows fails to repair). At last, please click on the OK button to confirm the storage path.
When all files have been saved to the appointed place successfully, a prompt window will appear in the software. At this time, you can close the software and put an end to the recovery.
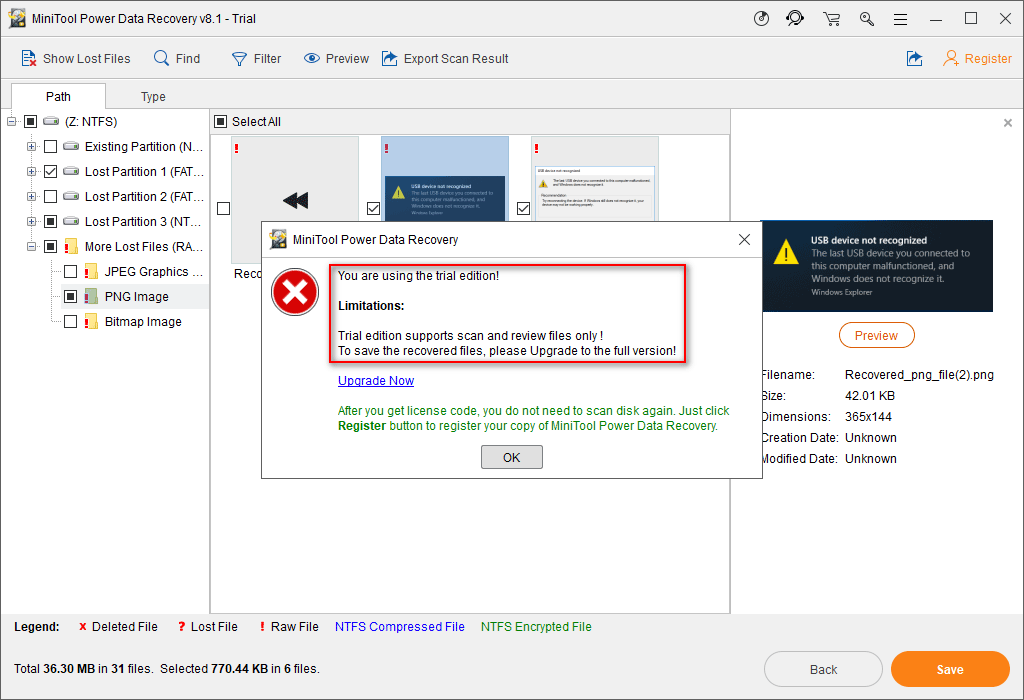
If you’d like to learn more details on how to fix a broken USB stick and recover data, please go to this page:
Possible Causes
After an investigation, I found 3 main causes for the unrepairable drive issue:
- Disconnect the USB device from your computer forcibly (you are advised to safely remove the USB device).
- Get attacked by the virus since you use the USB drive across different devices and platforms (use it on different PCs, game consoles, or cameras).
- There’s something wrong with the file system of the USB drive (The file or directory is corrupted and unreadable, fatal device hardware error, etc.).
Fix Error: Windows Was Unable to Repair the Drive
The Windows snap-in Error Checking or CHKDSK tool is mainly used to scan the partitions and disk drives mounted on the computer for disk errors or bad sectors. Once the problem is found, it will offer solutions to help you repair the error in order to make the drive working properly again. You just need to finish a few clicks to scan the disk and repair the error.
But, if the system says it can’t repair the drive for you, you need to turn to the following solutions for fixing the problem after recovering data after CHKDSK. (Please note that all the operations below are performed in a Windows 10 computer.)
Solution 1: Run Disk Check in Command Prompt
- Click on the Cortana icon/search box from the left corner of the taskbar.
- Type command prompt into the text box.
- Right click on Command Prompt (Desktop app) from the Best match area.
- Choose Run as administrator from the right-click menu.
- Select Yes in the pop-up User Account Control window so as to allow this app to make changes to your device.
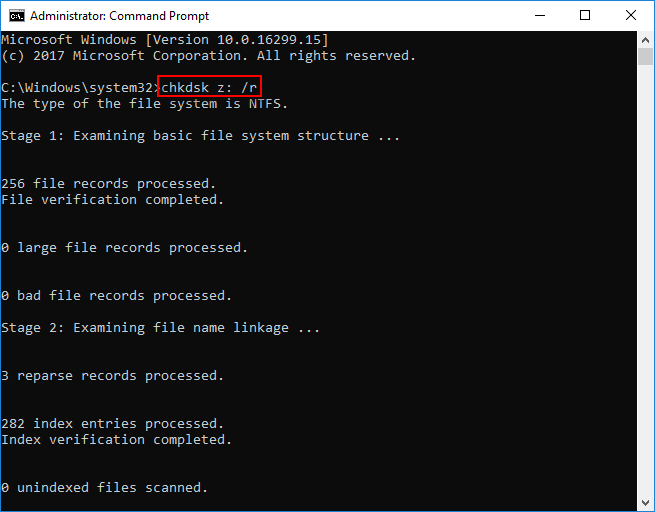
- Type chkdsk *: /r and press Enter (this command helps to locate the bad sectors on the target disk, analyze physical disk errors, and recover readable information; but you need to remember that the target disk must be locked).
- Wait for the check disk process to complete (if any problems are found, the system will fix them automatically).
Solution 2: Run System File Checker Tool
- Repeat step 1 ~ 5 mentioned in solution 1 or run the command prompt as administrator by another way.
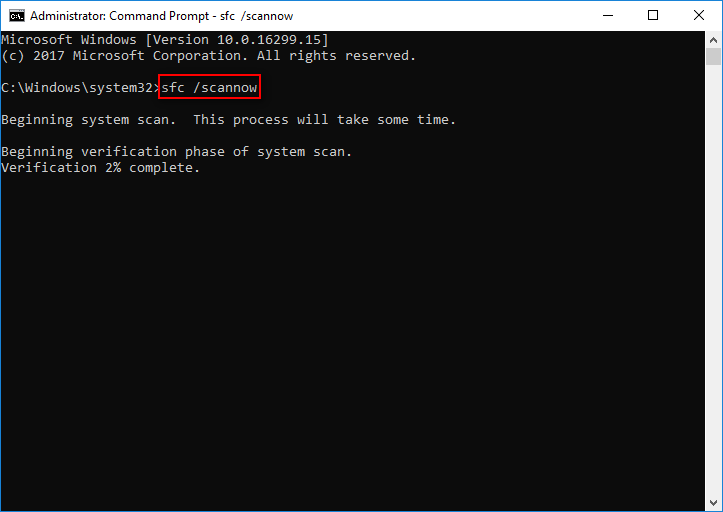
- In the Administrator: Command Prompt window, type sfc /scannow and press Enter.
- Wait for the completion of the scan and exit command prompt at the end.
- Restart your PC and go to check for any improvements.
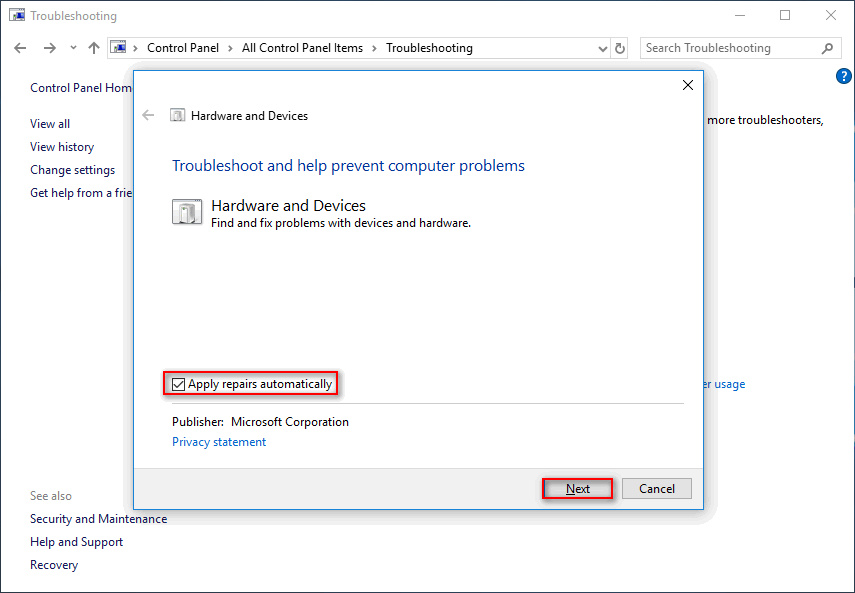
Solution 3: Troubleshoot Hardware and Devices
In all Windows systems, there is a Hardware and Devices troubleshooter, designing for fixing errors with storage devices. Here’s how to use it:
- Click on the Windows Start button in the lower left corner of the screen.
- Scroll down to find the Windows System folder.
- Click to expand this folder and choose Control Panel within it.
- Choose to View by Small icons.
- Choose Troubleshooting from listed items.
- Find Hardware and Sound from the right-side pane.
- Click on the Configure a device option under it.
- Click on the Advanced option in the pop-up window so as to Apply repairs automatically.
- Click on the Next button and then follow the instructions to finish the repair process.
Solution 4: Run Startup Repair
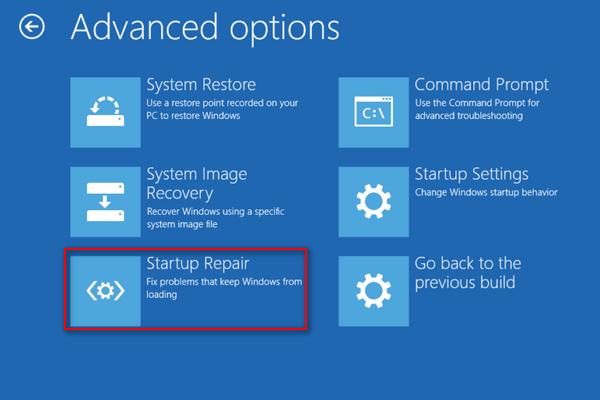
The Startup Repair is also a popular tool built in Windows. Its main function is to scan and repair the errors that may break off the loading process of the computer system. Here’s how to use it:
- Click on the Windows Start button.
- Scroll down to select Settings option.
- Choose Update & Security (Windows Update, recovery, backup).
- Select Recovery from the left-hand pane.
- Find the Advanced startup section from the right pane.
- Click on the Restart now button.
- Click on the Troubleshoot button from Choose an option window.
- Select the Advanced options from Troubleshoot window.
- Click on the Startup Repair button from Advanced options window.
- Select the correct account and type the corresponding password.
- Click on the Continue button and wait for the scanning/problem detecting process.
- If any problem is found, the tool will fix it.
Click here to see how to access Advanced startup in different cases.
That’s all I want to say about how to fix the Window can’t repair this drive/check program error. Of course, there are other possible fixes like running a diagnostic tool and a clean install of Windows. You may follow them step by step to try to solve the problem yourself.
Conclusion
It’s a normal thing to see a Windows prompt on your computer. Sometimes, the message only informs you of some information; while in other cases, it may indicate a series of problems found by the system. For instance, Windows was unable to repair the drive is a popular error message to show that there’s a problem fixing the found error on the target device.
What’s the right thing to do at this time? My suggestions are:
- Close the prompt window and recover data from it immediately with a reliable tool.
- Then, you may analyze your problem and try the possible solutions to try to make it right.
If you still can’t repair the error after reading this, please feel free to leave a message below, describing your situation in detail.
Windows Was Unable to Repair the Drive FAQ
- Right click on This PC/Computer icon on the desktop.
- Choose Manage from the context menu.
- Click Disk Management under Storage.
- Look through the disks & partitions list and pick out the problematic drive.
- Right click on it and choose Format.
- Wait for the process to finish.
- If this didn’t work, please use Format Partition of MiniTool Partition Wizard.
- Run CHKDSK in Command Prompt to repair logical problems.
- Check the drive for errors by clicking Check under Error checking.
- Run a scan under Maintenance in Control Panel.
- Recover data from the corrupted hard drive and then reformat it.
You can convert RAW to NTFS without formatting by using the Command Prompt tool.
- Open Windows search textbox and type cmd.
- Right click on Command Prompt from search result.
- Choose Run as administrator from the pop-up menu.
- Type Diskpart and press Enter.
- Type *: /FS :NTFS (* is the drive letter) and press Enter.
User Comments :