What Is Mac Terminal?
Mac Terminal is the command line interface (CLI) for the macOS operating system (OS), which is similar to the Command Prompt in Windows. When started, it provides a line interface to control the base of UNIX-based operating systems.
Every Terminal window corresponds to an individual shell process. Within each window, a prompt awaits your commands. The Terminal tool serves multiple purposes, including running software, opening files, and even assisting in the recovery of deleted Mac files, among other functions.
For more details about Mac Terminal, please turn to this page: Terminal (macOS).
How to Recover Deleted Files With Mac Terminal
Recovering deleted files using Mac Terminal is relatively straightforward. You can easily get deleted files back using Mac Terminal by typing specific command lines.
Notes:
- The Terminal command line for data recovery functions on files that haven't been emptied from Trash. After emptying Trash, the Terminal is no longer helpful.
- Since files deleted with the RM command will not be moved to Trash, you cannot recover RM-deleted files by proceeding in the following ways.
Way 1. Use Mac Terminal to Open Trash and Restore Data
Occasionally, for various reasons, you might be unable to open the Trash folder. In this situation, you can try to access Trash with Terminal.
Step 1. Open Mac Terminal.
On your desktop, double-click the Finder icon to open it. In Finder, move on to the Applications tab, then click the Utilities folder in the right panel and scroll down to double-click Terminal to access this powerful command line utility.
Step 2. In the command line window, type open .Trash and hit Return.
Step 3. Now you have come to the interface of Trash. Find the desired file according to the file name, modification date, etc. Then right-click the wanted item to select Put Back.
After that, the target file should be restored to its original location.
Way 2. Use Mac Terminal to List and Recover All Deleted Files
If the Put Back button is not working, you can use Terminal to list all deleted files located in Trash and recover them one by one using the command line.
Step 1. Open Terminal.
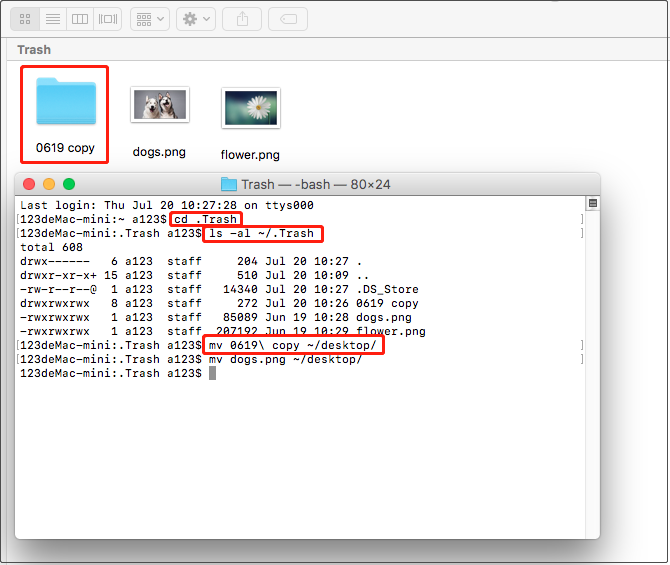
Step 2. In the Terminal window, type cd .Trash and press Return.
Step 3. Next, type ls -al ~/.Trash and hit Return (To ensure precise execution of the command, it is advised to simply copy and paste it).
This command will list all deleted files located in the Trash folder and display the file names.
Step 4. Input the corresponding commands one by one according to the files you want to restore, as shown in the figure below.
For example, to recover the folder named “0619 copy”, you need to type “mv 0619\ copy ~/desktop/” and press the Return key. To recover an individual file, such as the image file “dogs.png”, you need to type “mv dogs.png ~/desktop/” and press Return.
- For filenames containing spaces, replace them with a slash and space when tying the command.
- The “desktop” represents where the deleted files were previously stored.
Repeat the steps to recover all wanted files that are listed.
Alternative Ways to Recover Deleted Mac Files When Mac Terminal Not Working
As mentioned above, after emptying the Trash Bin, you cannot recover deleted files with Mac Terminal. Is there any other way to recover permanently deleted files Mac?
Fortunately, the answer is positive. Listed below are the alternative ways to restore Mac deleted files without using Terminal.
Solution 1: Recover Deleted Files With Time Machine
Time Machine is a built-in data backup application distributed with the Apple Mac OS computer operating system and designed for use with Time Capsule storage products and other internal and external disk drives.
With Time Machine, you can back up files on your Mac that aren’t part of your macOS installation, such as apps, music, photos, and documents.
Typically, when you connect a storage device to your Mac, your Mac might ask you if you want to use it for Time Machine backups. For detailed information about Time Machine backup, please check: Back up your Mac with Time Machine.
For a comprehensive guide to recovering deleted or lost files by using Time Machine, please refer to: Restore your Mac from a backup.
Solution 2: Recover Deleted Files With Data Recovery Software
If you cannot carry out a Mac Terminal file recovery and do not have a Time Machine backup file, you can turn to a piece of professional and free Mac data recovery software.
Stellar Data Recovery for Mac, a reliable and easy-to-use Mac data restoration tool, is designed to recover lost files from your Mac file storage devices, including Mac notebook/desktop, USB flash drive, digital camera, removable hard drive, and so on.
Various file types are supported by Stellar Data Recovery for Mac, such as documents, audio & videos, emails, pictures, graphics, archives, and more.
Step-by-Step Guide to Recover Deleted Files With Stellar Data Recovery for Mac
Before you start, click the button below to download the trial edition of Stellar Data Recovery for Mac.
Data Recovery for MacClick to Download100%Clean & Safe
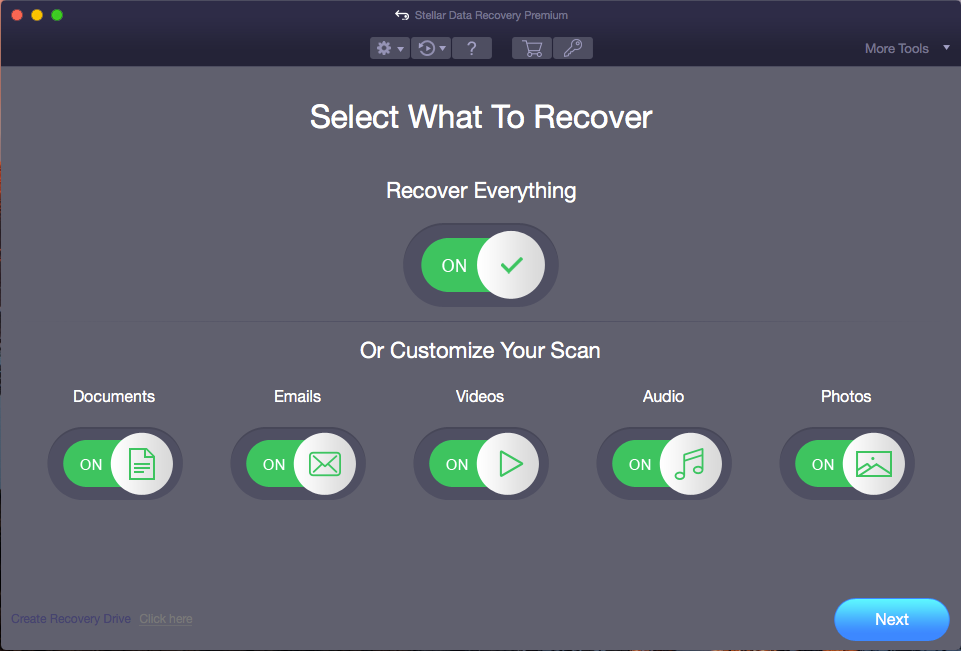
Step 1: Install and launch Stellar Data Recovery for Mac to get its main interface.
Step 2: Select what types of files you want to recover. For example, if you want to recover documents and photos, you can only turn these two options on. After that, click the Next button to continue.
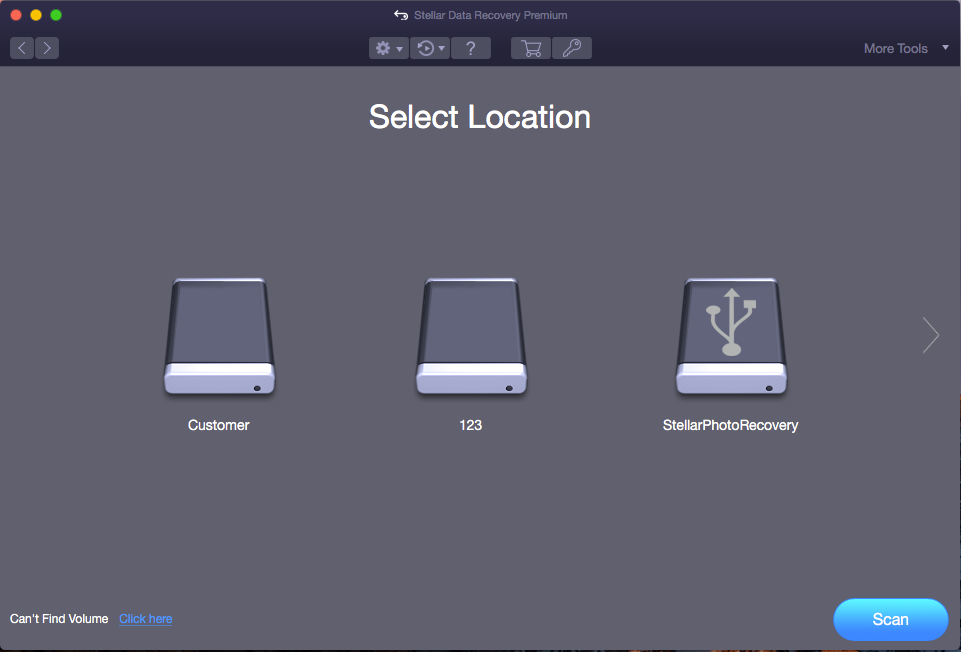
Step 3. In the new window, select the target volume where data loss happens and then click the Scan button located in the lower right corner to scan for data on it.
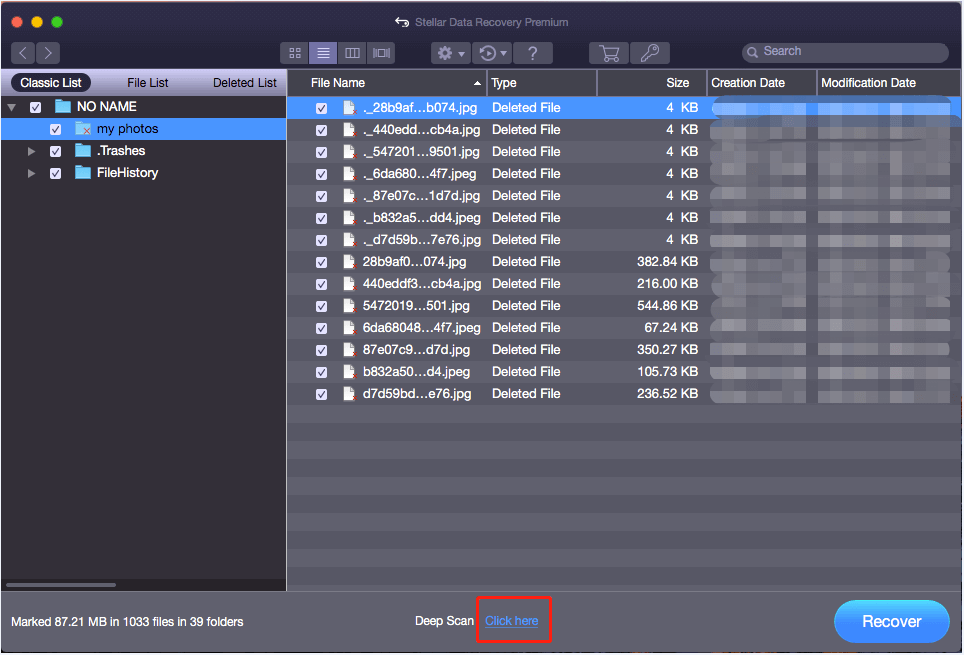
Step 4. After scanning, you will see all found files on the selected volume are displayed in the Classic List section. And, you can click the Click here button next to Deep Scan to perform a comprehensive scan of the selected volume.
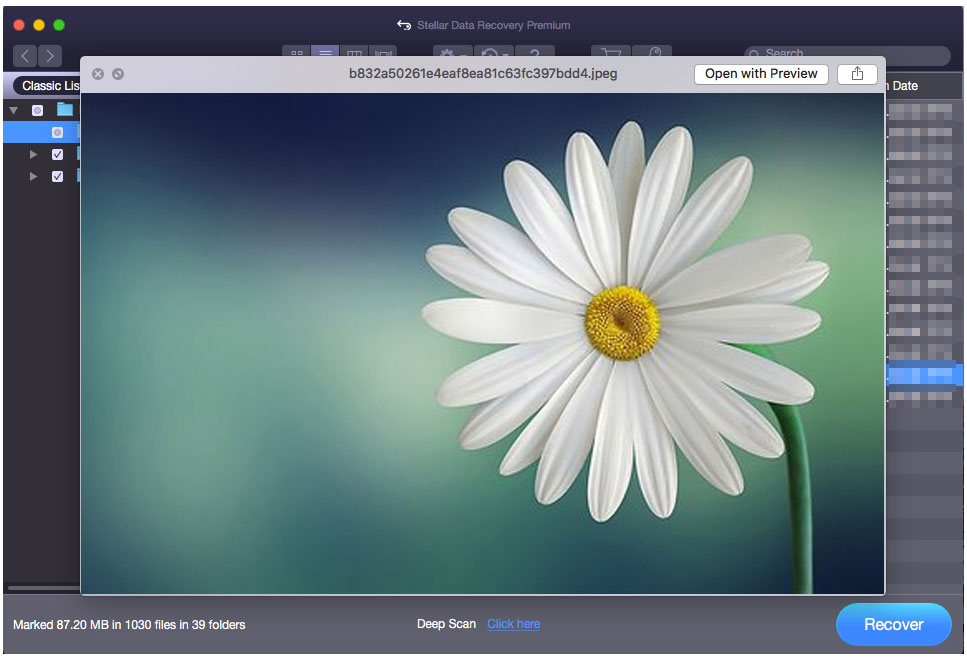
Step 5. To make sure which files are the required ones, you can double-click each file to preview it.
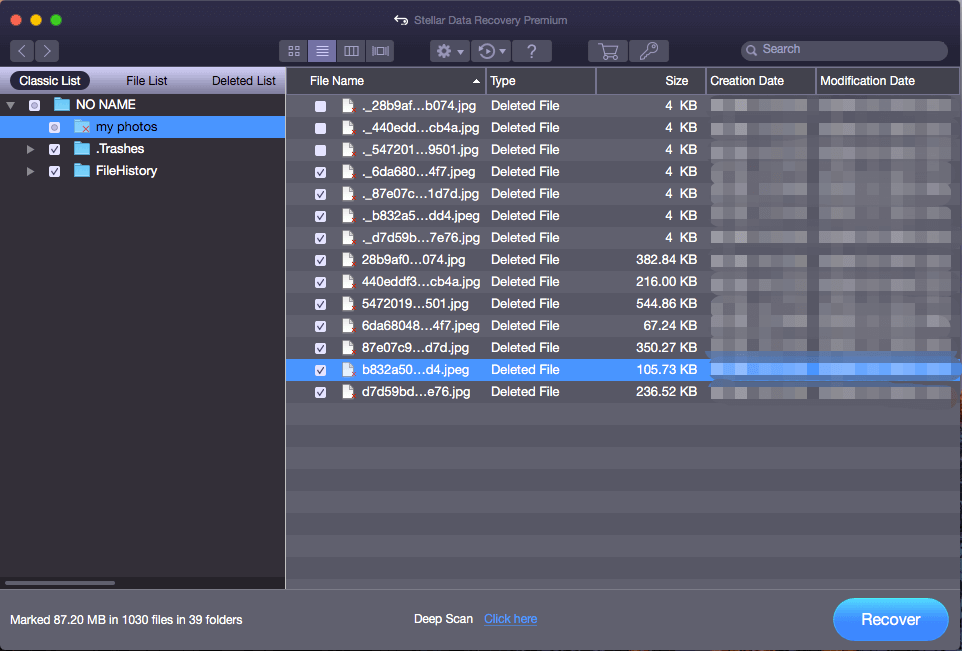
Step 6. Select all needed files and click Recover to choose an appropriate destination to store selected data.
Note: Since the trial edition of Stellar Data Recovery for Mac only supports data scanning and preview, you will be prompted to activate this data recovery product. Just type the activation key to activate it. If you do not have an activation key, click the Get it Now button to get one.
Solution 3: Recover Deleted Files via Data Recovery Companies
Apart from recovering Mac files with Terminal, Time Machine, and Stellar Data Recovery for Mac, you can turn to professional data recovery companies or services to restore Mac files.
With the help of data recovery companies or services, you don’t need to have a backup file or pay for any data recovery programs.
Nonetheless, this approach comes with its own drawbacks. Among the most prominent ones are substantial financial expenses and the potential vulnerability to information leakage.
2 Useful Tips for Mac Terminal Deleted Files Recovery
1: Back up data with Time Machine.
As mentioned earlier, Time Machine can help to back up and restore Mac data. So, you are strongly suggested to back up all needed data with Time Machine in case of any accidents.
2: Do not use the drive once data is lost.
Once your data are lost, you should stop writing new data on the drive containing lost files. If the original data is overwritten, it cannot be recovered by any data recovery solution, including data recovery companies and data recovery software.
Bottom Line
Now, it’s your turn to recover deleted files! Choose the right data recovery solution to get lost data back.
Should you have any questions about how to recover deleted files with Mac Terminal or how to use Stellar Data Recovery for Mac, please feel free to leave them in the following comment zone or directly contact us via [email protected]. Much appreciated!
Recover Deleted Files With Mac Terminal FAQ
Yes. You can recover them from the Trash folder or using the Mac Terminal tool. If the Trash Bin is emptied, you can restore them from backup files or use Stellar Data Recovery for Mac.
- Launch Stellar Data Recovery for Mac.
- Select the file types you want to recover.
- Scan the drive containing deleted files.
- Preview and check all the needed files, then save them to another drive.
If you delete files by mistake in Mac, you can find these deleted files in Trash. Open Trash, find the deleted file and right-click it to choose Put Back from the drop-down list to recover the recently deleted files.
Files deleted with the RM command are not put into the Trash, so they cannot be recovered using the Terminal tool. In this case, you can try Stellar Data Recovery for Mac, but it is not necessarily 100% sure that deleted files can be recovered.
About The Author

Position: Columnist
Shirley holds a bachelor’s degree in English and has been an editor at the MiniTool Team for many years. She specializes in IT-related content, with a focus on data recovery, file backup, disk management, and other technical topics. She is committed to delivering clear, accurate, and practical solutions to help users resolve common computer issues.
User Comments :