Windows Update Install Error 0x8007012A
The install error 0x8007012A can appear to stop you from updating the firmware of your Windows 11, Windows 10, or Surface device. Some people also report that they encountered the same error code 0x8007012A when they attempted to open any Microsoft apps after an update.
Some of the following tips may help you get rid of the error 0x8007012A. It is worth trying!
1. Check your Internet connection.
2. Keep connected to the power supply.
3. Remove all your connected external peripherals.
4. Restart your PC.
Then if you are still stuck in trouble, you can proceed to the next part. Before that, you had better prepare a data backup because some of the next operations may cause data loss, such as Windows reset.
You can use MiniTool ShadowMaker to backup files & folders, partitions & disks, and your system. Besides, you can also use the Clone Disk feature to clone SSD to larger SSD or the Sync option to share files and folders.
The program boasts many wonderful features and functions, such as backup schemes and schedules to optimize users’ experience. Download and install this program and you can get this 30-day free trial version.
MiniTool ShadowMaker TrialClick to Download100%Clean & Safe
Fix the Install Error 0x8007012A
Fix 1: Run the Windows Update Troubleshooter
Windows Update troubleshooter helps find and repair some issues in Windows updates. To run the tool, please do as follows:
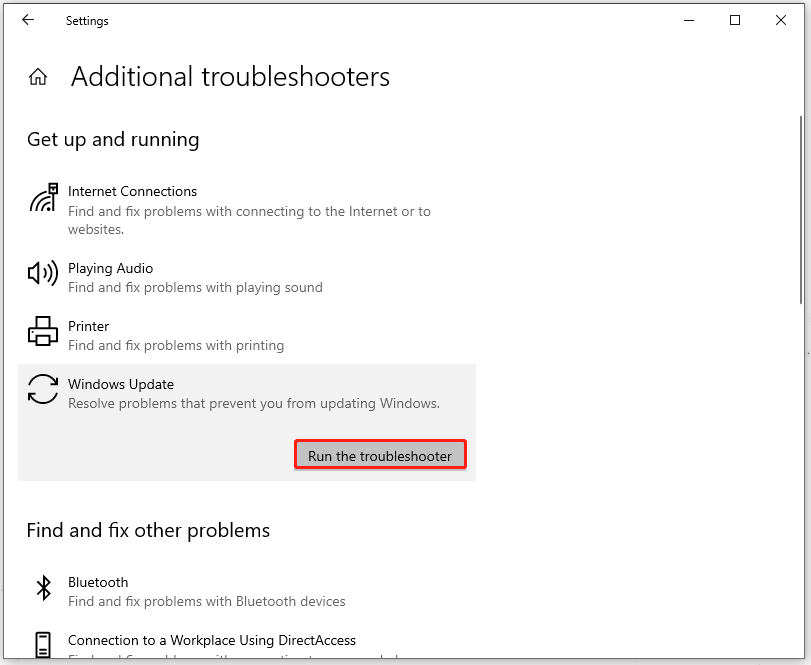
Step 1: Open Settings by pressing Win + I and click Update & Security > Troubleshoot.
Step 2: Click Additional troubleshooters and choose Windows Update > Run the troubleshooter.
Fix 2: Start Windows Update and Background Intelligent Transfer Services
Background Intelligent Transfer Service, or BITS, allows you to download or upload files between a client and server. BITS and Windows Update service are important to make the update downloading work well.
Step 1: Type Services in Search and open it.
Step 2: Scroll down to locate Background Intelligent Transfer Service and right-click on it to choose Start.
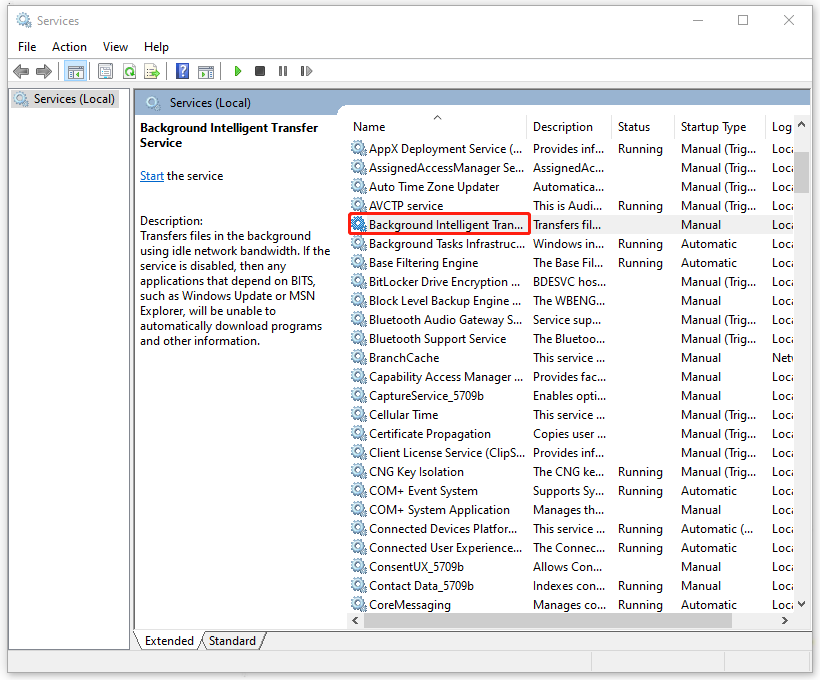
Then repeat the last step to enable the Windows Update service to start running.
Now, you can check if the install error 0x8007012A has been removed.
Fix 3: Run the SFC Scan
To run the SFC scan, you can scan and repair the corrupted system files and errors that may lead to the Windows update install error 0x8007012A.
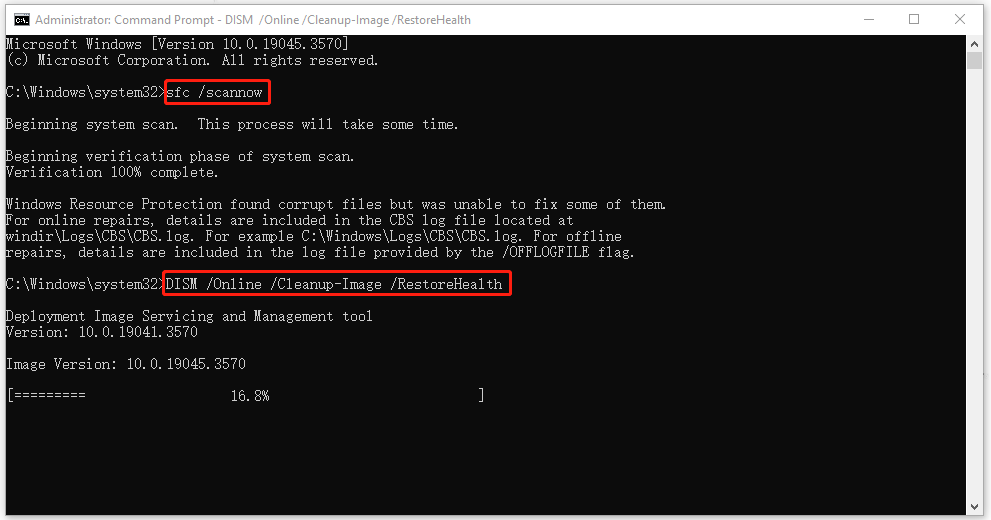
Step 1: Type Command Prompt in Search and choose Run as administrator.
Step 2: Type sfc /scannow and press Enter to execute the command.
If this command fails to repair the corruption, please continue with the command – DISM /Online /Cleanup-Image /RestoreHealth.
Fix 4: Manually Download Your Updates
If you still encounter the error 0x8007012A during the update, you can manually download and install it.
Step 1: Go to Settings > Update & Security > Windows Update > View update history.
Step 2: Remember the KB number you want to download and go to Microsoft Update Catalog to search for that.
Then you can follow the on-screen guide to download and install it.
Fix 5: Reset Your PC
The last method to fix 0x8007012A is to reset your Windows.
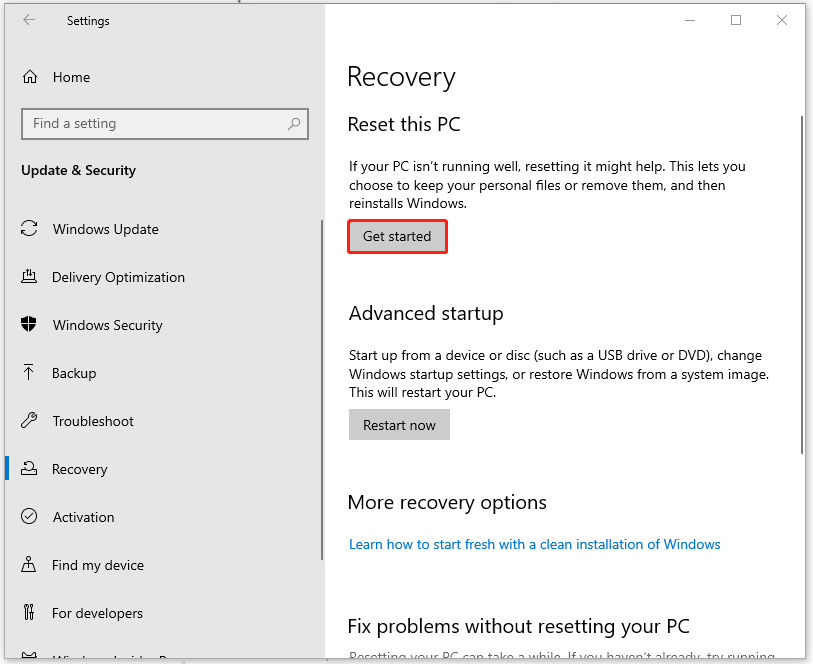
Step 1: Open Settings by pressing Win + I and click Update & Security.
Step 2: Click Recovery and choose Get started under Reset this PC.
Bottom Line:
This post can help you resolve the install error 0x8007012A. Hope this article can resolve your concerns.
User Comments :