Are you wondering how to add apps and files to the desktop in Windows 11/10? If yes, you are in the right place. In this comprehensive guide from MiniTool, we will show you several feasible and effective ways to do this task.
“Help: I want to add some apps I installed to my desktop, but I can't. How can I do it? (I already tried looking for the file and adding it from there, but I don't even have the option to do it.”reddit.com
Applications and files play a significant role in our digital experiences. They fulfill various functions, ranging from productivity to entertainment. Adding apps pr files on the desktop is a common requirement for users.
Having quick access to these applications or files on your desktop can significantly enhance your efficiency and simplify tasks. It allows for quicker and easier access to the apps, eliminating the need to sift through menus or the start menu.
Don’t hesitate any longer and add apps and files to the desktop in Windows! Relish the ease of direct access and a more streamlined workflow. Continue reading to learn how to add apps and files to the desktop in Windows 11/10.

Way 1. Use Drag and Drop
The easiest method to add apps and files to the desktop in Windows 10/11 is to drag the application from the Start menu. Follow these steps:
- Select the Start button on the taskbar to launch the Start menu.
- At the top right corner, click on All apps.
- Browse through the list to locate the application for which you want to generate a shortcut.
- Press and hold the app, then drag it onto your desktop.
- The application shortcut will now be visible on your desktop.
Way 2. Create an App Shortcut from the Start Menu
If dragging and dropping is not effective, you can generate a desktop shortcut using the file location from the Start menu. Here’s how to do it:
- Click the Start button located on the taskbar.
- Select All apps at the top right corner.
- Locate the application in the list.
- Right-click on the app, choose More, and then select Open file location.
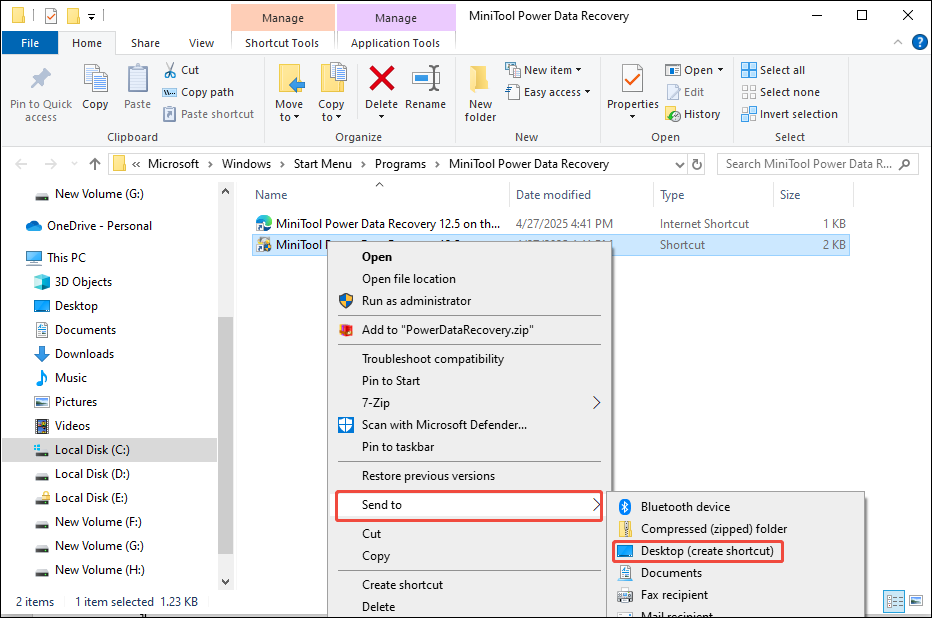
- In the File Explorer window that appears, right-click on the program icon and select Show more options.
- Then click on Send to and select Desktop (create shortcut). Another option is to copy and paste the icon directly onto the desktop.
Way 3. Create a Shortcut for Apps or Files on the Desktop
To create a shortcut for applications that might not show up in the Start menu, you can generate a shortcut directly from the installation directory:
- Right-click on a blank space on the desktop, hover over New, and choose Shortcut.
- In the Create Shortcut dialog, click Browse.
- Go to the application’s installation folder, select the executable file, and click OK.
- Click Next to proceed.
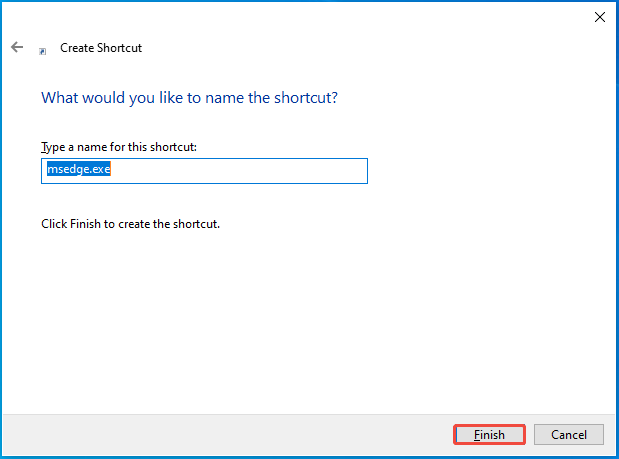
- Provide a name for the shortcut or keep the existing name, then click Finish.
Way 4. Create an App or File shortcut Via Command Prompt
To create a shortcut for an application using the Applications folder, follow these steps.
- Press Win + R to launch the Run dialog, then type cmd, and hit Enter to open the Command Prompt.
- In the Command Prompt window, enter the following command and press Enter: explorer shell:AppsFolder
- This action will display the Applications folder that contains all your installed programs.
- In the Applications folder, find the application for which you wish to create a shortcut.
- Right-click on the app and choose Create shortcut.
- A message will pop up asking if you want to place the shortcut on your desktop. Click Yes.
What If Shortcuts Are Lost on Windows
Occasionally, shortcuts may get lost due to human errors, virus and malware infection, system crashes, or other data loss scenarios. In such cases, you may need to utilize MiniTool Power Data Recovery to recover your files.
This free software from MiniTool is able to recover all kinds of files from USB flash drives, SD cards, HDDs, SSDs, and various other storage media. The free version allows for the recovery of up to 1 GB of files at no cost.
MiniTool Power Data Recovery FreeClick to Download100%Clean & Safe
Here are the detailed steps to recover lost or deleted shortcuts on Windows:
Step 1. Launch this data recovery tool to enter its main interface.
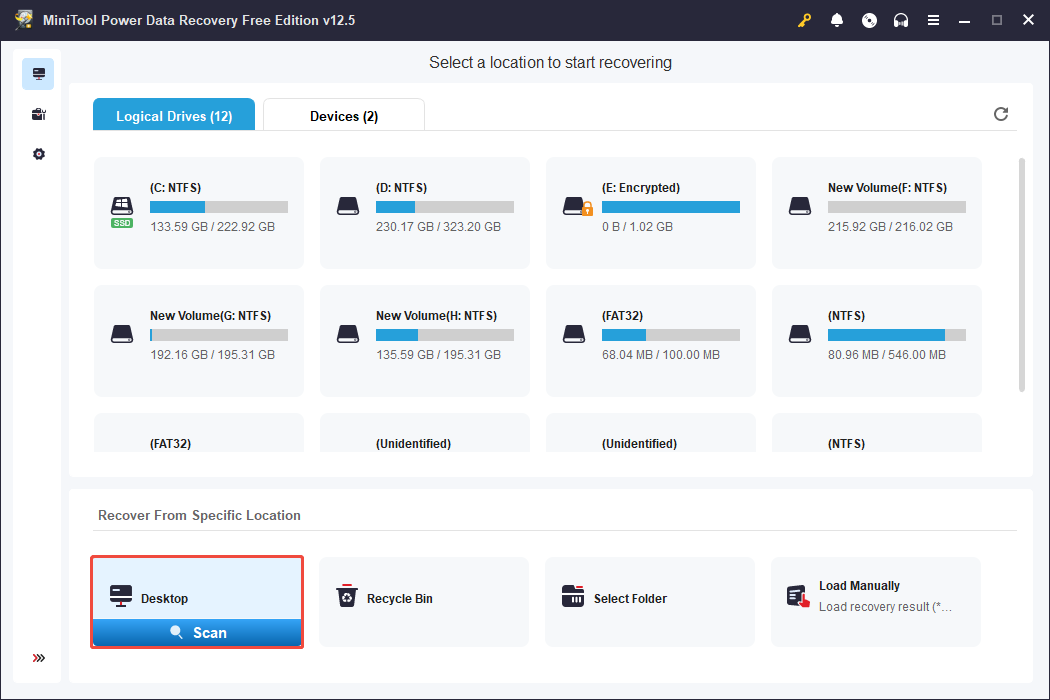
Step 2. Under the Logical Drives section, select the target partition where your lost shortcuts are stored and click Scan. Typically, these shortcuts are stored on the desktop. Therefore, you can go to the Recover From Specific Location section and choose to scan the Desktop option.
Step 3. Once the scan is finished, find the required shortcut files by using the Path, Type, Search, or Filter features.
Step 4. Double-click each preview file to view it. Once done, check all necessary files and click Save. In the subsequent window, choose a location to save the recovered files.

Bottom Line
To sum up, this post introduces how to add apps and files to the desktop in Windows and provides a professional data recovery tool to rescue your files. Hope you can smoothly complete your task.
About The Author

Position: Columnist
Sandy became an English editor after graduation. She is devoted to finding effective solutions for diverse IT problems and provides articles on data recovery, data backup, and computer partitions and drives. In her spare time, she likes listening to music and playing games.
User Comments :