Black screen issue can appear in many situations, such as Windows update, graphics driver update, etc. If you have no idea, this post will be helpful. This post from MiniTool introduces the main causes of this issue and shows some effective solutions here.
The black screen is a common issue on Windows 10. Many situations can cause this problem. For example:
- A buggy system update can also cause the issue.
- A hardware-related issue with the display, connection, or video adapter is also a main cause of the issue.
- A peripheral connected to your computer causes the problem.
- The issue can happen after a graphics driver update or during the installation of a Windows feature update that contains a compatibility problem.
- …
Today, we are talking about the black screen 1920×1080 issue, that is to say, black screen after changing resolution Windows 10.
Fix 1: Change Graphic Driver in Safe Mode
The cause of a black screen or other display problems is usually related to a damaged or incorrect driver. However, if the screen is black, correcting the driver problem may be a little difficult. The first method to fix the 1920×1080 black screen issue is to boot in recovery mode and start the PC in Safe Mode.
Step 1: Insert your Windows installation CD/DVD or USB bootable drive to your computer, and start the computer.
Step 2: Enter the BIOS.
Step 3: Choose the DVD or USB flash drive as the first boot device and boot the Windows 10 PC from the device.
Step 4: Click Repair your computer to enter into WinRE successfully.
Now, you can continue to enter Safe Mode.
Step 1: From the Choose an option screen, click the Troubleshoot option. Next, click Advanced Options.
Step 2: Click the Startup Settings option.
Step 3: Click the Restart button.
Step 4: Then you will see multiple options for startup. Press the F4 key to enable Safe Mode.
Now your PC will restart in Safe Mode, which is visible on the wallpaper and there is a version number on the top middle screen. Then, you need to change the graphic driver.
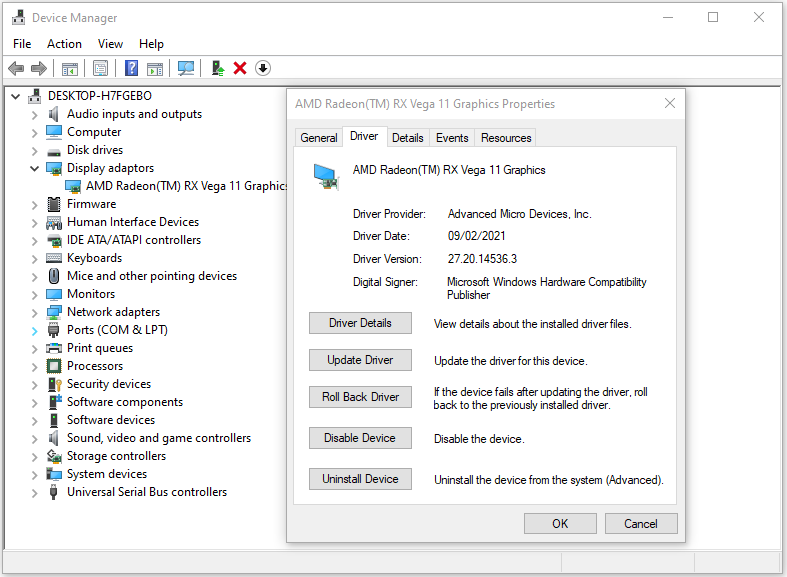
Step 1: Open the Device Manager Window again.
Step 2: Check under the Display Adapters section to locate your display adapter.
Step 3: Right-click on the adapter you currently have installed and select the Properties option.
Step 4: Then navigate to the Driver tab and choose the Roll Back Driver option. You can also choose Update Driver to update it or Uninstall Device to reinstall it.
Fix 2: Enable Low Resolution
You can also try to enable a low resolution to remove the 1920×1080 black screen issue. Here is how to do that. After entering WinRE with the steps in fix 1, you can continue to do the following steps:
Step 1: From the Choose an option screen, click the Troubleshoot option. Next, click Advanced Options.
Step 2: Click the Startup Settings option.
Step 3: Click the Restart button.
Step 4: Then you will see multiple options for startup. Now, choose Enable low-resolution video.
Fix 3: Startup Repair
The last method is to do the startup repair to fix the black screen 1920×1080 issue. After entering WinRE, follow the steps below:
Step 1: You need to click Troubleshoot in the popup window to continue.
Step 2: Click Advanced options to go to the next page.
Step 3: Choose Startup Repair in the Advanced options screen and wait for the process to be completed.
Now, when the process is finished, you can restart your computer to check whether the “black screen 1920×1080” issue is fixed.
Final Words
To sum up, this post has shown fix the “black screen 1920×1080” issue. If you come across the same error, try these solutions. If you have any different ideas to fix it, you can share them in the comment zone.
User Comments :