Because of the high system requirements of Windows 11, only eligible PCs are allowed to upgrade to or install this operating system. However, you can try some methods given by netizens to install Windows 11 on an unsupported PC, for example, running a specific command or using Rufus. Besides, there is another additional way – bypass Windows 11 system requirements with Flyby11. This is today’s topic we focus on.
About Flyby11
Flyby11 is a free tool designed by Belim, a creator of several Windows customization tools, to remove the annoying restrictions that block you from installing Windows 11 24H2 on unsupported hardware.
Flyby11 utilizes a feature in the Windows Server setup process to dodge TPM, Secure Boot, and CPU checks required in the regular Windows 11 setup, allowing for an in-place upgrade to Windows 11 on unsupported systems.
Microsoft Flags Flyby11 as Hacktool
On February 1, 2024, Flyby11 1.1 was flagged as HackTool/PUA:Win32/Patcher, (PUA short for Potentially Unwanted Application) in Windows Defender, meaning you are blocked from running this tool. But you can go to Windows Security > Virus & threat protection, access Protection history, locate the target item, and choose Allow to permit execution.
After contacting Microsoft, this company doesn’t flag the current version Flyby11 1.2 anymore, at least for now. The old “HackTool” classification only applies to v1.1 while v1.2 remains clean and safe to use. The new release makes some adjustments to accommodate the updated CPU and TPM policies of Microsoft and refines & tests some scripts to ensure stability.
How to Use Flyby11 to Dodge Windows 11 System Requirements
How can you bypass Windows 11 system requirements with Flyby11 to upgrade incompatible Windows 10 to Windows 11? It is simple to use Flyby11 by following the guidelines.
Part 1: Flyby11 Download
Step 1: First up, visit the Release page on GitHub, locate the Assets section under Flyby11 1.2, and click Flyby11.exe to download this tool.

Step 2: Run the exe file to launch this tool.
Part 2: Download Windows 11 ISO
Step 1: Open Microsoft’s Windows 11 download page.
Step 2: Under Download Windows 11 Disk Image (ISO) for x64 devices, follow the on-screen prompts to download a Windows 11 ISO file.
Part 3: Back up Files in Advance (Optional)
Since the upgrade or installation from Windows 10 to Windows 11 is a major change to the computer, you had better back up your important files beforehand for safety. MiniTool ShadowMaker, the backup software, comes in handy. With it, file backup, folder backup, disk backup, partition backup, and disk backup become simple tasks.
MiniTool ShadowMaker TrialClick to Download100%Clean & Safe
Don’t know how to use MiniTool ShadowMaker for backup? Read through this full guide on how to backup PC to external hard drive.
Part 4: Upgrade to Windows 11 on Unsupported Hardware
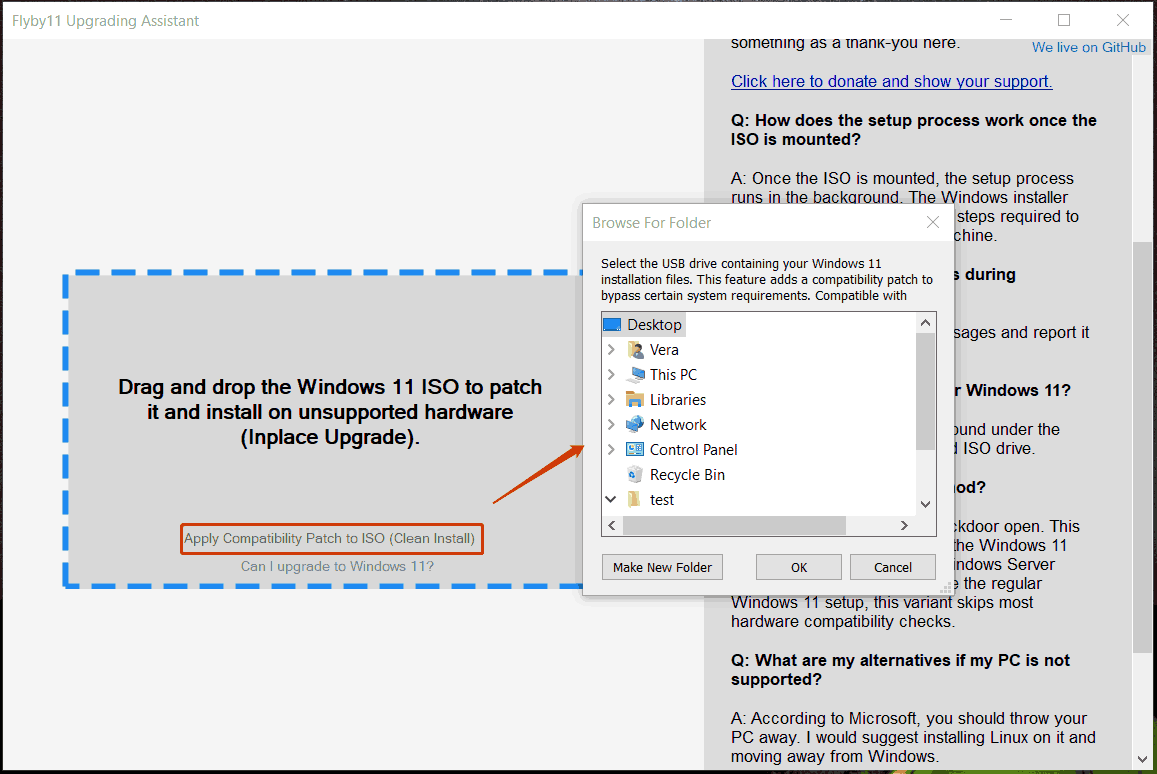
Step 1: In the main interface, drag and drop your downloaded Windows 11 ISO file to the corresponding place. This opens Windows PowerShell to run scripts and the Windows Server Setup popup appears.
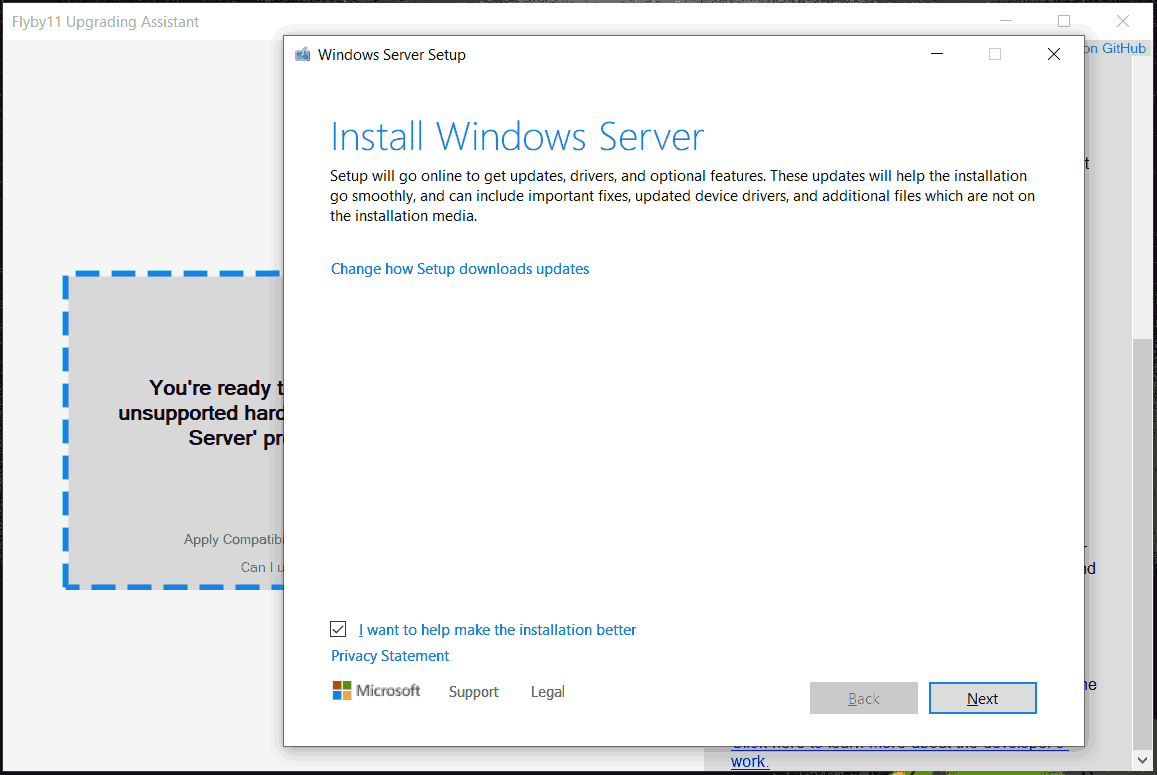
Step 2: Proceed with the Windows 11 installation on an unsupported PC according to the prompts on the screen.
Flyby11 adds a compatibility patch to bypass system requirements. For this, click Apply Compatibility Patch to ISO (Clean Install), choose a USB drive that contains Windows 11 installation files, click Yes to bypass settings on the selected USB drive, and then the unattend.xml file exists in the specified directory.
Later, you can use the Windows 11 bootable USB drive to clean install the system, without any hardware checks.
Final Words
Don’t fret if your computer cannot meet Windows 11 requirements. Try to easily bypass Windows 11 system requirements with Flyby11 to install the OS on unsupported old PCs. This comprehensive guide on how to use Flyby11 is of any help.
About The Author

Position: Columnist
Vera has been working at the MiniTool Team for over 10 years as a technical editor and content writer. She mainly focuses on disk and partition management, data recovery, Windows backup and restore, and PC troubleshooting. Through in-depth software testing and hands-on experience, she has helped users solve a wide range of computer problems and better protect their data on Windows devices.
User Comments :