WD My Passport is an extremely popular data storage solution, famous for its high capacity, high data transfer speeds, comprehensive compatibility, and powerful portability. Formatting WD My Passport can help you clear disk data, rebuild partitions, change file systems, and so on.
If you are not sure how to format WD My Passport on Windows, keep reading to choose a way.
How to Format WD My Passport for Windows PC
No matter which disk formatting tool you use, you need to connect WD My Passport to your computer first. Moreover, since formatting a disk removes all files on it, it is highly recommended to back up your files by using MiniTool ShadowMaker before formatting the drive.
MiniTool ShadowMaker TrialClick to Download100%Clean & Safe
Way 1. Format WD Passport via Disk Management/File Explorer
When it comes to disk formatting, the first tool that comes to mind is usually the one built into the Windows operating system, namely Disk Management.
Step 1. Right-click the Start button on the taskbar and choose Disk Management.
Step 2. Find and right-click on the WD My Passport partition, then choose Format.
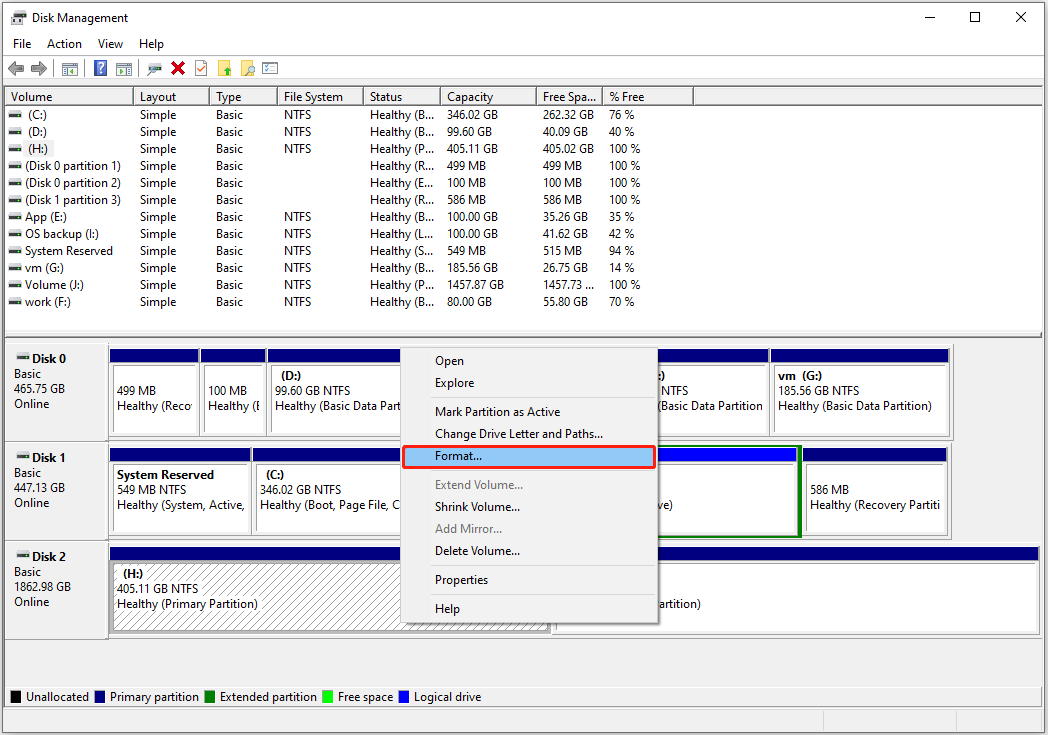
Step 3. Type a volume label, choose a file system, tick Perform a quick format, and then hit OK.
Alternatively, you can format the disk in File Explorer. In the This PC section, right-click the target disk and choose Format from the context menu. In the new window, choose the file system, tick Quick Format, and then hit Start.
Way 2. Format WD Passport With CMD
The Command Prompt can help you perform many disk management operations, such as showing hidden partitions with CMD, removing partitions using CMD, and so on. Here you can see how to format a disk with it.
Step 1. Run Command Prompt as an administrator.
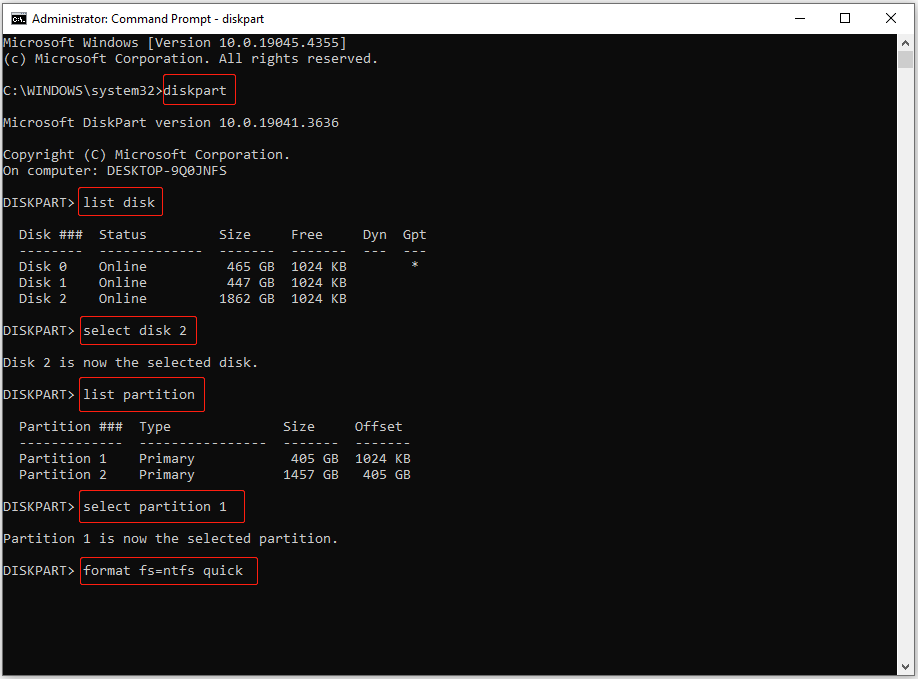
Step 2. Type the following commands and press Enter after each one to execute them.
- diskpart
- list disk
- select disk * (* represents the disk number of your WD My Passport)
- list partition
- select partition * (* represents the number of the partition you want to format)
- format fs=ntfs quick (replace ntfs with the desired file system)
Way 3. Format WD My Passport Using WD Quick Formatter
WD Quick Formatter is a formatting tool developed by Western Digital Technologies, Inc. You can download it from Western Digital’s official site, and then use it to format your disk. See How to Format an External Hard Drive with WD Quick Formatter.
Way 4. Format WD My Passport With MiniTool Partition Wizard
If you experience any issues while using Disk Management, CMD, or WD Quick Formatter to format your disk, you can turn to MiniTool Partition Wizard. It is the best partition manager for Windows that is highly praised by users, allowing you to deeper diving into your hard drive. It helps format/create/resize/move/clone your partitions.
You can download and use it to format your WD Passport for free.
MiniTool Partition Wizard FreeClick to Download100%Clean & Safe
First, launch MiniTool Partition Wizard.
Second, on its main interface, select the target partition, then scroll down the left menu bar and choose Format Partition.
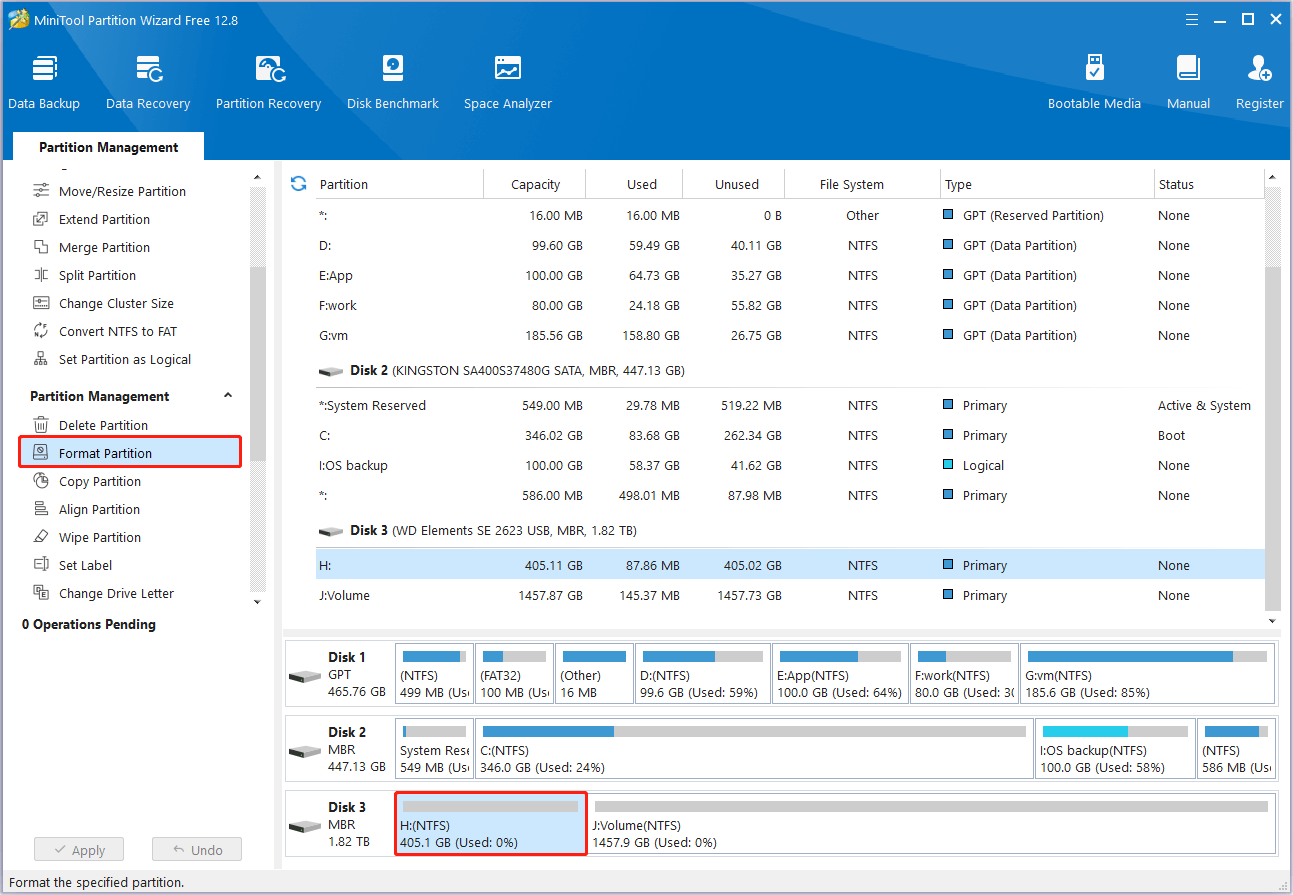
Third, set up a partition label and file system, then click OK.
Finally, hit the Apply button to complete the format process.
MiniTool Power Data Recovery FreeClick to Download100%Clean & Safe
Bottom Line
In a word, this is a detailed guide on how to format WD My Passport for Windows. You can choose the most convenient method.
About The Author

Position: Columnist
Shirley holds a bachelor’s degree in English and has been an editor at the MiniTool Team for many years. She specializes in IT-related content, with a focus on data recovery, file backup, disk management, and other technical topics. She is committed to delivering clear, accurate, and practical solutions to help users resolve common computer issues.
User Comments :