It is frustrating to encounter ksecdd.sys blue screen all of sudden. In most cases, this issue can be fixed by a simple restart of your system. However, if ksecdd.sys failed consistently and triggered blue screen repeatedly, there must be something wrong with your computer. If you happen to have the same problem, these solutions listed on MiniTool Website might help you out.
Ksecdd.sys Blue Screen of Death
Kscedd.sys is the part of Kernel Security Support Provider Interface from Microsoft. It is a system file that can be removed or changed. Once it is removed or altered, your operating system will malfunction and even causes issues like black screen, blue screen of death, and more.
In this post, we will come up with multiple solutions on ksecdd.sys blue screen Windows 10/11 for you. You can have a try until the problem is fixed.
Any blue screen of death like ksecdd.sys failure might lead to accidental data loss. In case your computer fails to boot next time, it’s better to create a system image beforehand. Once you have created a system image, you can restore your system to a previous state rather than spending much time troubleshooting. To do so, MiniTool ShadowMaker stands out from the similar products. This Windows backup software is known for its one-click system backup solution, that is, you can back up your system with only a few clicks. Try it for free now!
MiniTool ShadowMaker TrialClick to Download100%Clean & Safe
How to Fix Ksecdd.sys Blue Screen of Death on Windows 10/11?
Fix 1: Perform SFC & DISM Scan
Corrupted or faulty system files are common causes for ksecdd.sys BSOD. If this is the case, you can run the combination of SFC and DISM to detect and repair them.
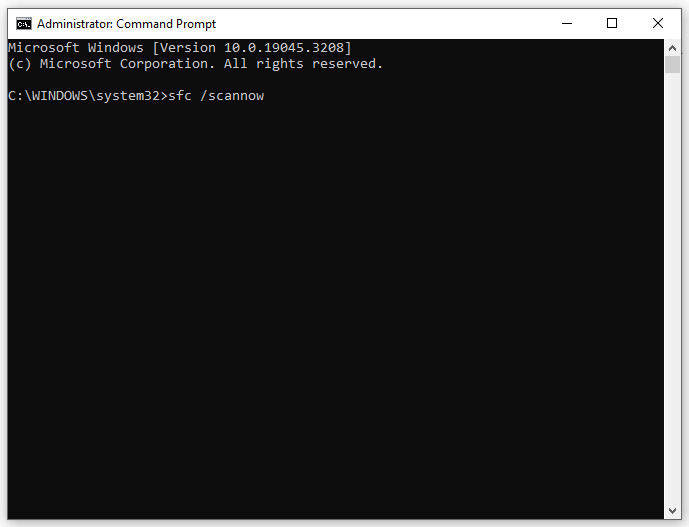
Step 1. Type cmd in the search bar to locate Command Prompt.
Step 2. Right-click on it to select Run as administrator.
Step 3. Type sfc /scannow and hit Enter.
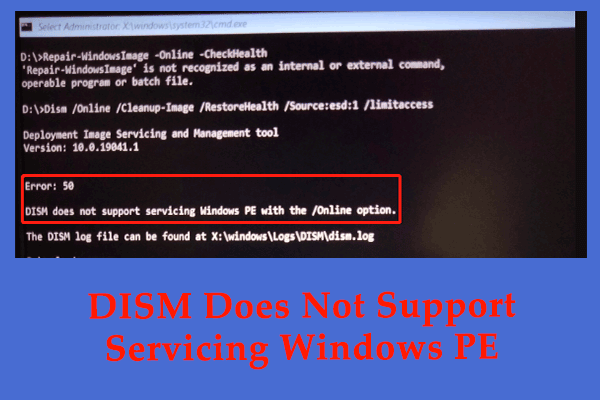
Step 4. After the process is done, run the following two commands:
dism /online /cleanup-image /checkhealth
dism /online /cleanup-image /restorehealth
Step 5. Reboot your computer.
Fix 2: Update All System Drivers
Chances are that the drivers on your computer are corrupted, leading to persistent BSOD errors like ksecdd.sys blue screen. Therefore, updating all the drivers might also be a good solution.
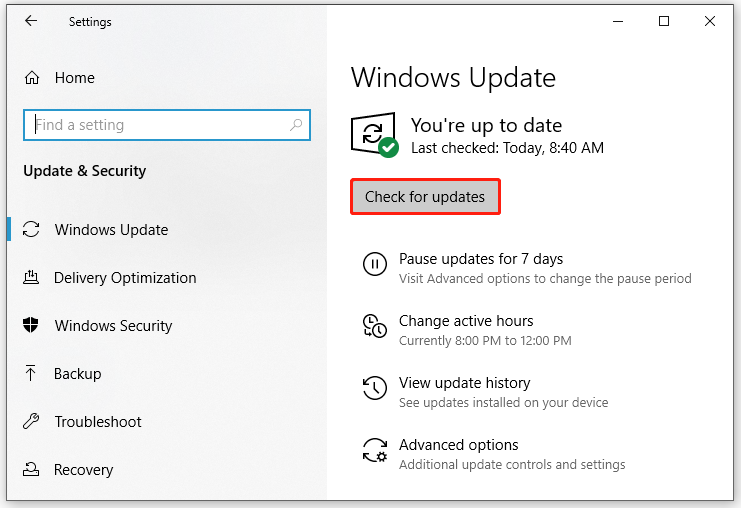
Step 1. Press Win + I to launch Windows Settings.
Step 2. In the settings menu, scroll down to find Update & Security and hit it.
Step 3. Under Windows Update, click on Check for updates > View optional updates > Download and install under Driver updates.
Fix 3: Perform System Restore
Performing a system restore can enables you to roll back recent system changes and configurations hence help to solve ksecdd.sys blue screen of death. Follow these steps:
Step 1. Press Win + R to open the Run box.
Step 2. Type rstrui and hit Enter to launch System Restore.
Step 3. Tick Choose a different restore point and hit Next.
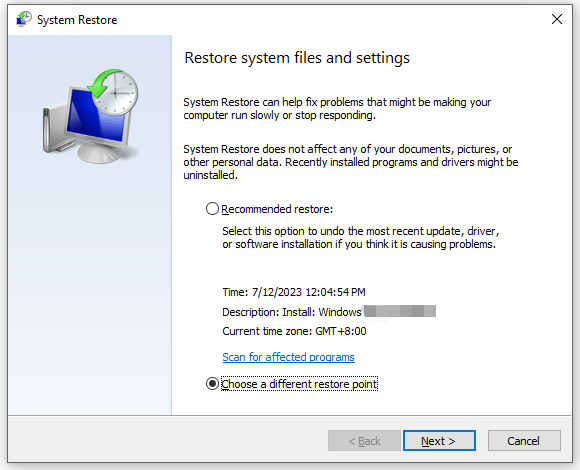
Step 4. Select a restore point and hit Next.
Step 5. Confirm your restore point and hit Finish to start the process.
Fix 4: Stop Overclocking
If you often play computer games or run other GPU-intensive tasks, enabling overclocking might be a good choice to you. Since this process provides you with a better experience by going beyond the regular capabilities of CPU or GPU, it might trigger overheating and system crashes. Therefore, if you are overclocking your hardware, you can set the settings to the default options.
Also see: Is It Good to Overclock Your CPU? Let’s Figure It out
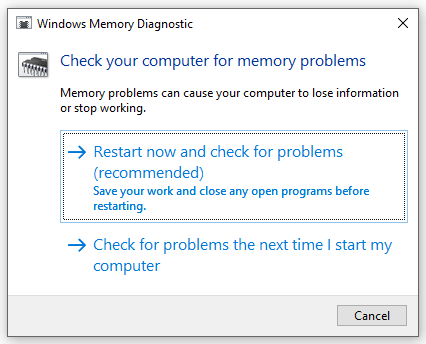
Fix 5: Run Windows Memory Diagnostic
Memory corruption can also be another culprit of ksecdd.sys blue screen error. In this case, you can check your memory via Windows Memory Diagnostic. To do so:
Step 1. Type windows memory diagnostic in the search bar and hit Enter.
Step 2. Click on Restart now and check for problems to perform a full memory check.
![[Issue Fixed!] Fsulgk.sys Blue Screen of Death on Windows 10/11](https://images.minitool.com/minitool.com/images/uploads/2023/07/fsulgk-sys-bsod-thumbnail.png)
User Comments :