Do you feel annoyed in this situation: you leave the computer for just a few minutes and you have to input the password again or sometimes you lose unsaved data when coming back since the computer goes to sleep? Take it easy, and MiniTool Solution offers this post to show you how to stop computer from sleeping easily.
Overview of Sleep Mode of Windows 10/8/7
Sleep mode is a useful function in Windows operating system and it refers to a low-power state. This mode can extend the life of your screen, hard drive and battery and prevent you from leaving your computer running for hours if you are distracted.
Unlike Hibernation mode, sleep mode will draw a very small amount of power when a device is in this mode. When it is enabled, the Windows system will store anything you open to RAM and all processes on your computer are paused. To go back to your work, you can press any key on the keyboard or move your mouse.
Sleep mode doesn’t always satisfy you. Sometimes you read some eBook, any article or watch a movie without pressing any key or touching the mouse but the PC goes to sleep. Or sometimes you only leave for a few minutes and you need to type the password again when going back from the sleep mode. How annoying it is!
Importantly, you should note that all contents will get lost if you haven’t saved them once power outage happens by accident. Luckily, you can stop computer from sleeping by following these methods mentioned below.
How to Make Computer Not Sleep Windows 7/8/10
To prevent computer from sleeping, you can set your power plan so your machine doesn’t go to sleep even though you don’t touch your mouse or press any key. Or you can go to Windows Settings to change the setting. Additionally, a third-party tool will be helpful.
Now, let’s see how to disable sleep mode in these ways.

Method 1: Stop Computer from Sleeping via Control Panel
Step 1: In Windows 7/8/10, type control panel in the search box and click this app to open it.
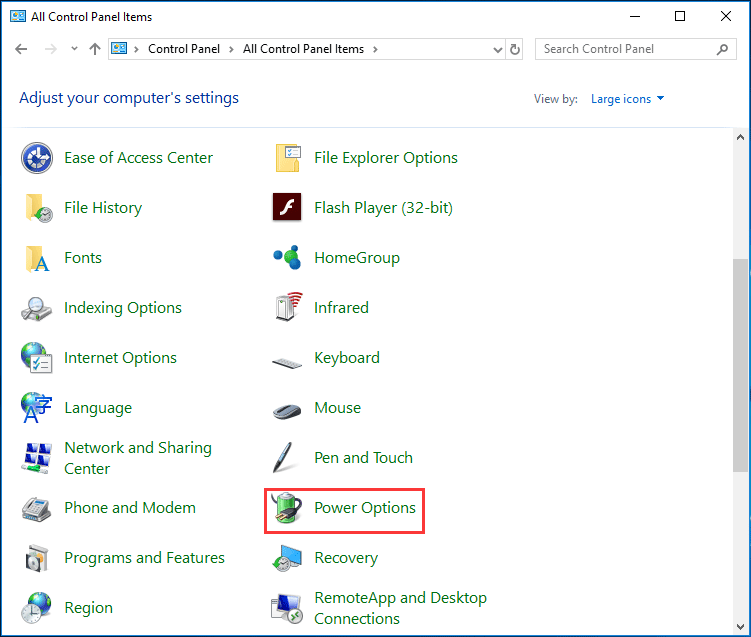
Step 2: View all Control Panel items by large icons and then click Power Options.
Step 3: Click the Change when the computer sleeps link from the left pane to edit plan settings.
Step 4: Go to the Put the computer to sleep section, select Never from the drop-down menu. If you are using a laptop, here choose Never for On battery and Plugged in.
Step 5: Click Save changes.

Now you successfully prevent computer from locking without admin rights. This way applies to Windows 10/8/7.
Method 2: Disable Sleep Mode Windows 10 via Settings
Step 1: Navigate to Start > Settings > System.

Step 2: Click Power & sleep in the left pane and go to the Sleep category to change the setting to Never.

This method is available only for Windows 10 operating system. If you need to stop computer from sleeping in Windows 7, you can try the first solution.
Method 3: Use a Third-Party Tool
In addition, you can also use a professional tool to make your computer not sleep. In the market, there are many third-party tools helping you to prevent computer from sleeping, such as, Don’t Sleep, Insomnia, Caffeine, etc. Just choose one based on your needs.
Bottom Line
How to stop computer from sleeping in Windows 10/8/7? Try these above methods and then you can easily let your PC not sleep.
If you need to re-enable sleep mode, you can also do this work via Control Panel, Settings or the third-party tool. But note that you should save your open documents to avoid data loss if power outage happens in sleep mode.
About The Author

Position: Columnist
Vera has been working at the MiniTool Team for over 10 years as a technical editor and content writer. She mainly focuses on disk and partition management, data recovery, Windows backup and restore, and PC troubleshooting. Through in-depth software testing and hands-on experience, she has helped users solve a wide range of computer problems and better protect their data on Windows devices.
User Comments :