Computers lock automatically might trigger many other problems, such as improper installation, failed updates, corruption processes, and other system errors. Here are four solutions for you to stop Windows from locking automatically. If you are bothered by this problem, try these methods.
How to Turn Off Windows Auto Lock
Method 1: Disable Sleep Mode
Your computer will lock when it enters the Sleep Mode. You can try to disable auto lock in Windows by changing the Power settings.
Step 1: Press Win + I to open Windows Settings.
Step 2: Select Settings, then go to the Power & sleep tab.
Step 3: On the right pane, choose Never from the drop-down menu under the Sleep section.


Method 2: Turn Off Sign-in and Dynamic Lock
Provided you enable the Dynamic Lock function, when you connect any Bluetooth devices to your computer, the computer might lock up when this device is out of range. Therefore, you might find the Windows automatically locking while in use. Follow the next steps to turn off it.
Step 1: Press Win + I to open Windows Settings.
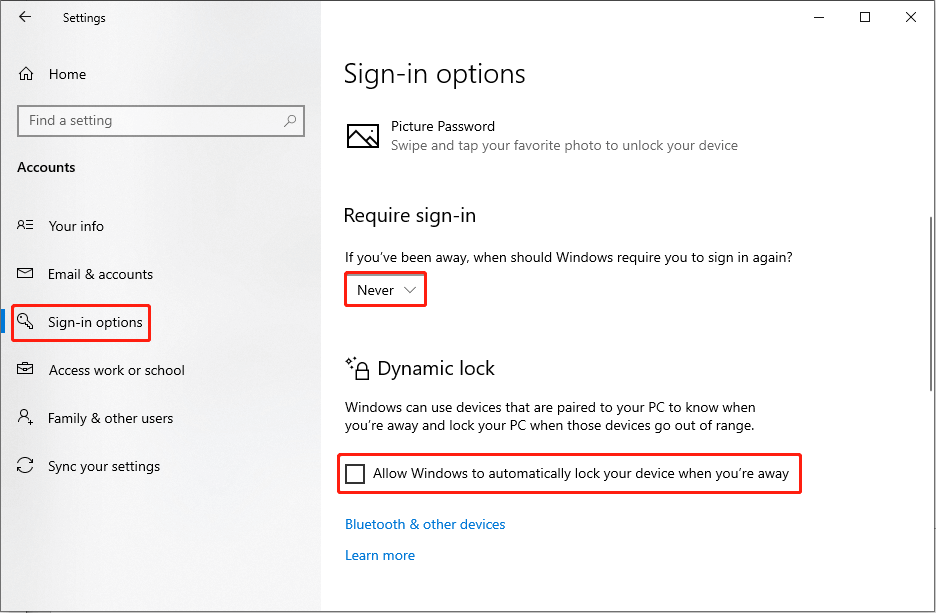
Step 2: Select Account > Sign-in options.
Step 3: You can choose Never from the submenu of the Require sign-in section.
Step 4: Uncheck the Allow Windows to automatically lock your device when you’re away option under the Dynamic lock section.
After this, check whether the computer still turns off automatically.

Method 3: Modify Windows Registry
The last method is to change the registry keys. Windows Registry is an information base that contains crucial information about software, hardware, and the operating system. You can also change certain registry keys to adjust computer settings.
But be careful when you try to delete or modify them. Changes will be applied immediately and wrong operation might bring irreversible damage to your computer. Thus, you are advised to back up the registry key as a saver.
Step 1: Press Win + R to open the Run window.
Step 2: Type regedit into the text box and hit Enter to open Registry Editor.
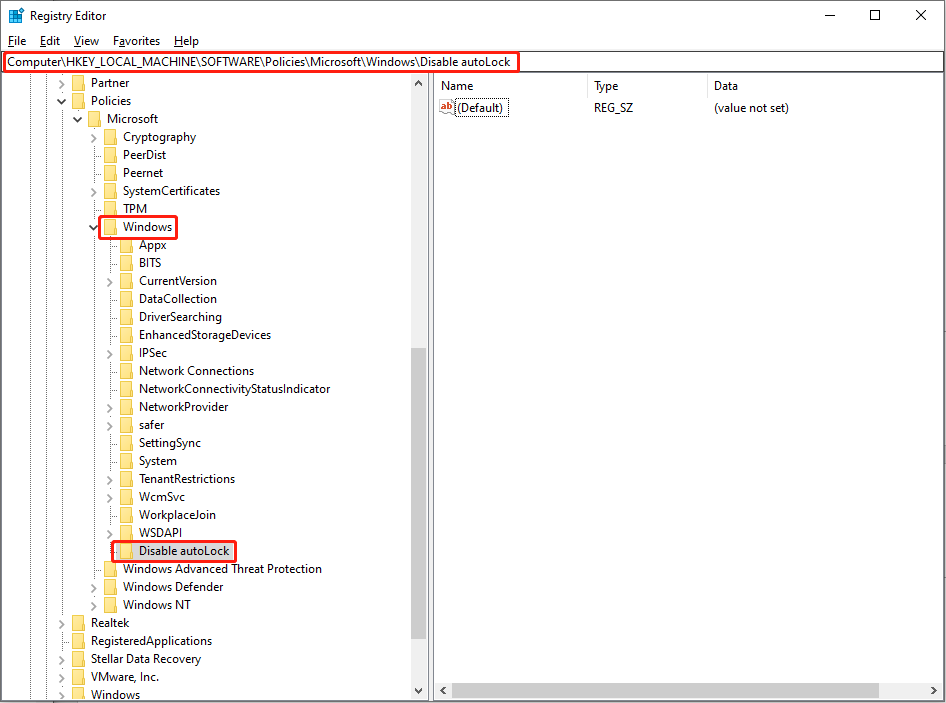
Step 3: Navigate to HKEY_LOCAL_MACHINE > SOFTWARE > Policies > Microsoft > Windows.
Step 4: Right-click on the Windows and choose New > Key to create a new folder in Windows.
Step 5: Rename this new folder as Disable autoLock.
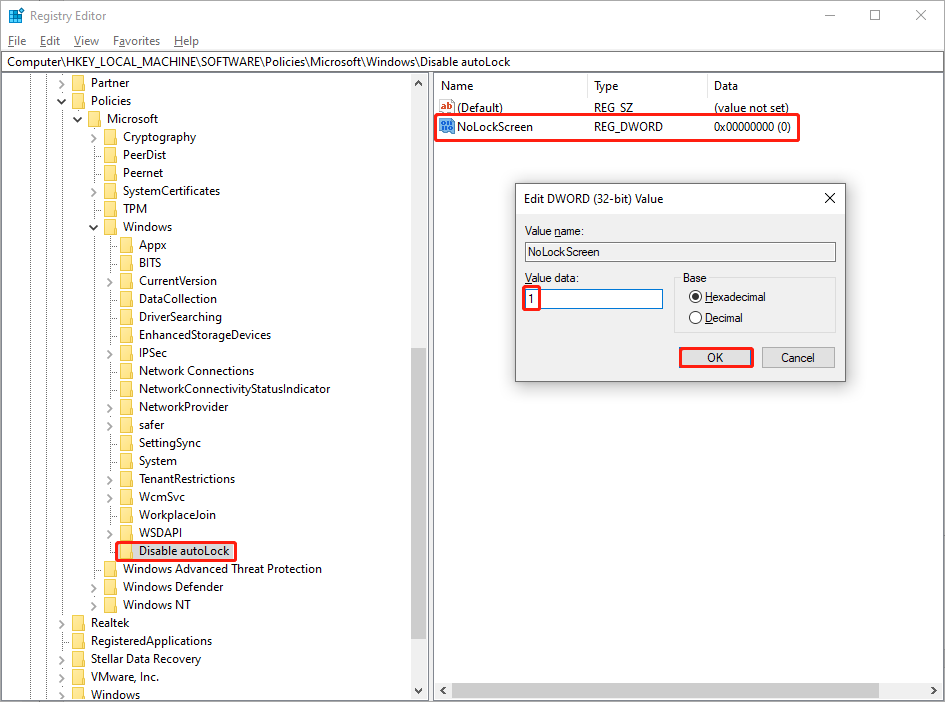
Step 6: Select this newly created folder, right-click on the right pane, and choose New > DWORD (32-bit) Value.
Step 7: Change the name of this new subkey to NoLockScreen.
Step 8: Double-click on the subkey and change the Value data to 1.
Step 9: Click on the OK button to save the changes.
Afterward, restart your computer to fully apply the changes to your computer.
Bonus Tip
Since digital data has become the main form of data storage and collection. However, digital data is facing a greater risk of loss. When your important files disappear, you can recover them by using reliable third-party software, such as MiniTool Power Data Recovery.
This software is able to recover deleted files, missing photos, lost videos, and other types of files from various data storage devices, like external hard drives, USB flash drives, SD cards, memory cards, etc. It provides you with different editions, you can go to this page to find one that suits you best. If needed, try MiniTool Power Data Recovery free first to scan and recover up to 1GB of files.
MiniTool Power Data Recovery FreeClick to Download100%Clean & Safe
Final Words
If you are tired of typing passwords to unlock the screen, you can try the above methods to stop Windows from automatically locking. Hope this post gives you useful information.
User Comments :