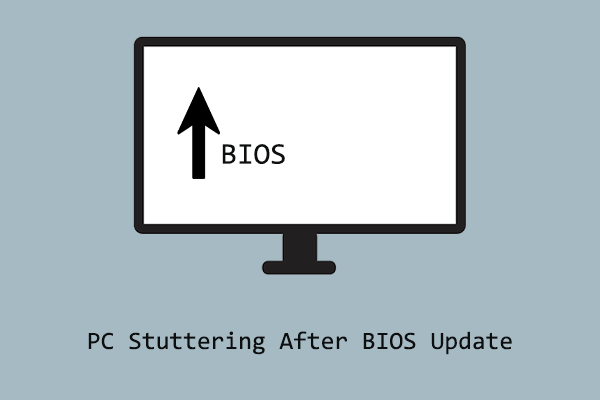
Performing a BIOS update is an important way to fix known bugs and vulnerabilities and improve computer performance. However, after updating the BIOS, sometimes you may encounter an issue where you are unable to access your files. It can be so frustrating if your files are now inaccessible and you do not have a backup.
Why did your files disappear after BIOS update?
Why You Are Unable to Access Data After BIOS Update
Typically, there are many reasons for the file missing issue after a BIOS update, and these are the common ones:
- The system failed to load the correct user profile and created a temporary profile instead.
- An unexpected event occurred during the BIOS update process, causing file system errors or data loss.
- After updating BIOS, some device drivers may be incompatible with the computer, causing malfunctions.
- The BIOS update may have changed the system’s boot order. This will prevent you from accessing the correct partition, especially if your computer has multiple operating systems installed.
- The connection to the disk where your files are stored is unstable.
Listed below are some universal solutions for addressing the issue of invisible data after updating BIOS.
How to Fix if BIOS Update Discarded Desktop Files or Other Files
Fix 1. Restart Windows in Safe Mode
The Windows safe mode only loads core drivers and services, so booting into this mode can effectively prevent third-party software or problematic drivers from interfering with files or user configuration files.
Step 1. Press and hold the Shift key on the keyboard, and click the Start button > Power > Restart.
Step 2. When you access the WinRE window, select Troubleshoot > Advanced options > Startup Settings > Restart.
Step 3. After restarting the computer, press F5 to start safe mode with networking.
Step 4. Now you can go to File Explorer, and check if the correct user profile is located in C:\Users. If yes, it means that the problem is not with the core drivers. You can try to disable or update non-core drivers one by one until you find the source of the problem.
Fix 2. Disable Antivirus
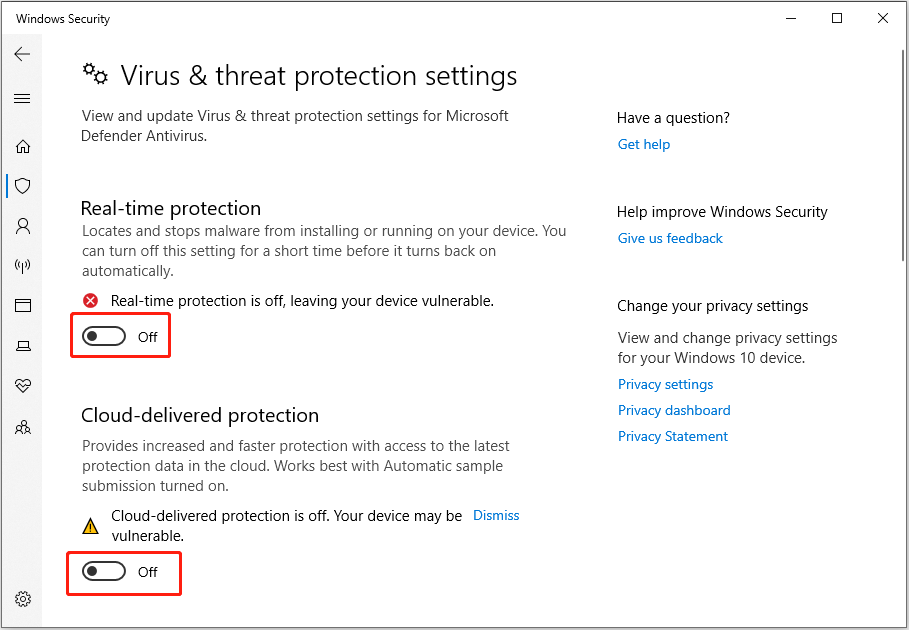
According to user experience, disabling the antivirus temporarily and then restarting the computer may help with the problem. You can give it a try. For Windows Defender, go to Settings > Update & Security > Windows Security > Virus & threat protection. Under Virus & threat protection settings, click Manage settings. Finally, turn off real-time protection, cloud-delivered protection, and other protections.
Fix 3. Tweak the Registry
If the problem is with a temporary user profile, you can fix it by changing the registry values.
Step 1. Keep signed in to the account with the temporary profile. Then type cmd in the Windows search box and press Enter to open a Command Prompt window.
Step 2. Type whoami /user and press Enter. Then you will get a result with a SID value displayed.
Step 3. Right-click the Start button and choose Run. Type regedit in the box and click OK.
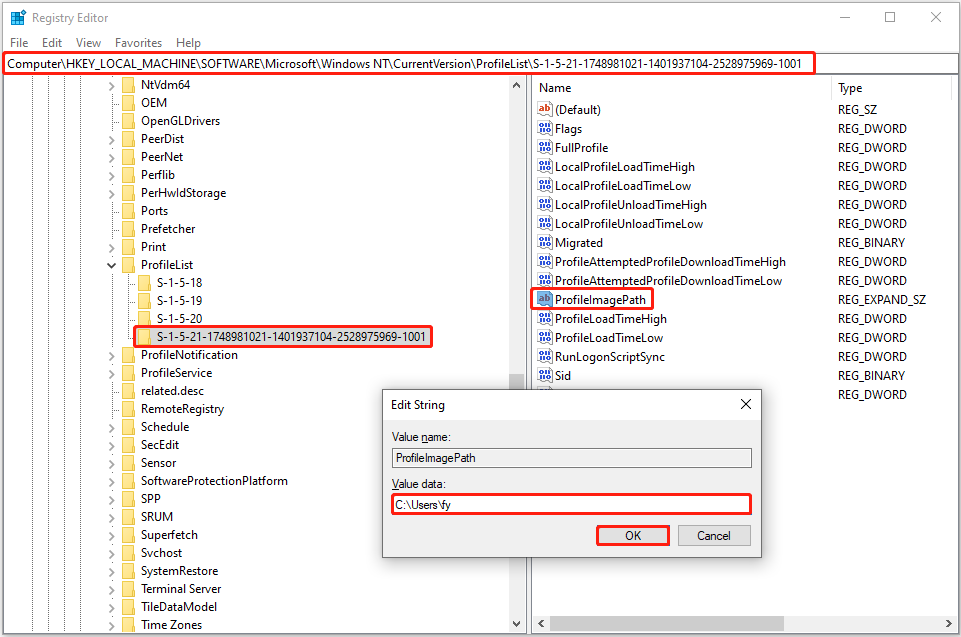
Step 4. In Registry Editor, type the following location in the top address bar and press Enter:
Computer\HKEY_LOCAL_MACHINE\SOFTWARE\Microsoft\Windows NT\CurrentVersion\ProfileList
Step 5. In the left panel, under ProfileList, find the SID entry queried above and check if it is listed at the end of .bak.
If the SID key does not have a .bak, double-click ProfileImagePath in the right panel. Then, type the correct path like C:\Users\username in the value data box and click OK.
If the SID key has a .bak, right-click on the SID key, click on Rename, and then remove the .bak part. Then duplicate the steps above to change the value data of ProfileImagePath to the correct path. Next, you need to double-click on the State DWORD and make sure it is set with a value data of 0.
If the SID key is without and with .bak, delete the SID key without .bak. Then, rename the SID key with .bak to remove .bak. Finally, set up the correct value data for ProfileImagePath, and then verify the value data of State.
Step 6. Restart your computer and check if you can log in to the correct account and access your files without any problems.
Fix 4. Change the Boot Order
If you have two more operating systems installed on your computer, you may boot into the wrong one, which may cause you to be unable to access data after BIOS update. In this case, you should boot into the BIOS and change the boot order to boot from the correct system.
The steps to enter BIOS vary depending on your computer manufacturer. Typically, you should restart the computer, and repeatedly press F2 or Delete during the boot process until you enter BIOS.
Recover Files if BIOS Update Deletes Your Data
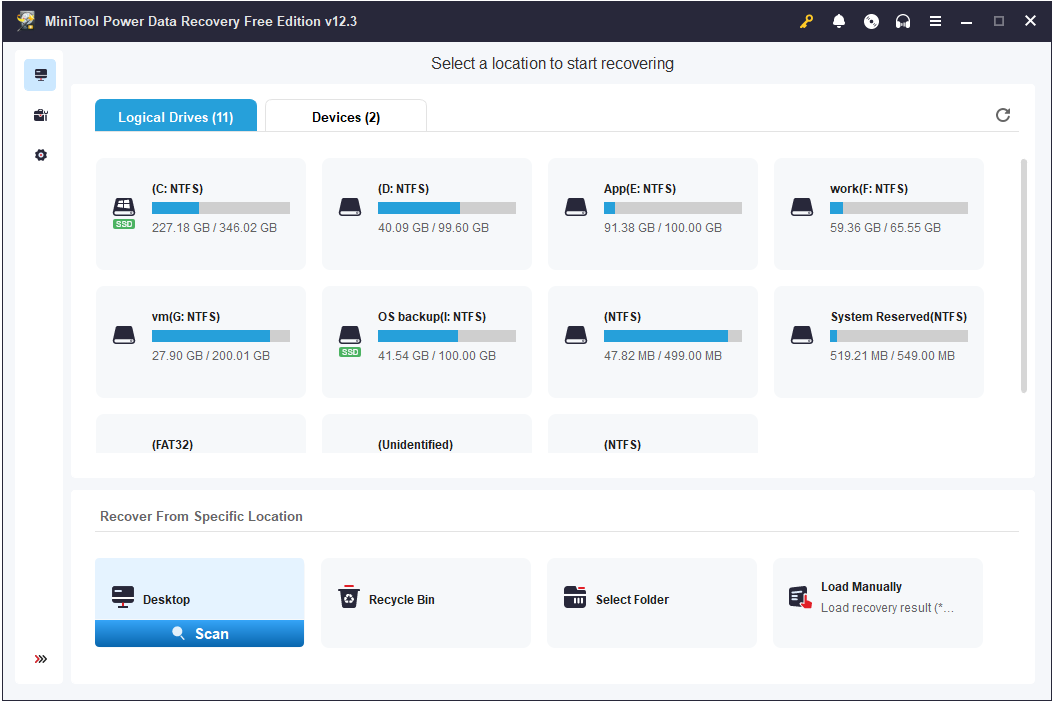
Although BIOS usually does not actually remove your personal files, if you find that it does happen, don’t worry, there is still an effective way to recover files. MiniTool Power Data Recovery comes in handy at this time. As the best and most reliable Windows data recovery tool, it is capable of restoring all types of files from the desktop, the Recycle Bin, HDDs, SSDs, and other types of file storage media.
The free edition of this tool allows you to scan your computer and preview the found files for free. Moreover, it supports recovering 1 GB of files for free. So, if necessary, you can download it and have a try.
MiniTool Power Data Recovery FreeClick to Download100%Clean & Safe

Bottom Line
Unable to access data after BIOS update? Now you should know how to fix it and regain access to your files. At the end of the article, it is necessary to emphasize that before performing a BIOS update or other operations that may affect system stability or personal files, it is recommended to use MiniTool ShadowMaker to create a data backup.
About The Author

Position: Columnist
Shirley holds a bachelor’s degree in English and has been an editor at the MiniTool Team for many years. She specializes in IT-related content, with a focus on data recovery, file backup, disk management, and other technical topics. She is committed to delivering clear, accurate, and practical solutions to help users resolve common computer issues.
User Comments :