This article on MiniTool mainly describes how to use Track Changes in Microsoft Word, including how to turn this feature on and off, how to hide and show revision traces, how to accept and reject changes, and how to change the user name of Track Changes.
How to Turn on/off Track Changes in Microsoft Word
The first part is about how to turn on and turn off the Track Changes feature. Here are the major steps to activate Track Changes:
Step 1: Open a word document.
Step 2: Under the Review tab, click on the document icon above Track Changes (After this function is enabled, the icon displays a different color).

You can click the document icon again to turn off Track Changes in Word. And pressing the keyboard shortcut Ctrl + Shift + E is also a way to turn on/turn off Track Changes in Word.

How to Show/Hide Changes in Microsoft Word
When there are too many comments and modification traces, the visual effect may be affected. You can set up the display of view to choose how would you like to see changes in the word document. Here is a step-by-step tutorial.
Step 1: Go to the Review tab again.
Step 2: Click the drop-down triangle next to Track Changes to set the display for view.
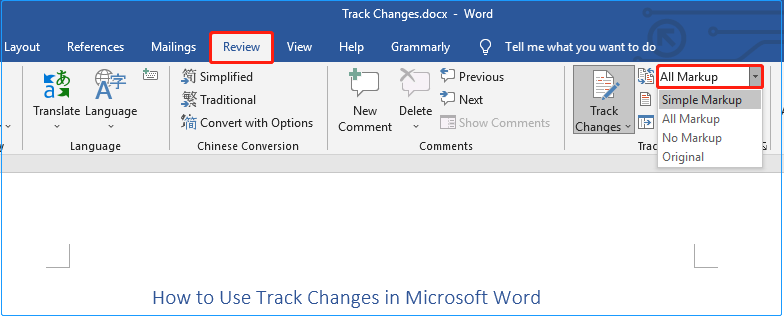
Here are four options in total:
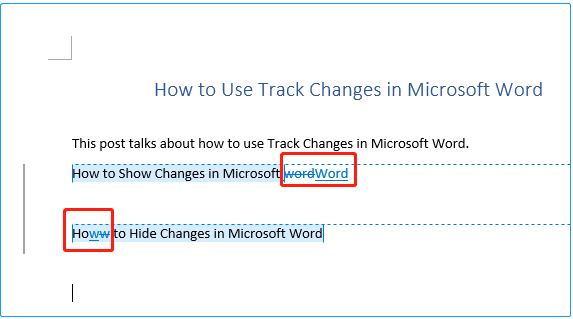
All Markup: It shows all the changes to your document.
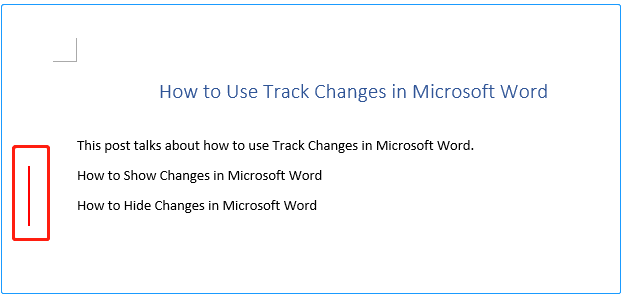
Simple Markup: It shows a simplified version of the modification traces instead of displaying all the modification traces like All Markup. A line is displayed on the left side, indicating that a change was made here.
No Markup: It shows the edited version of the document without any traces of modification.
Original: It shows the original version of the content without any changes and comments.
You can choose the most suitable option according to different scenarios and needs.
How to Accept/Reject Changes in Microsoft Word
After you have made changes to the document, you may need to accept these changes. Three options are listed below.
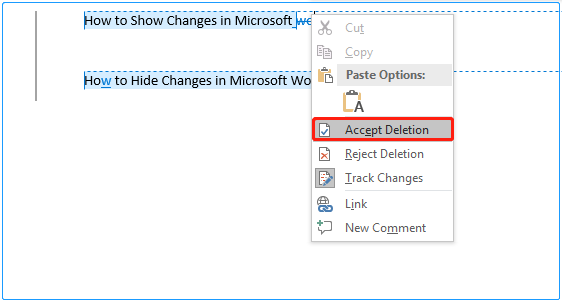
Method 1: Accept/Reject Changes From the Text
The operation steps are very simple: Right-click on the edited text and select Accept Deletion or Reject Deletion.
Please note that the menu options may change according to the actual modification you made, such as changing to Accept Insertion.
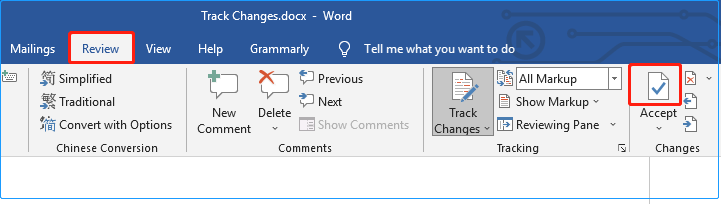
Method 2: Accept/Reject Changes From the Ribbon
The second method to accept changes is also easy to operate:
Step 1: Go to the Review part of the ribbon.
Step 2: Click the tick icon above Accept.

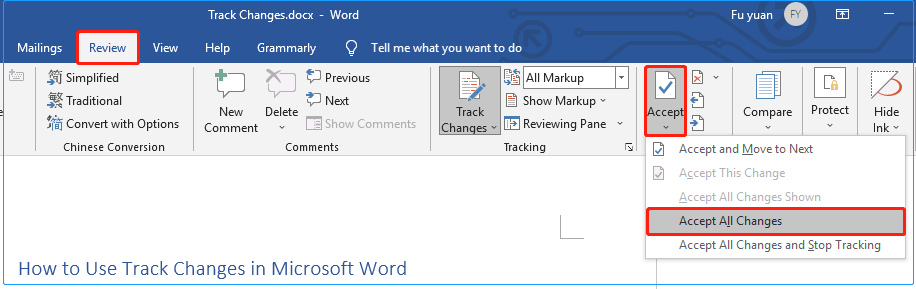
Method 3: Accept All Changes
The third method is suitable when you have confirmed that all modifications have been completed. It takes a lot of time to accept changes one by one individually, but you can accept all changes at once through the steps listed below:
Step 1: Under the Review tab, click Accept.
Step 2: Choose the Accept All Changes option.
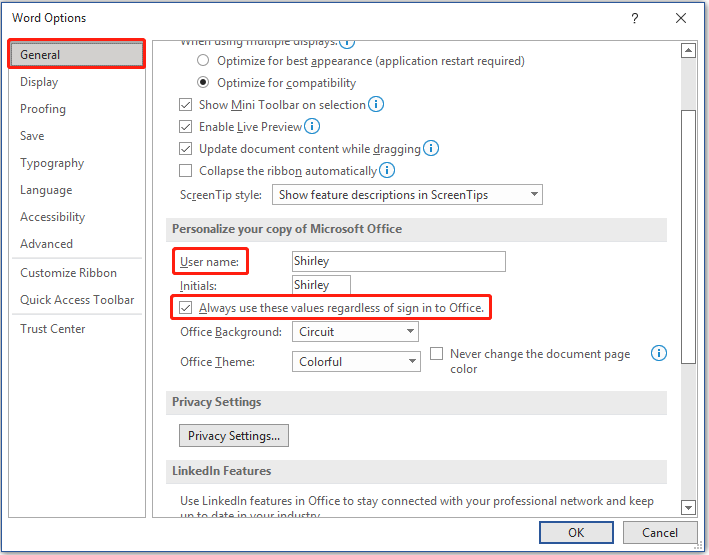
How to Change the User Name of Track Changes
When multiple people are editing the same document, you may need to add comments for multiple parts. It is very important to make the name of the comments clear. So how to change the user name of Track Changes? You can follow the steps below:
Step 1: Under the Review tab, click on the small collapsed arrow in the Tracking section.
Step 2: Select Change User Name.
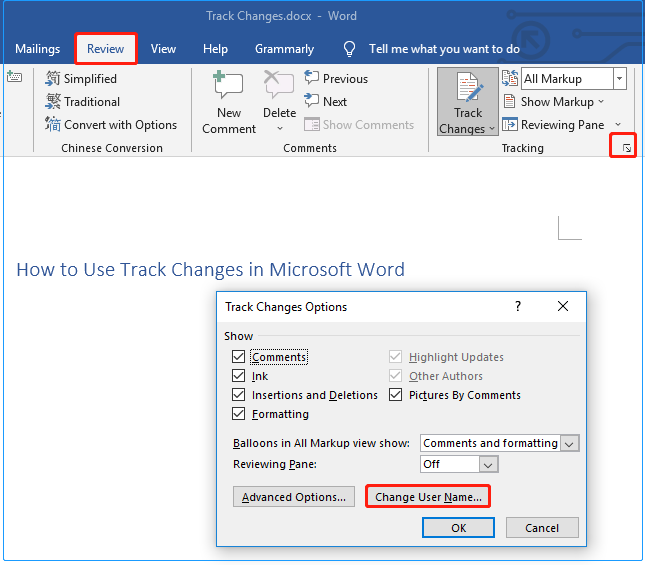
Step 3: In the General section, scroll down to input the user name and check Always use these values regardless of sign in to Office if you need. Then click OK.
Recommended articles:
- Fix Microsoft Print to PDF Missing Issue in Windows 10
- Fix: Word Cannot Do This Because a Dialog Box Is Open
Bottom Line
This article has explained how to use Track Changes in Microsoft Word. I believe that by reading this article, you can use Word Track Changes better and can complete the revision and finalization of your article. If you have any doubts about the topic “use Track Changes in Microsoft Word”, welcome to leave a message in the comment area below.
About The Author

Position: Columnist
Shirley holds a bachelor’s degree in English and has been an editor at the MiniTool Team for many years. She specializes in IT-related content, with a focus on data recovery, file backup, disk management, and other technical topics. She is committed to delivering clear, accurate, and practical solutions to help users resolve common computer issues.
User Comments :