The hardware and devices troubleshooter exists in Windows 8/7 and earlier Windows 10 versions. Starting from Windows 10 version 1809, it was removed from Settings. In this post, MiniTool shows you how to run it in Windows 11/10/8/7.
What Is Hardware and Devices Troubleshooter?
Windows Hardware Troubleshooter is a built-in diagnostic tool. You can use it to scan your computer for common hardware-related issues, like problems with printers, Bluetooth, or other peripherals. It will detect misconfigured hardware, missing drivers, or other conflicts preventing devices from functioning.
Moreover, this tool will also attempt to fix these detected problems, ensuring devices work correctly with your system. The possible measures include resetting network adapters or reinstalling drivers.
The Hardware and Devices troubleshooter existed in older Windows versions like Windows 7 and earlier Windows 10 builds. However, Microsoft removed the direct GUI access in Windows 10 version 1809 and later.
How to Run Hardware and Devices Troubleshooter in Windows 8/7
On Windows 8 and 7, you can access the hardware troubleshooter through Control Panel. Here is the guide:
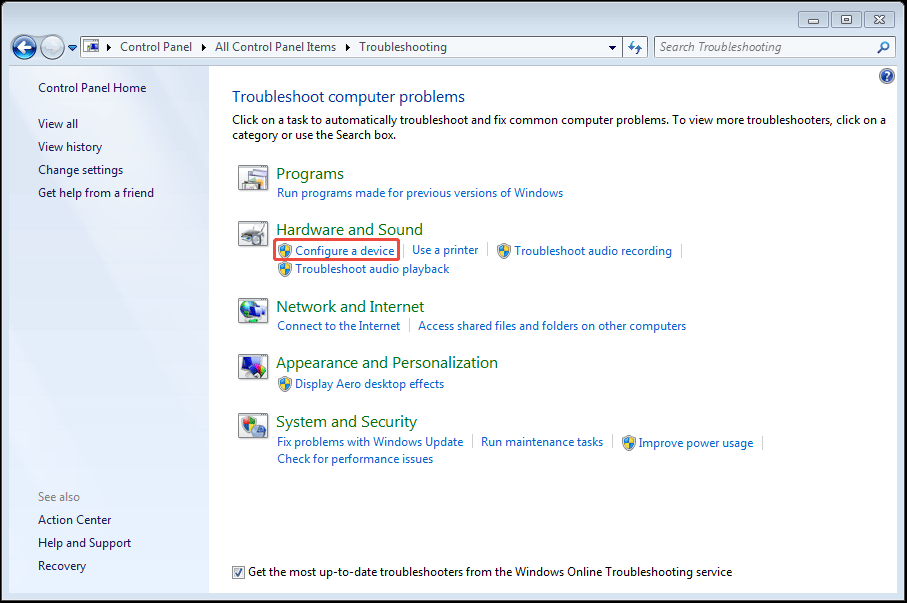
Step 1: Open the Hardware and Devices troubleshooter from Control Panel.
- Open the Control Panel from the search bar.
- In the search bar of the Control Panel, search for “troubleshooting” and select it.
- Under Hardware and Sound, click Configure a device.
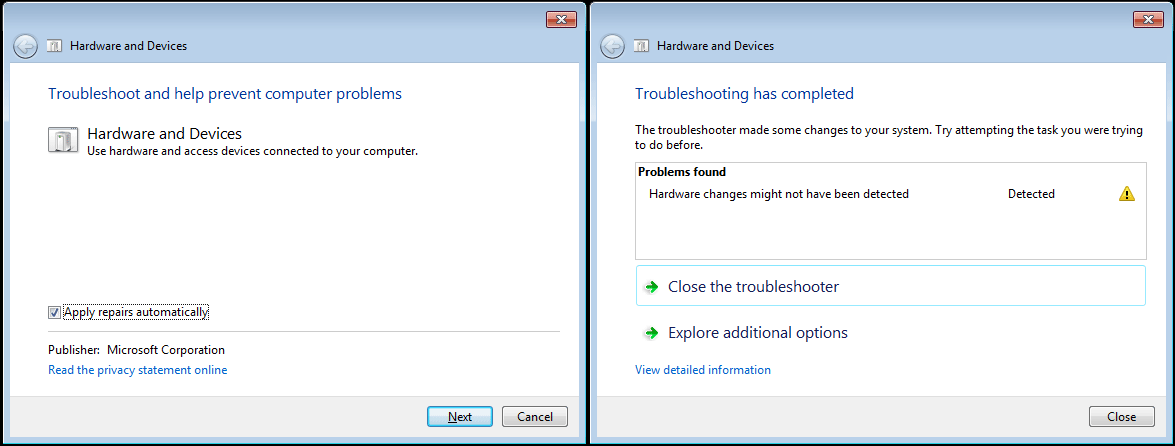
Step 2: Go through the Hardware and Devices troubleshooting process.
- Once the Hardware and Devices troubleshooter opens, click Next. The troubleshooter will detect and resolve problems automatically.
- Once completed, it will display the result. Then, close the troubleshooter.
How to Run Hardware and Devices Troubleshooter in Windows 11/10
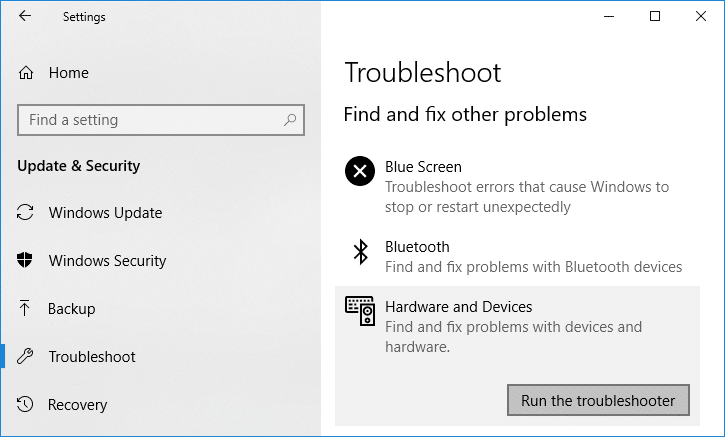
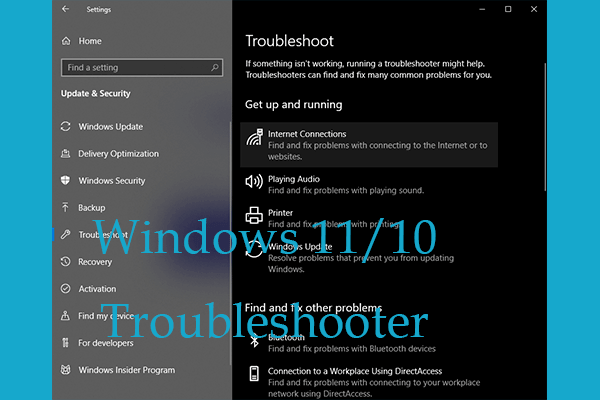
For Windows 10 builds prior to version 1809, you can run the Windows hardware troubleshooter through the following steps:
- Press the Windows logo key + I to open Settings.
- Navigate to Update & Security > Troubleshoot. You will see the Hardware and Devices troubleshooter.
- Click this troubleshooter to expand it. Click Run the troubleshooter.
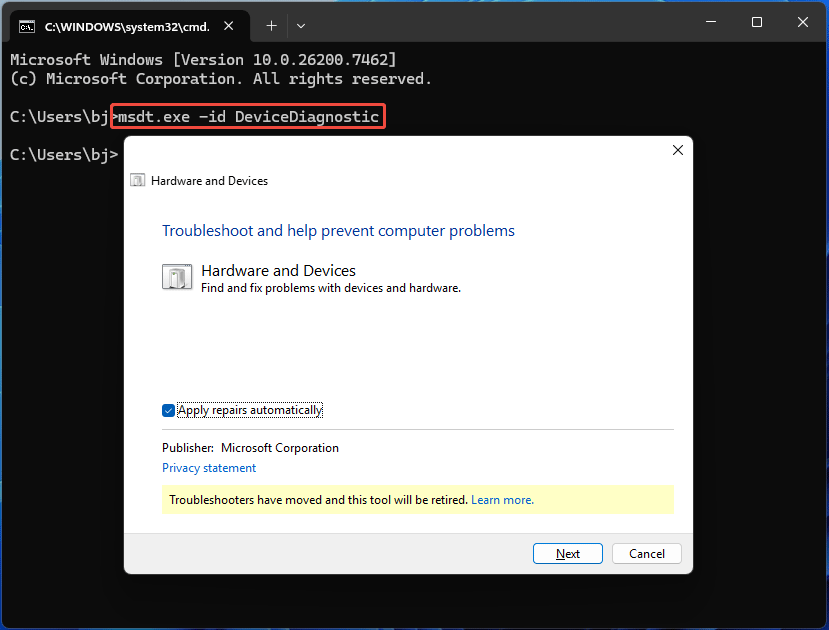
For Windows 10 version 1809 and later, including Windows 11, you can run the hardware and devices troubleshooter via commands. Here are the steps:
- Press the Windows logo key + R to open Run.
- Type “cmd” and press Enter to open Command Prompt.
- Type “msdt.exe -id DeviceDiagnostic” and press Enter to open the Hardware and Devices troubleshooter.
Alternatives to Hardware and Devices Troubleshooter
As mentioned above, in newer versions of Windows (Windows 10 version 1809 and later, and Windows 11), the generic troubleshooter was removed. Instead, a list of more specific troubleshooters is available in the standard settings menu.
These individual troubleshooters are:
- Playing Audio
- Printer
- Bluetooth
- Camera
- Keyboard
- Network adapter
- Power
- Etc.
Each of these acts as a targeted version of the older, general “Hardware and Devices” troubleshooter, focusing on the specific component. They can do the hardware troubleshooting more effectively.
Here is how to run these troubleshooters in Windows 10:
- Open Settings and go to Update & Security > Troubleshoot > Additional troubleshooters.
- Expand the desired troubleshooter and click Run the troubleshooter.

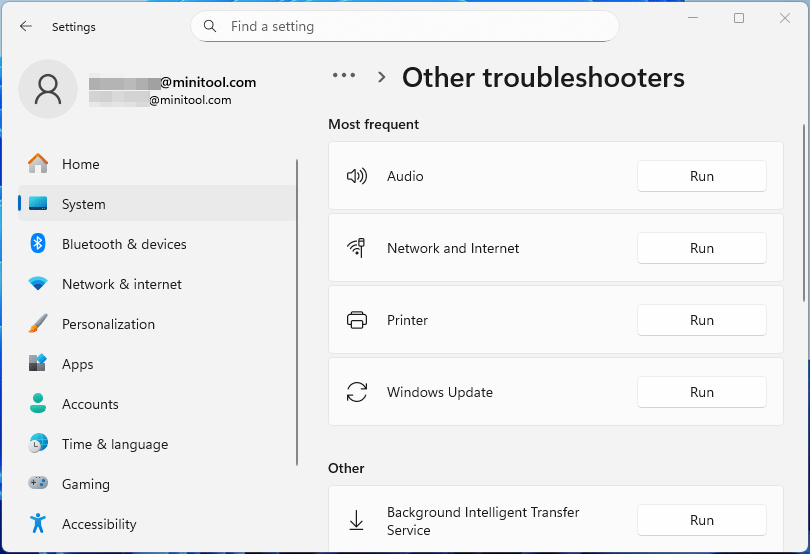
Here is how to run these troubleshooters in Windows 11:
- Open Settings and go to System > Troubleshoot > Other troubleshooters.
- Click the Run button for the troubleshooter.
Hardware and Devices Troubleshooter FAQ
1. Perform simple checks like securing cables and restarting.
2. Go through visual inspections for overheating or damage.
3. Run built-in diagnostics (like Windows Troubleshooter or memory tests).
4. Check Device Manager for driver issues.
5. Finally, isolate components by testing them one by one or removing non-essentials to pinpoint the faulty part.
Besides, you can also go to Settings > Update & Security or System > Troubleshoot > Additional troubleshooters or Other troubleshooters to run specific troubleshooters for individual problems like audio, Bluetooth, or printers.
1. Physical Hand Tools: Anti-static wrist strap and mat, screwdrivers, compressed air cans, lint-free cloth, etc.
2. Electrical Equipment: Multimeter, power supply tester, etc.
3. Diagnostic Software: Built-in system diagnostics, SMART, memory testing software, hardware monitoring software, etc.
1. Restart app/PC
2. Check updates
3. Clear cache
4. Run in Safe Mode
5. Check background apps/firewalls
6. Use logs
7. Check resources like RAM/disk space
8. Scan for malware
9. Reinstall the app
10. Adjust settings
11. Contact support
Bottom Line
This post introduces the hardware and devices troubleshooter and shows you how to run it in Windows 11/10/8/7.
As this troubleshooter has been removed from Windows 11 and modern Windows 10 versions, this post also introduces alternatives to it and shows you how to run them.
Besides, this post also answers some questions about hardware troubleshooting. Hope it’s helpful to you.
About The Author

Position: Columnist
Linda has been an editor at MiniTool for seven years. She continuously learns about computers and puts her knowledge into practice. Moreover, she is particularly knowledgeable in disk management, data recovery, system installation, and PDF editing. Her articles typically reference multiple examples or are based on her own experience, providing users with the most suitable solutions.
User Comments :