After upgrading to Windows 11, you may discover that VPN is not working on your device. This is an annoying issue, but you should not worry about it. In this MiniTool post, you can find some useful methods to solve this issue.
VPN Is Not Working on Windows 11?
Windows 11 is a new version of Windows, which has been released on October 5, 2021. Many users have upgraded their computers to Windows 11, and some other people are still waiting for a good opportunity.
Top Reasons for Windows 11 VPN Not Working
Yes, Windows 11 is not so perfect so far. For example, many users report that their VPN is not working on Windows 11. This is a common issue, even the author encountered this problem. Why does this issue happen? Here are some common reasons:
- Your VPN is blocked by Firewall.
- The cached DNS data is outdated.
- Some software is not compatible with VPN
- And more….
Fortunately, this issue can be solved. This post will show you some methods you can try.
Fix 1: Update Windows 11
After the first release of a Windows version, Microsoft will continue to release some updates to fix the known issues and bugs. Windows 11 is not an exception. Windows 11 VPN not working should be a bug. If you are not using the latest version of Windows 11, you can perform a Windows 11 update and see if the issue can be solved.
You can go to Start > Settings > Windows Update to click the Check for updates button to see if there is an available Windows 11 update. If yes, you can click the Download now button to download and install the update on your computer.
Fix 2: Reinstall the Drivers for WAN Miniports
WAN miniports are important parts to make sure your internet connection works well. If VPN won’t connect on your Windows 11 computer, you can reinstall the drivers for WAN miniports (WAN Miniport (IP), WAN Miniport (PPTP), and WAN Miniport (IPv6)) to have a try.
- Right-click Start and then select Device Manager to open it.
- Expand Network adapters.
- Right-click WAN Miniport (PPTP) and select Uninstall device. Then, follow the on-screen instructions to uninstall this device from your PC.
- Repeat the above step for WAN Miniport (IP) and WAN Miniport (IPv6).
- Restart your computer. Then, the system will reinstall the latest versions of these three WAN miniports on your device.
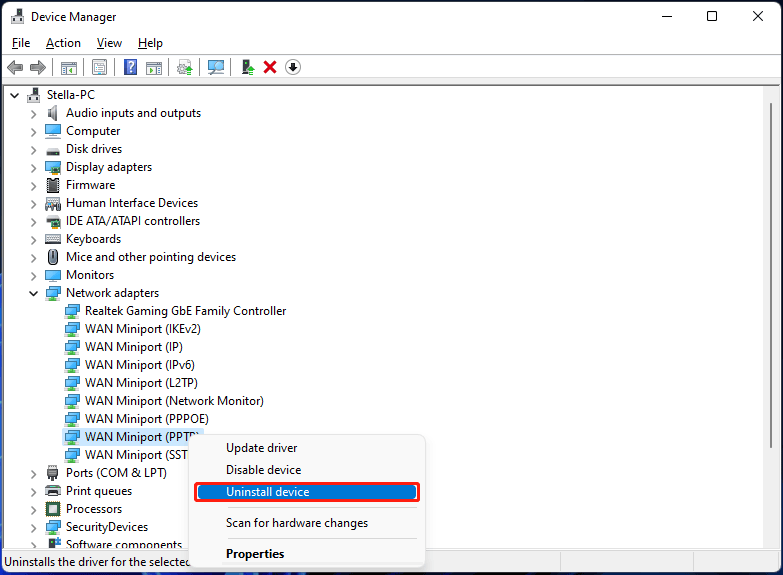
After these steps, you can go to use your VPN to see if it can be connected successfully.
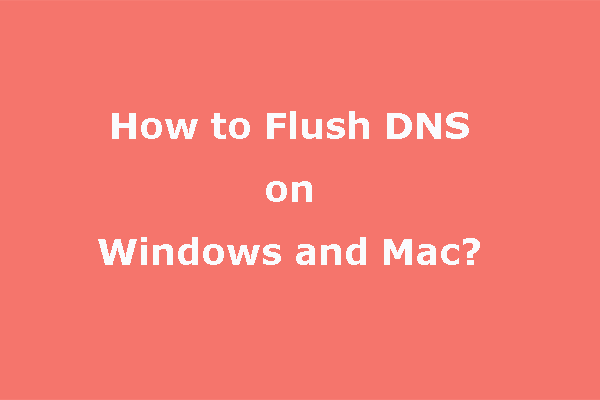
Fix 3: Flush DNS
Flush DNS is a good way to solve your internet connection issue. This can reset the IP on your computer. If you can’t connect to your VPN on your Windows 11 computer, you can do this to have a try.
It is not difficult to do this:
1. Click the search icon from the taskbar and search for cmd.
2. Right-click Command Prompt and select Run as administrator.
3. Type the following command into Command Prompt and press Enter after each:
ipconfig /release
ipconfig /flushdns
ipconfig /renew
netsh int ip reset
netsh winsock reset
4. Close Command Prompt.
5. Restart your computer.
Fix 4: Turn off Internet Protocol Version 6
- Use Windows search to search for network connections and click View network connections from the search results to open Network Connections.
- Double-click your VPN network adapter to open the Properties
- Switch to the Networking section and uncheck Internet Protocol Version 6 (TCP/IPv6).
- Click the OK button to save the change.
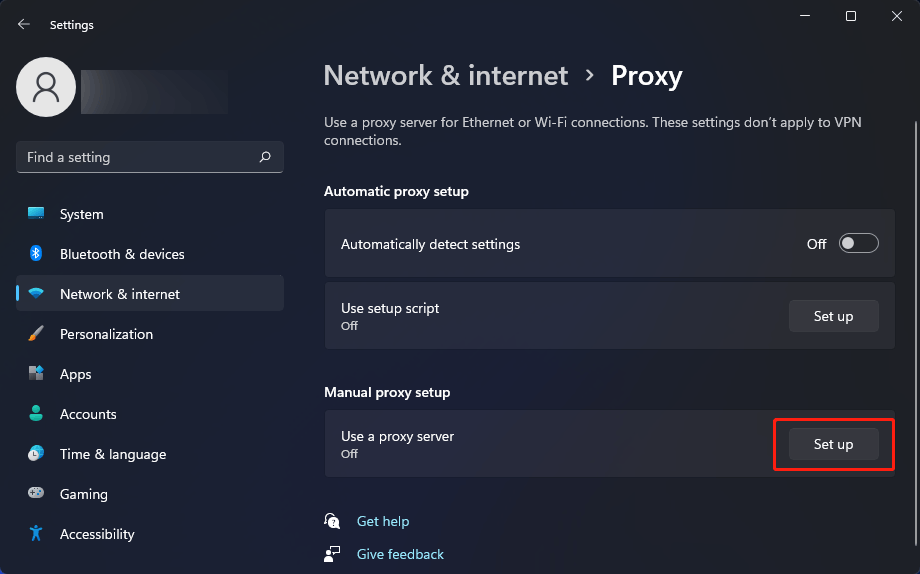
Fix 5: Don’t Use a Proxy Server
- Go to Start > Settings > Network & internet.
- Click Proxy from the right panel.
- Check if Use proxy server is enabled under Manual proxy setup. If it is enabled, you need to click the Set up button to turn it off.
- Click the Save button to save the change.
Fix 6: Allow VPN in Firewall
- Click the search icon in the taskbar and search for Control Panel.
- Click Control Panel from the search results to open it.
- Go to System and Security > Windows Defender Firewall.
- Click the Allow an app or feature through Windows Defender Firewall link from the left panel.
- Click the Allow another app If it is greyed out, you can click the Change settings button and then click Allow another app.
- Click Browse and find the installation directory of the VPN app. Then open the .exe file.
- Check Private and Public.
- Click OK.
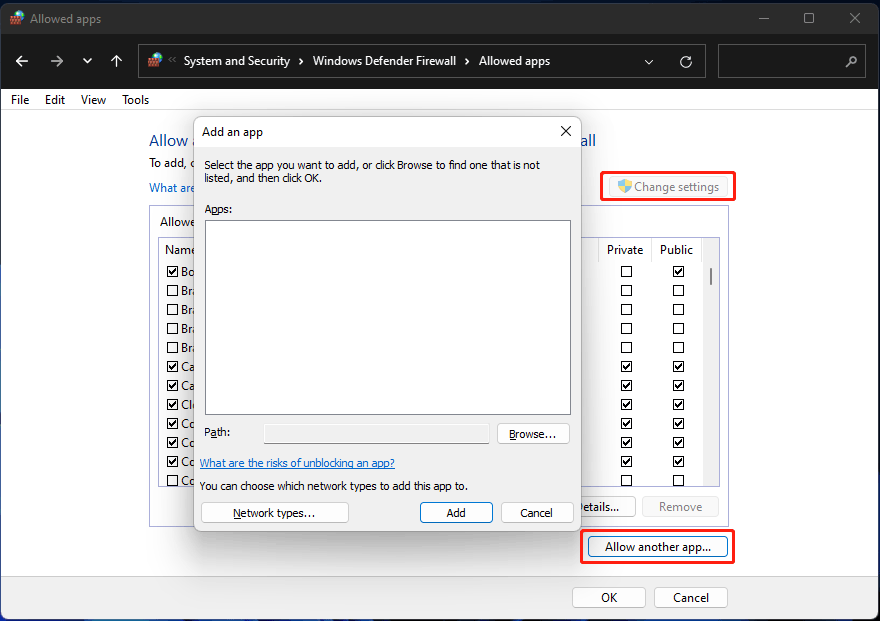
Now, you can go to check if you can use your VPN as normal.
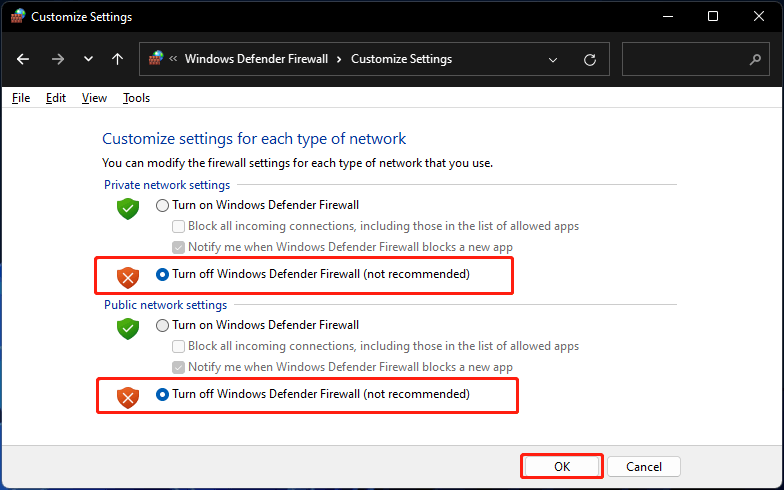
Fix 7: Turn off Firewall
- Open Control Panel.
- Go to System and Security > Windows Defender Firewall.
- Click the Turn Windows Defender Firewall on or off link from the left panel.
- Check Turn off Windows Defender Firewall under Private network settings.
- Check Turn off Windows Defender Firewall under Public network settings.
- Click OK to save the changes.
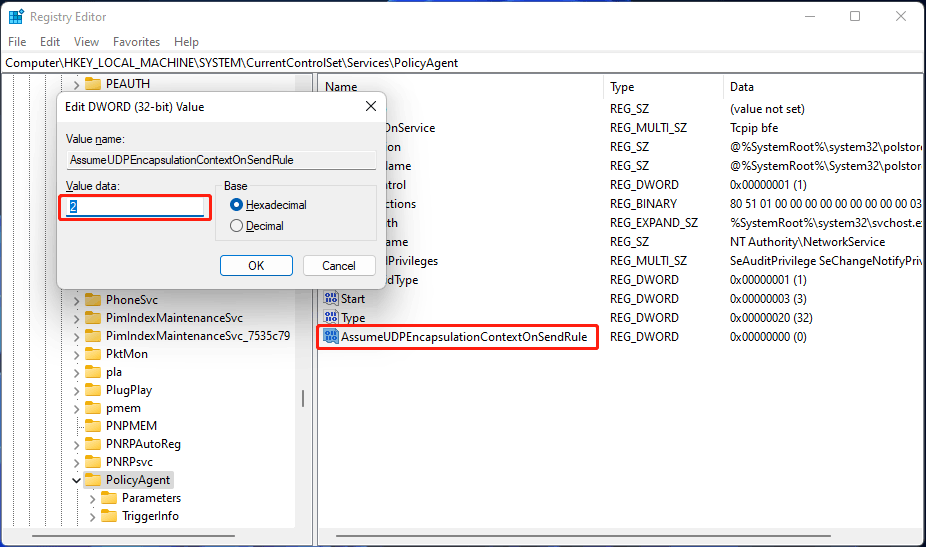
Fix 8: Set up an Exception for UDP
You need to do this via Registry Editor. To avoid unnecessary trouble, you’d better back up your registry key in advance.
1. Press Win + R to open Run.
2. Type regedit and press Enter to open Registry Editor.
3. Go to this path:
HKEY_LOCAL_MACHINE\SYSTEM\CurrentControlSet\Services\PolicyAgent
4. Right-click PolicyAgent and go to New > DWORD (32-bit).
5. Rename the new value AssumeUDPEncapsulationContextOnSendRule.
6. Double-click this new value and change the value data to 2.
7. Click OK to save the change.
Fix 9: Reinstall VPN
- Press Win + R to open Run.
- Type appwiz.cpl and press Enter to open Network connections.
- Find your VPN software and select it.
- Click Uninstall to remove it from your computer.
- Restart your computer after the uninstallation of the VPN.
- Download the VPN software again and reinstall it on your machine.
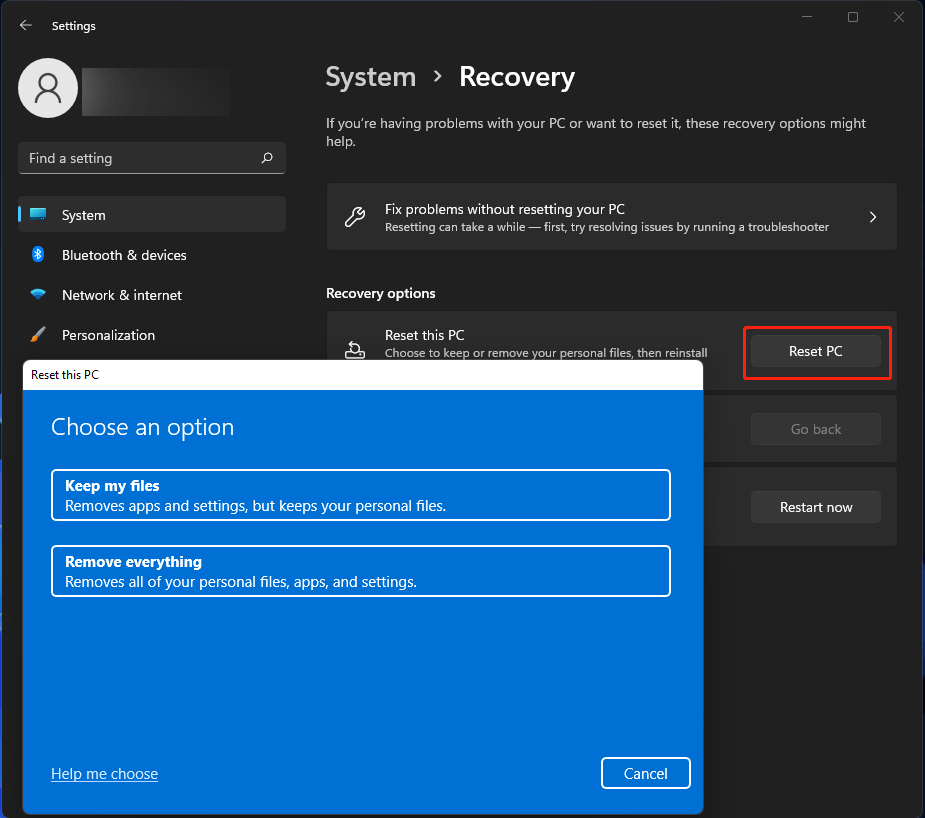
Fix 10: Reset Windows 11
Another choice to fix VPN not working on Windows 11 is to reset Windows 11. We don’t recommend doing this unless all of the above methods don’t work for you.
To protect your files, you should back up your data using MiniTool ShadowMaker (a professional Windows backup software) before resetting Windows 11.
MiniTool ShadowMaker TrialClick to Download100%Clean & Safe
How to Reset Windows 11?
- Go to Start > Settings > Windows Update > Advanced options.
- Click Recovery under Additional options.
- Click the Reset PC button next to Reset this PC under Recovery options.
- Select Keep my files.
- Follow the on-screen instructions to reset Windows 11. You need to select the following options according to your requirements.
If some of your files get lost by mistake, you can use MiniTool Power Data Recovery, a dedicated file recovery tool, to get them back. As long as the lost files are not overwritten by new data, this software can work to find your files.
MiniTool Power Data Recovery TrialClick to Download100%Clean & Safe
Windows 11 VPN Not Working! Fixes Are Here
If your VPN is not working or connecting on your Windows 11 computer, you can just try the methods mentioned in this post to solve the issue. However, if all these solutions don’t work for you, you can choose to wait until an update that can solve this issue is released.
Should you have any other related issues, you can let us know in the comments.
About The Author

Position: Columnist
Stella has been working in MiniTool Software as an English Editor for more than 8 years. Her articles mainly cover the fields of data recovery including storage media data recovery, phone data recovery, and photo recovery, videos download, partition management, and video & audio format conversions.
User Comments :