SSDs (Solid-state drives) are commonly used in computers because they provide quicker performance, quieter operation, and consume less power compared to HDDs.
When using an SSD, one significant factor to consider is its speed, which plays a pivotal role in determining your computer’s responsiveness.
However, you may not fully harness your SSD’s capabilities due to default system configurations that are designed for HDDs.
These outdated or incorrect Windows settings restrict SSD’s speed, lead to unnecessary writes, and can reduce the lifespan of the drive.
By adjusting specific Windows settings, it is possible to remove performance limitations, reduce latency, extend your SSD lifespan, and speed it up.
Read on to learn which Windows settings should be adjusted to speed up your SSD.
MiniTool Power Data Recovery FreeClick to Download100%Clean & Safe
10 Key Windows Settings to Speed Up SSD
Now, follow the instructions below to optimize the SSD’s speed with Windows settings.
1. Set Power Plan to High Performance
Windows default Balanced power plan reduces the storage and processor performance to save energy, which limits the SSD speed, particularly for NVMe SSDs connected via PCIe.
Changing to the “High performance” power plan turns off the power-saving limitations for storage controllers, ensuring a steady power supply.
To enable this setting, follow these steps:
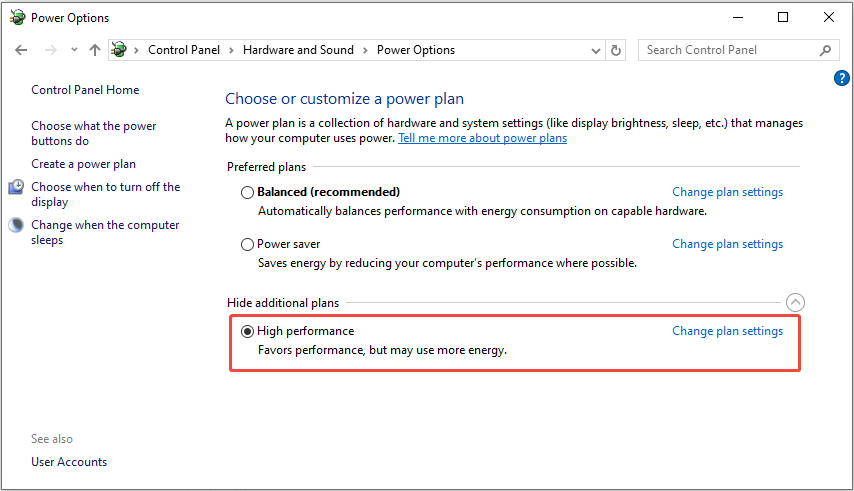
Step 1. Press Win + S to open the Windows search bar, type Control Panel in the box, and press Enter.
Step 2. In the pop-up window, go to Hardware & Sound > Power Options.
Step 3. Select High performance under the Hide additional plans or Preferred plans section.
2. Turn Off Hard Disk Shutdown
The “Turn off hard disk after” power setting is designed to extend the lifespan of HDDs, but it is not beneficial for SSDs.
When this feature is enabled, Windows puts the SSD into a low-power idle mode after inactivity, causing delays when waking it up.
Since SSDs lack moving components, this setting doesn’t offer any advantages and only decreases responsiveness.
Here’s the breakdown on how to adjust this setting to speed up SSD:
Step 1. Open Control Panel, then navigate to Hardware & Sound > Power Options.
Step 2. Click Change plan settings next to current power plan.
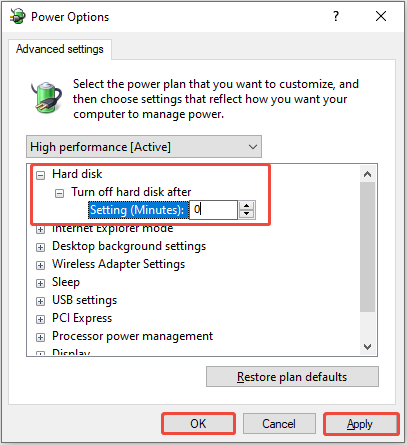
Step 3. In the following interface, click Change advanced power settings.
Step 4. In the pop-up window, expand Hard disk > Turn off hard disk after, and set the value to 0 (Never).
Step 5. Click Apply > OK to save the change.
3. Disable Hibernation
When a computer enters hibernation mode, it saves all the information from the RAM to a file called Hiberfil.sys on the SSD.
If you frequently use hibernation on your PC, this file can become quite large. Continuous and intense writing can wear out your SSD, so consider disabling hibernation.
Here’s how to do it:
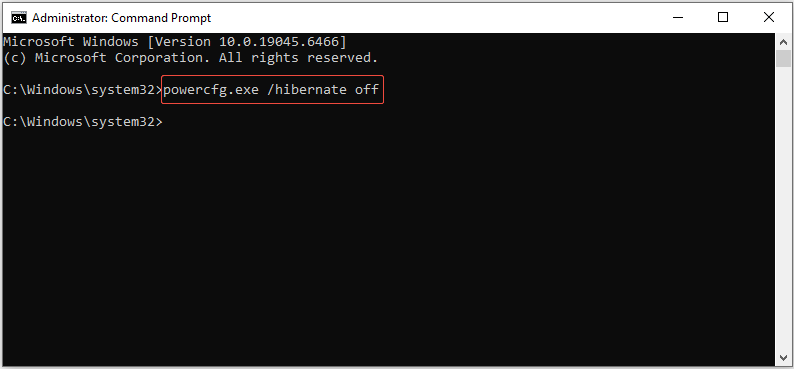
Step 1. Open Windows Search, type cmd in the box, and press Ctrl + Shift + Enter to run Command Prompt as administrator.
Step 2. Type the command “powercfg.exe /hibernate off” and then press Enter.
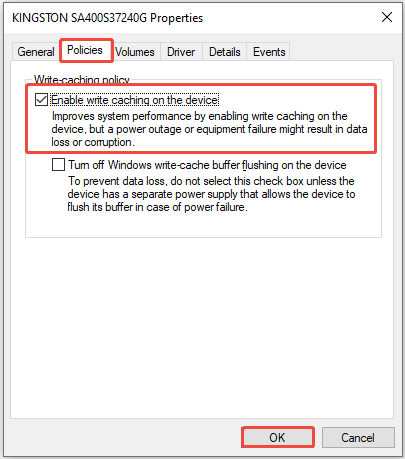
4. Enable Write Caching
Many SSDs offer write caching, which allows the temporary storage of data in a cache to avoid frequent small writes to the SSD.
Activating this function will reduce the frequency of write cycles to speed up the SSD and extend its lifespan. Therefore, consider enabling SSD write caching:
Step 1. Press Win + X to launch the Power User menu and choose Device Manager.
Step 2. Expand the Disk drives category, right-click your SSD, and select Properties.
Step 3. Go to the Policies tab, check Enable write caching on the device, then click OK.
5. Enable TRIM
To extend SSD lifespan and speed it up, enable the TRIM command.
This command allows Windows to notify the SSD’s controller about unused data blocks, allowing the drive to clean them up during idle time.
If you don’t enable the TRIM, the SSD has to undertake additional and unneeded tasks to remove old files, which can lead to increased wear and shorten its lifespan.
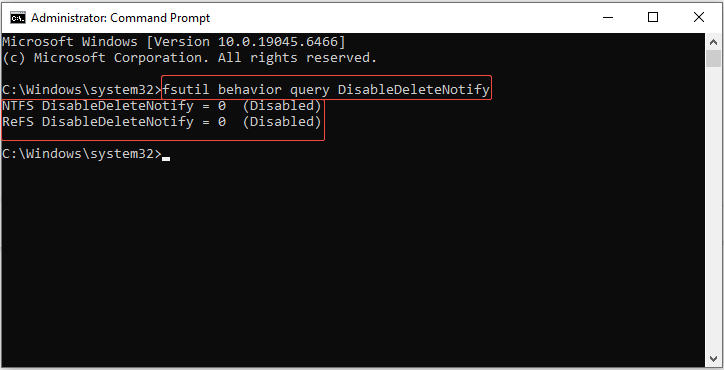
To verify whether TRIM is enabled, follow these steps:
Step 1. Run Command Prompt as administrator.
Step 2. In the pop-up window, type the command “fsutil behavior query DisableDeleteNotify” and press Enter.
If you receive the notification DisableDeleteNotify = 0, it means that TRIM is activated.
If you don’t see this notification, you can enable TRIM using the command: fsutil behavior set DisableDeleteNotify 0.
6. Disable SysMain
SysMain, previously known as Superfetch, is a Windows service designed to preload commonly used applications into RAM for quicker startup times on HDDs.
For SSDs, this service is unnecessary, as SSDs already load apps instantly. This service causes constant background writes that waste resources and wear out the drive.
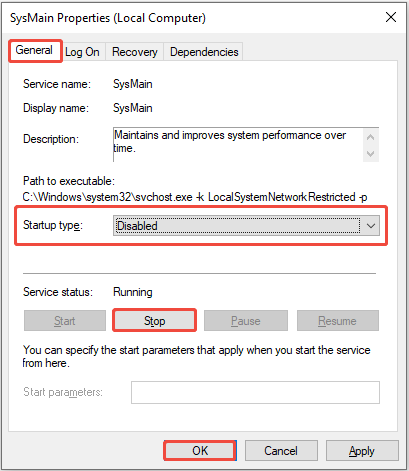
In this case, opt for turning off SysMain:
Step 1. Press Win + R to open the Run dialog box, type services.msc, and press Enter.
Step 2. In the Services window, find SysMain, right-click it, and select Properties.
Step 3. In the General tab, set Startup type to Disabled, and click the Stop button.
Step 4. Click OK.
7. Disable Paging File
The paging file (pagefile.sys) is virtual memory that Windows uses when RAM reaches its capacity, but it regularly writes to the SSD and takes up storage space.
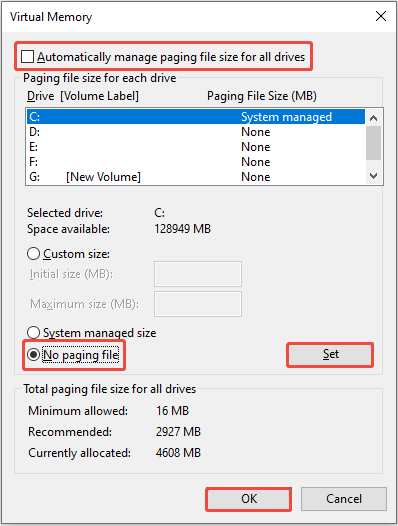
Here’s the breakdown for turning off the paging file:
Step 1. Press Win + R to open the Run dialog box, type sysdm.cpl, and click OK to open System Properties.
Step 2. In the pop-up window, go to the Advanced tab and click Settings under the Performance section.
Step 3. In the Performance Options window, navigate to the Advanced tab and click Change under the Virtual Memory section.
Step 4. In the following window, uncheck Automatically manage paging file size for all drives and select the drive where the pagefile is located (usually C:).
Step 5. Choose the No paging file option and click Set.
Step 6. Click OK.
8. Disable Drive Indexing
Windows Search indexing scans files on your SSD to speed up searches, but it generates constant writes and uses system resources.
SSDs have near-instant access times, so indexing provides minimal benefit while shortening the drive’s lifespan or reducing its speed.
Follow the steps to disable drive indexing:
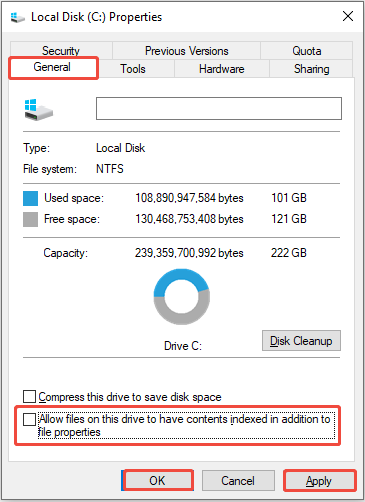
Step 1. Press Win + E to open File Explorer, go to This PC, right-click your SSD, and select Properties.
Step 2. In the General tab, uncheck Allow files on this drive to have contents indexed in addition to file properties.
Step 3. Click Apply > OK to apply the change.
9. Use Storage Sense
Overstuffed SSDs with low free space experience severe performance drops since the drive’s controller has fewer clean blocks for wear leveling and writing data.
Storage Sense is Windows’ built-in tool that automatically deletes temporary files, Recycle Bin items, and unused downloads to maintain your SSD’s cleanliness and efficiency.
Here’s how to enable it:
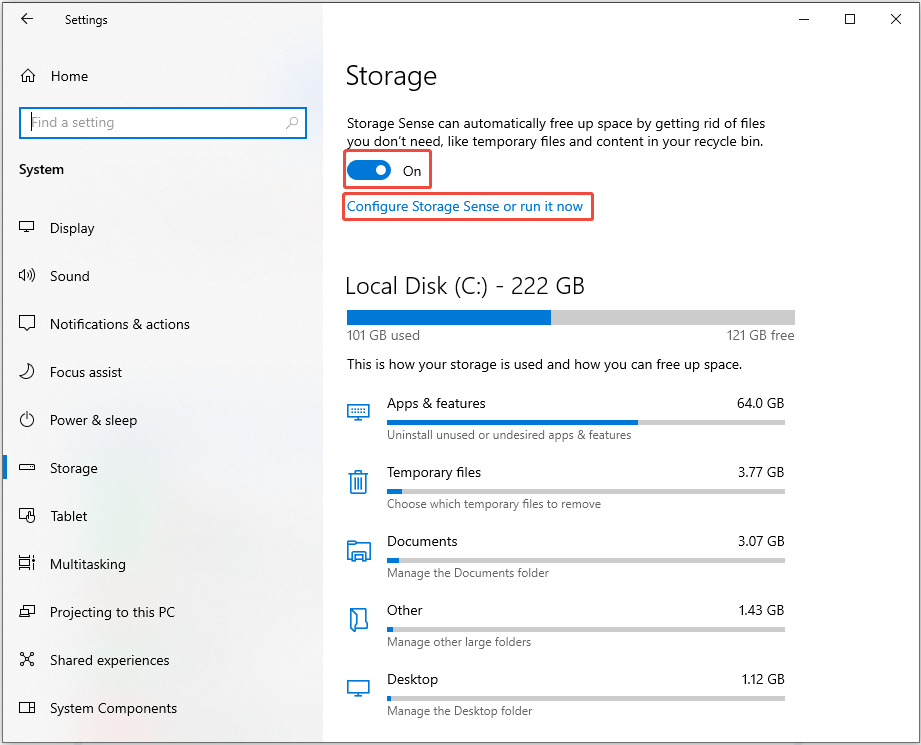
Step 1. Press Win + I to open Settings, then go to System > Storage.
Step 2. In the Storage section, toggle the Storage Sense to On. Then, click Configure Storage Sense or run it now to customize the cleanup frequency (daily/weekly/monthly).
10. Keep 20% Free Space
SSD controllers depend on free space to effectively perform garbage collection, wear leveling, and TRIM functions.
If the SSD is filled up, it can shorten its lifespan and slow down the drive’s performance. To maintain the SSD durability and efficiency, keep at least 20% of the space free.
To see how much space is used on your SSD in Windows, go to Devices and drives (Open File Explorer and choose This PC).
You’ll find the drive’s capacity displayed below the visual representation of the drive, along with a clear indication of the available free space.
If you want to determine which files are occupying too much space, easily do this by using the Space Analyzer feature in MiniTool Partition Wizard.
Space Analyzer is a tool embedded in MiniTool Partition Wizard. This hard drive analysis tool allows you to scan a drive and provides a view of the hard drive space usage.
Space Analyzer helps you identify the largest files and folders on your hard drive, making it easier to browse and remove unnecessary items.
The hard drive space analyzer is compatible with all types of storage devices, including SSDs, HDDs, external hard drives, and other drives.
MiniTool Partition Wizard FreeClick to Download100%Clean & Safe
To Sum Up
This post explains 10 Windows settings to speed up SSD. Try adjusting them to optimize your SSD performance and extend its lifespan.
Should you have any problems while using MiniTool software, please feel free to reach out to our support team at [email protected] for further assistance.
About The Author

Position: Columnist
Sandy became an English editor after graduation. She is devoted to finding effective solutions for diverse IT problems and provides articles on data recovery, data backup, and computer partitions and drives. In her spare time, she likes listening to music and playing games.
User Comments :