What Is WMIC
Wmic is a command-line and scripting interface that simplifies the use of Windows Management Instrumentation (WMI) and systems managed through WMI. Wmic actually operates in two modes. The first is interactive, which allows entering commands one line at a time, and non-interactive, which allows commands to be scripted for use in batch files.
You should know that Microsoft removed WMIC from Windows 10 and Windows 11, but you can add the feature back to your PC if you want. However, users who did add Wmic back to their Windows 11 machines reported processing Wmic not recognized as an internal or external command error.
How to Fix WMIC Not Recognized on Windows 11
Now, we will show you how to fix the “WMIC not recognized” issue on Windows 11.
Step 1: Input cmd in the Search box. Then right-click Command Prompt and select Run as administrator to open the command window.
Step 2: Type the command SET PATH=C:\Windows\System32\wbem\;%PATH% and then press Enter. Then, type where wmic.
Step 3: If the results come back as C:\Windows\System32\wbem\WMIC.exe, you have added it successfully.
However, the path environment variable set with the above SET command only applies to an active cmd session and must be done every time a new command prompt session is started. To make this change permanent, you need to follow the below steps:
Step 1: Open the Settings app by pressing the Windows + I keys together.
Step 2: Select System and click About.
Step 3: Click Advanced system settings and click the Environment Variables button. Under System variables, select Path and click the Edit button.
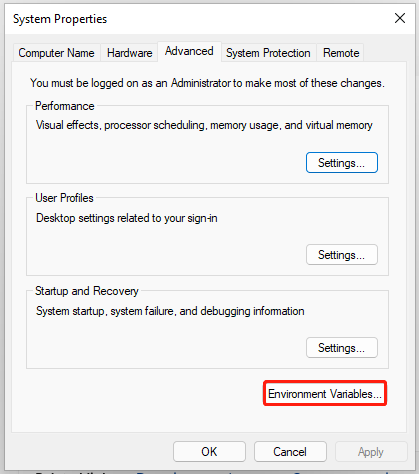
Step 4: Add %SystemRoot%\System32\Wbem and click OK.

How to Add WMIC to Windows 11
Starting with Windows 11 build 22572, WMIC is only available as an optional feature that can be uninstalled or reinstalled. This process is very simple and only requires you to make some adjustments in the settings menu of your Windows 11 device. Here is how to add it.
Step 1. Open Settings by pressing the Windows + I keys together.
Step 2. Choose System. Then, scroll down to select Optional features.
Step 3. Click the View features button.
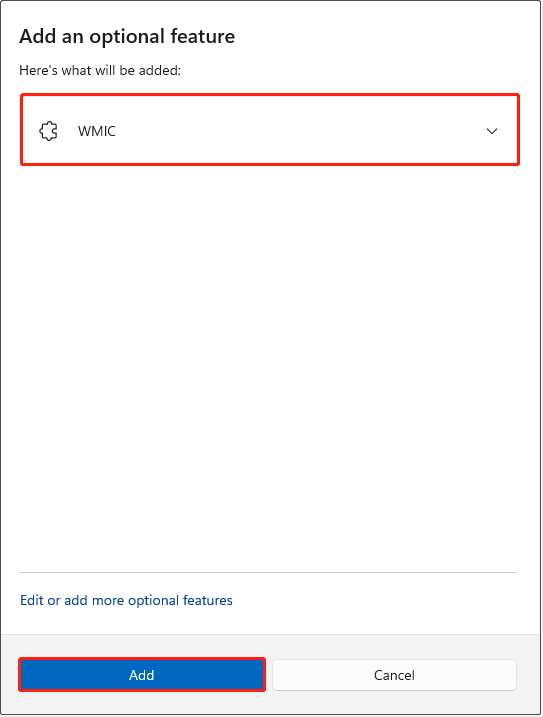
Step 4. Search for WMIC. Then, check the box next to it and press Next.
Step 5. Click the Add button to begin the installation process.
Final Words
Now, you have known how to fix the Wmic not recognized on Windows 11 error. Besides, you have known how to add Wmic to Windows 11. I hope that this post can be helpful to you.
User Comments :