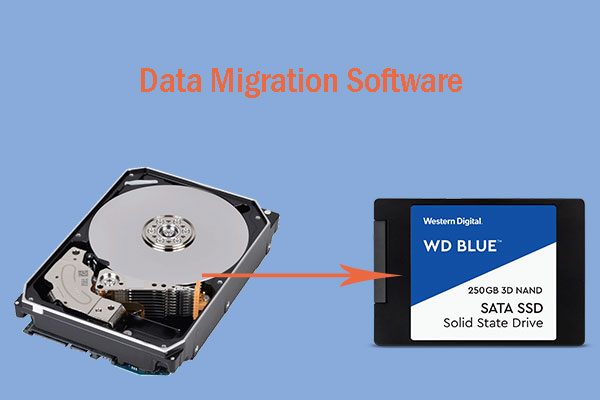
This MiniTool guide introduces how to move boot drive to another drive by cloning the system disk or migrating the operating system using disk cloning software. After migration, you need to set the new drive as the primary boot device in BIOS.
Quick Answer:
How to move boot drive to another drive?
You can move Windows to another drive by cloning the system disk or migrating the OS using disk cloning software like MiniTool Partition Wizard. After cloning, set the new drive as the primary boot device in BIOS.
Why Move Windows to Another Drive
A boot drive is the storage device that contains the Windows operating system and boot loader required to start a computer.
You may need to move the Windows drive for system upgrades, performance improvements, or storage replacement:
- Clone HDD to SSD for faster boot speed and better performance
- Increase storage capacity by replacing small or old drives
- Replace a failing or unstable hard drive
- Migrate Windows without reinstalling the system
What You Need to Do Before Cloning/Migration
Before moving your boot drive to another drive, proper preparation is required to ensure a successful migration without boot failure or data loss.
- Back up important files to an external drive
- Ensure the target SSD/HDD has enough capacity for system data
- Download and install reliable disk cloning or OS migration software
MiniTool Partition Wizard is a professional disk cloning tool designed for Windows users.
Its Migrate OS to SSD/HD and Copy Disk features help transfer Windows to another drive without reinstalling the operating system.
- Migrate OS to SSD/HD: transfer only the Windows operating system and required boot partitions to another drive.
- Copy Disk: clone the entire system disk, including Windows, boot partitions, applications, and personal files
MiniTool Partition Wizard DemoClick to Download100%Clean & Safe
How to Move Boot Drive to Another Drive
You can move your Windows boot drive using either OS migration or disk cloning. Both methods ensure the system remains bootable after transfer.
Method 1. Migrate OS to SSD/HDD (Recommended)
Suitable case: You only want to move the Windows system without the data partition
Step 1. Connect the new drive to your computer.
For a laptop with only one drive slot, you usually need an NVMe/SATA to USB adapter to make sure the source and target drives can be connected at the same time.
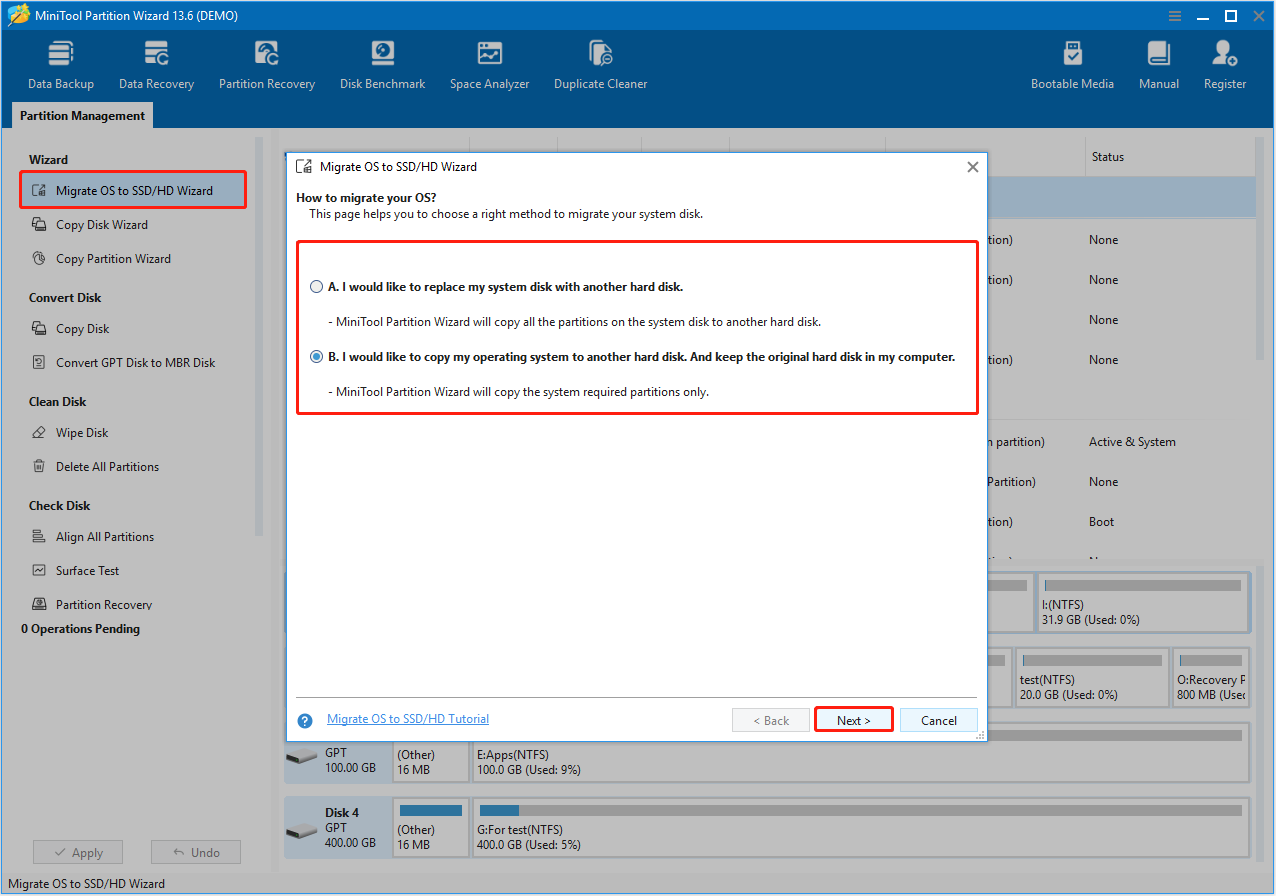
Step 2. Click Migrate OS to SSD/HD Wizard from the left action panel.
Then choose the method you want to migrate the OS and click Next. Both migration options keep the original disk data intact.
- If you want to copy all partitions on the system disk, choose option A.
- If you decide to move the operating system only, choose option B.
Step 3. Select the destination disk and click Next.
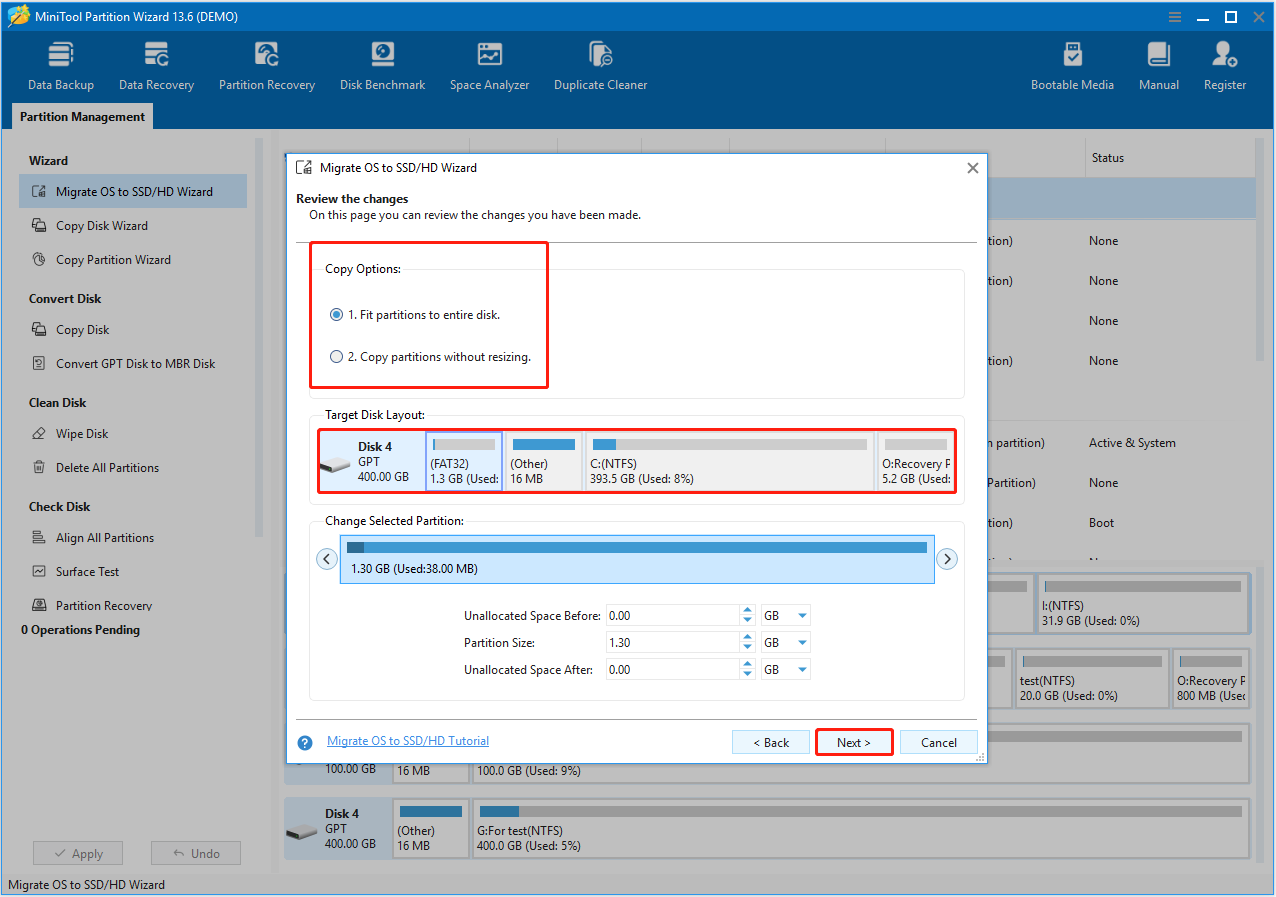
Step 4. Select a copy option and click Next.
- Fit partitions to entire disk: All the partitions will be cloned to the target disk and occupy their entire capacity in proportion to the partition size.
- Copy partitions without resizing: This option is available when the destination disk is large enough to hold all partitions on the source disk.
You can preview the layout of the target disk after copying.
Step 5. Click Finish > Apply, and wait for the migration process to complete.
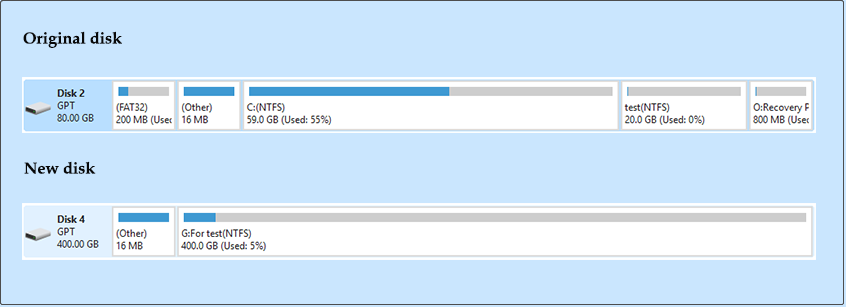
Before OS Migration:
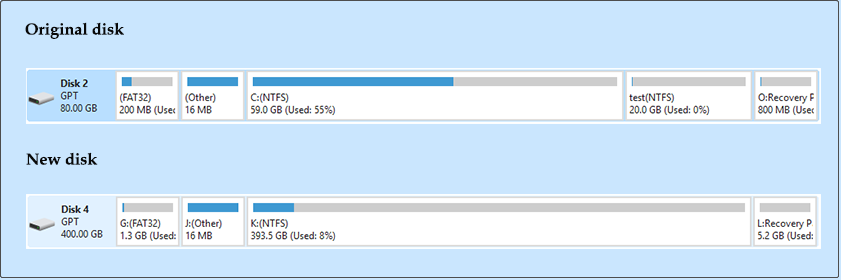
After OS Migration:
Method 2. Clone Entire Boot Disk
Suitable case: You want a 1:1 copy of the entire system disk
Step 1. On the main interface of the partition manager, choose Copy Disk Wizard, then click Next.
Step 2. Select the system disk that contains the Windows-related partitions and click Next.

Step 3. Select the new drive to copy the source content to and click Next.
Step 4. Choose a copy option, preview the disk payout, and click Next.
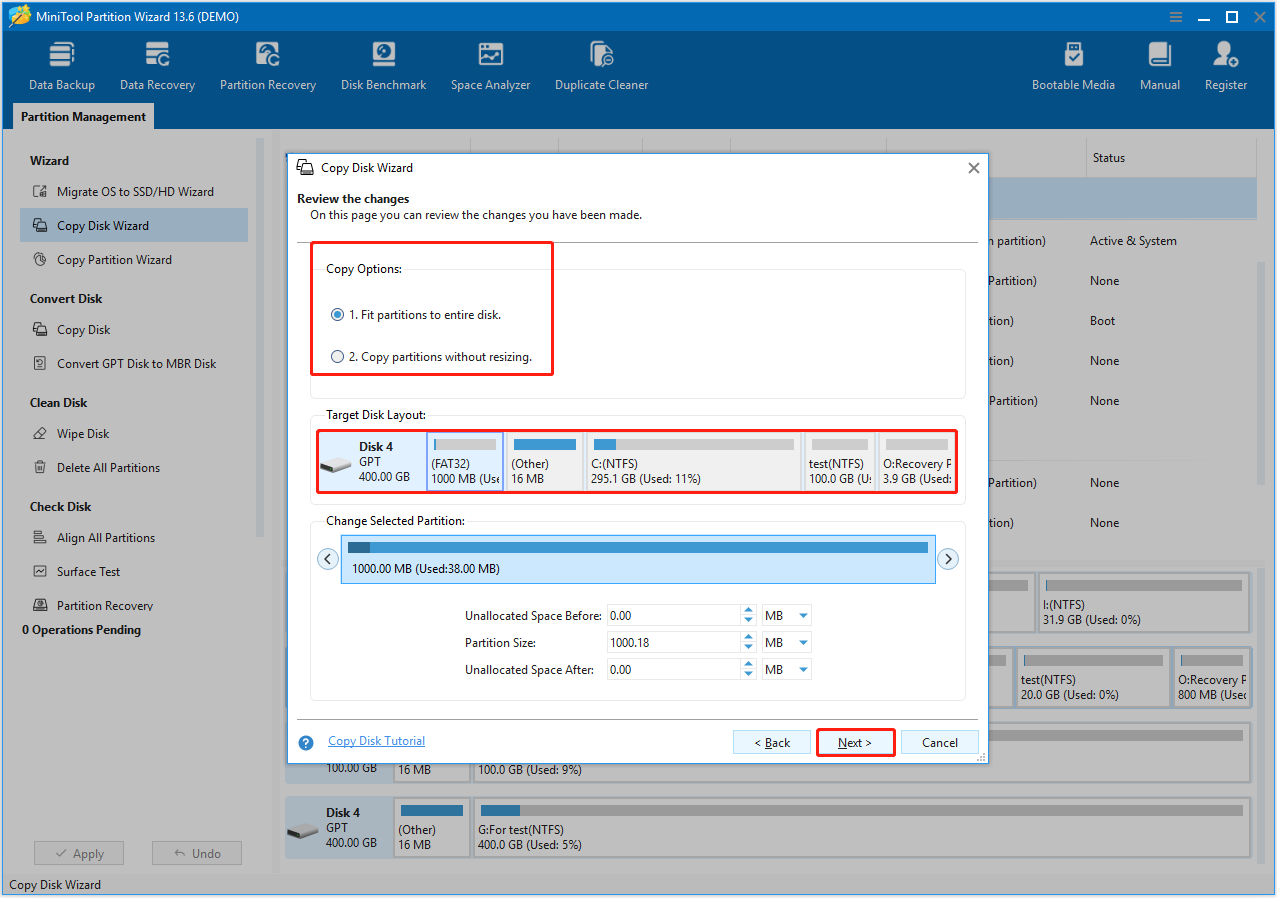
Step 5. Click Finish > Apply.
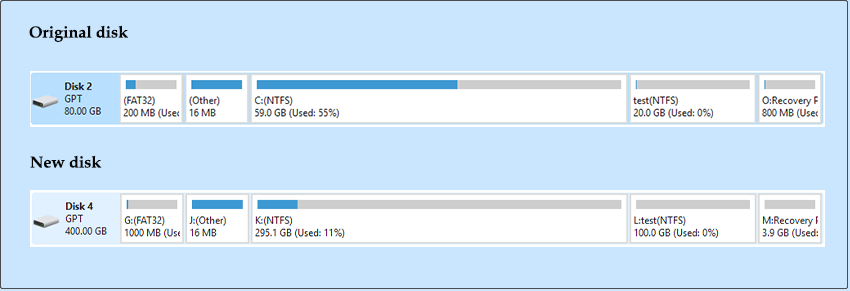
After Disk Copy:
The following table compares Copy Disk and Migrate OS to SSD/HD:
| Feature | Migrate OS to SSD/HD | Copy Disk |
| Migration scope | The Windows system or the entire disk | Entire disk |
| Migration speed | Faster | Slower |
| Storage requirement | Lower | Larger |
| Suitable for | OS upgrade or SSD migration | Full disk replacement |
How to Set a New Drive as Boot Device
After moving the boot partition to a new HDD/SSD, you need to set the new disk as the first boot device and boot the computer from it. Here are the steps:
Step 1: First, you need to shut down your computer.
Step 2: Turn on the computer and immediately press the F2 key or another function key (F1, F3, F10, or F12) when the computer brand logo appears to access BIOS Setup Utility.
Step 3: Go to the Boot tab by pressing the right arrow key. Boot (or another name) that is responsible for changing the boot sequence.
Step 4: Press and hold the Enter key to expand the Hard Drive.
Step 5: In this pop-up window, you should move the drive you want to boot from to the top of the list (using the + and – keys). Afterward, make sure that the boot order is correct and that the first boot drive contains valid and complete boot files.
Step 6: When you’re sure everything is correct, you should press the F10 key to save the change and exit the window.
Now you can restart your computer with the new boot order. When you click Restart under the Power icon, your BIOS will start booting from the first drive in the boot order you modified. Then, you will successfully enter Windows.
Common Issues After Moving Boot Drive
After moving the boot drive to another drive, some users may encounter boot or hardware detection issues. Below are the most common problems and solutions.
1. PC Cannot Boot from the New Drive
This usually happens because the new SSD/HDD is not set as the first boot device in BIOS/UEFI. Enter BIOS and make sure the cloned drive is selected as the primary boot drive.
2. Windows Boots from the Old Drive
If both drives are connected to your computer, the system may still boot from the old disk. Change the boot order in BIOS or temporarily disconnect the old drive to test the new one.
3. Cloned SSD Not Showing Up
Check whether the SSD is properly connected and detected in Disk Management. Try reconnecting the disk and verifying if it shows normally.
4. New Boot Disk Has Unallocated Space
This usually happens because you selected “Copy partitions without resizing” instead of “Fit partitions to entire disk” during OS migration or disk cloning.
To fix this issue, you can recopy the disk or remigrate the OS using the correct copy option. Alternatively, you can extend the partition using Disk Management or MiniTool Partition Wizard to use the unallocated space.
MiniTool Partition Wizard FreeClick to Download100%Clean & Safe

Bottom Line
This guide explains how to move Windows to another drive using MiniTool Partition Wizard. You can either migrate only the Windows OS or clone the entire system disk without reinstalling Windows.
The article also covers preparation tips, differences between Copy Disk and Migrate OS, and common issues after migration.
If you have any questions about MiniTool products, please contact the support team at [email protected].
About The Author

Position: Columnist
Shirley holds a bachelor’s degree in English and has been an editor at the MiniTool Team for many years. She specializes in IT-related content, with a focus on data recovery, file backup, disk management, and other technical topics. She is committed to delivering clear, accurate, and practical solutions to help users resolve common computer issues.
User Comments :